Auto Fill and Flash fill
Fill Features
Excel provides an amazing feature to fill the data automatically, if the available data is present in the form of any pattern. Instead of entering your data manually, you can use Fill features to fill cells with data that follows some pattern. The commonly used Fill Features are AutoFill and Flash Fill.
- Auto Fill
A useful Excel feature which allows creating a series of numbers of character or rows of data based on the values from other cells. Excel assumes and compares the selected data and tries to guess the following values that will be inserted. This feature allows you to create the excel spreadsheets more efficiently and quickly fill the selected cells with a series of data.
The following are the steps for harnessing the Auto Fill features:
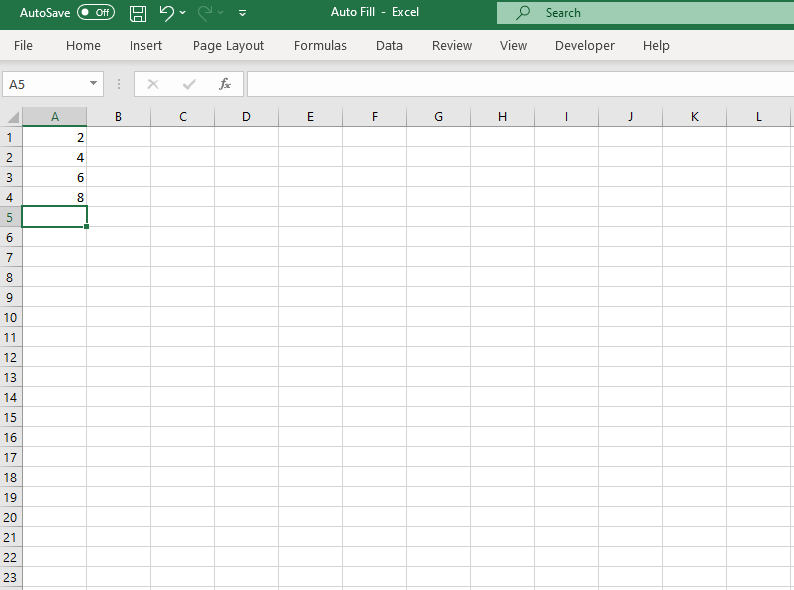
- Open a new sheet and name it as “Auto Fill”. Add the initial data that is needed. Go to cell A1 and enter 2, 4 in A2, 6 in A3, and 8 in A4. It represents the even numbers.
- Select the top 4 rows and move the cursor to the bottom right corner. You will notice that it has turned into a small black cross. This is called the File Handle. Drag it to down till 20throw cursor. You can drag the cursor across the cells to as many as you require.
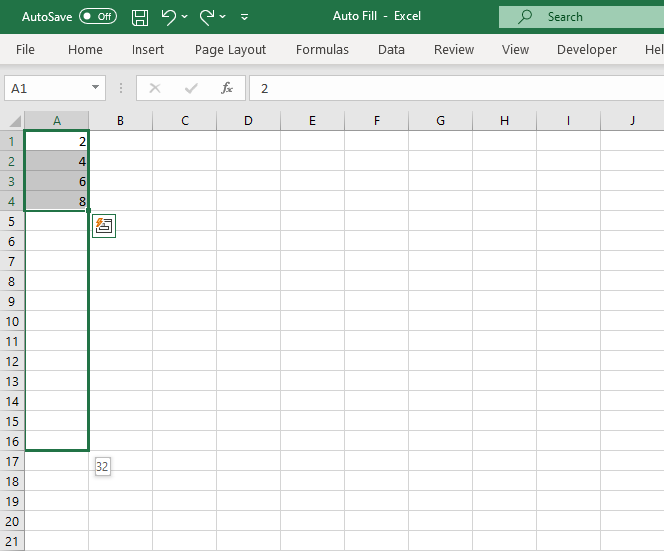
- You will notice that Excel has automatically recognized the pattern and fills the pattern of even number quickly. It saves time and efficient. Similarly, you can try it for formulas, months, days, odd numbers, different patterns, etc.,
Note: This feature is suited for copying formats and formulas. In fixed data, unlike months, weekdays, etc., if you exceed the number of cells needed, data will be repeated.
2. Flash Fill
The Excel Flash Fill option recognizes a pattern in your data and fills in data for you to save your time and effort. To use flash fill, the user must enter a couple of examples of the output and must keep the active cell in the column you want to be filled in. Flash Fill gets updated instantly as soon as Excel recognizes the pattern in the date that the user is entering.
Shortcut Used: CTRL + E
The following are the steps for enabling the Auto Fill features:
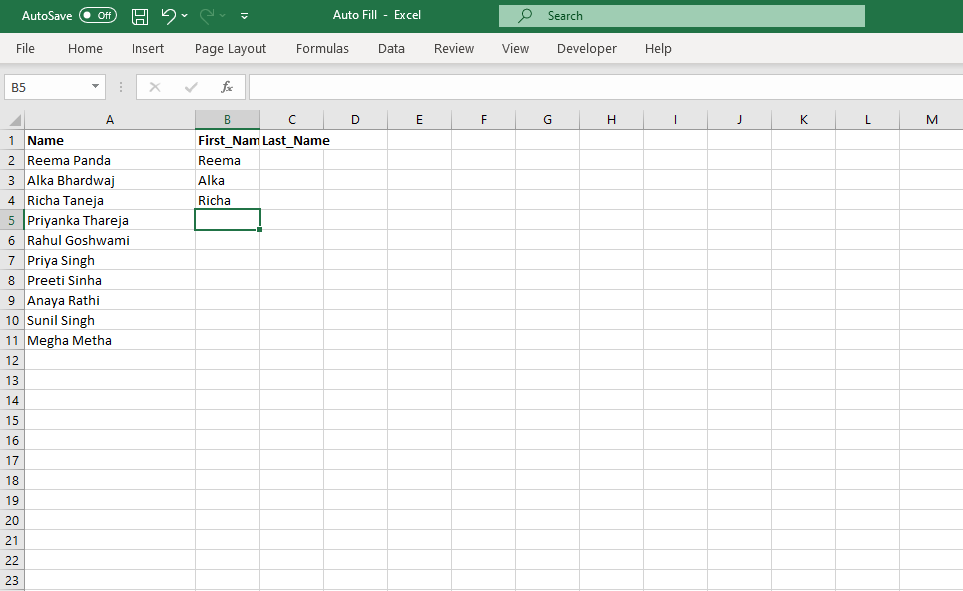
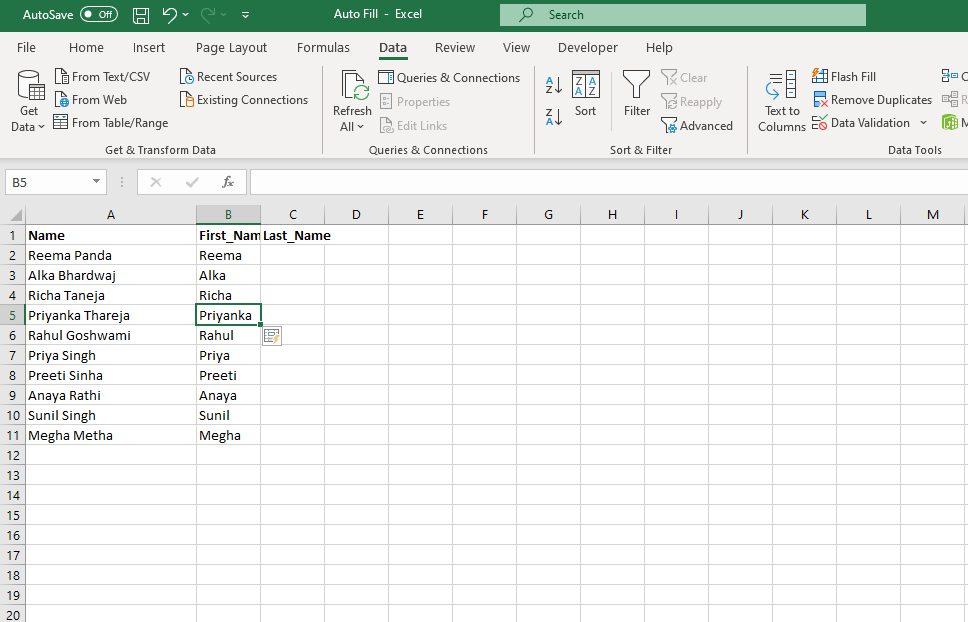
- First, we must create few entries and establish the basic pattern so as we can guide Excel to establish the pattern. In the below example, we have created few name entries and have fetched only the first name of those entries in column B. Fill up to 3-4 entries.
- Keep the cursor in the cell from where you want to fill the data. Under Data, click on the Flash Fill option. Or you can also press the shortcut for Flash Fill, i.e., CTRL +E.
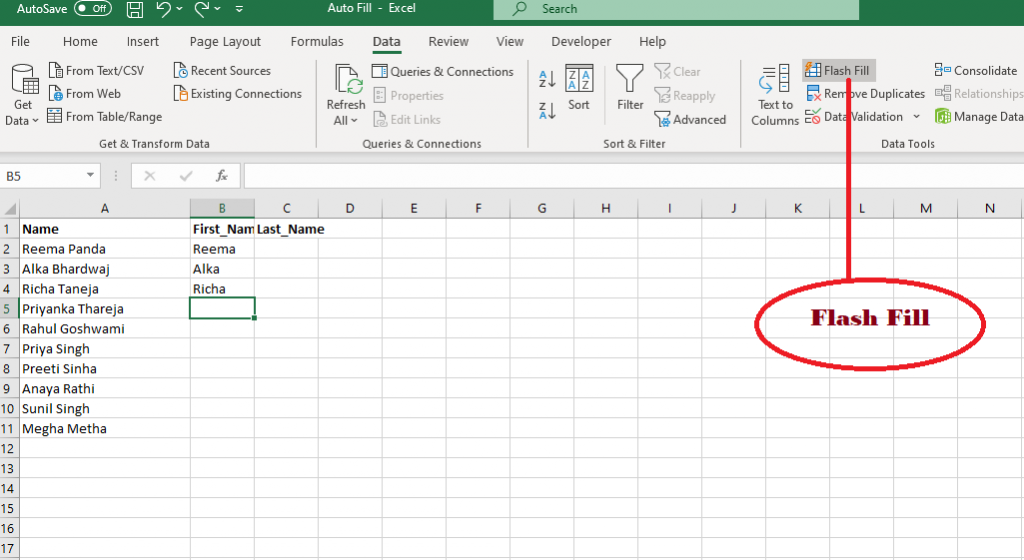
- You will notice that the desired output has been fetched in the same pattern, and all the First Name entries have been filled in Column B.
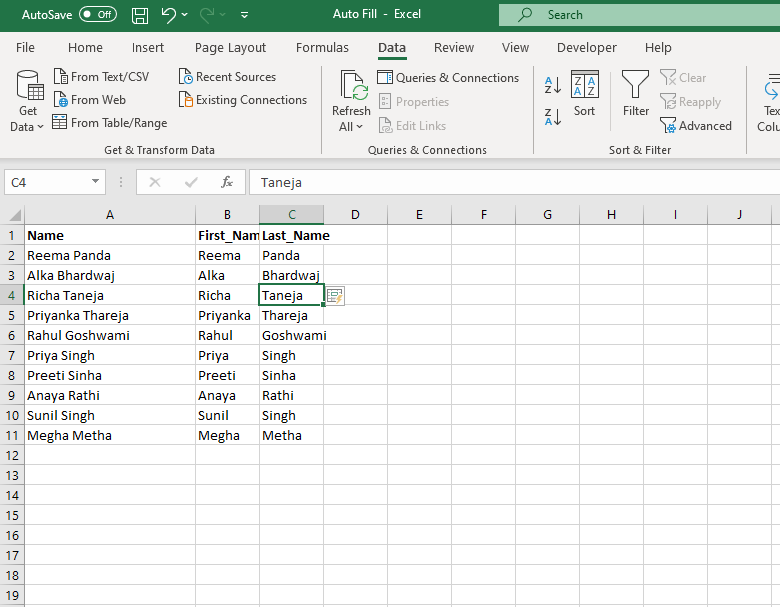
- Similarly, now you can try with Last_Name. Just right few entries, and you will notice Excel is automatically suggesting the other values for you.
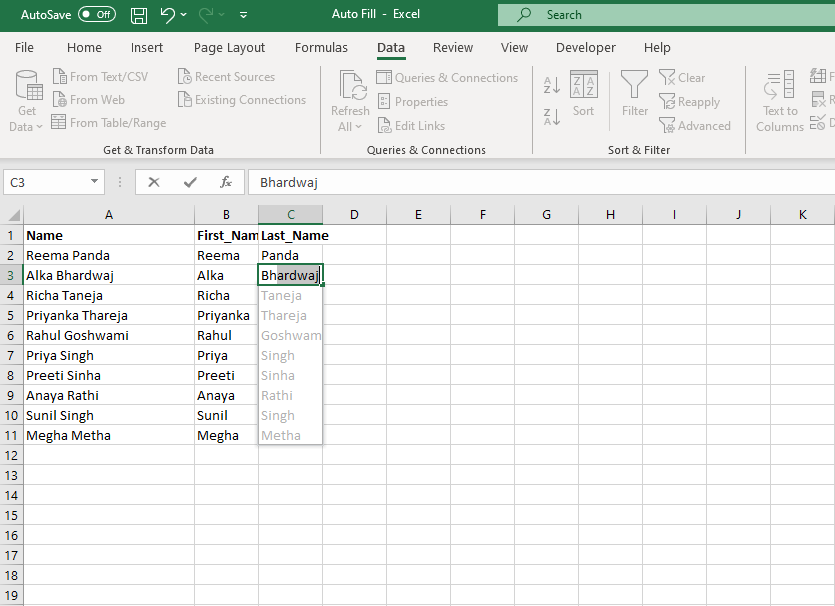
- Click on Enter and you will notice all the values have been automatically filled.
Note: Sometimes, Excel does not realize the pattern. In that case, instead of 3-4 basic entries, you must perform a few more entries such that it can adapt the pattern quickly.