Create and Manage CMS in Magento 2
Create and Manage CMS in Magento 2
- We will discuss the usage of Magento 2 CMS in this section of Magento 2. We can build a new page, block, and widget on our store with the aid of CMS in Magento 2. For details about our products and services, we may add the three elements below to create a custom static page here.
- Add a new Widget
- Add a new Block
- Add a new Page
Add New Page
Following instructions are given below:
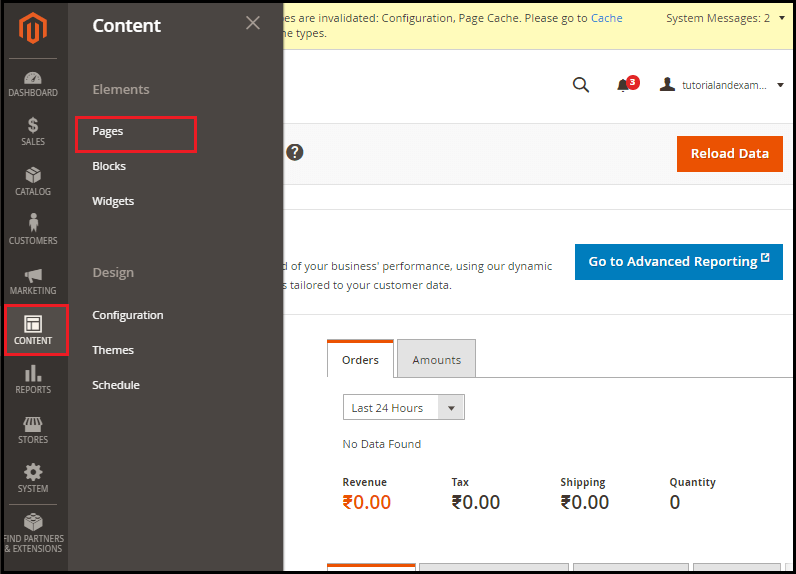
Step 1: Here, we'll first click on the content given on the Admin Panel side, then click on the pages tab.
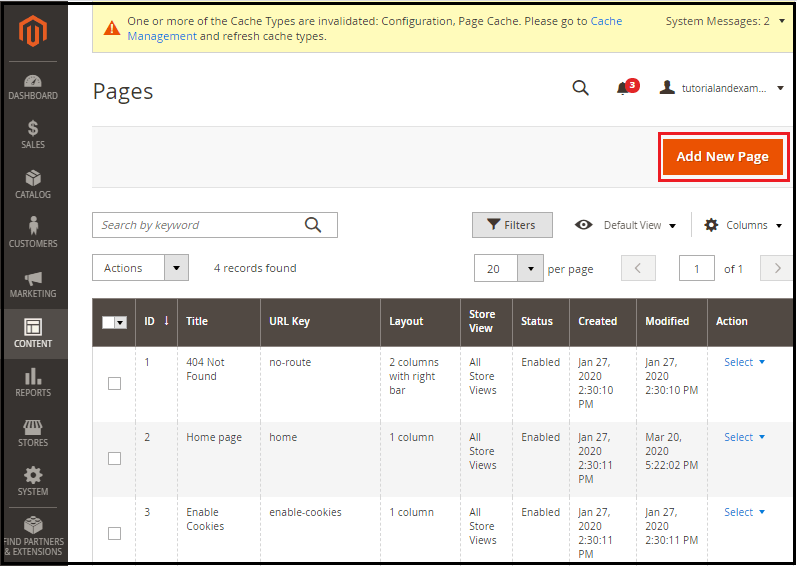
Step 2: A list of the latest sites will appear in front of you. Click on Add New Page tab to create a new website.
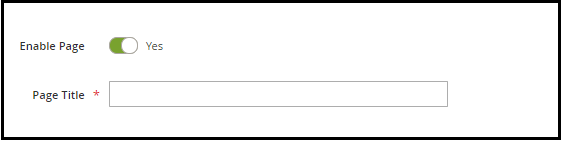
Step 3: Enable or deactivate the given page option and enter the new page name in the title column.

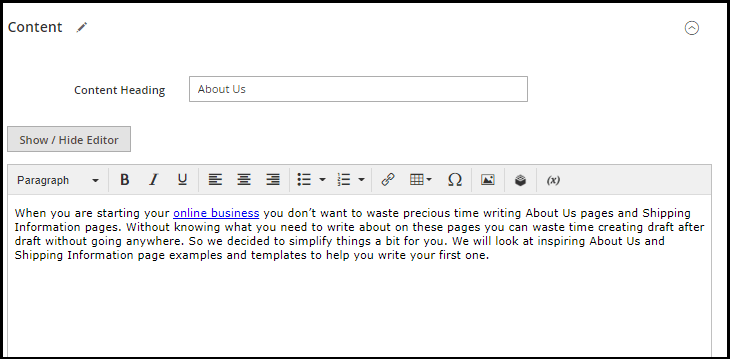
Enter the page heading and material that you wish to see in the Tab section. You can also insert a picture, chart, and widget.
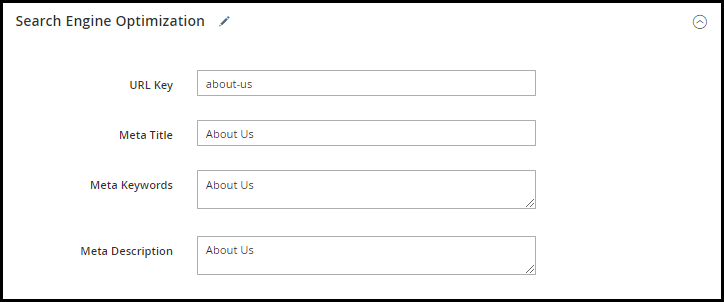
Set a New Page URL Password. If you did not have the URL, it would take the Page title automatically and replace the spaces with a hyphen-).
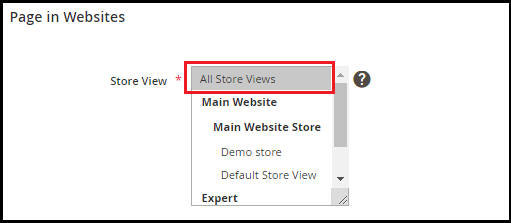
You may also pick the views of the store in which it will appear on the Page in the Websites section. From here you can select shop for a single store, we have pick All Store View for all shops.
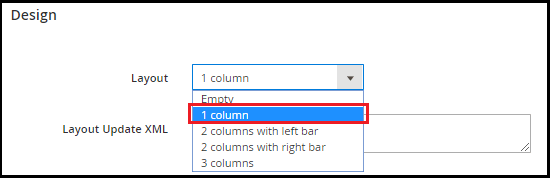
Use the page layout in the Design tab.
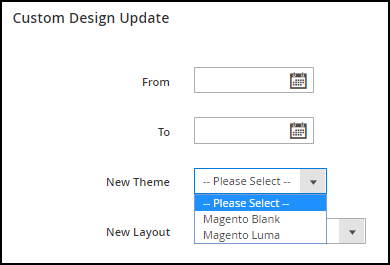
You may set a template or theme and layout for a given date in the section Custom Design Update.
Click the Save button at the top, after completing all the necessary details, and start.
Add New Block
Of several purposes, blocks are used, such as separating product features on product pages or on the homepage, which contains different product categories. To attach a new block to Follow the instructions below.
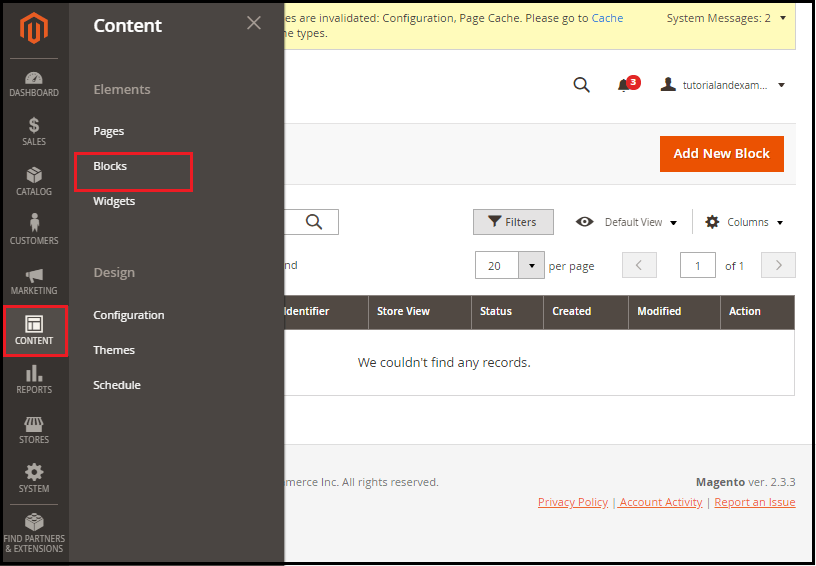
Step 1: Go to Material > > Elements > > Columns, on the sidebar of the Magento 2 Admin screen.
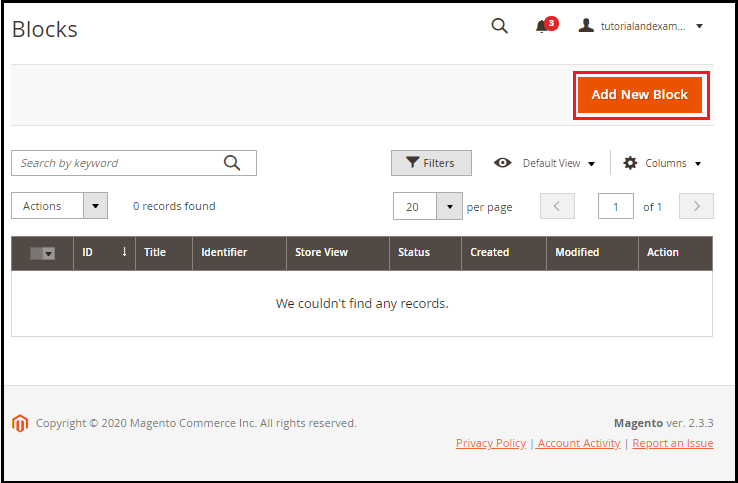
Step 2: We may add a new element here. To build a new block, click on the Attach New Block button.
Step 3: Fill out all the information you need here. The Identifier field is the most important area since we need to add our newly created block to a list in this section. This should be unique to the line, and an underscore should be produced using space-separated lowercase letters only.
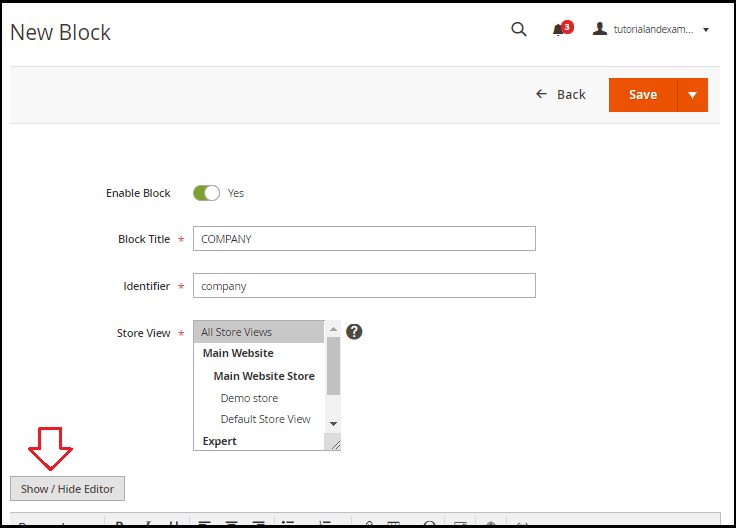
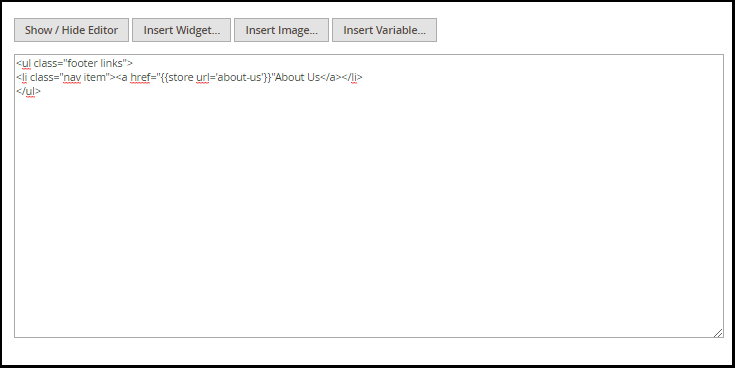
To build the connect, click the Show / Hide Editor button. By selecting this, you can see a list of additional settings such as Insert Photo, Insert Widget, Insert variable, etc.
Step 4: Use the code below to create a connection in a block section for the About Us page.
Click the Save button to build a new block after completing all the detail.
Follow the steps below to access the widget manage page:
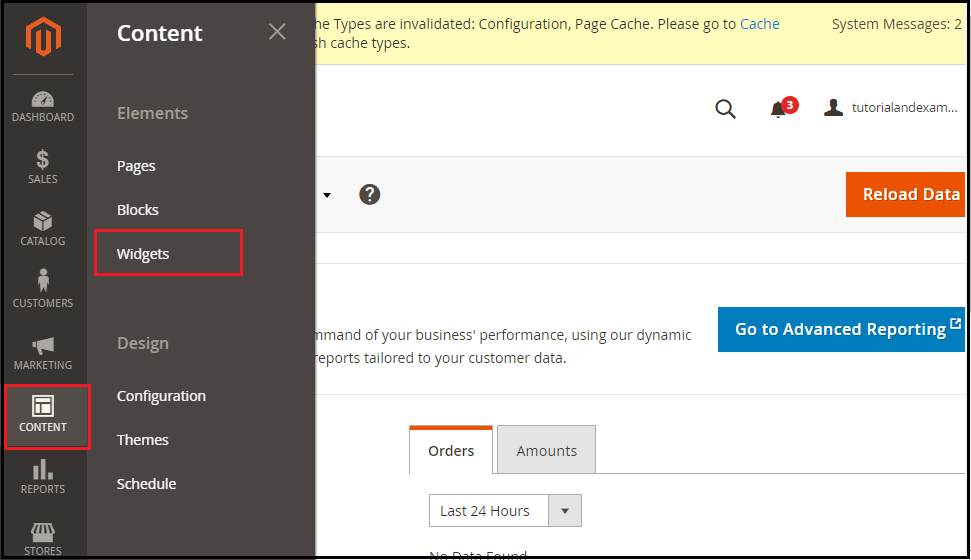
Step 1: Go to Material > > Elements > Widget from your Magento 2 Admin Panel's left sidebar.
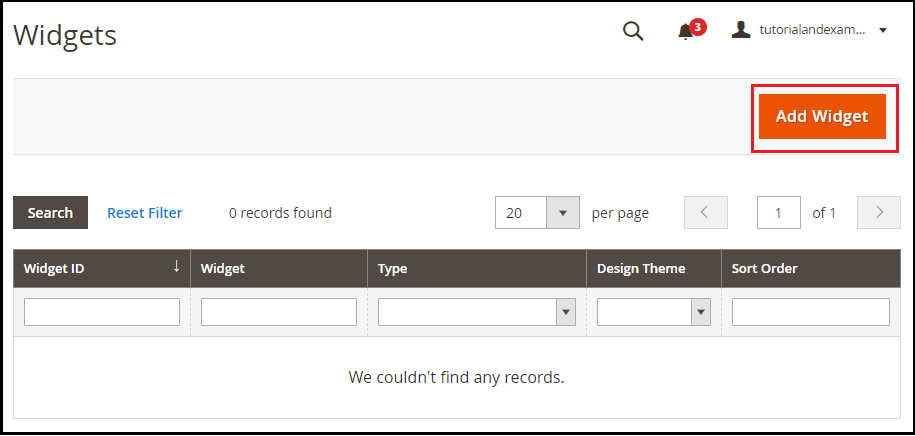
Step 2: As you can see in the screenshot below, we could find no widget record here. We just might add a new Widget. To build a new dashboard, click on the Attach Dashboard button.
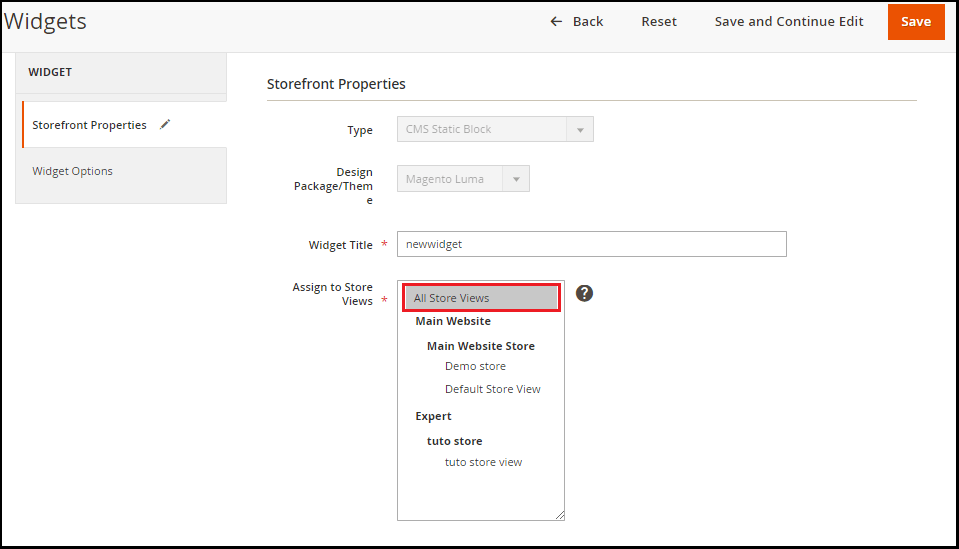
Step 3: Now, select the widget style and theme template and click the Continue button.

We need to set Widget Title in Storefront Properties and assign it to Store Views, and also define the Sort Order widget.
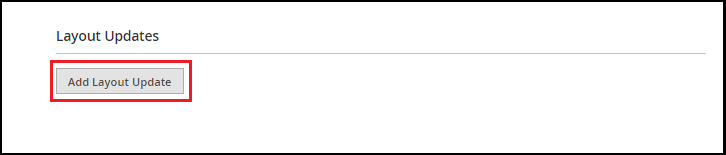
We can also update the widget layout below the Storefront assets from the Interface Updates section. To add a theme, press the Add the Theme Update button.
Use the Show on and the container that displays the item.

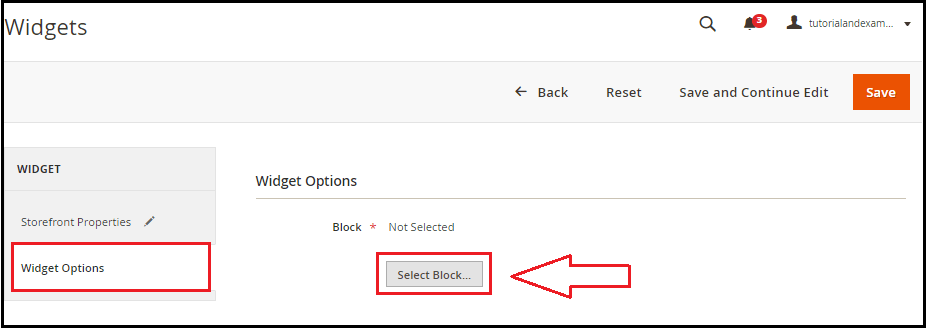
Now press the Select Block button inside the Storefront Property portion of the Widget Options on the left below.
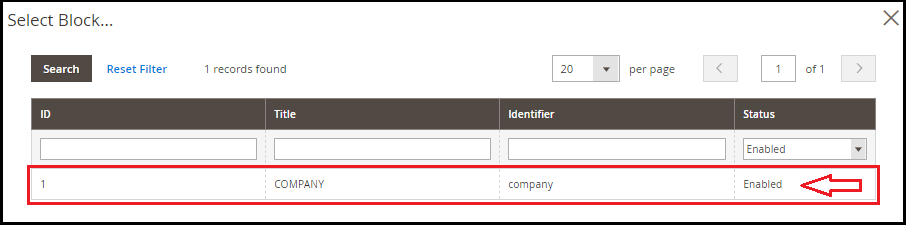
Here we will add the Block that we want to show on the frontend. So, we select the block COMPANY to add to a widget.
Now, in the screenshot below, you can see that the block COMPANY is being introduced. When all is up, press the Save button to close the Widget.

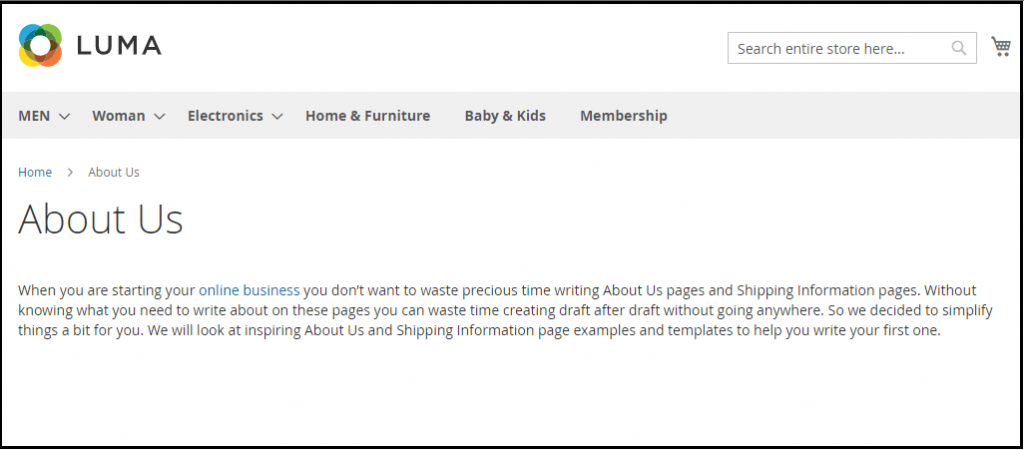
Refresh the website's frontend where you can see the About Us tab attached to the footer.
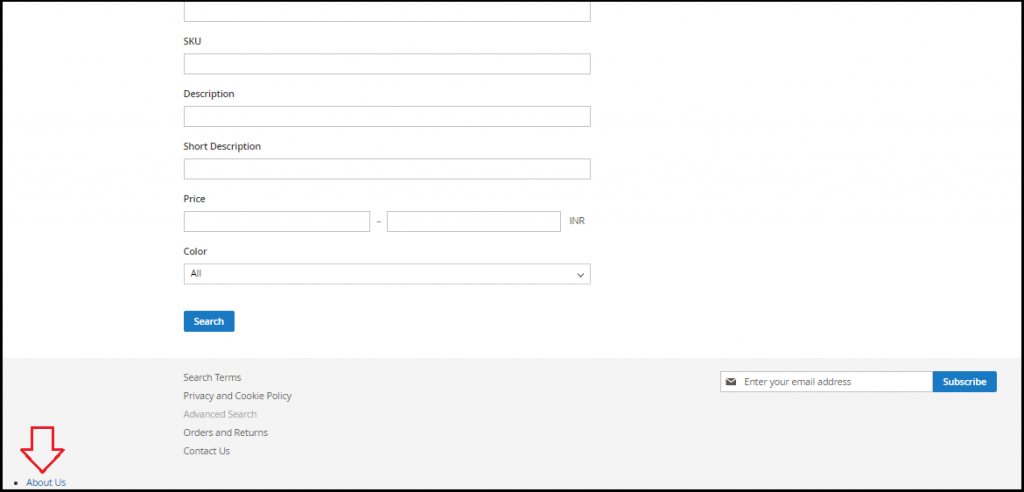
To see how this is available, click on the link About Us.