How to Crop An Image to a Frame in Photoshop?
Crop An Image to a Frame in Photoshop
There are millions out there who use Photoshop to edit their pictures and print them for framing purposes. It is super easy to edit your pictures with Adobe Photoshop CC. If you want to learn how to crop an image for a frame in Adobe Photoshop CC, don't worry, we have got the easiest tutorial for you today. Make sure to stick to this article until the end so that you become a pro in cropping images to a particular size in Photoshop.
The step-by-step guide to crop images for a frame is as follows:
Step 1: Open the image
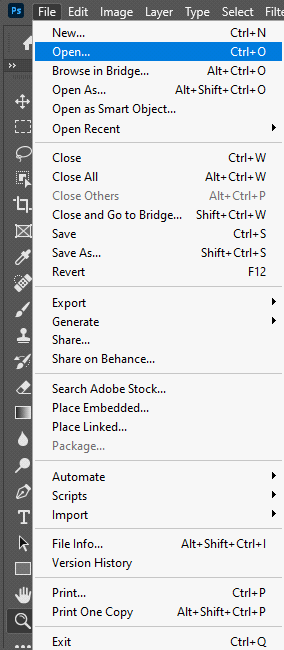
We have to open the image we want to crop. To do this, go to the "File" menu in the upper left corner and click on the option "Open", as shown in the image below. Choose the image file you want to edit and click on "Open". Your image will appear on the Photoshop screen.
To open the image, navigate to File ? open ? choose file ? open menu:

Step 2: Go to image size
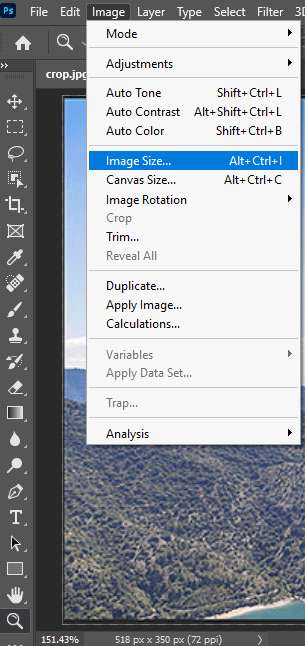
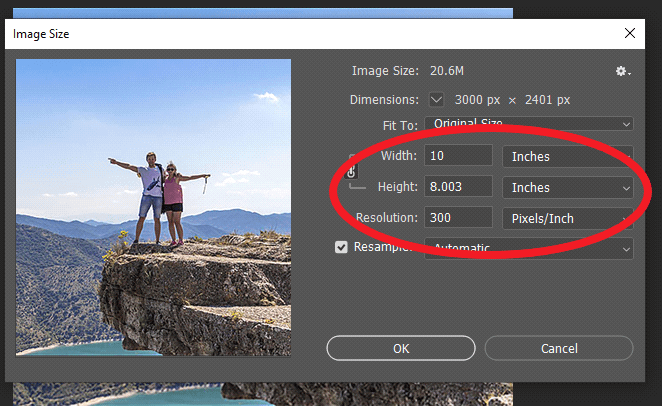
We need to know the current size of our image and the size required to fit it in a frame. To know the current size, go to "Image" in the top menu and click on "Image Size". A dialog box will appear, showing the existing size of your image. If you change the size of your image from here, it won't be easy to manage the height and width simultaneously, depending on the size of your frame. Click on "OK" to close the dialog box.
Navigate to Image ? Image Size ? OK menu:

Let us assume that the size of your frame is 8 inches (width) * 10 inches (height).
Step 3: Select the crop tool
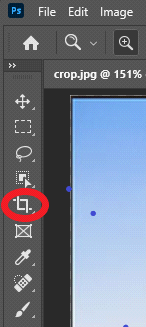
Once you know the actual and the required size of your image, look for the crop tool from the toolbar. The toolbar is in the left column of the Photoshop screen. Select the crop tool/symbol, as shown below.
Navigate to Toolbar ? Crop Tool:
Step 4: Go to Options Bar
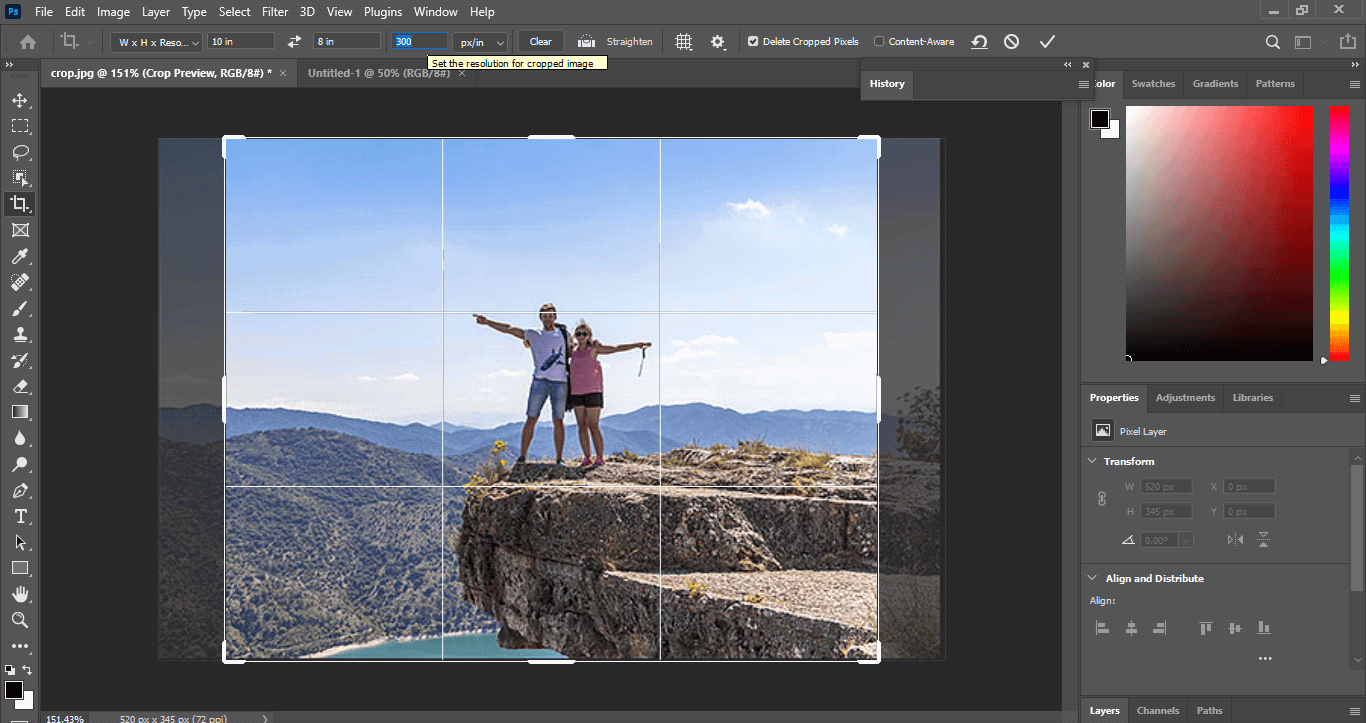
As soon as you select the crop tool, Photoshop will place a cropping border around your image. This cropping border will have handles around it so that we can crop the image by clicking and dragging the handles. Look for the options bar on the Photoshop screen. If you have cropped an image before with Photoshop CC, then this Options bar will show the same size you cropped before. You will find the options bar at the upper screen of Photoshop.
To Reset the options bar, right-click on the tool icon and choose "Reset Tool".
Navigate to Options bar ? Tool icon ? reset tool menu:
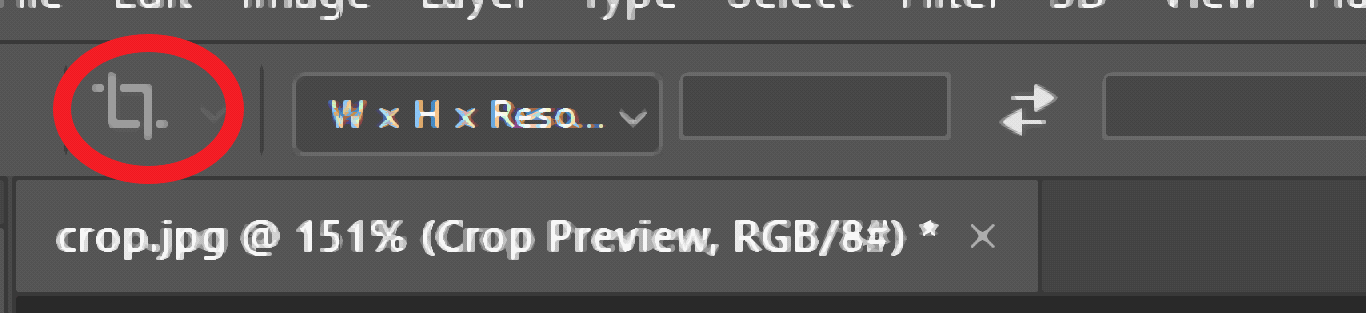


Step 5: Choose the mode of size
You can set the size of the cropping border in terms of aspect ratio or width, height, and resolution. Since we have to set the size in "inches" here, we will select the "width, height, and resolution" option from the options bar.
Navigate to Options Bar ? Width, height, and resolution
Step 6: Enter your size
You will see three boxes in the options bar in which you can type the required size of your image. The boxes are for width, height, and resolution, respectively. In the first box, type "8 in" for having a width of 8 inches. Type "10 in" in the second box for height. And set the resolution of your image from the third box according to your requirements. The standard resolution is 300 pixels.
Now the cropping border will resize itself to 8*10 inches, and you can hold and drag the inside of the border to reposition the image inside it. Once satisfied, press Enter to save your settings.
Navigate to Options bar ? Type your size ? Press Enter:


Step 7: Cross-check the size
Once you are done with cropping your image to that particular size, you can recheck the size to be sure. To do this, go to "Image size" from the "Image" option on the upper screen. The "Image size" dialog box will appear, showing the width and height of the image. Check if the width and height are 8*10 inches. Click on "OK".
Navigate to Image ? mage Size ? OK:
Step 8: Final Step
You are done with cropping your image to the size of your frame. You are now free to print your image or edit it further by adding more effects with Photoshop. Click on "Save" to save your edited image on your computer.

Hence, we can easily crop an image to the desired size.