Environment Set up in ES6
Environment Set up in ES6
JavaScript is a portable language. It can execute on any browser or any host, and any operating system. Before the use of JavaScript, we need to download the latest version of Node.
Node is a platform that executes on JavaScript engine. It enables us to create fast and extensible JavaScript applications. The JavaScript engine performs the execution of JavaScript code.
For coding and testing of a JavaScript code, we require the following.
Text editors
The Text editor is used as a tool. It helps us to write the JavaScript program code. The Different operating system has different Text editors. Notepad or Notepad++ for windows, Emacs or Pico for Unix, and TextEdit for Mac Operating system (Apple Macintosh).
We can save the program file of JavaScript with .js extension.
Installation Process of Node.js
Node.js is an open-source, runtime environment which helps us to code with server-side JavaScript. Node.js supports the V8 JavaScript engine of Google to run the program code.
Installation on Microsoft Windows
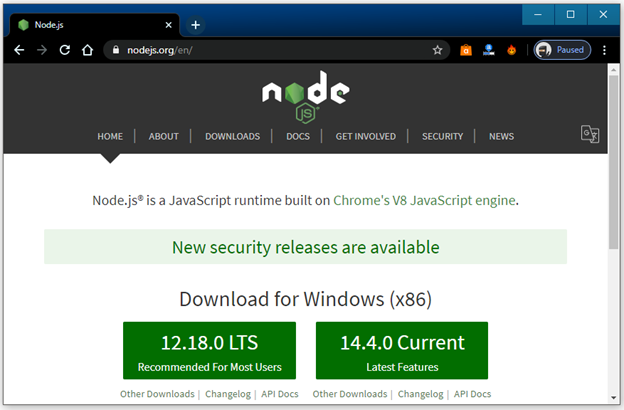
We need to download the Node.js on the windows operating system. We can download the node.js by using this link https://nodejs.org/en/.
After clicking on the above link, we got the following output:
After clicking on the current version, we got the following output:
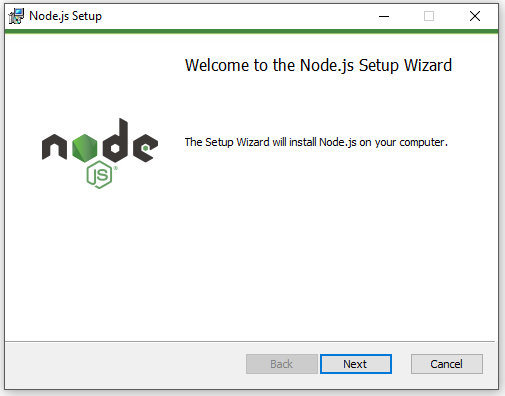
Now, click on the Next button to reach the next step. We get the following.
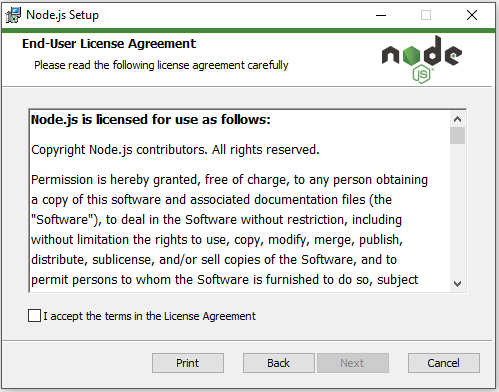
To accept the terms in the License Agreement, we will click on the checkbox; and click on the next. we got the following output:
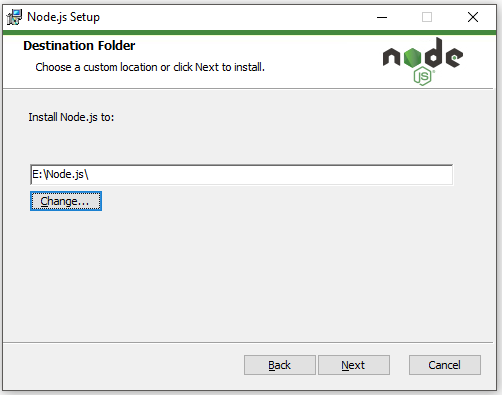
Now, we need to select the path where the Node.js setup being installed, and then click on next. By default, it will be installed in the C drive.
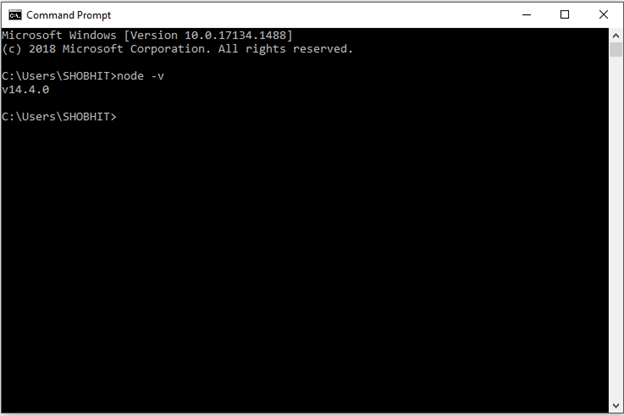
Node.js successfully installed in the system or not. We can check it on the command prompt with the help of node -v command and then press Enter. We can check it as follow.
Installation on Linux operating System
We can install the Node.js also on the Linux operating system. First, we need to understand the Linux terminal. Linux terminal helps us to install and test the Node.js and NPM.
Before installing the Node.js and NPM, we require to install the following dependencies.
Ruby and GCC: We need to install the current version of Ruby and GCC.
- In Ubuntu or Debian based Linux operating system, we require to execute the following commandin the terminal.
sudo apt-get install build-essential curl <a href=“link_name”>git</a> m4 ruby texinfo libbz2-dev libcurl4-openssl-dev libexpat-dev libncurses-dev zlib1g-dev
After execution, we will select Y(Yes), all the packages will be installed.
- In the Fedora-based Linux operating system, we require to execute the following command in the terminal.
sudo yum groupinstall 'Development Tools' && sudo yum install curl git m4 <a href=“link-name”>ruby</a> texinfo bzip2-devel curl-devel expat-devel ncurses-devel zlib-devel
After the execution of the above command, we will select Y(Yes), andthenall the packages will be installed.
Homebrew: It is used as a package manager.We can use it with Linux OS and Mac OS.
To install Homebrew for Linux, we require writing the following command on the terminal.
ruby -e "$(curl
fsSL https://raw.githubusercontent.com/Homebrew/linuxbrew/go/install)"
After it, we need to follow the process for the installation.
Installation Process
In Linux, Node.js and NPM installation are easy with the help of Linuxbrew. The Linuxbrew is responsible for compiling, downloading, unpacking, and installing NPM and Node in the computer system.
To install the Node, first, we need to open the terminal and write the following command.
brew install node
We can verify the installation of the node, and also check the version of NPM and node.js.
To check for the NPM, we will write the following command.
npm -v
To check for the Node.js, we will type the following command.
node -v
We can also update the version of NPM and Node in Linux with the help of Homebrew.
First, we have to check that Homebrew has the current version of the Node package. Then, we will open the terminal and write the following command.
brew update
For updating the Node in Linux, we need to type the following command.
brew upgrade node
IDE (Integrated Development Environment)
An IDE can be defined as a computer software application that enables the developers to code in any language. Generally, an Integrated Development Environment contains a debugger, development tools, and source code editor.
We can also use other development environments such as Brackets, Eclipse, Sublime Text2, and Visual Studio.
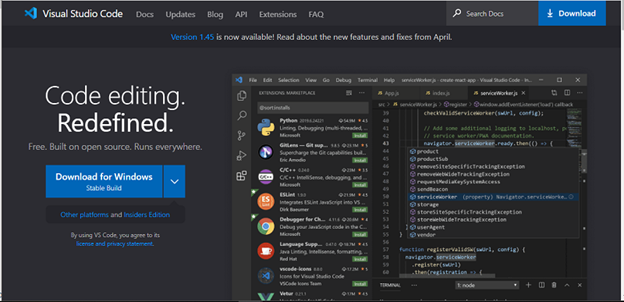
Here, we will use the Visual Studio Code development environment to execute the program code of JavaScript. We can download it with the help of the below link.
After clicking on the link, we will get the following snippet.
Visual Studio Code for Window
Installation Process
We can download the setup by clicking on download as shown in the above snippet. Then, we will get the following:
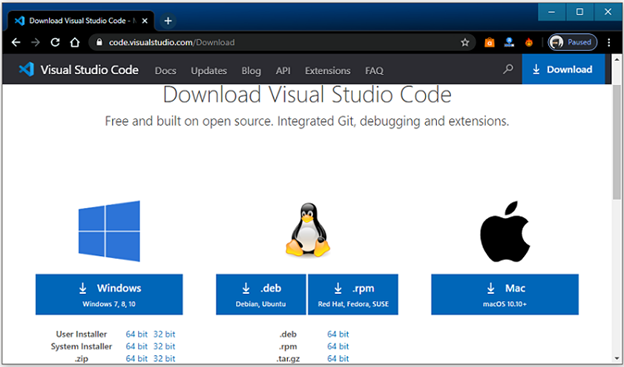
For the Windows operating system, we will click on the Windows button. After completing the downloading, we need to install the Visual studio code.
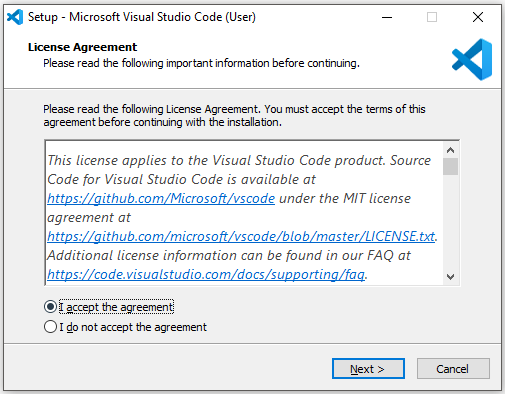
We need to accept the License Agreement and click on Next.
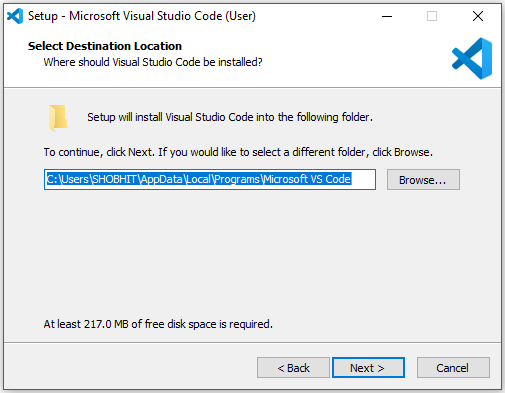
Now, we need to select the path. By default, it will be installed in C drive. We can select the path manually by clicking on the Browse button. After the successful installation, we get the following.
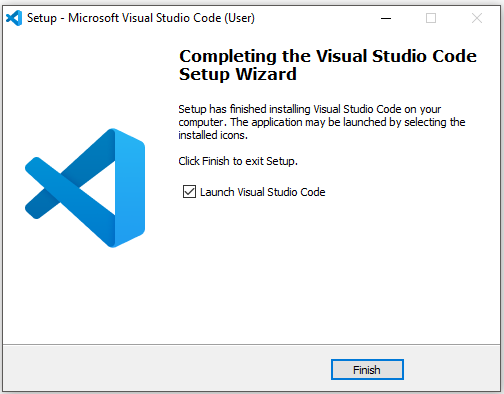
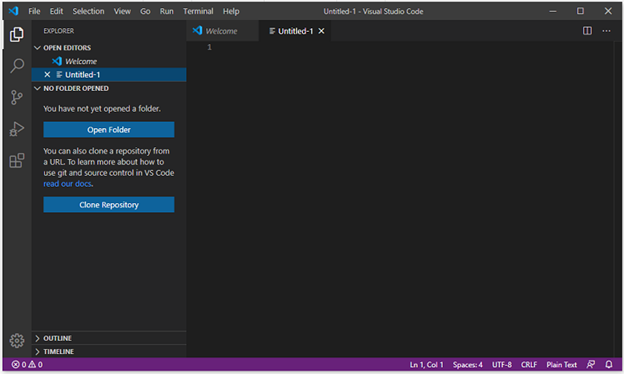
Now, we will click on the Finish button to complete the Setup. After opening the software, it will look as follow.
Visual Studio Installation on Linux
We can click on the provided link to install the development environment on a Linux operating system.
https://code.visualstudio.com/docs/setup/linux
Visual Studio Installation on Mac OS X
We can click on the given link to install the development environment on Mac OS x.