CodeIgniter File Uploading Class
The Codeigniter provides a file Uploading library class which is used to upload any file such as images, pdf, mp3, etc. to the codeigniter’s application. It also allows to set various preferences such as the type and size of files.
Load the File Uploading Class
Before using the file uploading class in Codeigniter, you must load in the controller file by following the
Syntax:
$this -> load-> library ( ‘upload’ );
These are the following methods that are available in the file uploading library to upload the documents.
1. initialize(): An initialize () function is used to initialize or load the config preference that is set in the config file. It also allows to set the preference manually in the controller file such as:
$config[ ‘upload_path’ ] = ‘./uploads/’;
 $config[ ‘allowed_types’ ] = ‘gif | jpg | png | mp3 |pdf’ ;
 $config[ ‘max_size’ ] = ‘200’;
 $config[ ‘max_width’ ] = ‘1024’;
 $config[ ‘max_height’ ] = ‘820’;
 $this->load->library( ‘upload’, $config);
Alternatively, you can set file preferences by calling the initialize() method to auto-load the config class.
Syntax
initialize ( [ array $config = array() [, $reset = TRUE ] ]);
It has two parameters
$config (array): In this field, you can set the file related preferences such as size, width, type, etc.
$reset: In this parameter, you can set either TRUE or FALSE value that indicates whether you want to reset the default preferences of the config.php file.
2. do_upload(): It is used to define the name of the form field or filename that you want to upload to the application.
Syntax
do_upload ( [ $field = ‘userfile_name’ ] );
$field: In this fields, you can pass the file name.
3. display_errors(): As the name represents, it is used to displays an error message, when the particular file is not uploaded to an application.
Syntax
display_errors ( [ $open = ‘<p>’ [, $close = ‘</p>’ ] ] );
$open: It defines an open markup to display the formatted error message.
$close: It defines a close markup to display the formatted end of the error message.
Note: It throws an error message when the do_upload() function is unable to upload the file.
4. data(): The data() function contains all the information that relates to files uploaded in the application such as file_name, file_type, file_path, etc.
Syntax
data ($data);
$data: You can define an element instead of the full array.
Write a program of file Uploading in the CodeIgniter application:
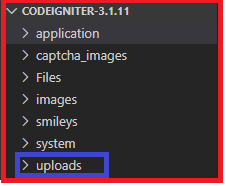
Before creating a file uploading program, you have to create a folder uploads in Codeigniter application.
Create a controller file Online.php and save it in application/controller/Online.php. After that, write the following program in the controller file.
Online.php
<?php
 class Online extends CI_Controller
 {
     public function my_upload_form()
     {
         $this->load->helper('form');
         $this->load->helper('url');
     $this->load->view('my_upload_view');
     }
     public function upload_my_file()
     {
     $config = Array(
         'upload_path' => './uploads/',         // define the allocated folder to store the files
         'allowed_types' => 'png|jpg|doc|pdf|mp3|mp4 | gif', // define the type of file
         'max_size' => 11096,
         'max_width' => 2000,
         'max_height_' => 2000,
         );
         $this->load->library('upload', $config);         // load upload library and config library
     if (  $this->upload->do_upload('file_upload'))
     {
             $data = $this->upload->data();
               $this->load->view('success');  // load view file
     }
     else
     {    $error = $this->upload->display_errors();
         print_r($error);
         }
 }
 ?>
Create a view file my_upload_view.php and save it in application/views/my_upload_view.php. After that, write the following program in the controller file.
my_upload_view.php
<html>
 <head>
 <title>Upload Form</title>
 <body>
 <form action ="<?php echo site_url('/online/upload_my_file'); ?>" method ="post" enctype="multipart/form-data" >
 <label> Select file to upload</label>
 <input type ="file" name ="file_upload"/>
 <input type="submit" name="mybutton" value="Upload-file">
 </form>
 </body>
 </html>
Create a view file success.php and save it in application/views/success.php. After that, write the following program in the controller file.
success.php
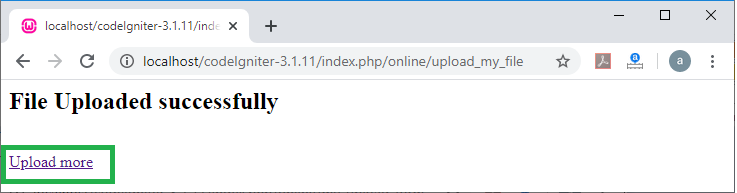
 <h2> File Uploaded successfully</h2>
   <br />
  <a href="http://localhost/codeIgniter-3.1.11/index.php/online/my_upload_form"> Upload more </a>
Now execute the program in the localhost by invoking the URL localhost/CodeIgniter-3.1.11/ Online/my_upload_form function, it shows the output, as shown below.
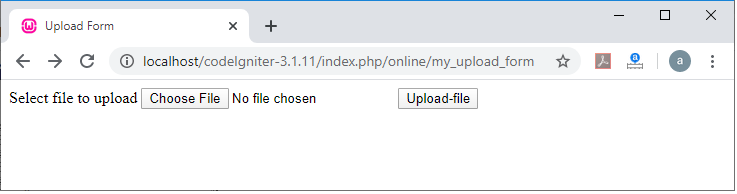
Now click on the Choose File button;it allows you to select a file from your system.
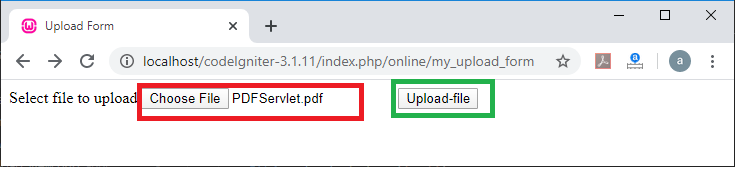
After selecting the file, click on the Upload-file button to upload and save the file in the Codeigniter application. When the file uploads successfully it shows the messaeg File Uploaded successfully, it saves the file in Uploads folder. And if you want to upload more files, click on the Upload more link. It redirects, you to the starting page “localhost/CodeIgniter-3.1.11/ Online/my_upload_form” of the upload file.
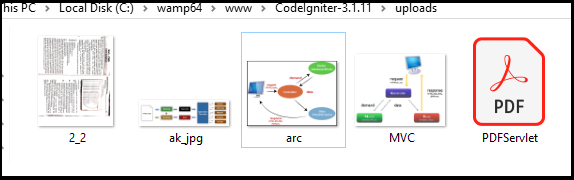
And if you want to check, your files have been successfully uploaded, go to the CodeIgniter-3.1.11\uploads folder and it shows the below image of uploaded files.