How to Create a Group Email in Gmail
How to Create a Group Email in Gmail
Every now and then, one needs to pass on or share a message to several people at the same time. To make this possible, Google developers have introduced the Group Email feature in Gmail.
Topics Covered
- What is Group in Gmail?
- Profits of Creating Group Email List in Gmail
- Steps to create a Group in Gmail on the computer by creating a contact label
- Steps to create a Group in Gmail on Android
What is Group in Gmail?
A Gmail group is a digital forum wherein multiple contacts can be grouped together to communicate at once. It can be also be termed as a group of batch mates, family, social welfare hub, colleagues, neighbors, project teams, etc., that can be used by the user in communicating or exchanging emails quickly.
Profits of Creating Group Email List in Gmail:
- Creating Groups saves your precious time as you can communicate and convey your message to multiple groups at a time. Also, we can send a single message to multiple people.
- It is highly useful in management and advertisement where the distribution of content is done on a large scale.
- Business hubs practice Gmail grouping as a significant part of Email marketing campaigns to generate more sales and revenue.
- It is also an excellent way to loop in all your relatives, old buddies, social or work circles together and pass on frequent messages.
Create a Group in Gmail on a computer by creating a label
The Label method is used for sending the same emails to a group of people (particularly sharing the same interest, unlike any organization, society, school mates, etc.) frequently. With this method, we add different contacts to a group. It also saves the space list in the recipient field of the message as you can directly enter the group or label in the BCC field.
Below are the step-by-step demonstrations to create a group on a computer by creating a label:
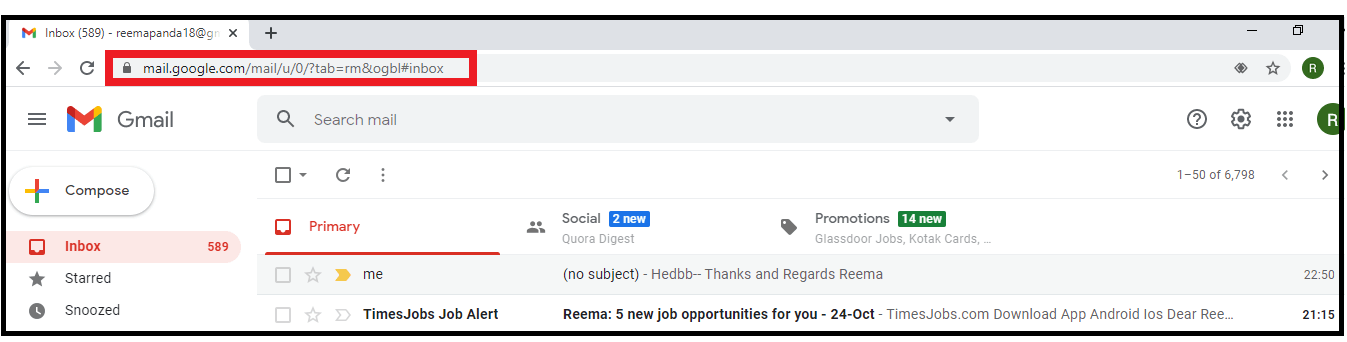
STEP 1: Login to your Email address
- Open the Google Gmail application on your web browser, or you can directly visit the URL: https://mail.google.com/. Login into your account by using your email address and password.
- You will arrive in your Gmail Inbox window.
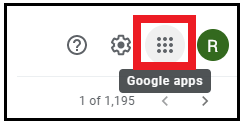
STEP 2: Click on Contacts
- On the top right corner of the window, click on the 'Google apps' icon.
- The window will appear, displaying all the applications. Click on contacts.
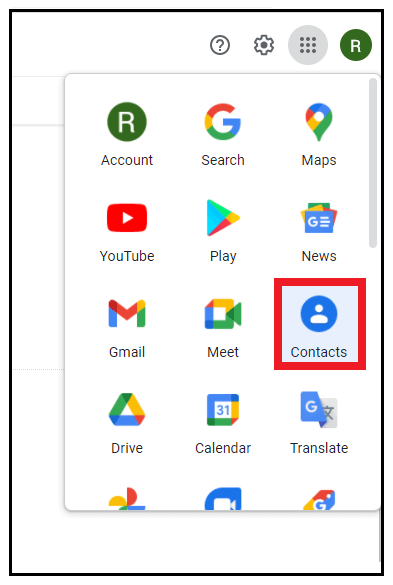
Note: For the older Gmail version, you can go for the contact preview option.
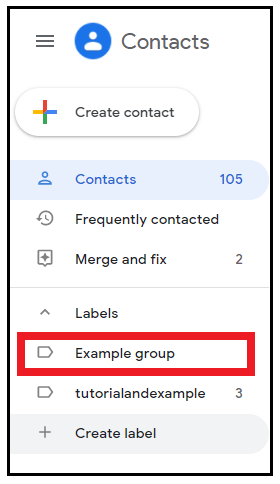
STEP 3: Create a Label.
- Google will immediately direct you to the https://contacts.google.com/ page. On the left pane of the webpage, look for 'Create Label' and click on that.
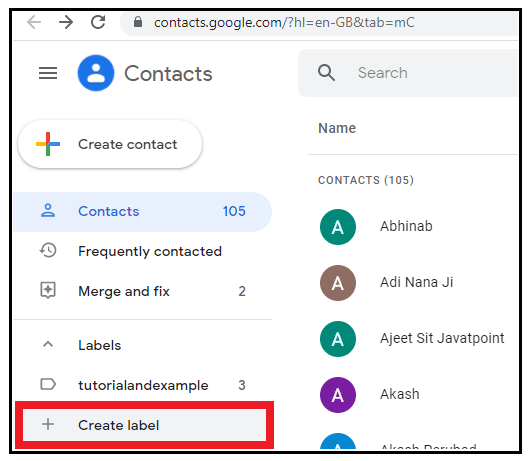
- A small dialog box will appear. Type in the name for your label in the appeared text field and click on the save option.
Note: Make sure to keep the name short, to the point and meaningful that could easily describe the group.

- Once the label gets saved, you will immediately notice that the same name below the "Labels" header mounted on the left pane. All your labels are displayed under the same header.
STEP 4: Create a Contact List
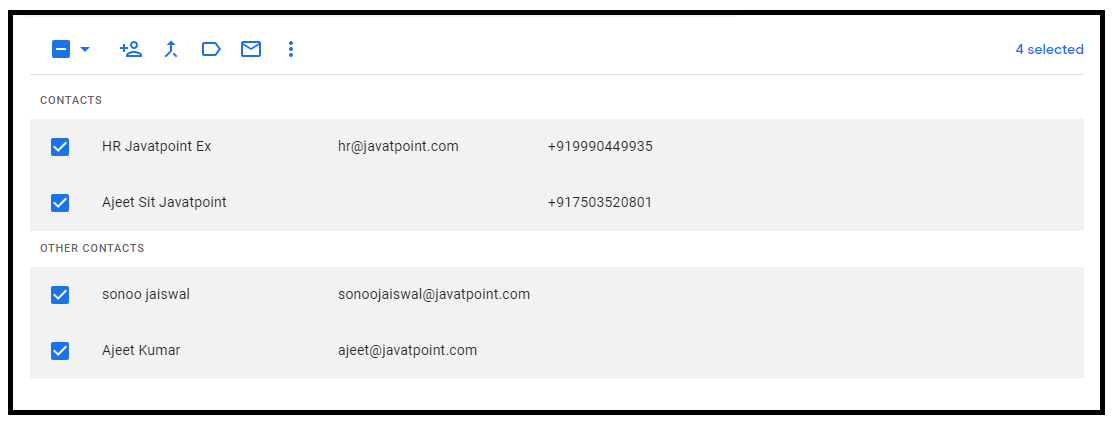
- Click on the Contacts located at the top of the left column. It will display your entire Gmail contacts list.

- Choose the contact that you want to add to your label. Hover the mouse cursor over the circle-shaped that either contains the profile picture or first initial of your contact name (in the absence of profile picture).
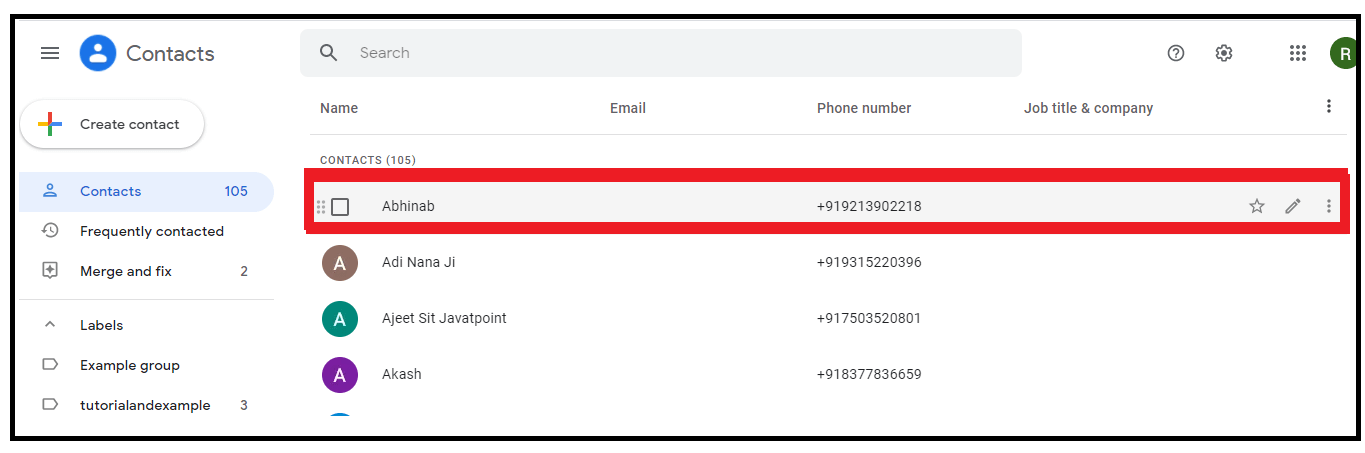
- The circle will be altered with a checkbox as soon as you place the cursor over it. Click on the checkmark to tick it.
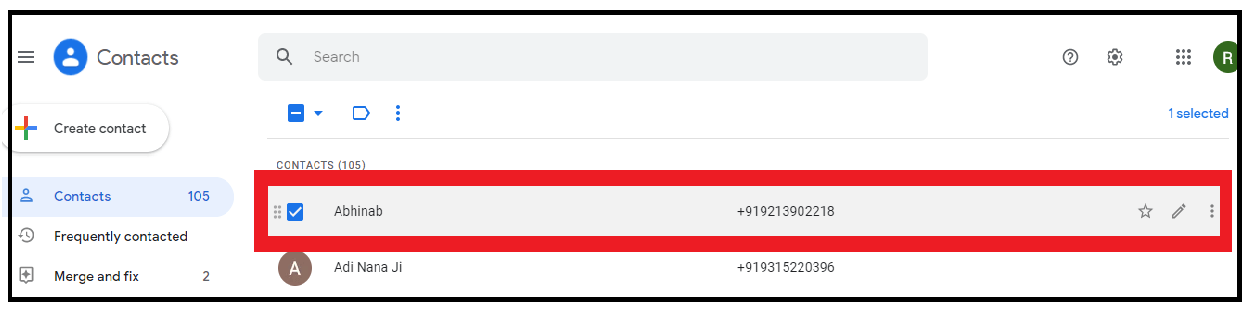
- Repeat the same activity with all the contacts that you wish to add to your grouping list.
STEP 5: Add contacts to your label
- Click on the ‘Manage Labels’ icon located on the top-left of the window. (As shown in the below image).
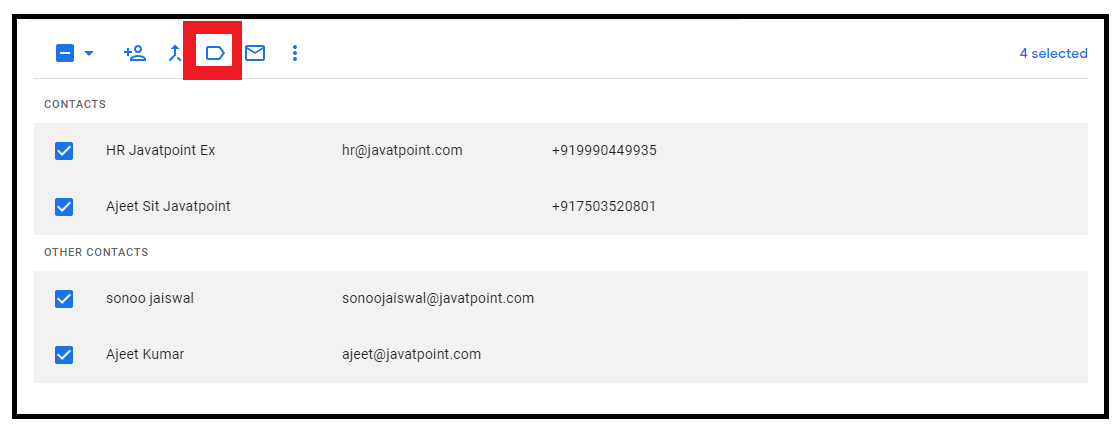
- Select the label name wherein you want to add all the contacts. Click on apply.
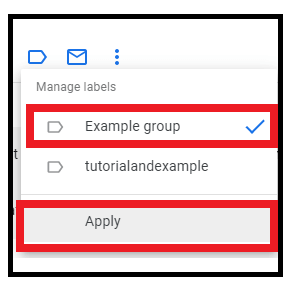
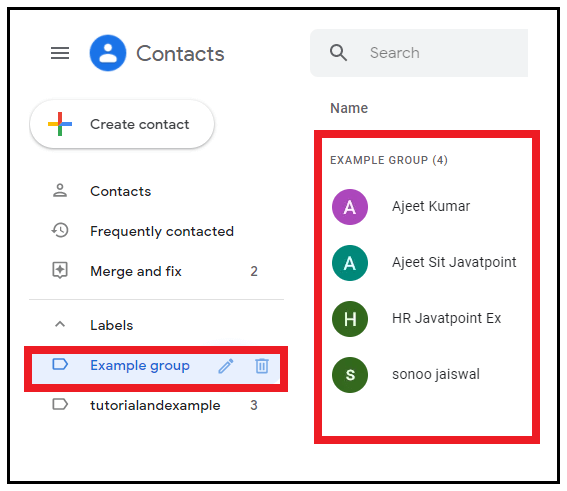
- All the contacts will be added to the label. You can double click on the label to confirm the acceptance of contacts.
STEP 6: Blind Carbon copy
As we have created our group, the next step is to send our message to all the contacts in the group using the Blind Carbon copy method.
NOTE: Blind Carbon Copy or BCC is a Gmail feature used to add email addresses, unlike To or CC. The only difference is that this field ensures that recipients can't see the entire grouped list. BCC also ensures that if a recipient from the grouped list answers back to your email, the replied email will be delivered only to you. You can also use TO, or CC do
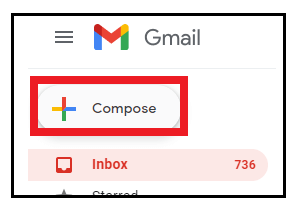
STEP 7: Compose and send your mail
- Click on the ‘+compose’ button mounted at the top-left corner of the page.
- It will open a new message window—type in the subject and the content you want to send to your recipients.
- In the BCC field, type in your Group label name; you only have to type the first few initials, and Google will automatically suggest the rest to you.
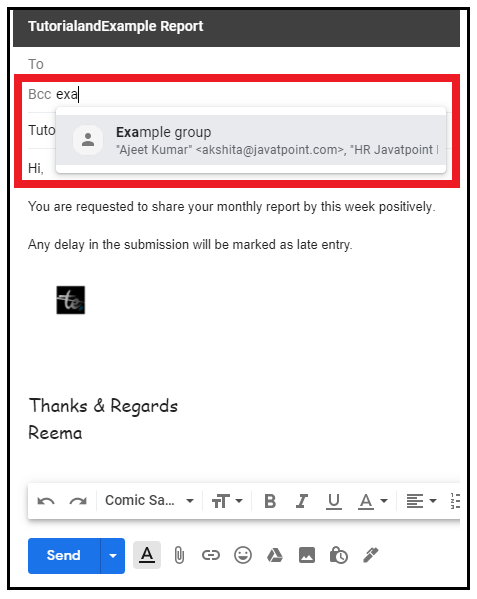
- Click on the send button.
There you go. Your mail will be sent to your grouped list with just a single click.
Steps to create a Group on Android
You can easily create a group or label on your android smartphone as well. All you have to do is to add contacts to the label and have you type in the label name in any of the fields (To or CC or BCC) to send the email to multiple people at the same time.
Below are the step-by-step demonstrations to create a group on an android smartphone by creating a label:
STEP 1: Download the Gmail app for android
- Unlock your android phone and download the Gmail app from your Android Play store. The icon would have a round red circle with the colorful outlined silhouette of M inside, as shown in the image below.
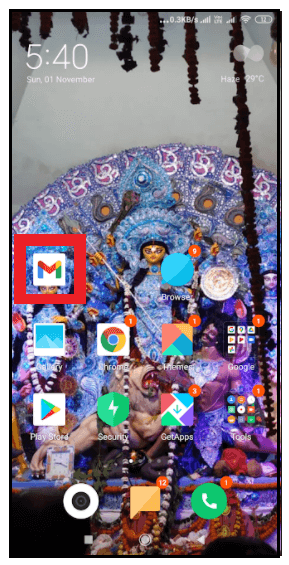
- Open the app and login to it by typing your email address and login password.
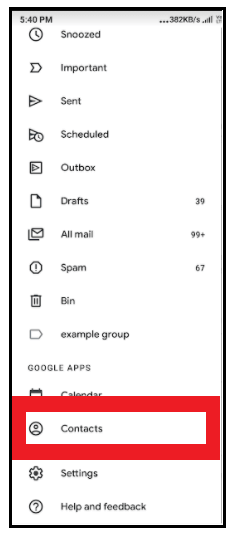
STEP 2: Click on the menu icon
- Click on the menu located at the top left of the page. The menu icon resembles three horizontal lines, as shown below.
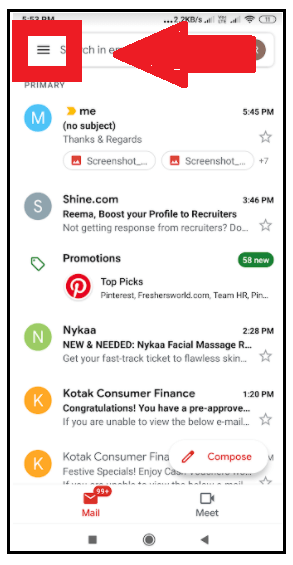
- Click on contacts.
- Suppose you have already downloaded and connected your contacts application to your Gmail account; you will be redirected to the application. In case you have not downloaded it, it will redirect you to the play store.
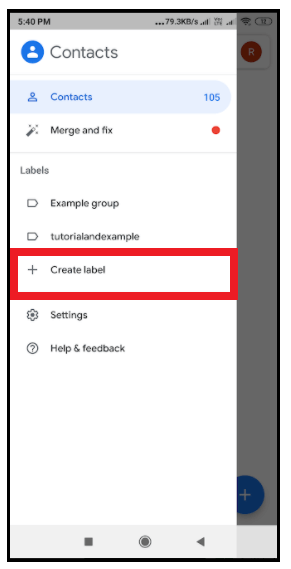
STEP 3: Create the label
- All the options will be displayed. Click on the 'Create label' option.
- The label name window will pop up. Type the name for your group.
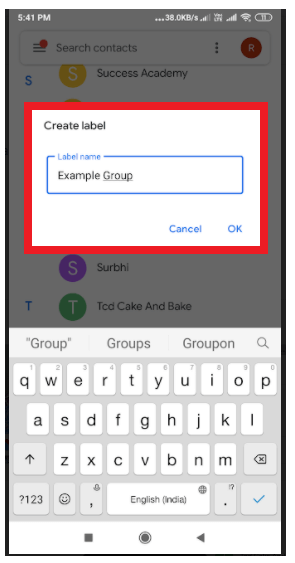
Note: Make sure to keep the name short, to the point and meaningful that could easily describe the group.
- Click on the OK button. Your label will be created.
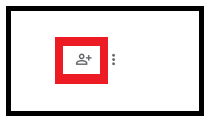
STEP 4: Add contacts to your label
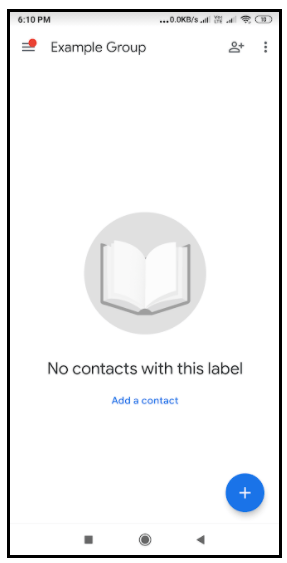
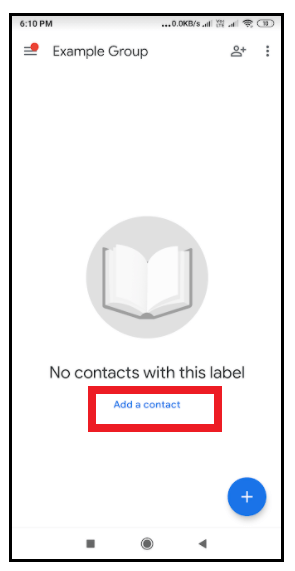
- Open the label. You will a message will be displayed "No contacts with this label." The next step is to add contact members to the new label.
- Click on Add contact.
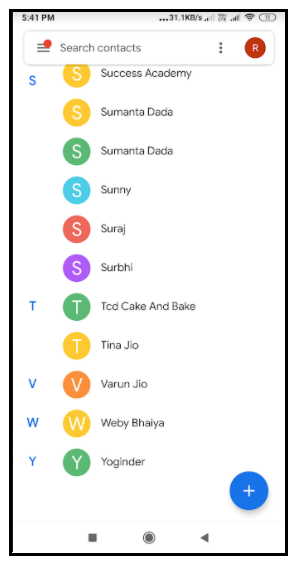
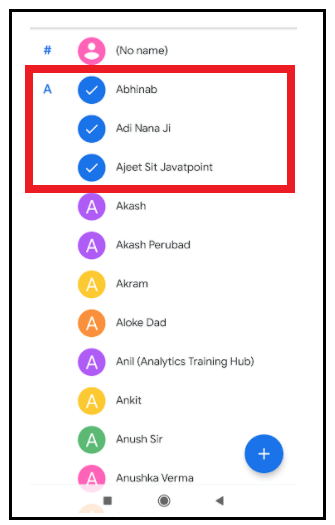
- The list of your Gmail contacts will be displayed. Tab and long-press the contact that you would like to add.
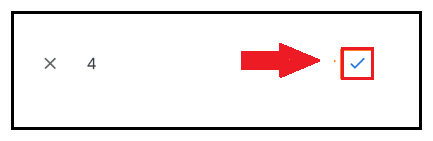
- Once done, click on the tick option located at the top right corner of the page.
- All the selected contacts will be added to your label.
- If you wish to add more contact to your group, you need to click on the Add contact located at the top-right corner of your screen.

STEP 5: Compose and Send the message
- Again, open the group to which you want to send the mail. Click on the three vertical dots icons located on the top-right corner of the screen. (Please refer to the below image).
- The given below window will be displayed. Click on the 'send email' option.
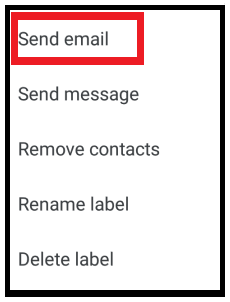
- Gmail will automatically compose an email for you wherein all your group's email addresses will be attached in the 'TO' field.
- Compose the message and add a subject. Click on the send button.