How to Install Matplotlib in Python?
How to Install Matplotlib in Python
The speed at which the enormous amount of data is generating has become a huge aid in understanding what's going on currently in the market. The people who are associated with industries now have a better idea of how they can flourish their business. The tech giants are now able to make much wiser decisions on investments because they know exactly what's in trend. Let's see what is that one thing that is making everything possible? The answer is data.
Once the data is collected and the useful features are extracted comes the most critical part which is visualization.
Matplotlib is a vast and interesting library for people who are enthusiastic about inferring results from the data.
There are scatter plots, histograms, box plots, and a lot more which makes it easy for us to comprehend.
In this article, we will discuss how to install matplotlib in Python.
- Checking the version of Python installed in our PCs, we have discussed this already in the previous articles but let’s talk about this again-
There are two ways to check the version of Python in Windows-
- Using Powershell
- Using Command Prompt
Using Powershell
- Click ‘Win+R’ or type ‘Run’ on the taskbar’s search pane.
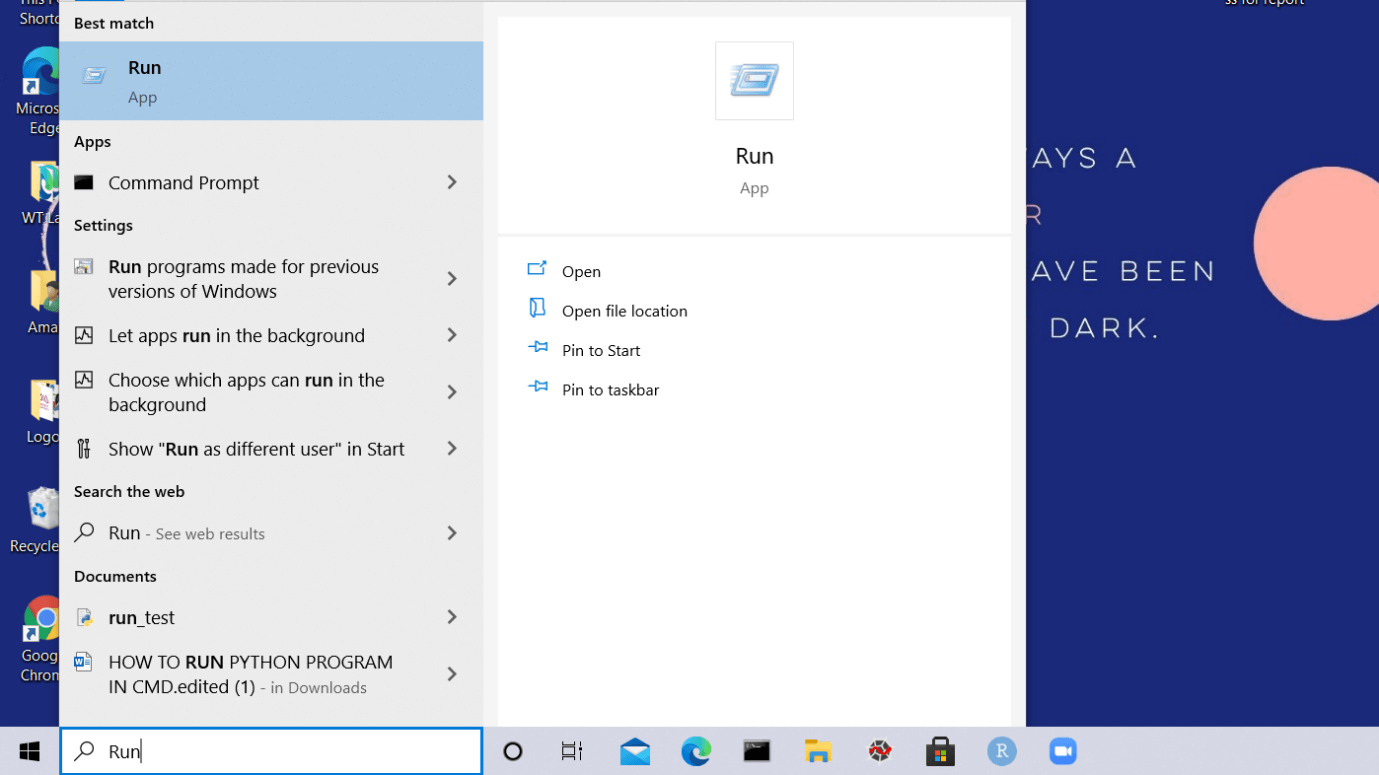
- Type ‘Powershell.’
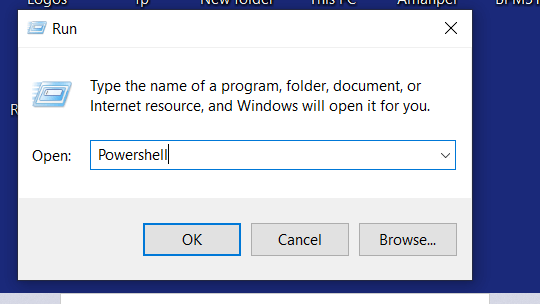
- A window will appear on your screen named ‘Windows Powershell’
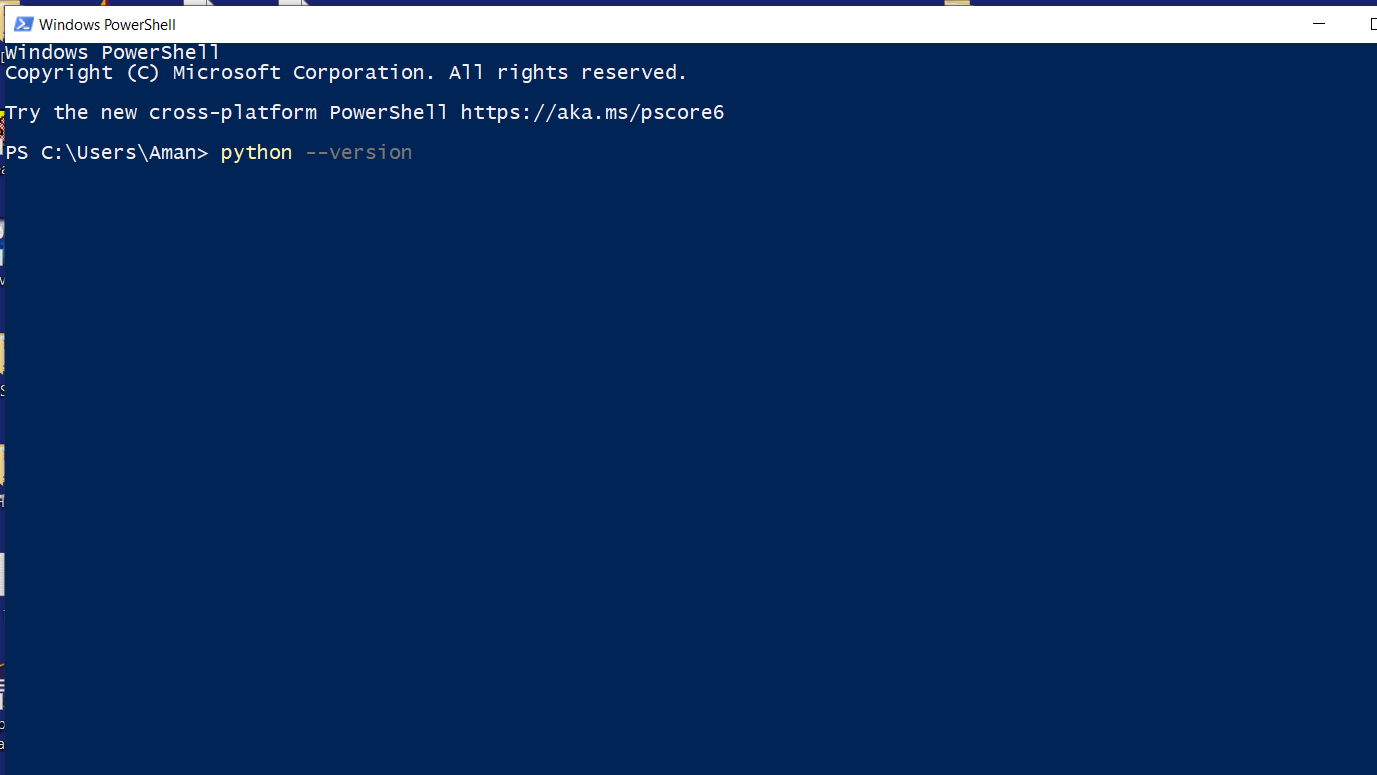
- Click on ‘Enter’
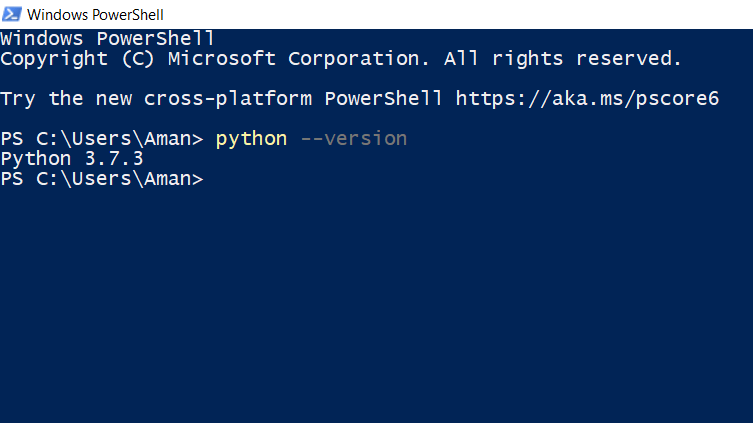
- Type python –version and click on ‘Enter’
- The version would be displayed in the next line.
Using Command Prompt
Type 'Command Prompt' on the taskbar's search pane and you'll see its icon. Click on it to open the command prompt.
Also, you can directly click on its icon if it is pinned on the taskbar.
- Once the ‘Command Prompt’ screen is visible on your screen.
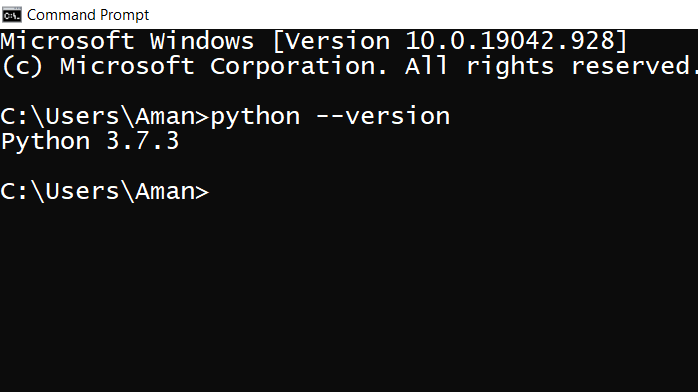
- Type python –version and click on ‘Enter’.
- The version installed in your system would be displayed in the next line.
Checking the version of Python in Linux
In Linux, we have a shell where we type our commands that are interpreted and tell the operating system about what the user wants.
The steps to check the version of Python in Linux is-
- Start your system and switch on to the Linux operating system (you might find it with the name Ubuntu).
- Once the desktop screen of Linux appears, click on ‘Terminal’ to open it.
- In the terminal window, type python –version and click on ‘Enter’.
In the next line, it will display the current version of python installed in your system.
- The next step is to use the pip command to install NumPy in our system
Simply writing the pip command in the command prompt can help us to download & manage packages.
Packages contain all the necessary files for a module and modules are the in-built codes that can be used directly in our python projects.
Installing pip in python (Windows)
- First of all, to check the version of python installed on our PCs we will type the python –version in the command prompt.
- If you have Python 2.7(or greater) or Python 3.4(or greater) you need not install pip because it is present by default in these versions.
- Download the get-pip.py installer script and save it with the extension .py
- The next step is to open the command prompt and run the command
get-pip.py
- Now this pip is installed successfully in your system.
- We can check the version of the pip using the pip –version.
Installing pip in python (Linux)
Linux has a great variety of commands. Since it follows the shell scripting way of interaction, the OS understands our tasks through commands. In Linux, the commands for installing pip vary with the version of Python.
We will look at some of them here-
First, we will see how to install pip in Python3
 sudo apt update
sudo apt install python-3 pip
We can check its version after the successful installation
pip3 –version
Using Command Prompt
Matplotlib can be installed in our system by using the given command in the Command Prompt-
pip install matplotlib
USING ANACONDA
We can install matplotlib using Anaconda by typing the following command in the Anaconda Prompt-
conda install matplotlib

Verifying the Installation
We can verify that matplotlib has been successfully installed in our system or not by typing the given program in the terminal-
 import matplotlib
matplotlib.__version__
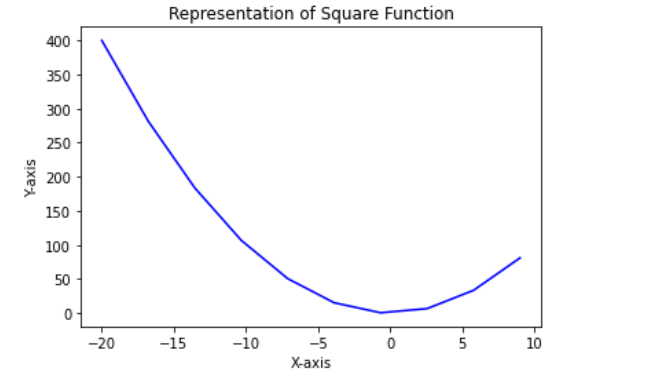
Let us see how we can create a line chart using matplotlib-
 import numpy as np
import matplotlib.pyplot as plt
x=np.linspace(-20,9,10)
y=x**2
plt.plot(x,y,'b')
plt.xlabel('X-axis')
plt.ylabel('Y-axis')
plt.title('Representation of Square Function')
plt.show()
INPUT-

OUTPUT-
So, in this article how the matplotlib library can help us and what are the ways of installing it.