How to snooze an email in Gmail
How to snooze an email in Gmail
With the popularity of Gmail, today every deal is likely to be discussed in emails. And with so many things rushing in the Inbox, it becomes tough for the Gmail users to give proper attention and keep up with all emails from meetings, business deals, ongoing projects delivery, family functions invitations, bank statements, etc. Hence, it is very likely to skip an email or forget to revert to the few, you opened in haste.
For the Gmail users who receive the bulk of mails in their day to day lives, Google introduced the Snooze feature to untangle the complications. This feature helps Gmail users deal with the overloaded Inbox by permitting them to save an important mail later. Snooze feature also allows the user to select a customized time as per their schedule for the email to reflect again and remind you to revert.
What does Snooze mean?
In English, ‘Snooze’ means to have a short sleep. As per it meaning this feature does the same task. The Snooze tool in Gmail is used to temporarily remove an email from our Inbox and save it later. The Snoozed mail pop-ups to the top of your Inbox at the specified date and time.
Gmail has a separate Snooze Folder that stores all the emails marked as Snoozed. You can easily find a message if you wish to revert any email sooner than the scheduled time.
Steps to Snooze an email in Computer
Follow are the below step-by step demonstrations to snooze an email on desktop:
STEP 1: Login to your Gmail account
- Open the Google Gmail application on your computer browser, or you can click the URL: https://mail.google.com/. Enter your password and email address to the respective fields.
- You will be directed to your Gmail Inbox homepage.

STEP 2: Select your Folder
- Gmail has different folders like Primary, Social and Promotions. Select the folder from where you want your email to be snoozed.
- In my case, I have selected the Primary as in this folder, most of the important mail resides.

STEP 3: Select the email
- Choose your email. To select the mail, click on the “square box” placed at the front of the email.

STEP 4: Snooze your mail
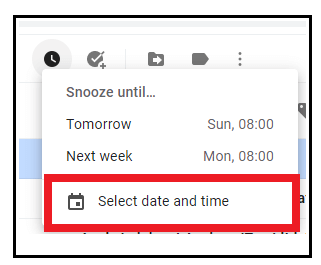
- Select the snooze icon located at the top (refer to the below screenshot).

- The following drop-down window will be prompted, showing you a few date and time options. Either select any of them, or if you want to have a customized date click on ‘Select date & time.’
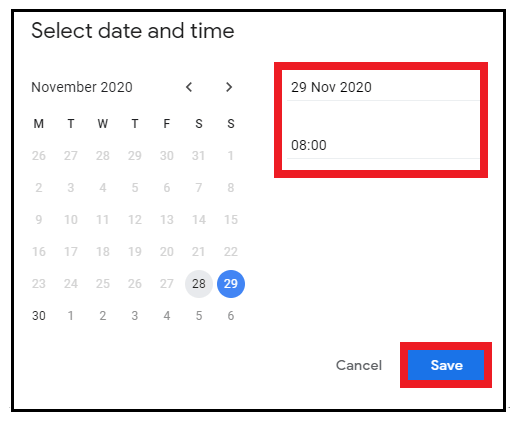
- The Select date & time window will be displayed. Select the date and time as per your requirement. Click on the “Save” button.
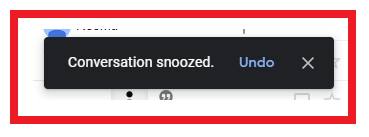
- The selected mail will be removed temporarily for your Inbox and pop up will appear at the top of your Inbox at its scheduled data and time.
Steps to Snooze a mail on Android phone
Below are the step-by step demonstrations to snooze an email in Android smartphone via Gmail app:
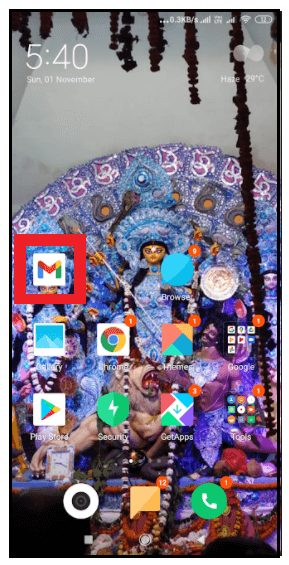
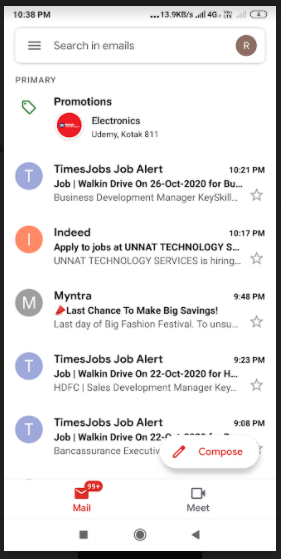
Step 1: Download and Open the Gmail app
- Unlock your android phone. Go to your play store, download the Gmail app. In some smartphones, it comes by default. Once downloaded, double click to open the app.
Step 2: Login or Sign up
Login into your email account by entering your email id and password, and you will be landed on your Inbox page.
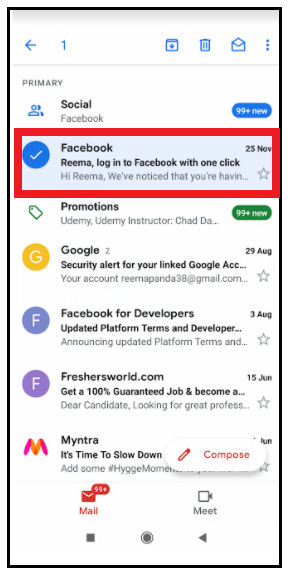
STEP 3: Select the mail and click on Snooze
- To select the mail, click on the “Circle” icon residing next to your email (refer to the below screenshot).

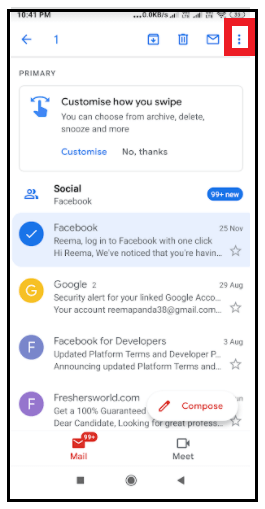
- Click on the three dots located at the top-right position of your screen.
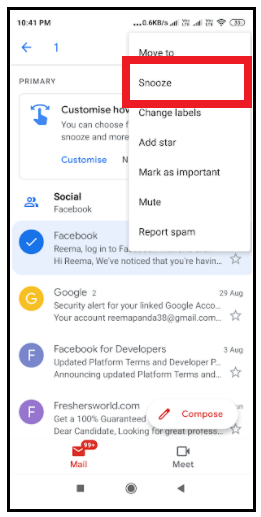
- The following window will be prompted. Click on the “Snooze” option.
STEP 4: Set the date and time to snooze
- The following drop-down window will be prompted, showing you a few date and time options. Either select any of them or if you want to have a customized date click on ‘Select date & time.’
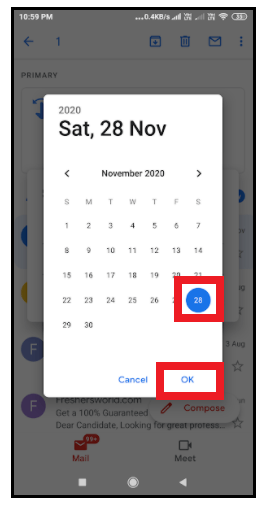
- The select date & time window will be displayed. Select the date and click on the “Ok” button.
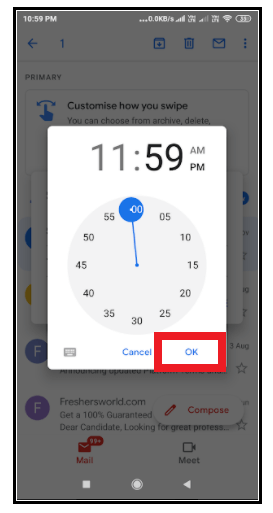
- Select your specified time with the help of the clock, as shown below. Click on “Ok”.
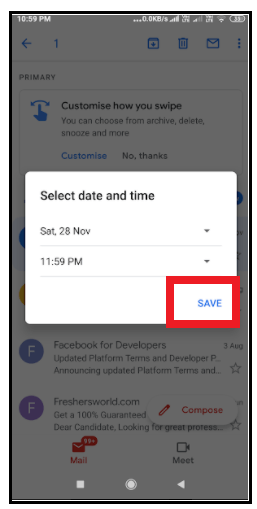
- At last, confirm your date and time by clicking on the “Save” button.
- Your email will immediately be removed from the Inbox, and Gmail will throw a window at the bottom of the screen displaying “1 snoozed until date, time’.
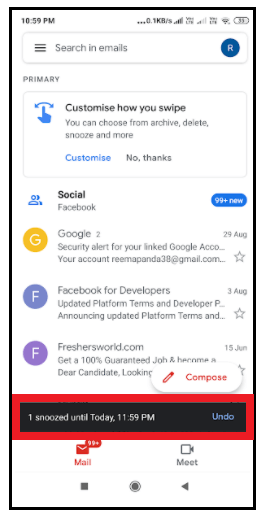
That’s it, your snooze will pop up at the top of your Inbox its scheduled data and time.