Installation of Xampp
Xampp Installation: XAMPP is a cross-platform, open-source software. Xampp stands for X (Cross-platform), A (Apache), M(MySQL), P(PHP), P(Perl). It is a complete package software, which includes Apache web server, PHP, MySQL database, and Perl. We will not install all of these separately; they are installed with Xampp. It is generally a local server. We run phpMyAdmin database on this localhost or local server using localhost/phpmyadmin/ on the default web browser.
Install Xampp server on windows 10 Step by Step
Here, we are going to install XAMPP on the windows operating system. The step-by-step installation of XAMPP is -.
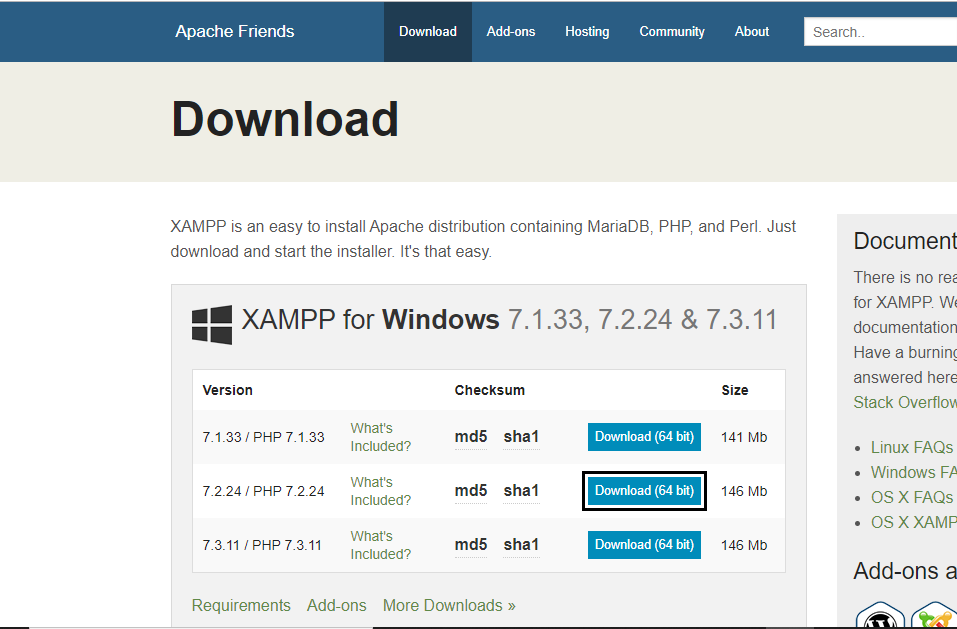
Step 1: To download the setup of XAMPP 7.2.24 or the latest software version, follow the link https://www.apachefriends.org/download and click on Download (64 bit).
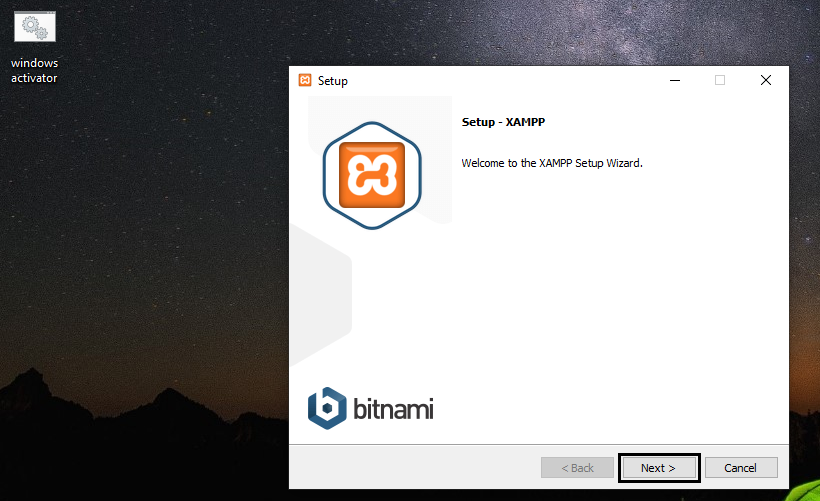
Step 2: After downloading the XAMPP setup file, double click on the downloaded .exe file to install the XAMPP and allow it to make changes in the system. A dialog box will appear where you have to click on the Next button.
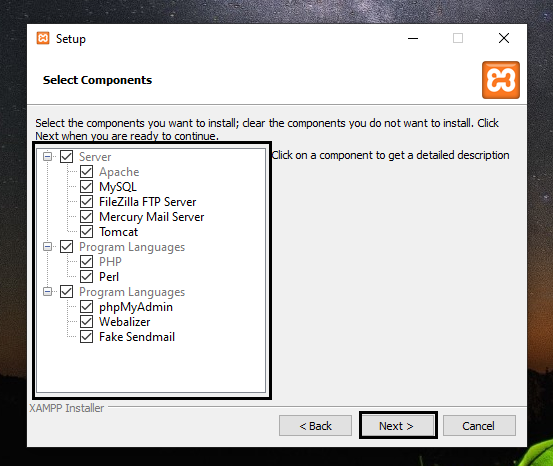
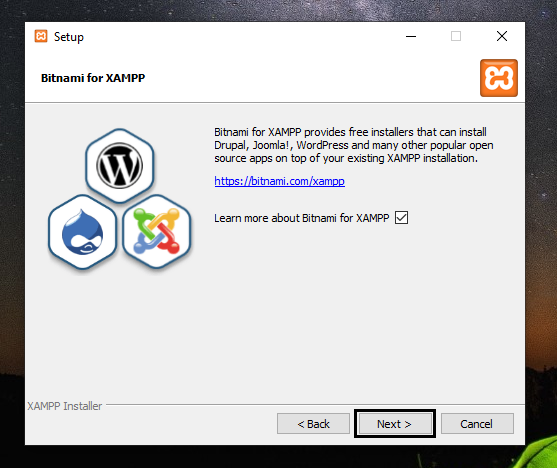
Step 3: Select the options from the right menu that you want to install and unselect if you don’t want to install any particular component, follow up by clicking on Next.
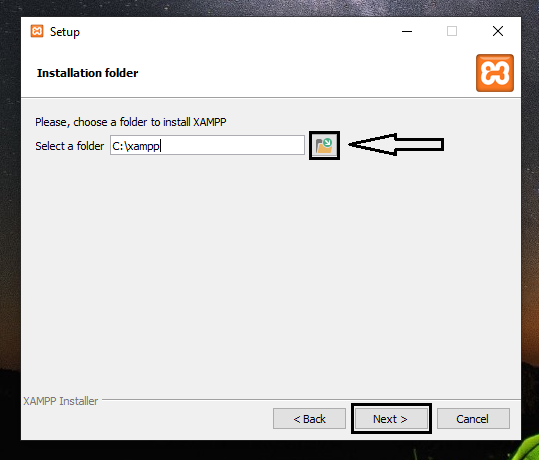
Step 4: Set the location where you want to install the XAMPP and click on Next. By default, the location is in the C drive of your PC.
Step 5: Click on the Next button to carry forward.
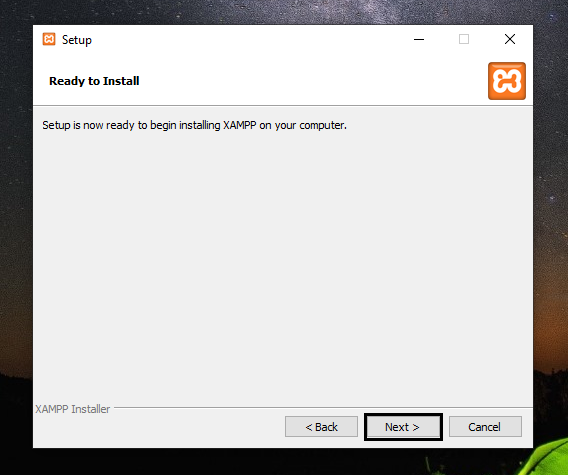
Step 6: Now, your XAMPP setup is ready to get installed. Click on the Next button to start the installation process.
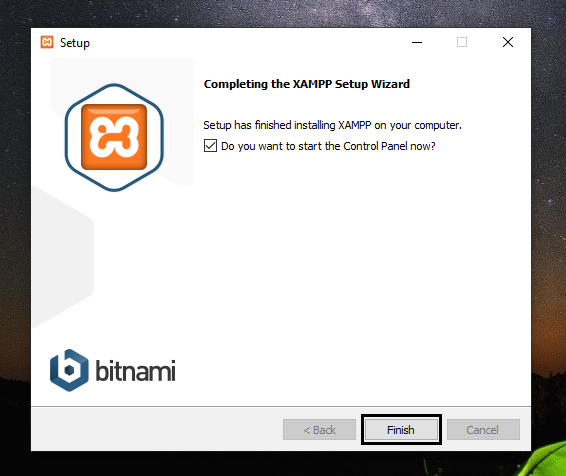
Step 7: Now that the installation has started, wait for the setup to complete its installation as the waiting time may vary as per system to system. Click on the Finish button.
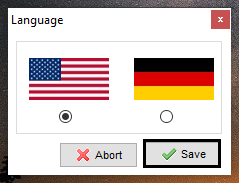
Step 8: Select the preferred language; click on SAVE.
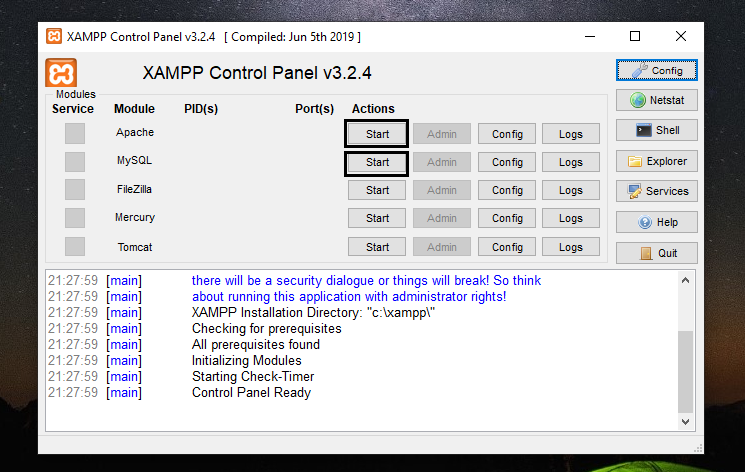
Step 9: Click on the Start button to run the Apache server and MySQL.
Step 10: Now, XAMPP is successfully installed on your system. Click on the Stop button if you want to stop the Apache and MySQL from running.
