Ionic framework Installation
Installation of Ionic
Before proceeding with the ionic application, you'll need to install node.js and NPM (Node Package Manager), the code editor, and Ionic CLI.
Installation of node.js and NPM
These are the primary platforms needed for the development of the Ionic application. For the installation of Node.js and NPM, we will follow the following steps:
Steps for Installing Node.js and NPM
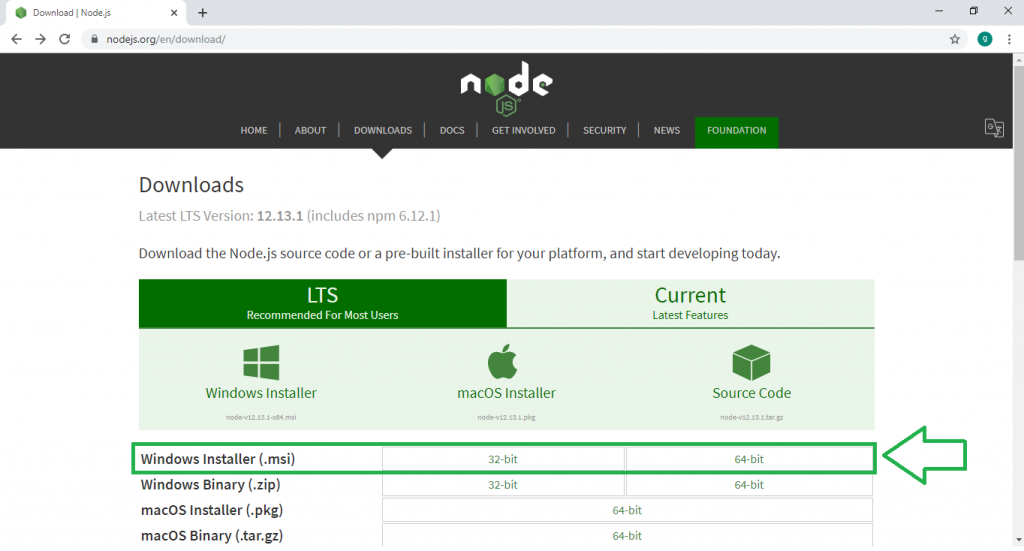
Step 1: Go to https://nodejs.org/en/download/ and download the necessary binary files. If you install the Node.js for Windows, then you click on 32-bit setup files for Node.js.
++
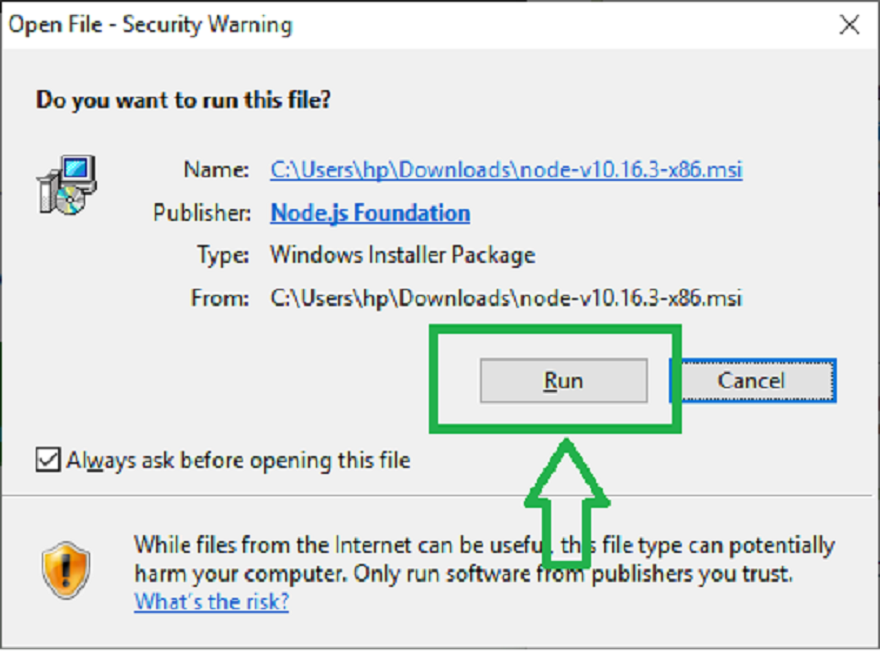
Step 2: Double click on the Windows Installer (.msi) 32-bit and 64-bit file to start the downloading. Once the downloading is completed, then open the file and click the Run button to start the installation. The given below screenshot shows how to begin the installation process.
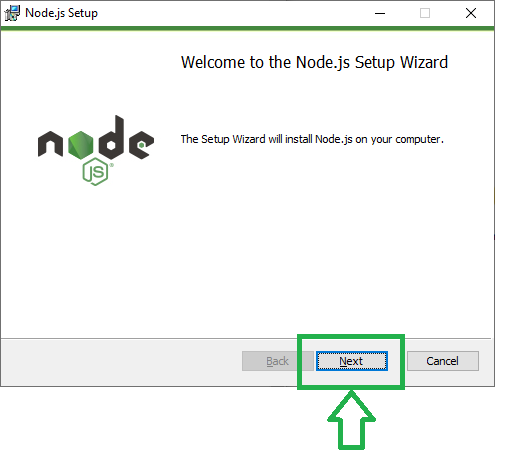
Step 3: To continue the installation, you click on the Next button.
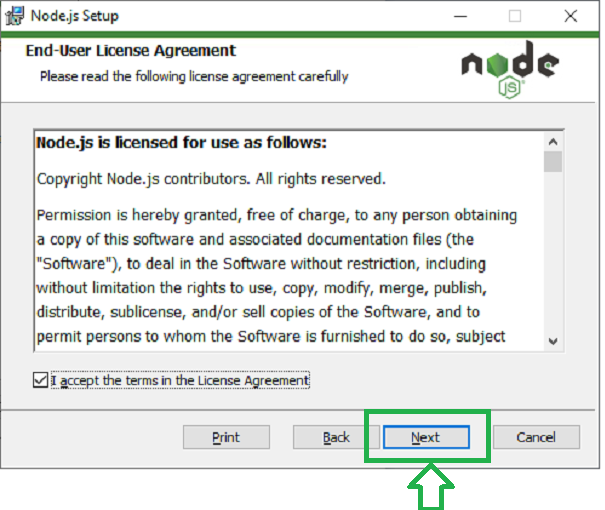
Step 4: The Next Step of installation is to Accept the license agreement. You click on the Next button to continue the installation process.
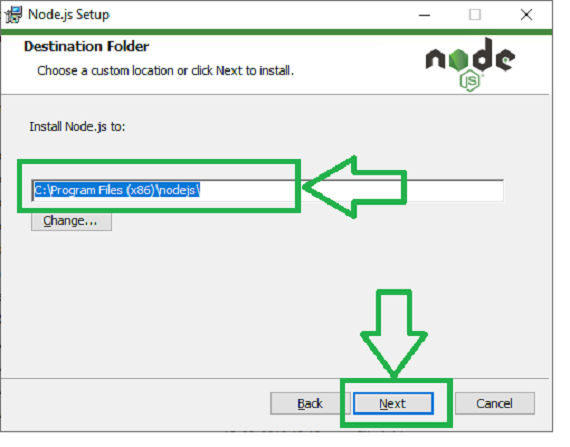
Step 5: In this step, you have to choose the location where you want to install the Node.js, and then click on the Next button.
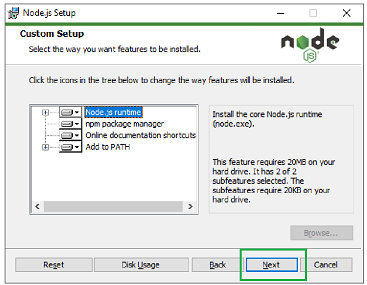
Step 6: To continue the installation, you have to accept the default components and click on the Next button.
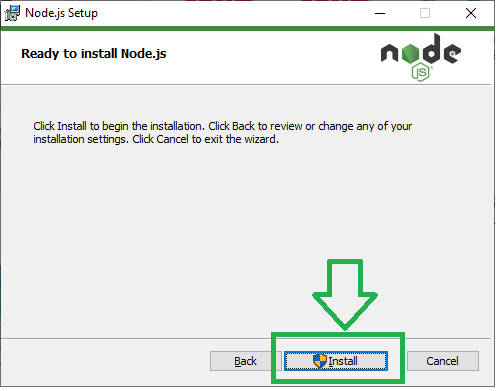
Step 7: In this step, you have to click on the Install button to start the installation.
Step 8: Once the installation is completed, then you click on the Finish button.

When your environment has been set up of Node.js, then NPM is generally installed along with it.

Code Editor
Visual Studio is the source code editor which is developed by Microsoft for Windows, Linux, and macOS. This code editor is most popular in creating Ionic applications. It is a free text editor, and you can download it from the given link https://code.visualstudio.com/download. The given below screenshot shows which code editor you have to install.

There are several types of code editors available to build the Ionic application like as:
- Notepad++: Notepad++ is the free and open-source code editor for Windows. It comes with syntax highlighting several languages, including PHP, JavaScript, HTML, and CSS.
- UltraEdit: UltraEdit is the powerful HTML and code editor available for Mac, Windows, and Linux. It comes with a built-in file comparison tool, autocomplete, advanced design, multiple tab editors, various panels, and syntax highlighting for the most common programming languages.
- Sublime Text: Sublime Text is the cross-platform code editor for Mac, Windows, and Linux. It comes with all the features you would expect from a powerful code editor and more. You can download the latest version of Sublime Text Editor from https://www.sublimetext.com/3 link.
Ionic CLI (Command-Line Interface)
Ionic Command Line Interface (CLI) is an access tool for the development of ionic applications.
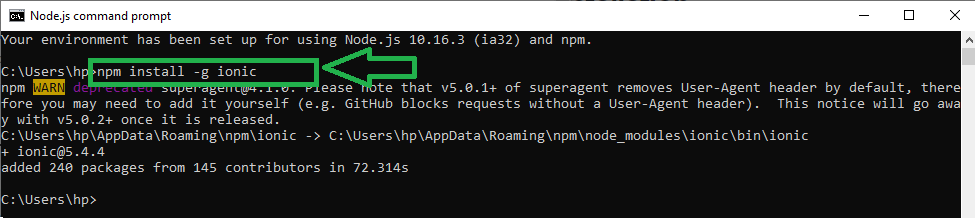
The Ionic CLI can be installed globally using NPM. To install the ionic CLI, you have to open the command prompt and enter the following command in the terminal window.
$ npm install -g ionic
The given below screenshot shows how to run this command in the terminal window.
Creating Apps
To create a new app open your command prompt, and enter the following command:
$ C:\Users\hp> cd desktop
After running the above command, you have to write a new command which is shown below:
$ C:\Users\hp\Desktop>ionic start
When you enter these commands and run in the terminal window, then it asks the Project name. You enter the name of the project and run the command with the Enter button. After entering the project name and run the command, then you can see different types of Templates in the terminal window.
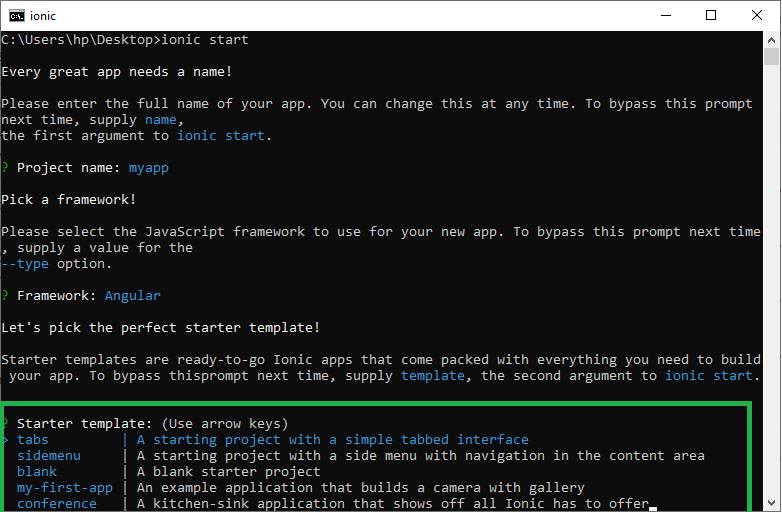
Now you'll learn about the different types of templates that are as follows:
Tabs App
It starts the project with three simple tabbed interfaces. If you select the Tabs App template, the app will be created through the tab list, header, and several useful screens and functions. This command is used to create the tabs app.
The command used is:
C:\Users\hp\Desktop>ionic start myapp tab
After running this command, the Ionic Start command creates a new folder named myapp, and then you have to run this command.
C:\Users\hp\Desktop>cd myapp
After running this command, you have to run another command, i.e.,
C:\Users\hp\Desktop\ myapp>ionic serve
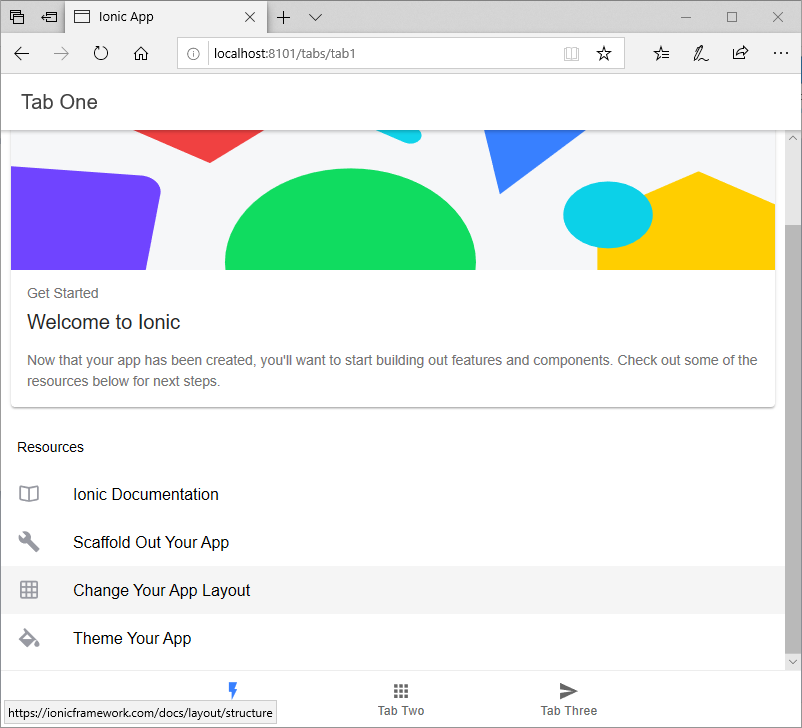
When you run these commands, then you get localhost http://localhost:8101/tabs/tab1on the new tab of Web Browser.
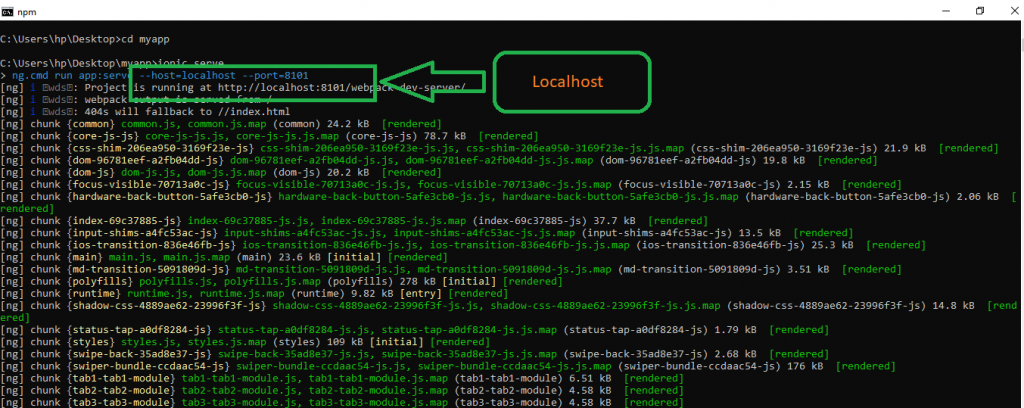
After opening a new tab in the browser, then it shows the tabs on screen, which is shown in the below screenshot.
Side Menu
If you select the Side Menu template, it adds the side menu in the content area of your app. The following command is used to create the Sidemenu app.
The command used is:
C:\Users\hp\Desktop>ionic start myapp sidemenu
Now again, you would follow the same steps which you used in the Tabs App.
C:\Users\hp\Desktop>cd myapp
C:\Users\hp\Desktop\ myapp>ionic serve
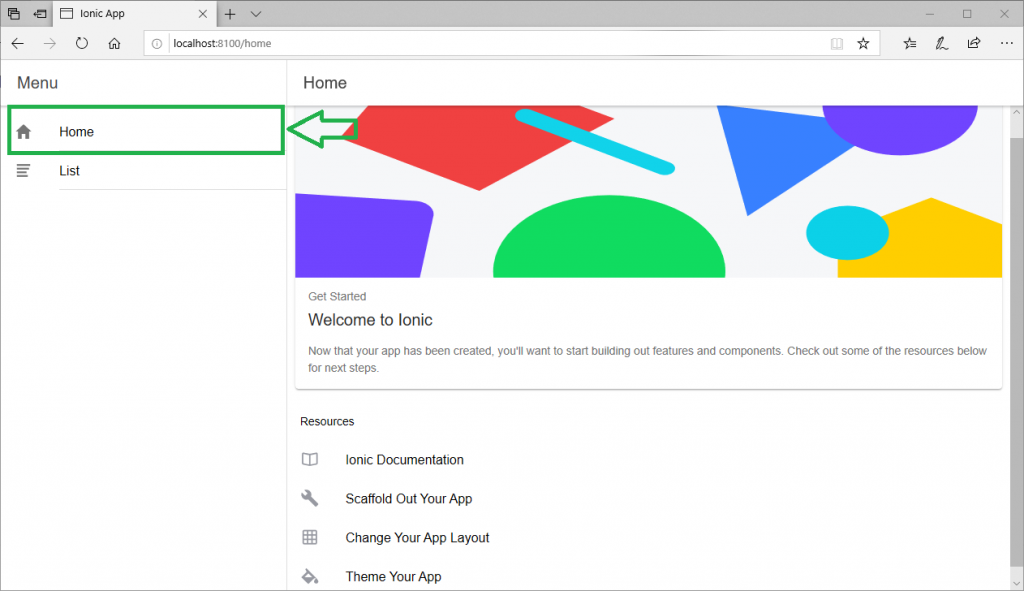
When you run all these commands, then you get the localhost http://localhost:8100/homeon the new tab of the web browser. It shows the side menu in the Ionic app.
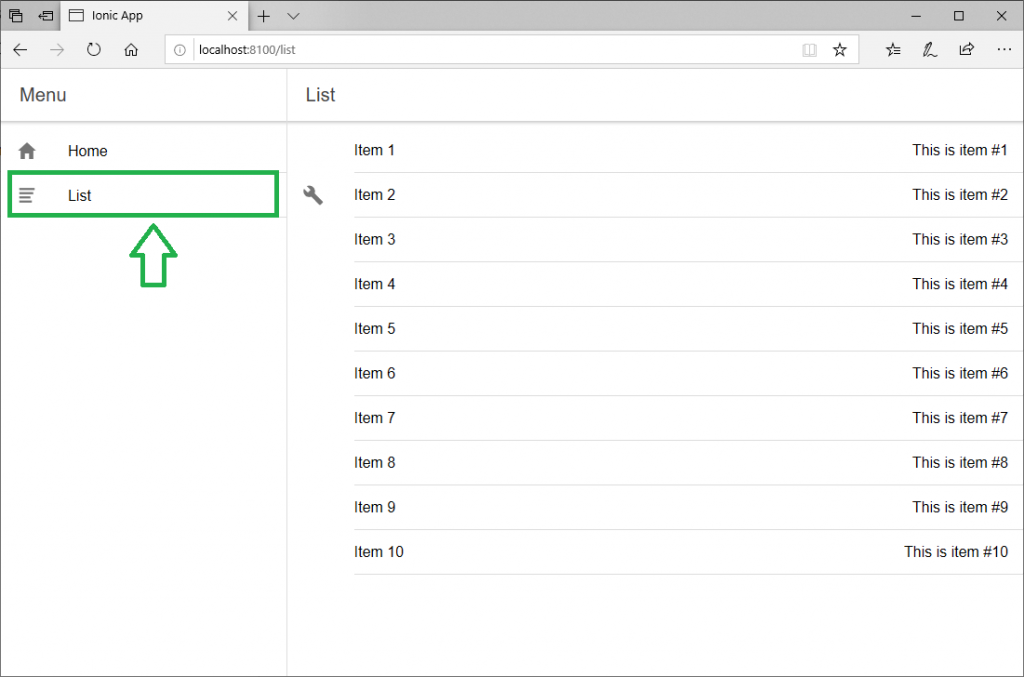
When you click on the list, then you get the following screen.
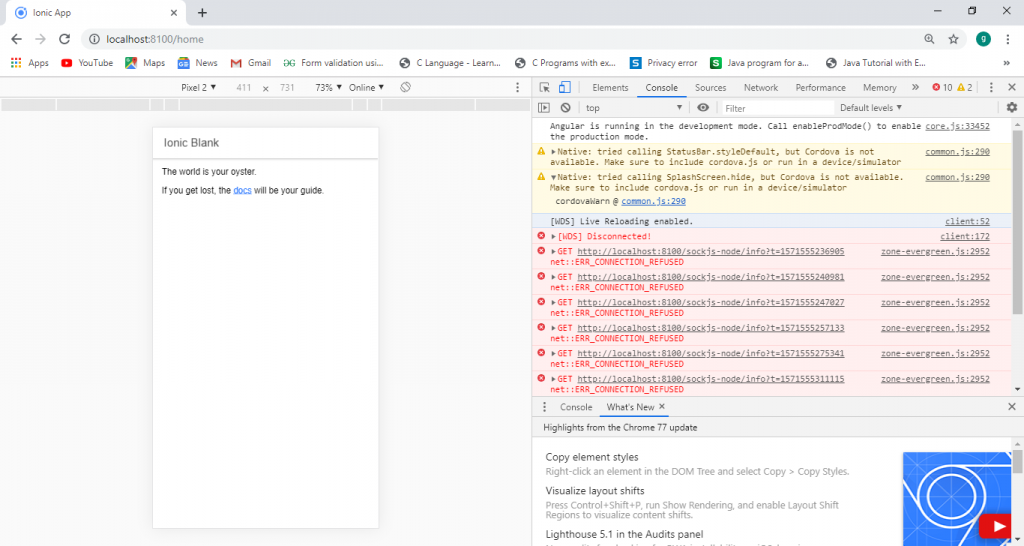
Blank App
If you select the Blank template, you can install the Blank App. It is a blank starter project. The following commands are used to create a Blank App.
The command used is:
C:\Users\hp\Desktop>ionic start myapp blank
Again, you would follow all those steps which are used in the Tabs and side menu.
C:\Users\hp\Desktop>cd myapp
C:\Users\hp\Desktop\ myapp>ionic serve
After using all these commands, you make a Blank App in the Ionic App.

Testing App in Browser
While working with JavaScript, your application can be used in any web browser. It will speed up your building process, but you should always test your application on native hardware emulators. Enter the following command to serve your app in your web browser.
C:\Users\hp\Desktop\myapp>ionic serve
When you run the above command, it will open your application in the web browser. Web Browser provides the device mode functionality for mobile development testing.
Now, Open the Web Browser and press Ctrl+Shift+I to access the developer console. When you click on the toggle device toolbar, then you will get this output, which is shown in the below screenshot.