Latex Tutorial
Basics of LaTex
LaTex is a tool mainly used for typesetting. One should not get confused with Latex, a polymer mainly used in the world of Chemistry. The Latex we are talking about is used a lot in writing a research paper, creating mathematical equations, writing an article, etc. It is mainly based on the concept of WYSIWYM. Here WYSIWYM is an acronym that stands for What You See Is What You Mean. Using Latex, one only has to focus on the contents of an article, and the formatting part would be taken care of by the latex tool itself.
Latex is a typesetting program that is an extension of program Tex developed by Donald Knuth. However, the question is, what do we understand by a typesetting program? Let us know by looking at the various stages involved in getting a document prepared on the computer.
First Stage - We give input using the keyboard to write a document.
Second Stage - That written document is formatted into lines, paragraphs, etc.
Third Stage - Output text is displayed on the monitor/screen.
Fourth Stage - We can finally take the printout of the document.
At the second stage, the Tex program comes into the picture, i.e., when doing the document's formatting. To typeset a document, one has to pass the necessary formatting commands before writing the document's contents. These commands would ensure how the written document would look like. We have to compile them to see the output. One can also think of Latex as a markup language, like HTML.
Please note that word processors can also be used to format texts. It leads to another question that if we have word processors, then why use LaTex. We will see why Latex is preferred.
Now, let us format a few sentences using Latex. Please look at the code mention below.
\documentclass[11pt, A4]{article}
\usepackage[utf8]{inputenc}
\begin{document}
   My name is \emph{Nikhil} Kumar. I have started to write about Latex on \today.
\end{document}
The output of the above program would be:

As mentioned earlier, writing code in Latex is somewhat similar to writing in HTML. For emphasizing on a word <em> tag is used in HTML and \emph is used in LaTeX.
It is worth to note that \ (backward slash) is very important for the system to comprehend that \emph is not a simple text. It is an instruction that needs to be deciphered. Please also note that as we have <body> and <\body> tag in HTML, we have \begin and \end commands in LaTex.
Whatever is present between \begin and \end commands are rendered. Most of the commands in LaTex are self-explanatory.
After the command name comes to the curly braces where we give options, options vary from command to command. In the above example, article, document, and Nikhil are options while documentclass, begin, end, emph, usepackage, and today are command names.
The first line of the code, i.e., \documentclass[11pt, A4]{article} defines the document's overall layout. Here, the documentclass command is set to the article, and the font size is 11pt. A4 is the type of sheet on which output will be rendered. We can have different sheets like legalpaper or letterpaper. By default, the font size is 10, and the sheet type is A4. Readers must try out different options and commands for better understanding.
The next line of code describes the encoding of the text. Generally, it is recommended to use utf8. The significance of this line of code is that it allows using non-ASCII characters like ü. By default, the engine allows the use of ASCII characters, but when the user wants to go beyond ASCII's boundary, the inputenc package acts as a savior.
Everything that is written before '\being{document}' comes under the preamble of the document. In the code, as mentioned above, the first two lines constitute the preamble of the document.
Why is LaTeX preferred?
Donald Knuth aimed to create a tool to typeset those technical documents that contained many mathematical equations handsomely. It becomes extremely difficult, sometimes even impossible, to write those equations in the word processor. At this point, LaTex is preferred. Even for normal text, it is recommended to use LaTeX to do the typeset.
-------------------------------------------------------------------------------------------------------------------
Note - We can simply copy-paste the codes in an online LaTeX editor (from overleaf.com or any other editors of one's choice) and see the output. If someone wants to install the packages for LaTex, feel free to do so. Texlive package is advisable for Linux users and MikTex for Windows. MacTex is good for MAC os users. In this tutorial, most of the codes and their output are generated on online editors.
Basic typesetting
New Line and spaces
As we already know, to format a specific word, we have to put the word in curly braces along with the command name to get the desired result (The way word Nikhil is formatted in the above example).
Now, look at the following code.
\documentclass{article}
\begin{document}
Learning \LaTeX is very important for typesetting a document.
\end{document}
The output of the above will be:

We see the word 'is' comes immediately after the word 'LaTex,' which is wrong. Word 'is' should come after space. To fix this issue, we must rewrite our input as:
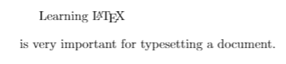
Learning \LaTeX\ is very important for typesetting a document.
This time output will be:

Now, the word 'is' is coming with space, which is correct. Notice the extra '\' after the word 'LaTex'. If we put one more '\' after the word 'LaTex' we get the text, following the backslashes, in the next line.
Learning \LaTeX\\ is very important for typesetting a document.
This above line gives the output as:

Observe that after the word 'LaTex' everything is in a new line. As the new line comes immediately after the previous one, the next question arises is how to put some spaces between these two lines? Let's see how we can do it.
Learning \LaTeX\\[10pt] is very important for typesetting a document.
This will produce the following output.
Comment and Unicode characters
In most of the programming languages, we do write comments to make the code more readable. LaTex is no exception. We use the percentage (%) sign to write comments. Comments never take part in output.
\documentclass{article}
\begin{document}
%We are learning about comments
Comment makes code more readable.
\end{document}
Output:

Notice, comment part is ignored in the output. Now, look at the following code and try to predict the output.
\documentclass{article}
 \begin{document}
We only know 10% of this tutorial.
\end{document}
Output:

As after the percentage sign (%), everything is considered to be commented on. So, the problem is we cannot see a % sign in the output, which is not okay in this case. To deal with this, we insert \ between 10 and % sign, i.e.,
We only know 10\% of this tutorial.
Now, we get the desired output.
Sometimes, it is required to put special accents over letters. Usually happens while writing the names of foreigners. Consider these two real names: Mesut Özil (German Footballer), Sven Magnus Øen Carlsen (Norwegian Grandmaster). Here, the problem is we do not know how to write Ö or Ø. These characters are not part of the ASCII character sets. LaTex facilitates users to type these characters quite easily in the document. The following table provides information about how to generate these letters.
| Command | Character | Command | Character | Command | Character | Command | Character | Command | Character |
| \"O | Ö | \O | Ø | \'e | é | \~e | ? | \c c | ç |
| \u e | ? | \d e | ? | \d a | a? | \^o | ô | \v a | ? |
These characters (ç, ?, and Ø, etc.) are also called Unicode characters.
Text positioning in LaTex
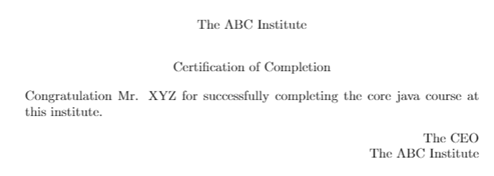
We all have seen similar kinds of certification documents in our life. To accomplish the above, please run the following code and see the output.
\documentclass{report}
\begin{document}
\begin{center}
The ABC Institute\\[.70cm]
Certification of Completion
\end{center}
\noindent Congratulation Mr. XYZ for successfully completing the core java course at this institute.
\begin{flushright}
The CEO\\The ABC Institute
\end{flushright}
\end{document}
Texts enclosed between \begin{center} and \end{center} get positioned at the center of the page. Content between \begin{flushright} and \end{flushright} get positioned to the right of the page.
Instead of flushright, we can also flushleft. Use flushleft and see the output yourself for better understanding. \noindent command is used to avoid indentation. By default, some indentation is always there in LaTeX.
Font styles and shapes
Consider the following code.
\documentclass{report}
 \begin{document}
 \textit{India is our country.}\\
\textbf{India is our country.}
\end{document}
Output:
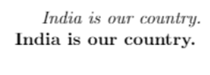
Command \textit (it in 'textit' stands for italic) and \textbf (bf in 'textbf' stands for boldface) are used to make text italic and bold, respectively.
LaTeX commands to play with fonts are mentioned below.
\uppercase{} - For uppercase
\lowercase{} - For lowercase
\textrm{} - For Roman font family
\textsf{} - For sans serif font family
\textnormal{} - For normal font. This is also the default font style in LaTex.
\textsc{} - For small capitals.
\textmd{} - For medium weight.
We can even use the nesting of the LaTeX commands to generate different styles of fonts.
\documentclass{report}
\begin{document}
\textbf{\textit{India is our country}}
\end{document}
Output:

Let's discuss font size now.
Various commands for font size are: \tiny, \small, \normalsize, \large, \Large, \LARGE, \huge and \Huge etc. We will learn a few of them here. It is advisable to play with these commands to see their functionality.
\documentclass{report}
\begin{document}
\tiny India is our country.\\
\normalsize India is our country.\\
\large India is our country.
\end{document}
Output:
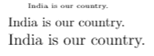
Command \normalsize will always render the text of normal font size, which is also the default font size.
Latex Tutorial Index
- Basics of LaTex
- Formatting Documents in LaTex
- Bibliography in LaTex
- Different Styles Of Displaying Text
- Index And Glossary In LaTex
- Rows and Columns In LaTex [Currently working]
- Typesetting Mathematics in LaTex
- Typesetting theorems in LaTex
- Different kinds of boxes in Latex