How to Create a Layer Mask using Adobe Photoshop CC?
Layer Mask in Photoshop
Layer Masks assist us in editing a part of the Layer, manage the level of transparency of a layer, make image composites, cut out objects to use in other documents, and many more things beyond imagination.
Let's understand the step-by-step method to create a Layer Mask in Photoshop CC:
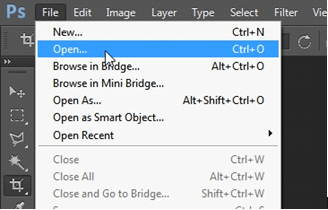
Step 1: Open image
Click on the "File" menu and choose "Open" to select the image you want to edit and open it. The image will appear on the Photoshop screen.
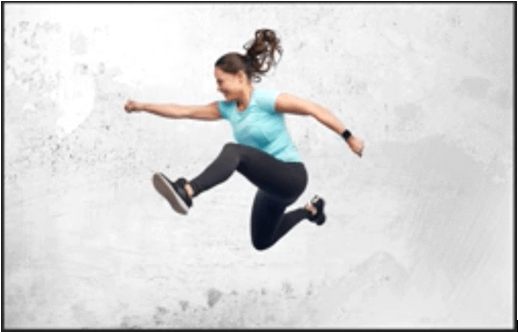
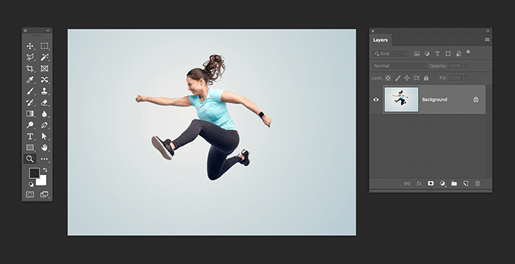
Here, we will combine two images, one will be the main image, and the other will be the background, with the help of Layer Mask. Now, choose another image that you want to combine and open it too.
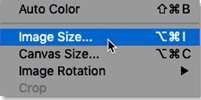
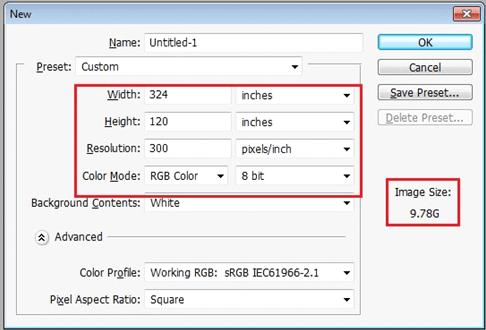
Step 2: Set the Image Size
We can set our image size in terms of pixels, percentages, inches, cm, etc. To do this, we need to go to the "Image" menu on the menu bar and click on Image size. The dialogue box will show the scale of the picture that already exists. You can type your desired size in the box given there.
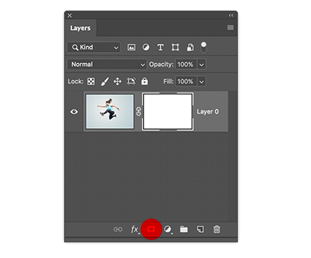
Step 3: Go to the Layer Panel and add Layer Mask
We can find the Layer Panel on the right side of the Photoshop screen. Choose the image layer in which you want to add Layer Mask and select it. At the bottom of the Layer Panel, press the Layer Mask icon, as shown below. We have the option of operating on the Layer Mask in black, white and grey. Both colors make use of them. White will show the Layer's content, black will make a part of the Layer transparent, and gray will partially make the Layer transparent. To change the color, right-click on the layer mask thumbnail and click on "Edit".
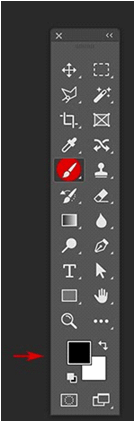
Step 4: Select the Paintbrush Tool
Select the paintbrush tool from the Photoshop toolbar on the left column of the screen. Right-click on the tool to make changes in the brush. Hide the parts of your image by swiping over the image after selecting the Layer Mask thumbnail. Hide unnecessary parts of the image so that it mixes itself flawlessly with the background.
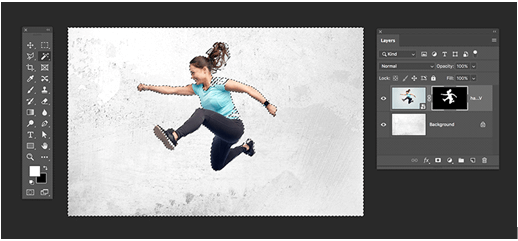
Alternatively, the Magic Wand Tool (W) can be picked from the toolbar. Go to the Options bar, then set the sample size to the sample point. Also, set the Tolerance to 32 from the options bar. Select the part of the image that you would like to hide.
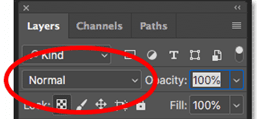
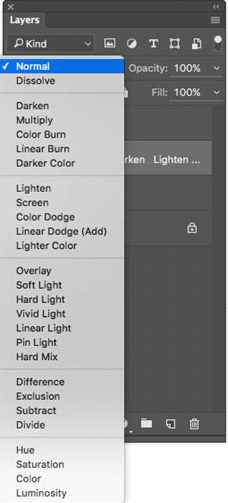
Step 5: Use the blend mode
To make the combined image look more real and effective, select the "blend mode" from the Layer Panel. This will effectively blend the image with the background image.
Step 6: Final Step
We can further edit our image with Photoshop tools or save it by clicking on "Save". Photoshop provides us with millions of other edit options and effects to make our image more attractive and beautiful.