PostgreSQL Tables
PostgreSQL Tables
In order to use a PostgresSQL database, there are few steps that need to be done.
So, in this article, we will be discussing those steps and the prerequisite of using a PostgreSQL database. The steps include connecting to a PostgreSQL Database Server, creating a PostgreSQL database, selecting that particular database, and then creating tables according to your need and do required operations.
There are two ways to perform those operations:
- The first one is by using a GUI utility named pgAdmin.
- The other one is to use the PostgreSQL CLI by the command-line interface.
PostgreSQL CLI gets installed automatically while installing PostgreSQL but we need to explicitly download pgAdmin.
pgAdmin is one of the management tools available for the easier usage of PostgreSQL. It allows the user to perform all the operations on a PostgreSQL database by Graphical User Interface. It runs on your machine as a web or desktop application. It’s also multi-platform, i.e., it can run on macOS, Linux, and Windows easily.
To download the latest version of pgAdmin, i.e., pgAdmin4, go to https://www.pgadmin.org/download/.
Table creation using pgAdmin:
First of all, we need to connect to a PostgreSQL Database Server. Open the pgAdim application.
This is how the main home page of pgAdmin looks like. It will ask you to enter the master password, that you need to set for the first time when you launch the application.
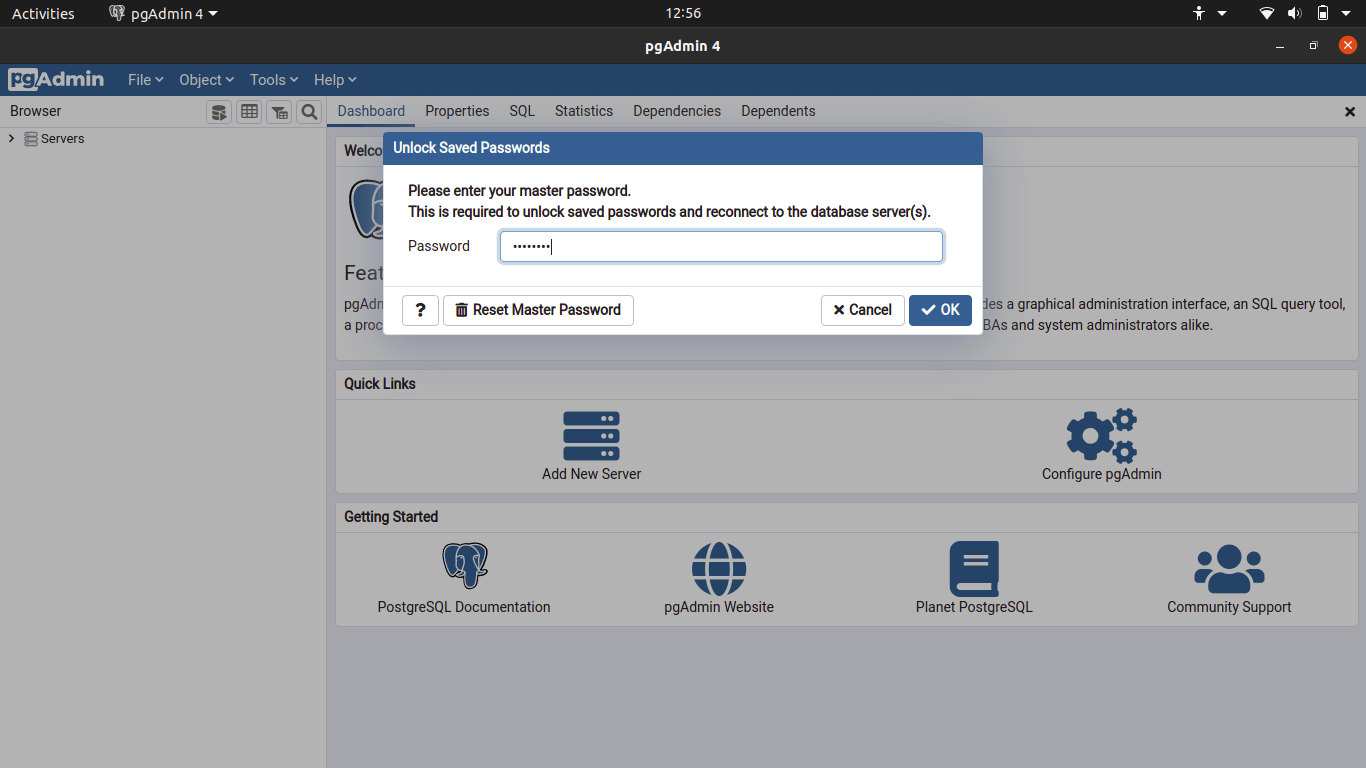
Enter the password and click ok.
Then on the left-hand side corner, you can see the Servers button, click on this button.
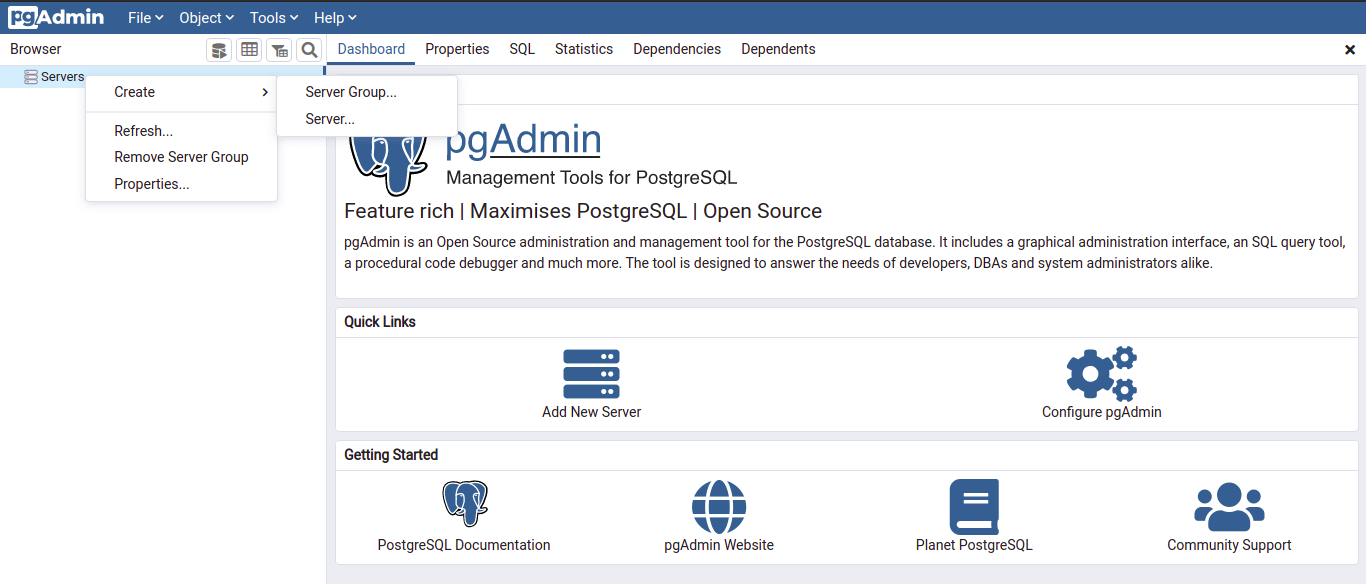
After clicking, select create option and then select Server to create a new server.

Then create-server dialogue box will get opened, enter the name of the server you want to give, here the name given is “myServer_25_may”. We can also add Comments to the server.
After giving the name, click on the “Connection” tab.
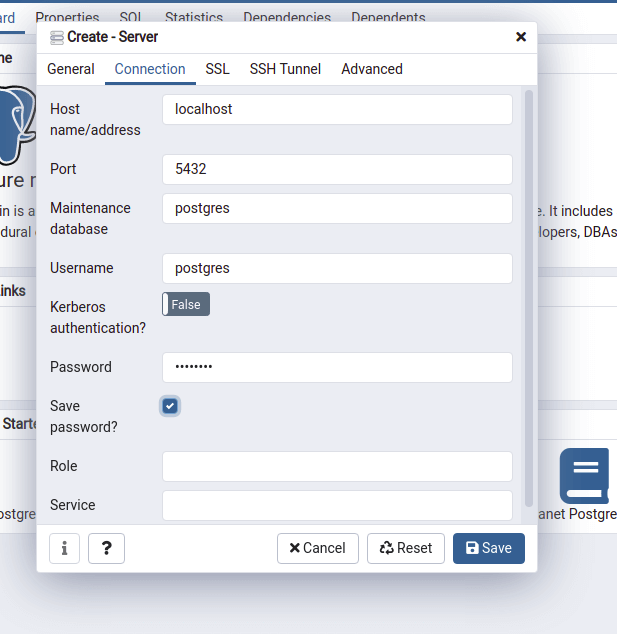
In the connection tab, add the hostname/address and the port number to which our database will be connected. Here the server is created locally that’s why the hostname is given as “localhost”, i.e., 127.0.0.1 having default port number 5432.
After specifying the host addresses and the port number, now add the password for the user ‘postgres’ and check the ‘Save Password” checkbox and click on the Save button.
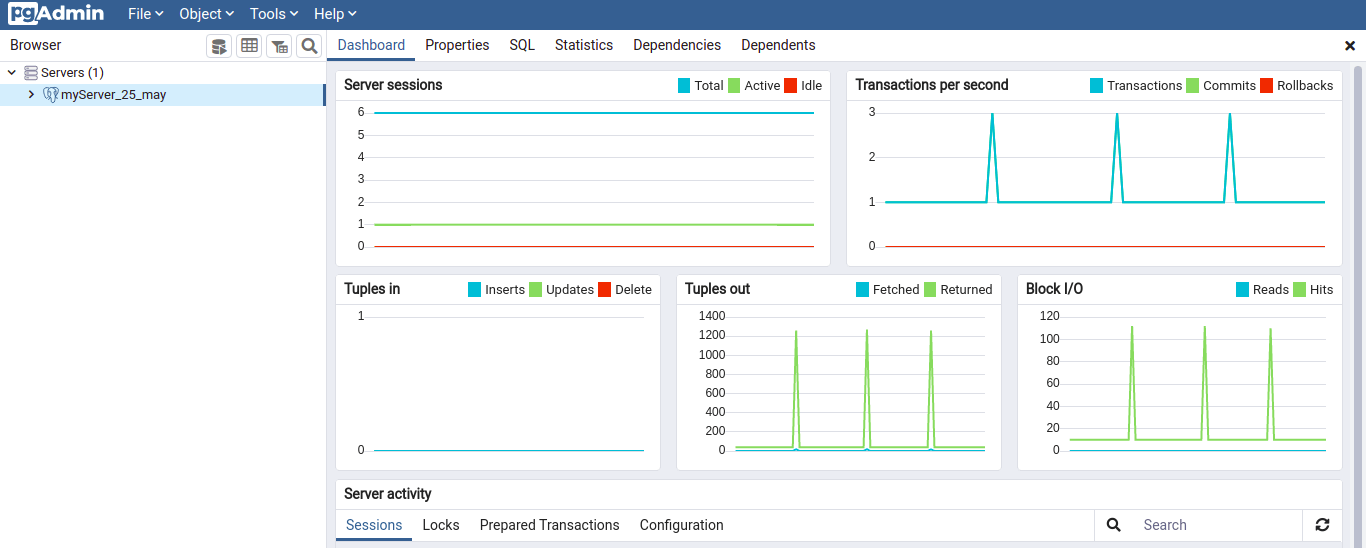
After clicking on the save button, a new server by the name ‘myServer_25_may’ will be created and it is available for use under the Servers tab. Other than that, it also shows the various information about the server like Transactions per second, Tuples in, Tuples out, etc.
Now the next step is to create the database, to create a new database, expand the newly created server and right-click on the Databases, then select create and then Database.
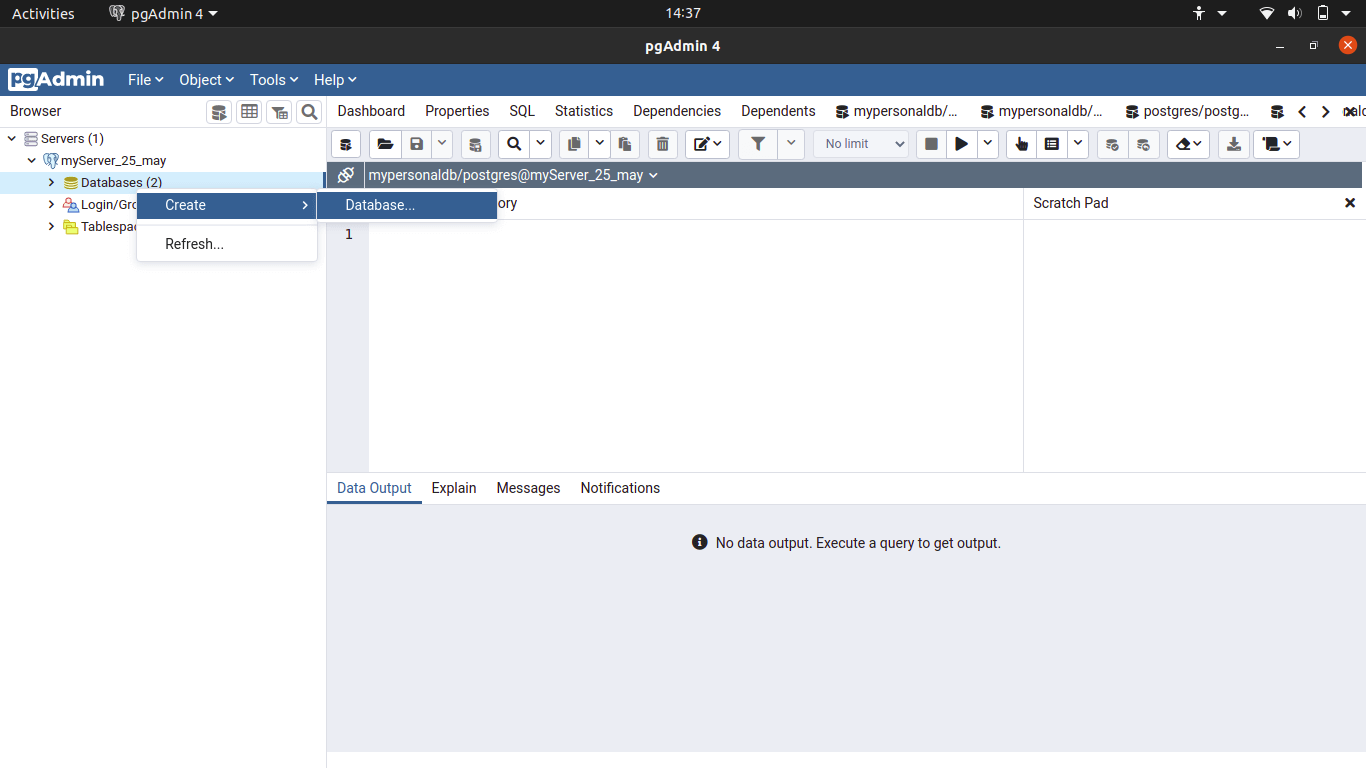
After clicking, a ‘Create-Database’ named dialogue box will be opened.
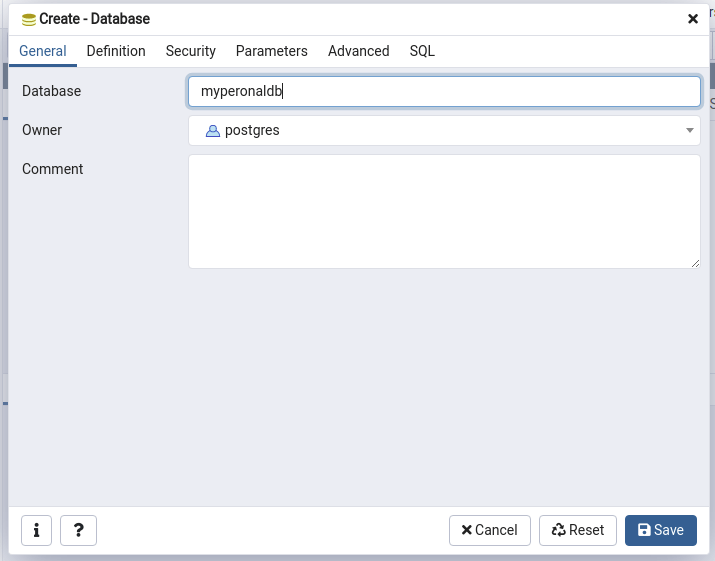
In the Database field, add the name of the database. Here in the example, the name chosen is ‘mypersonaldb’.
Once the database is created, the next step is to create a table to store the records.
To create a table, click on the server, then it’ll expand and it’ll look something like this.
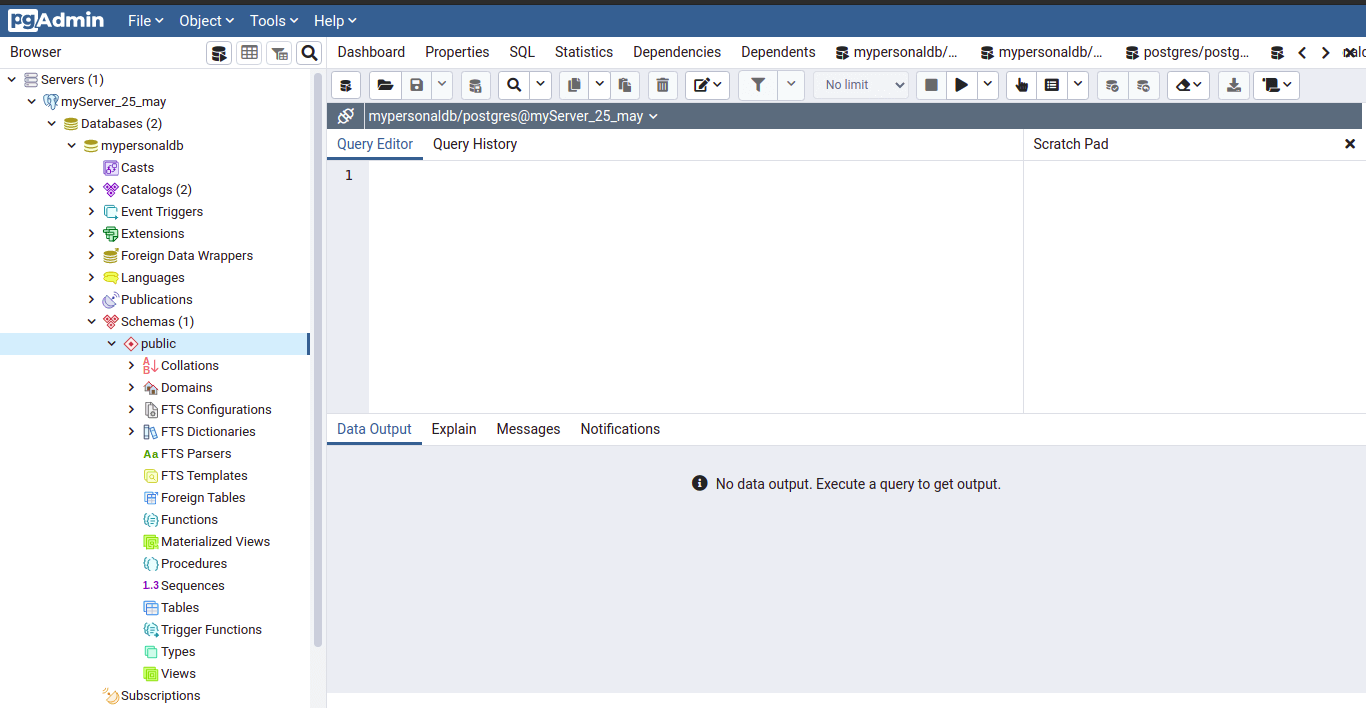
Now, expand the Databases inside the server, then expand the database that you have created in the last step. From this expansion, select the ‘schemas’ and then right-click on the public option.

Once you right-click on the public option, select Create and then select the table option from the drop-down menu.
Then a “Create-table” dialogue box will be prompted.
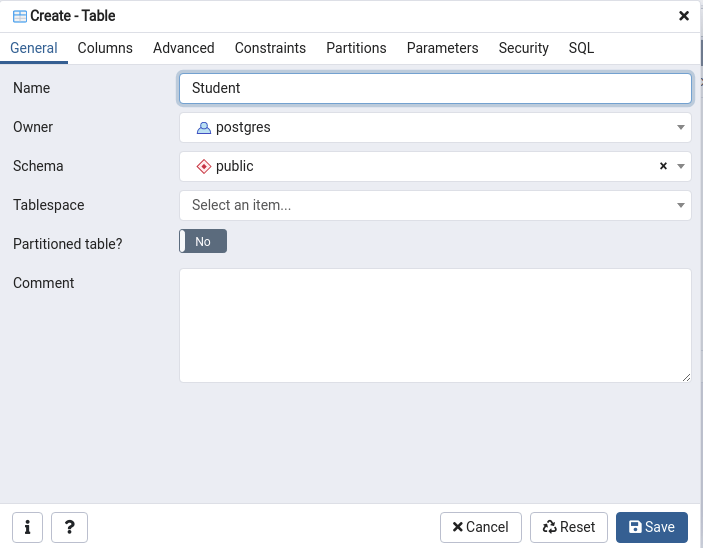
Enter the name of the table to be created. Then click on the columns tab and add the columns to be added in the table.
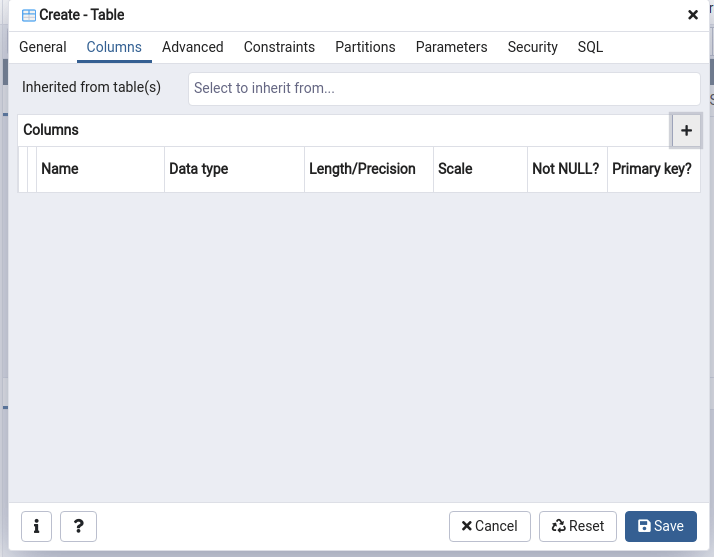
Click on the “+” icon on the upper right-hand side.
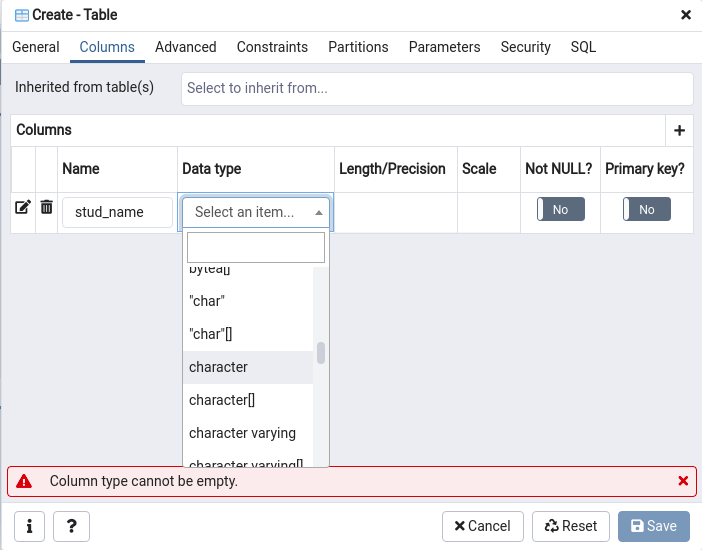
Now add the column name and select the data type of that column. Other constraints like ‘Not NULL’ and “Primary key” can also be enabled from here.
Add as many columns as needed in the table.
After defining the columns, click on the Save button to create the table.
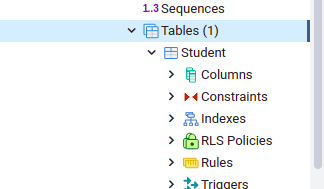
Once the table is created, it will be visible under the Tables section.
Now, to remove a particular column from a table, first of all, open the “Query Tool” from the Tools menu.

Now the “Query tool” is opened and we can easily run our queries here.

Here the query written is to remove the ‘stud_age’ column from the student table.
To run this query, click the F5 button.
Once this query is successfully executed the result of the query can be seen in the Messages tab and the changes in the table are also reflected.

To delete a whole table, right-click on the “Tables” and select the “Delete/Drop” option.
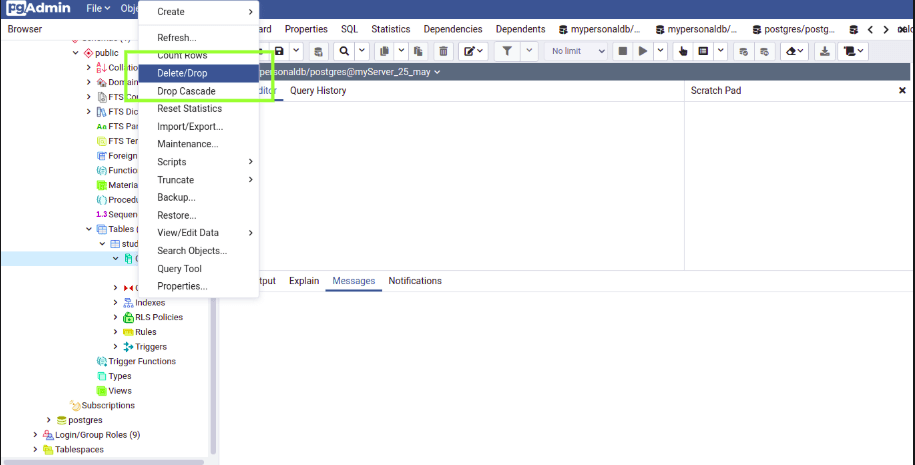
As a result of this step, the whole table named Student will be deleted.
Hence, this article gives a clear idea about how to create a server, database, and various table schema alterations using the pgAdmin tool for PostgreSQL.