How to set up multiple websites, stores, and store views in Magento 2
set up multiple websites, stores, and store views in Magento 2
Magento helps us to set up and manage multiple store or domain instances within a single Magento backend. In this segment, we'll go over how multiple websites, stores, and views are set up in Magento 2.
Some of the variable functionalities that Magento 2 brings to store owners is the establishment of several stores in a single Magento 2 backend. This feature helps us to create as many different stores as we need in one configuration. Here all the stores just share the same domain and can be set up as a sub-domain of the same domain. It is a completely different domain and still share a backend for possible easy administration.
Step 1: Create websites
1. Go to Stores > > Settings > > All Stores inside the Magento 2 Admin screen.
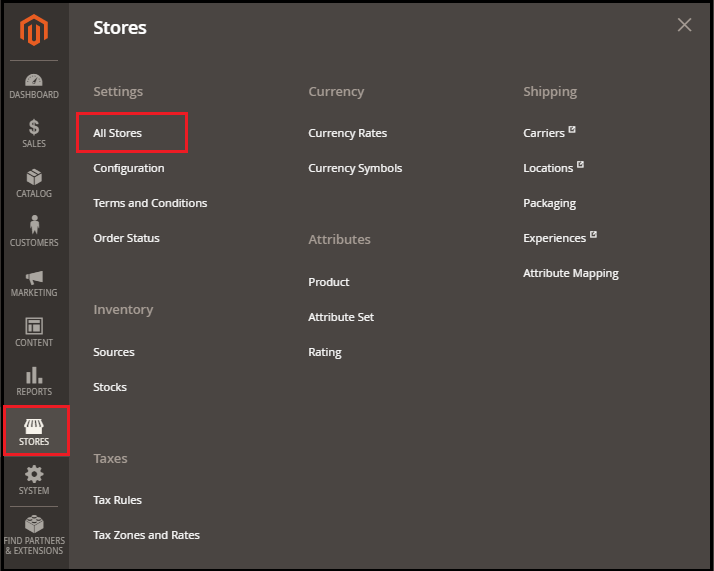
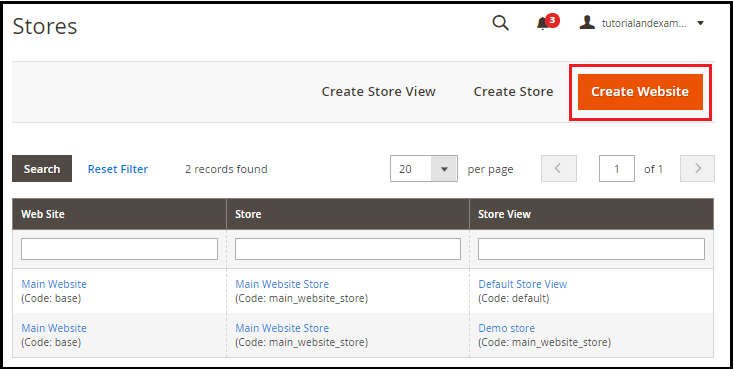
2. Stores tab, click on Create Website and appears before you.
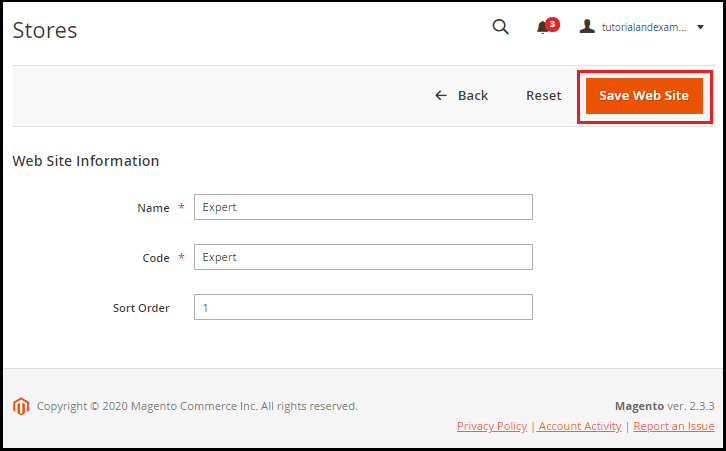
3. Enter the appropriate information in the specified area, such as Name, Code, and Sort Order, and click the Save Website button.
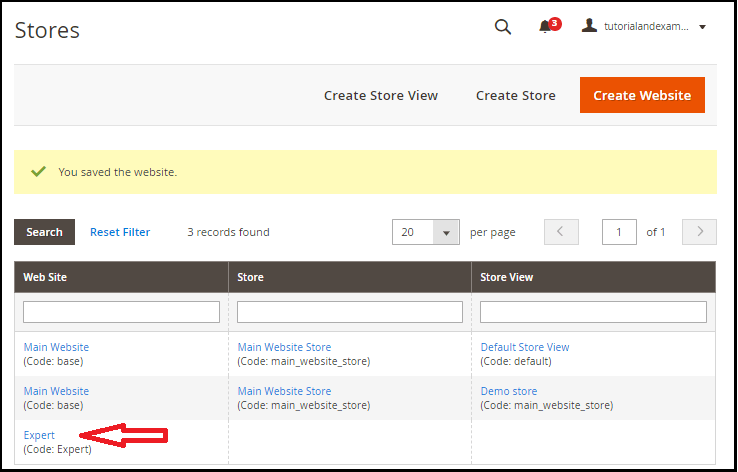
4. Now, on the Store side, we can see that the website is being installed that is visible below the Main Website. To build your website, repeat those steps as many times as possible.
Step 2: Create Stores
- Go to Stores > > Settings > > All Stores inside the Magento 2 Admin screen.
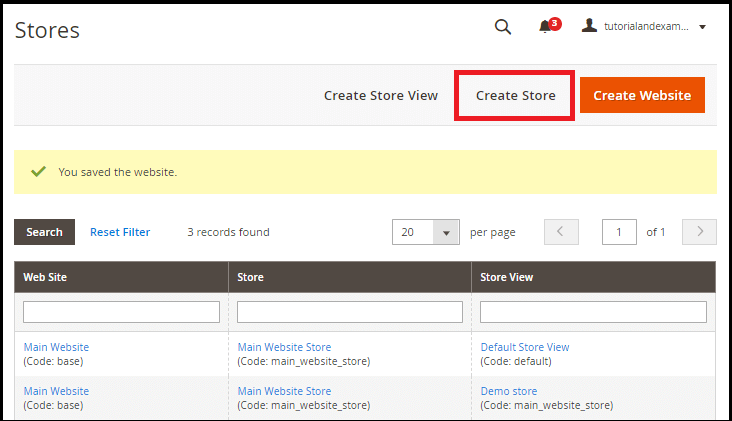
2. Now, click the Create Store button on the Stores page to build the shop.
3. Follow the instructions below to fill in the necessary details within the specified fields:
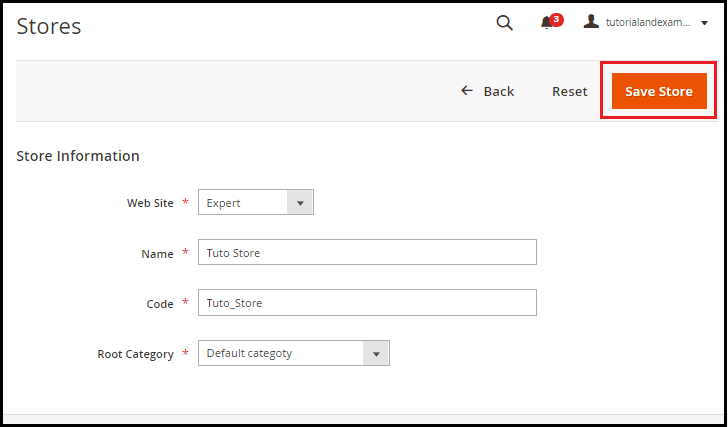
a. Select the location from the drop-down list, which is the parent of the new store. If only one domain exists, then use the Main Domain as the norm. Here we will pick the Expert we have generated in previous acts.
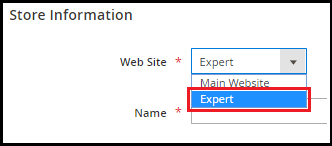
b. Enter the name of the new store for internal reference only.
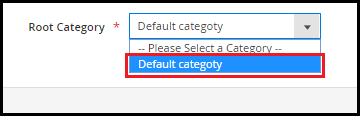
c. In the Root, the Category area picks a category for the main menu of the shop. We are going to choose the Default Group here.
After completing the product details, press the Save Store button.
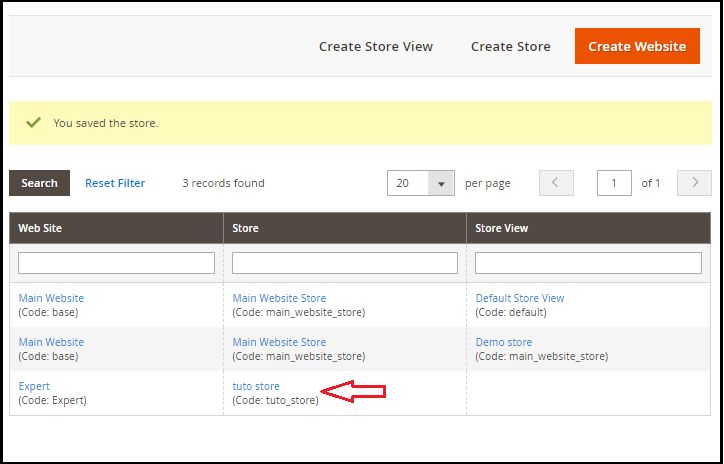
4. Now we can see that the shop is being built as well, which is visible on the Shop side below the Main Website. Repeat those steps as many times as possible to create your shop.
Step 3: Create Store Views
1. Go to Stores > > Settings > > All Stores inside the Magento 2 Admin screen.
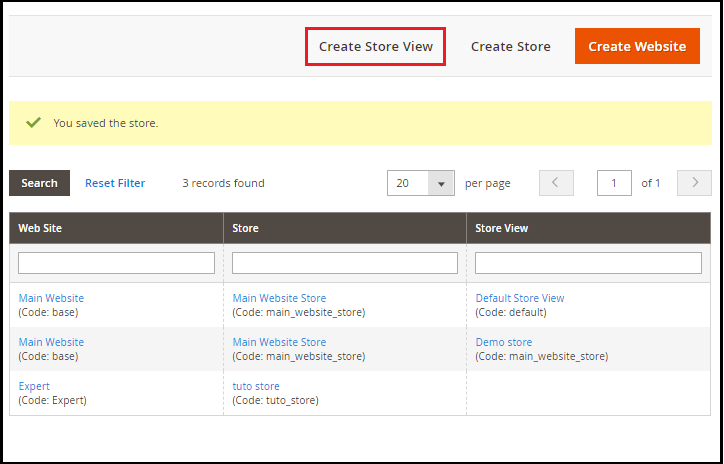
2. Now click on the Create Store View button in the Shops tab to establish your shop view.
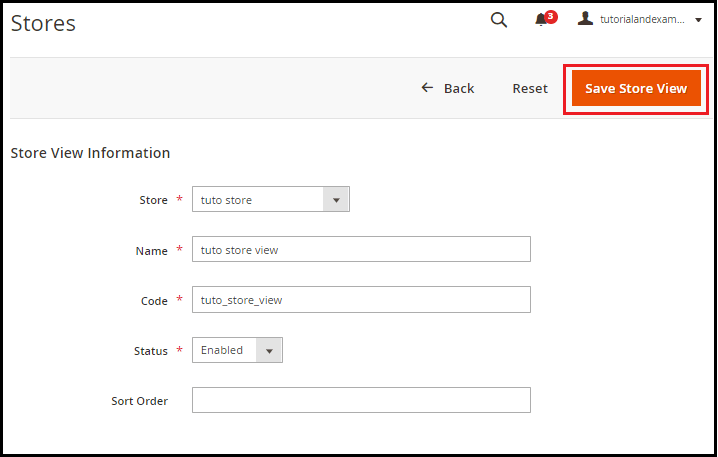
3. Fill in the necessary details in the fields you mentioned.
a. To link the shop view, choose the shop from the drop-down list.
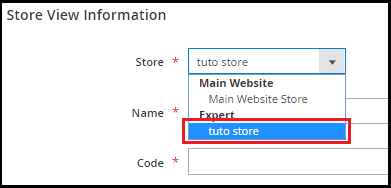
b. To set this store view, enter the name in Name field.
c. Provide a special name to that store view in the Code field.
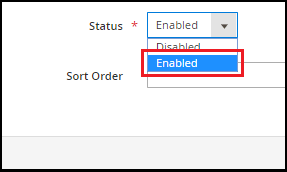
d. Set Status to Trigger
e. Join a numerical sort order as an alternative.
Now, click the Save Shop View button to save new shop information.
4. A pop-up will open when you save details of the view of the shop. Click OK, and then start.

5. Repeat the steps as many times as needed to establish a view of the store. In the screenshot below, you can see that the User view for your new website and shop is being created.
Step 4: Setup the Store URL
We'll be configuring the Store URL in this phase.
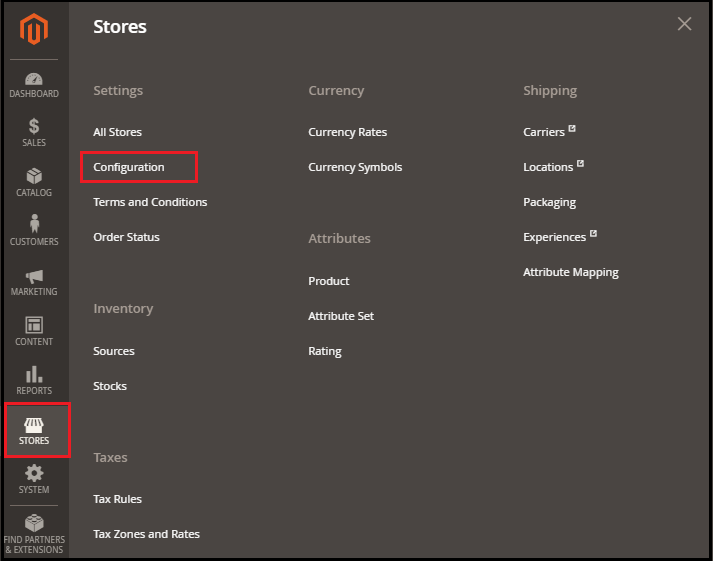
1. Go to Stores > Configuration > Setup on the left-hand sidebar of the Admin Screen.
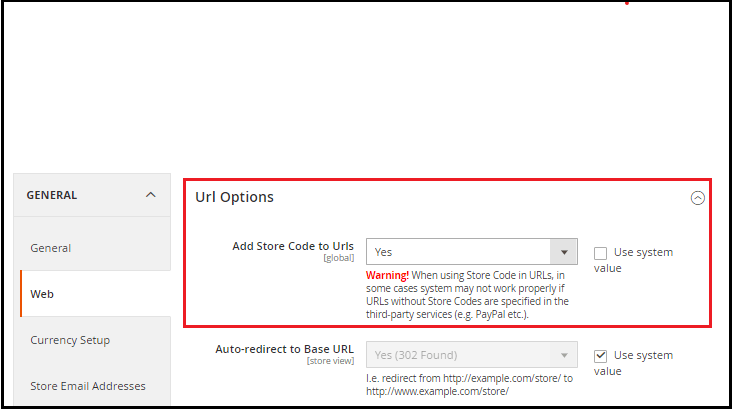
2. Under the General tab, click Web.
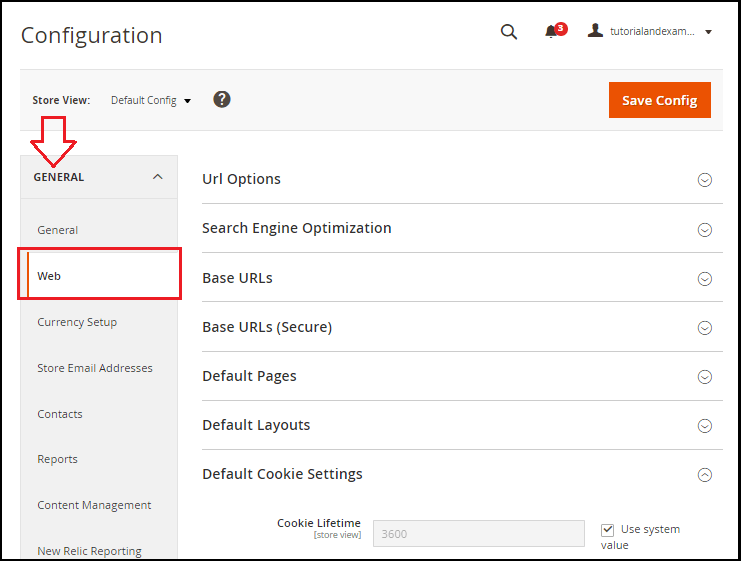
3. Expand the segment URL Options, and set Yes to connect and save Store Code to URLs. And when we turn the store, the store code will automatically be appended to the URL.
4. Select the Store View on the upper left corner to test the new store we've created. From the Store View list, pick a Website. In the Shop View, we can get the information by selecting any shop from the drop-down list.
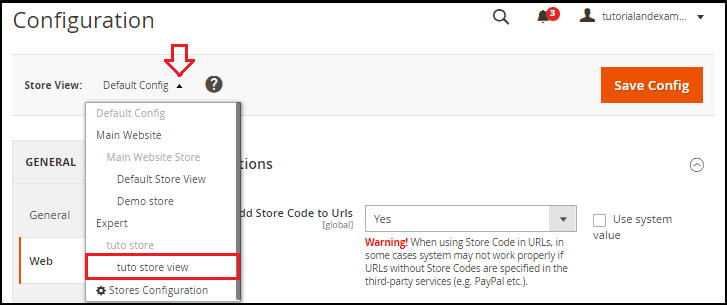
Click on OK to test the move to scope.
5. Expand the segment on Base URLs. Clear the checkbox for Using Website that is next to the Base URL area and change the store's Base URL.
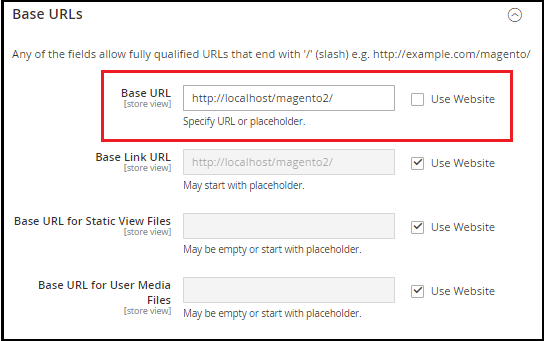
6. Open the section Secure Base URLs and set the secure URL of the store, if necessary.
Click the To full Save Config button at the top of the page.
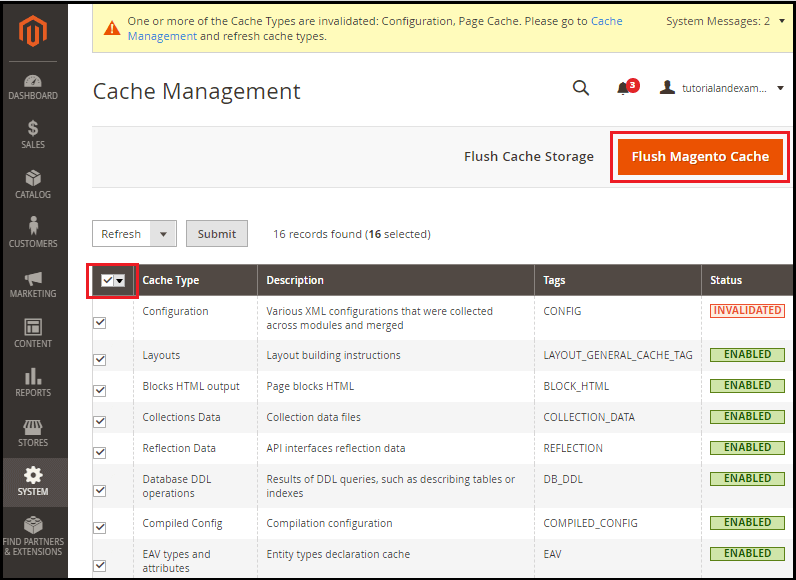
Clear cache management Go to System > > Tools > > Cache management on the Admin side.
Pick everything from the drop-down list, and click on the Cache Flush Magento button.
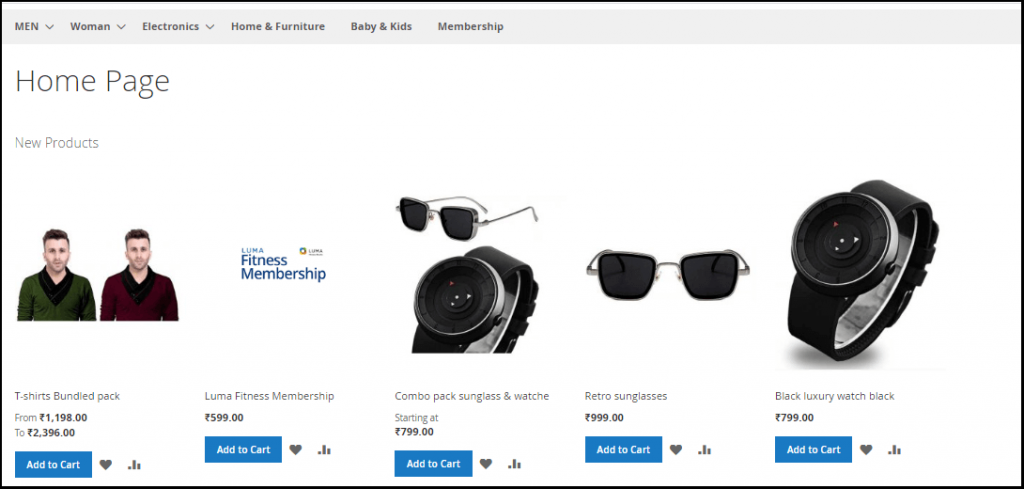
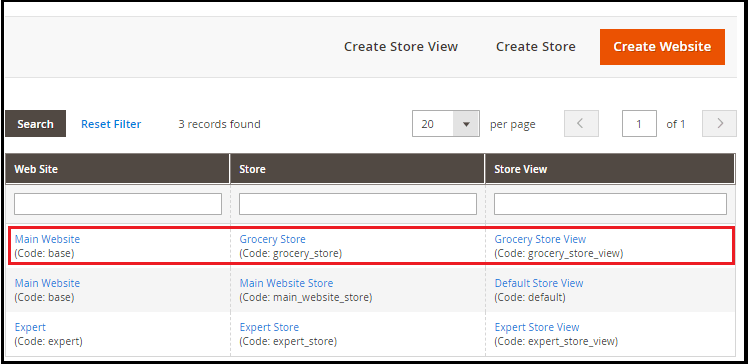
Now, open your frontend and reload your webpage. Here, by clicking on the Main Website Store subdomain, you can move from one store to another. See the screenshot below.