VBA ListBox
What is a ListBox?
ListBox refers to a permanently displayed control (usually box-shaped) which contains a list of objects (or attribute, or elements) from which the user can select single or multiple attributes. The objects or attributes may be text, date, Booleans, pictorial representations, or graphics. The ListBox is usually connected with a text box control where the selected item is loaded or displayed in the list.
VBA Listbox allows the users to create a list of options from which they can choose single or multiple items. In Excel, it is mostly used in Userforms, but Listbox can also be listed in Excel Worksheets. ListBox is one of the UserForm’s control. You can select and drag ListBox on the UserForm. It does not provide any text entry field to type the text value. The default name of its object is ‘ListBox1’, although you can change this name at your convenience.
ListBoxes are helpful and convenient to manage different tables within your user form. It permits users to select their necessary information chosen. With this method, the users can control the rows of information without displaying all the completed data within the userform itself. It restricts the end-user to pick the values only from the given set of data. Thus, it prevents the unnecessary spamming up of data.
ListBox is used where the object and choices are
represented textually and are not selected frequently. The listed data is
usually not well known to the end-user or cannot quickly be learned or
remembered. It is also used if the user wants to align the choices in a
non-predictable manner. For example, in
an institute course form, a list box can be used to select which courses the
student wants to get enrolled in. He could choose one or multiple based on the
given list.
Advantages of ListBox
- ListBox accepts unlimited number of choices as there is no limit to the list size.
- The ListBox is always visible.
- With ListBox, multiple selections could be made. The selection for the value can be made easily by pointing and clicking with the mouse.
- The ListBox can be easily scrolled to view an extensive list of choices.
- It selects the options from a large set of choices that could be mutually or non-mutually exclusive.
Disadvantages of ListBox
- ListBox acquires lots of screen space.
- The number of displayed elements depends upon the size of the box. Thus, the scrolling action is often required to look after all the choices.
- The attributes in the list are often unordered (or ordered unpredictably). Thus, making it tough for the end-user to find the elements.
- The content may change, making it tough to search for the items.
Steps to add ListBox to Excel Sheet
Let’s work with the set-by-step code of lines:
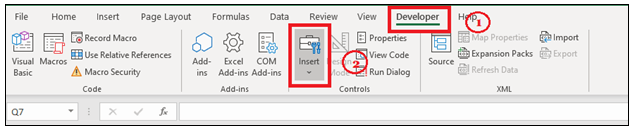
- Go to your ActiveSheet and click on Developer Tab -> Controls -> Insert
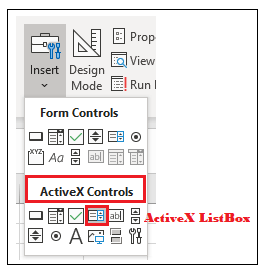
- The Form and ActiveX Controls window will pop up. From the ActiveX controls window, choose the ListBox control option.
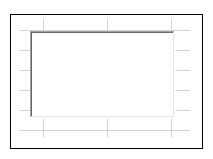
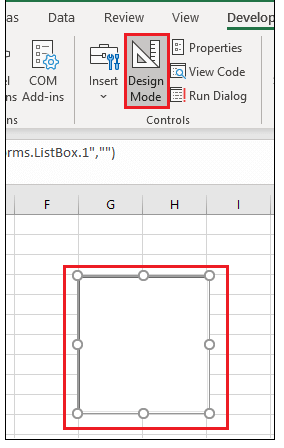
- Make sure the design mode is enabled. You will notice that the cursor has changed to a ‘+’ symbol. Drag the cursor to shape and position your ListBox. Once done, release the cursor. As shown below, the ListBox will be created.
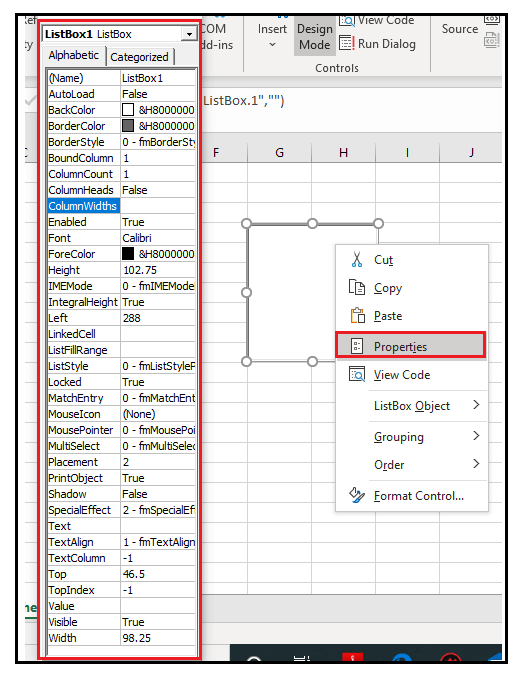
- You can rename the ListBox control by right-clicking on the control and selecting the properties option. The properties dialog box appears on the left side of the sheet. The default name for the first list box is ‘ListBox1’. One can change this name at any point. But for our convenience we will keep the default name. Under the caption option sets the control name. You can even change or enable the other properties unlike, ForeColor, BackColor, Height, locked, visible, etc., for this control.
- Insert a Button control and double click on it. And under the sub procedure you can right the code. Once the code is done disable the design mode. Click on the button. The action for the code will be implemented.
Add Item to ListBox
The ‘AddItem’ method is used to add an item to the Listbox. By default, it ends to items to the end of the lists. But one can also position the value as per their requirement.
- Add Item to the End
Syntax
ListBox.AddItem (value)
Value – It represents the value (could be int, text, Boolean) you want to add in your list.
Order – It specifies the position where you want to insert your element.
Example 1
With the help of the above example, add the list box window in your excel sheet. Now, double click on the button control. It will redirect you to the visual editor window where the sub-function is already defined.
Code:
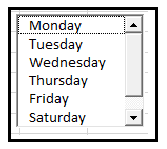
Private Sub CommandButton1_Click ()
 'it will list the items at the end of the box
 ListBox1.AddItem "Monday"
 ListBox1.AddItem "Tuesday"
 End Sub
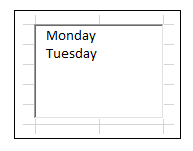
Output
Before running the output just make sure that design mode, is disabled.
- Add Item to a specific position
Syntax
ListBox.AddItem (value, order)
Value – It represents the value (could be int, text, Boolean) you want to add in your list.
Order – It specifies the position where you want to insert your element.
Example
Insert the ListBox in your excel sheet. Double click on the list box window and it will redirect you to the VBA editor sheet page with a predefined subprocedure. You just need to write the below code:
Code:
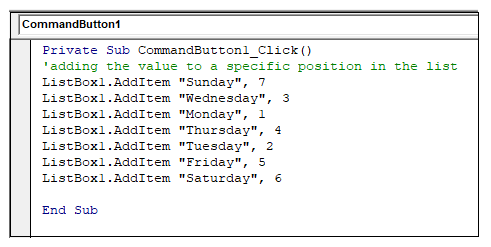
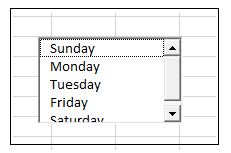
Private Sub CommandButton1_Click()
 'adding the value to a specific position in the list box
 ListBox1.AddItem "Sunday", 7
 ListBox1.AddItem "Wednesday", 3
 ListBox1.AddItem "Monday", 1
 ListBox1.AddItem "Thursday", 4
 ListBox1.AddItem "Tuesday", 2
 ListBox1.AddItem "Friday", 5
 ListBox1.AddItem "Saturday", 6
 End Sub
Output
Before running the output just make sure that the mode is disabled.

Add Multiple Items
- Individual AddItem
Here, we use multiple ‘AddItem’ method to add items in our ListBox window. This method is very easy to implement. But for more values, it increases the line of codes and is a tedious method.
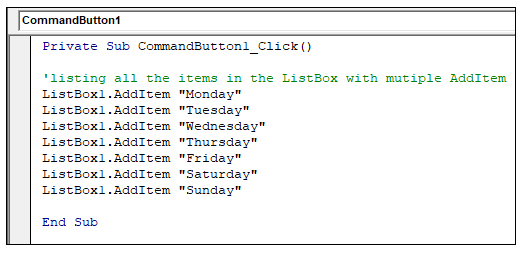
Code:
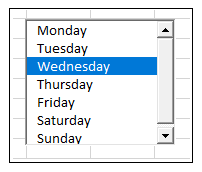
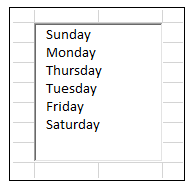
Sub ListBox_IndividuallyAddItem()
 'listing all the items in the ListBox with multiple AddItem
 ListBox1.AddItem "Monday"
 ListBox1.AddItem "Tuesday"
 ListBox1.AddItem "Wednesday"
 ListBox1.AddItem "Thursday"
 ListBox1.AddItem "Friday"
 ListBox1.AddItem "Saturday"
 ListBox1.AddItem "Sunday"
 End Sub
Output

- Array Listing
Array listing is very useful to add items in the ListBox at one go. It eradicates the code of lines. Thus, making it the code smaller and run time faster.
Code:
Private Sub ListBox_ArrayListing()
 'Defining the array variable
 Dim myArray As Variant
 'listing all the items in the array variable
 myArray = Array("Monday", "Tuesday", "Wednesday", "Thursday", "Friday", "Saturday", "Sunday")
 'passing the array variable in the listbox
 ListBox1.List = myArray
 End Sub

Output
- Adding with Cell Range
This method enables us to fetch the values from the sheet and load the values in run time.
Code:
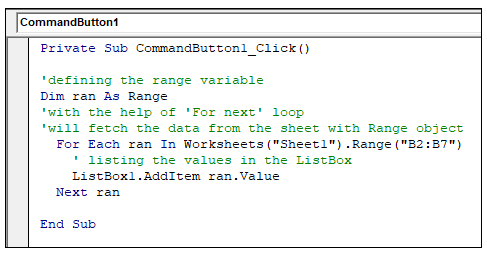
Private Sub ListBox_CellRangeListing()
 'defining the range variable
 Dim ran As Range
 'with the help of ‘For next’ loop
 'will fetch the data from the sheet with Range object
   For Each ran In Worksheets("Sheet1").Range("B2:B7")
     ' listing the values in the ListBox
     ListBox1.AddItem ran.Value
   Next ran
 End Sub
Output

- Table Listing
Code:
Private Sub ListBox_TableListing()
 Dim tbl As ListObject
 Dim rang As Range
 'Storing the Table Object to a variable
     Set tbl = Sheet1.ListObjects("Table1")
   'For each loop to call data present in the list
     For Each rang In tbl.DataBodyRange.Columns(1).Cells
     'Loading the values in the List Box
         ListBox1.AddItem rang.Value
     Next rang
 End Sub
Output

Delete ListBox
The ‘RemoveItem’ method is used to delete the items from the Excel list (if its present).
Syntax
ListBox.RemoveItem (value)
Value: It represents the position in integer from which you want to delete the value. It starts counting from 0.
- Delete one element from the ListBox
Code:
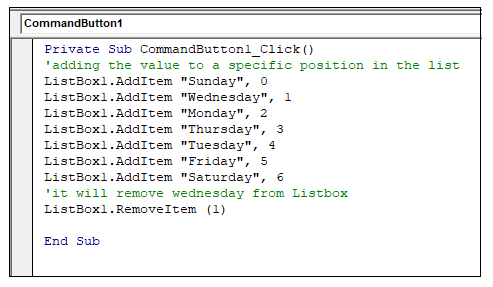
Private Sub CommandButton1_Click()
 'adding the value to a specific position in the list
 ListBox1.AddItem "Sunday", 0
 ListBox1.AddItem "Wednesday", 1
 ListBox1.AddItem "Monday", 2
 ListBox1.AddItem "Thursday", 3
 ListBox1.AddItem "Tuesday", 4
 ListBox1.AddItem "Friday", 5
 ListBox1.AddItem "Saturday", 6
 'it will remove wednesday from Listbox
 ListBox1.RemoveItem (1)
 End Sub
Output

- To remove only selected element from the list
Code:
Private Sub CommandButton1_Click()
 'Removing any selected items from the ListBox
 Dim val As Variant
 Dim OriginalCount As Integer
 val = "Monday"
 'Store original ListBox count
   OriginalCount = ListBox1.ListCount
 'hiding the ListBox as it runs the code faster
   ListBox1.Visible = False
 'Delete selected line items
   For val = OriginalCount - 1 To 0 Step -1
     If ListBox1.Selected(val) = True Then ListBox1.RemoveItem val
   Next val
 'Unhiding the ListBox
   ListBox1.Visible = True
 End Sub
Clear Method
This method is used to remove all the elements from the ListBox window.
Code:
Private Sub CommandButton1_Click()
 ‘The clear method is used to delete all the
 ‘items from the ListBox
 ListBox1.Clear
 End Sub
Output
Before running the code
After running the code

ListBox Multiple Selection
The MultiSelect property is used to enable the multi selection property in your Excel VBA. You can set it to one of the following values:
- fmMultiSelectSingle – This property enables you to select only 1 value. This is the default property.
- fmMultiSelectMulti – This property enables the user to select multiple ListBox items. If the user clicks on an item once it will get selected and if he will click on the selected item again, it will get deselected. Thus, will be removed from the existing selected items.
- fmMultiSelectExtended – This property enables the user to select multiple ListBox items. In this multiple items can be selected by holding and moving the cursor up and down.
Example 1: Demonstrate an example to enable fmMultiSelectMulti property.
Code:
Private Sub CommandButton1_Click()
 'Defining the array variable
 Dim myArray As Variant
 'listing all the items in the array variable
 myArray = Array("Monday", "Tuesday", "Wednesday", "Thursday", "Friday", "Saturday", "Sunday")
 'passing the array variable in the listbox
 ListBox1.List = myArray
 'enabling the multiselct option
 ‘clicking on the option will get them selected
 ListBox1.MultiSelect = fmMultiSelectMulti
 End Sub
Output

Example 2: Demonstrate an example to enable fmMultiSelectExtended property.
Code:
Private Sub CommandButton1_Click()
 'Defining the array variable
 Dim myArray As Variant
 'listing all the items in the array variable
 myArray = Array("Monday", "Tuesday", "Wednesday", "Thursday", "Friday", "Saturday", "Sunday")
 'passing the array variable in the listbox
 ListBox1.List = myArray
 'enabling the multiselct extended option
 'in this we can select multiple options by dragging cursor up/down
 ListBox1.MultiSelect = fmMultiSelectExtended
 End Sub
Output