What is WordPress?
WordPress is the open source, online web development tool based on
PHP and
MySQL. Now it has evolved into the
Content Management System-(CMS). You can create a simple blog as well as a fully operational website. It contains thousands of free plugin, theme, widgets and other tools.
Features of WordPress
- Ease of use
- No HTML and FTP
- SEO friendly Website
- Add extra functionality through plugins
- Plenty of widgets
- Theme customization
- Auto upgrade and support
What is CMS?
CMS is an application with the ability to
create, modify and
publish digital content. It supports multiple users, allowing them to work in collaboration. CMS contains
two major components:
- A Content Management Application (CMA) can be referred to as a GUI. A user can create, modify, remove and publish content without having knowledge of HTML or other programming languages.
- A Content Delivery Application (CDA) is responsible for the back-end services that manage and deliver content after it is in the CMA.
Difference Between WordPress.com vs WordPress.org
Both are the ways of
hosting a WordPress site. The thing that varies with these two methods is the actual host.
By using
WordPress.org, you may download the script
free of cost and host it on a
local machine or with a hosting provider. While
WordPress.com take care of all that by hosting the site for you. You need not manage a web server, but you will have to
pay for hosting.
If you don’t want to have your own hosting or managing a web server, then WordPress.com may be the way to go. It is free and can be quickly set up. You will also have various features and options for your site’s customization. However, it comes with a price. Your website will include
WordPress.com in the
URL and you will not be able to upload custom themes or plugin.
The self-hosted version from
WordPress.org provides more flexibility and control over your site. You will be able to use your own domain name, upload themes, plugin and install them. You will also have access to your WordPress files, database, and code, meaning that you will be able to modify it according to your liking.
Installing WordPress Step By Step
For installing WordPress following software are required:
- XAMPP Control Panel
- WordPress
How to Install XAMP on Windows
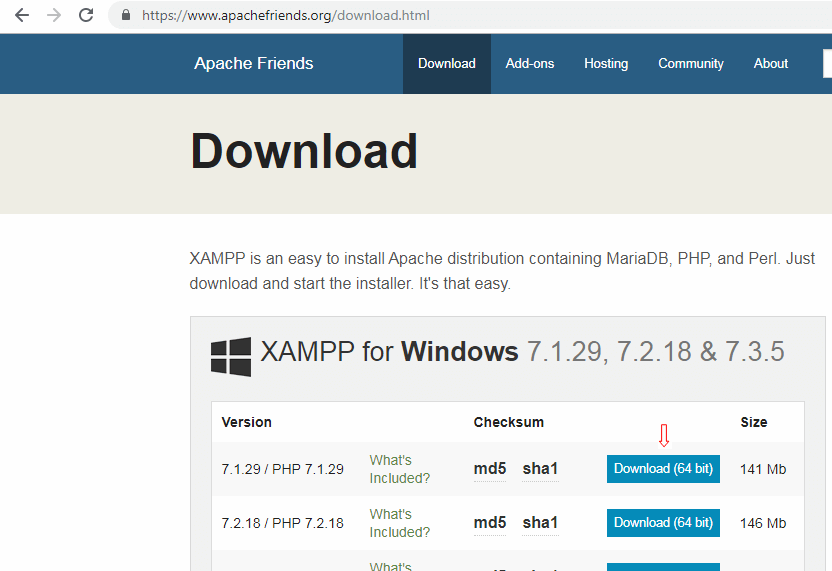
Step 1- Download
XAMPP Control Panel from
https://www.apachefriends.org/download.html
 Step 2-
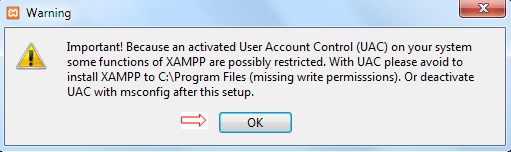
 When you double click on downloaded file a warning will appear. Click on
OK button.
 Step 3-
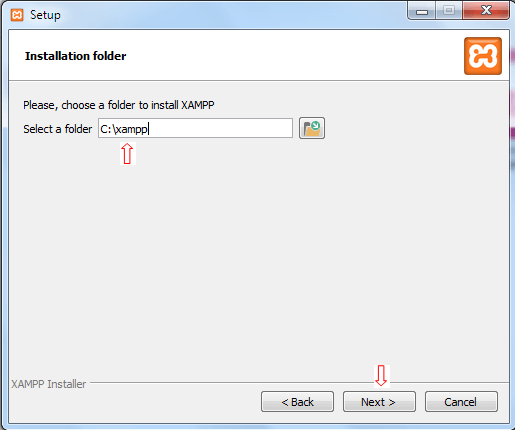
 Select the
path where you want to install XAMPP and click on
Next button.
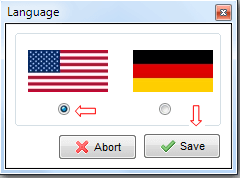
 Step 4-
 Select a
Language and click on
Save button. Your installation is complete. Start your XAMPP Control Panel and click on the
Finish button.
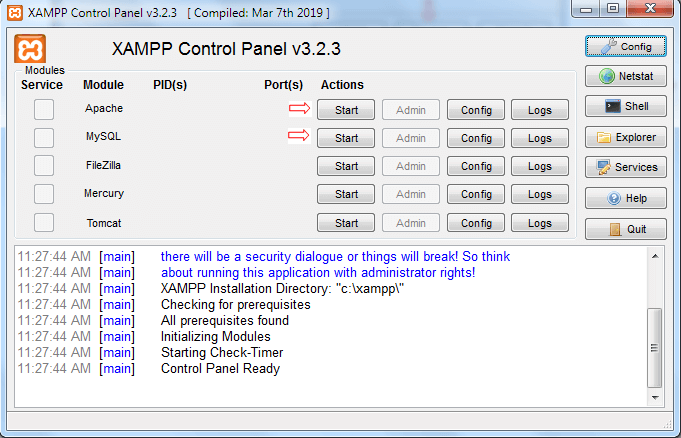
 Step 5-
 XAMPP Control Panel is now running. Click on the
Start button which starts
Apache and
MySQL.
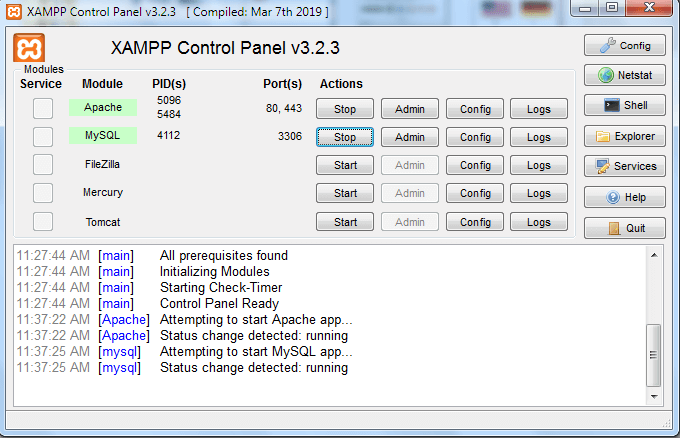
 Step- 6
 After starting Apache and MySQL it will look like this.
 How to Installing WordPress
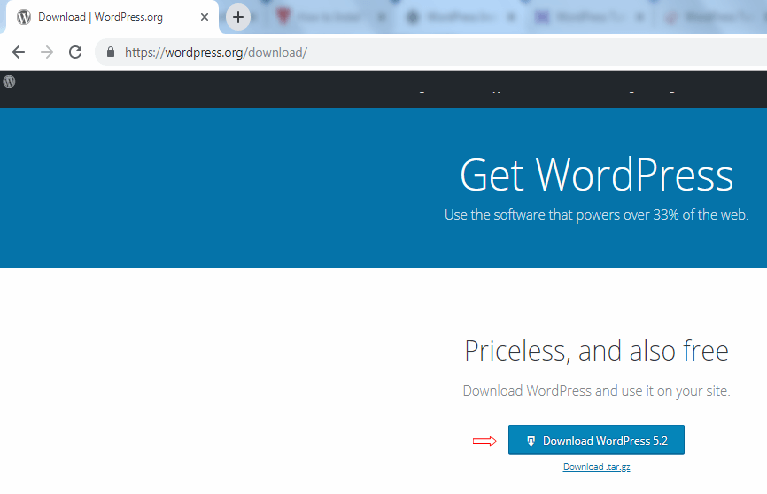
Step 1- Download
WordPress from
https://WordPress.org/download/
 Step 2-
 Extract the downloaded zip file.
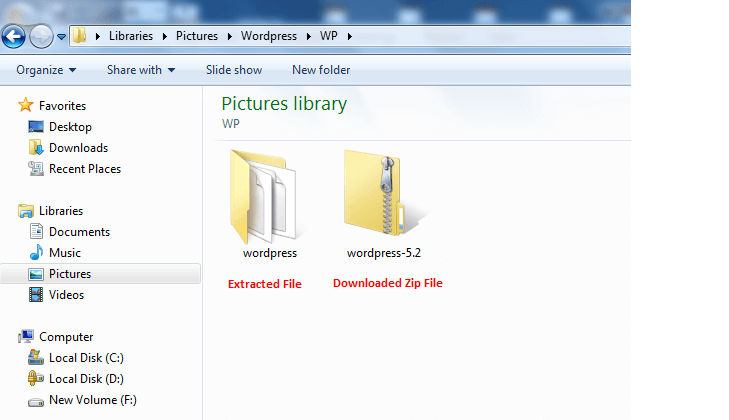 Step 3-
 Create a folder with any name,
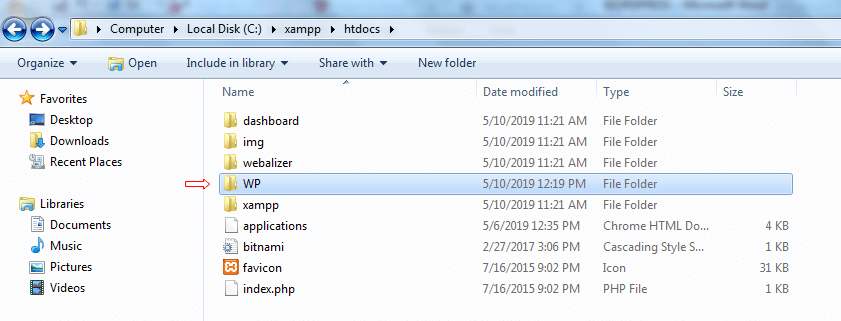
WP in my case. Move the extracted file into it. Copy the folder and paste on the location
C:\xampp\htdocs. Now cut all the files from the WordPress folder and paste into the created folder (WP). Delete the folder named WordPress.
 Step 4-
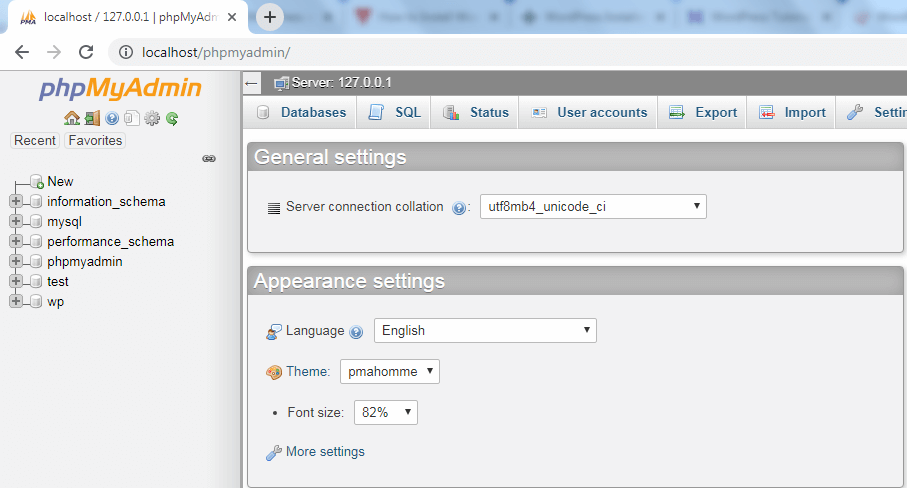
 Open your browser and type
localhost/phpmyadmin/ in the address bar and press enter. The following page will appear.
 Step 5-
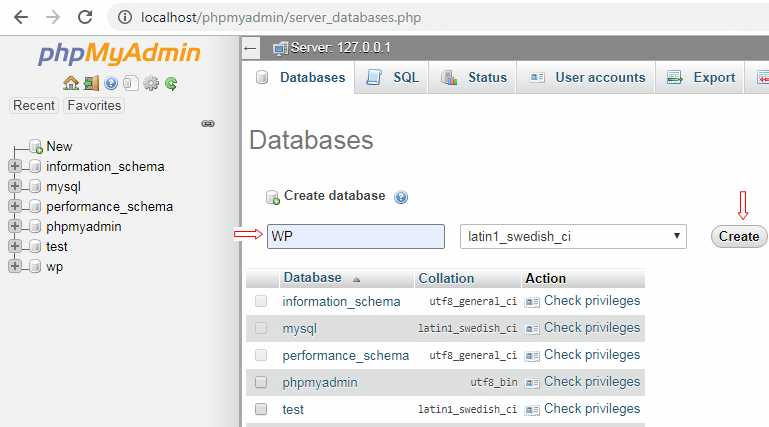
 Click on
Database tab, type name of the
database name and click
Create button.
 Step 6-
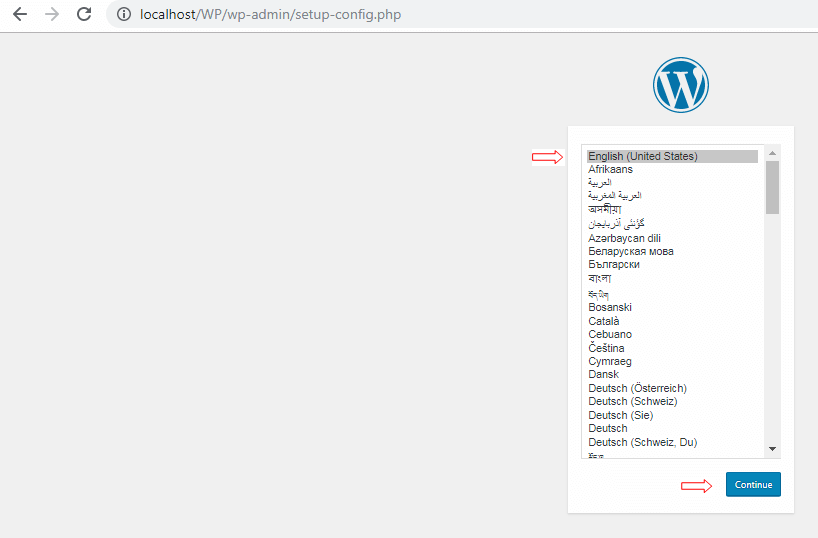
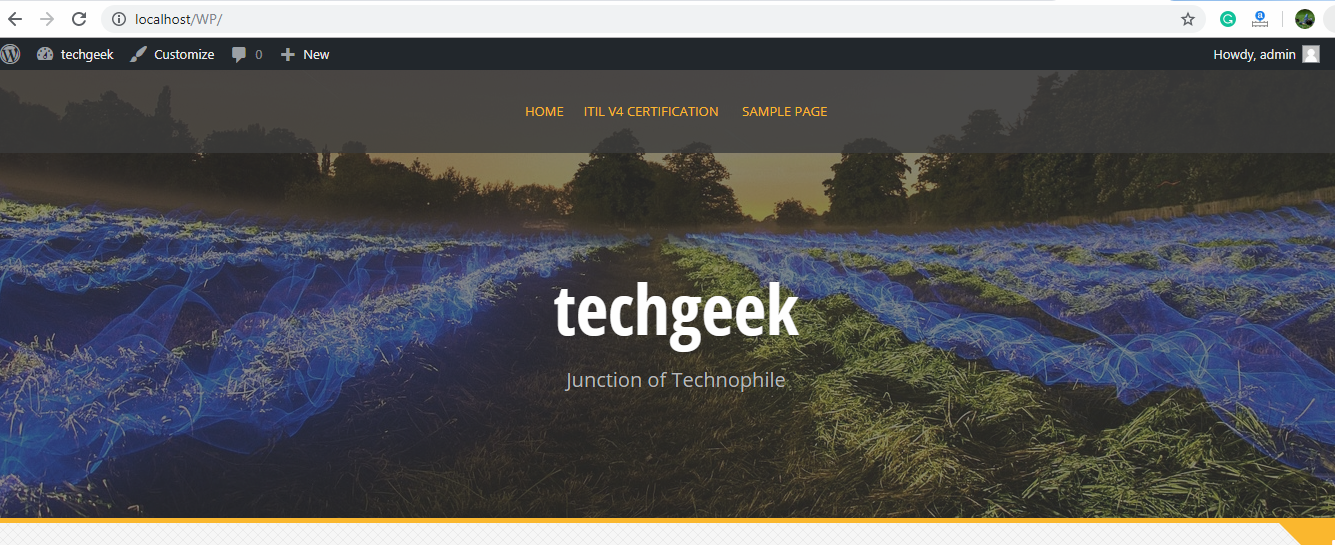
 Now open a new tab in the browser and type
localhost/WP in the address bar and press enter. Select language and click on the
Continue button.
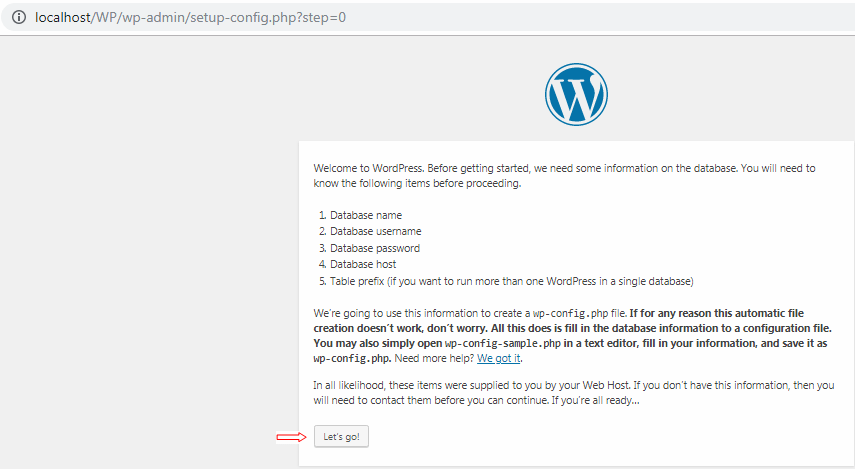
The following page will appear and then Click on
Let’s go! Button.
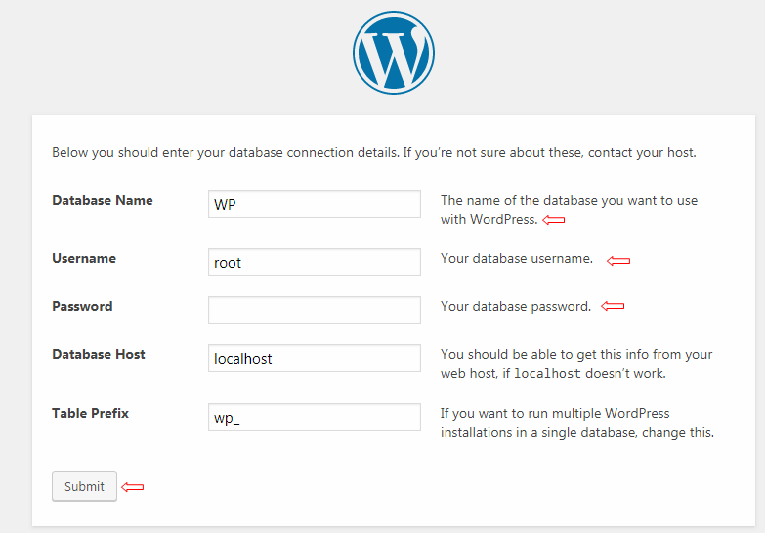
 Step 7-
 Write
Database Name,
Username and
Password (optional) and click on
Submit button.
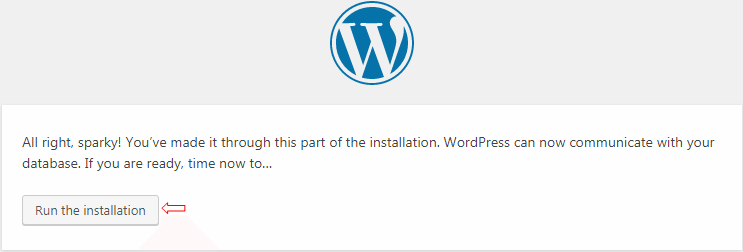
 Steps 8-
 After clicking on Submit button following page will appear. Now click on
Run the installation button.
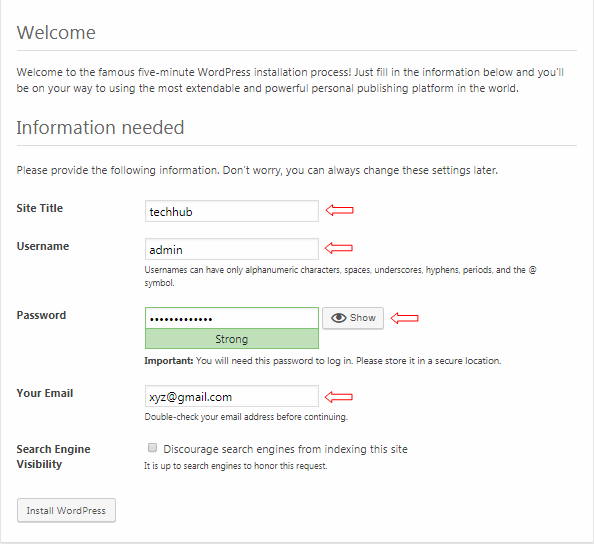
 Step 9-
 Enter
Site Tile, Username, Password, and
Your Email. Click on
Install WordPress button.
 Step 10-
 Now WordPress has been installed. Now click on the
login button to view your dashboard.

After Login, WordPress dashboard looks like this.
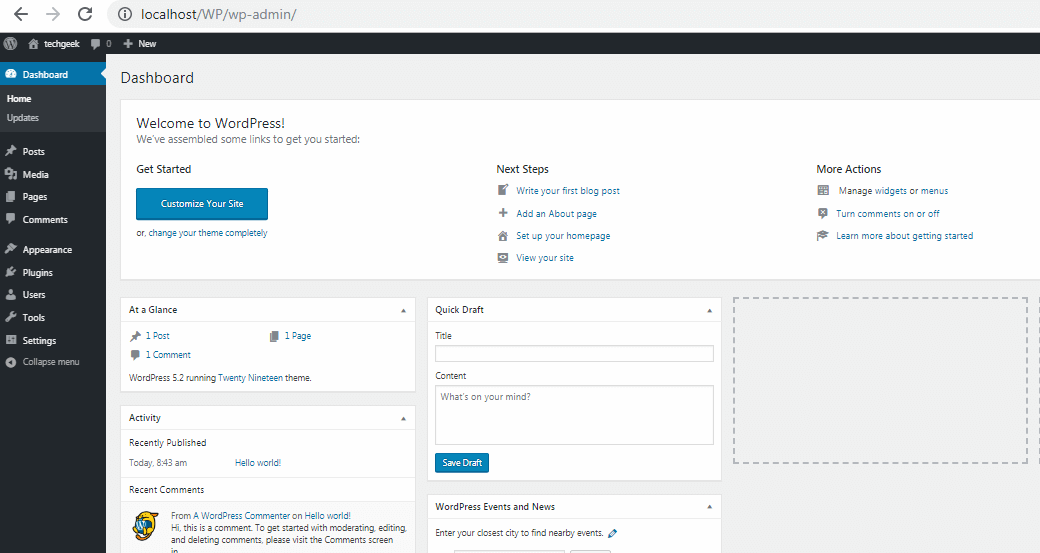 Dashboard
The main idea of the dashboard is to provide a place where you can get an overview of what’s happening with your blog or website. All the content of this dashboard grouped into widgets. Position of these widgets can be changed. The dashboard contains the following widgets:
- Welcome to WordPress
- At a Glance
- Quick Draft
- Activity
- WordPress Events and News
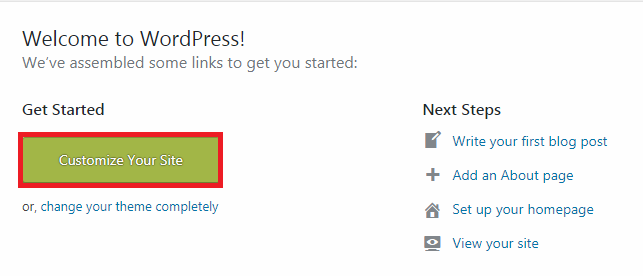
Welcome to WordPress
You can customize your site by clicking on the customized button. It contains different links like Write your first blog post, Add an About page, Set up your homepage, and View your site, etc.
At a Glance
It shows the WordPress version and theme you are running. It counts how many posts, pages, and comments you have.
Quick Draft
This is a mini post editor that allows instant content creation from the dashboard. You can include the title and content of your post and save it as a draft.
Activity
It gives you a bit more information about your latest post and comments. It also shows the status of all comments.
If you hover your mouse over one of the listed comment, action links will appear.
 WordPress Events and News
This widget provides information about nearby events organized by WordPress by entering your city name in the box. It also displays the latest WordPress news.
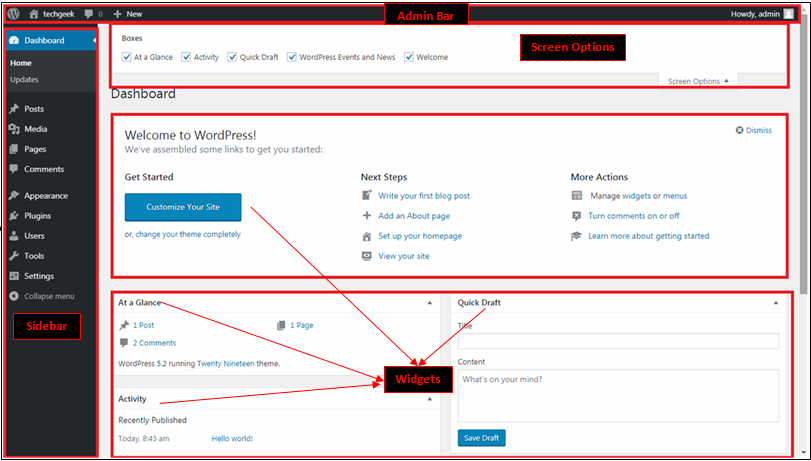
Screen Options
There is a Screen Options widget which allows you to
enable and
disable different
widget as per your need. You can minimize and drag a widget according to your need.
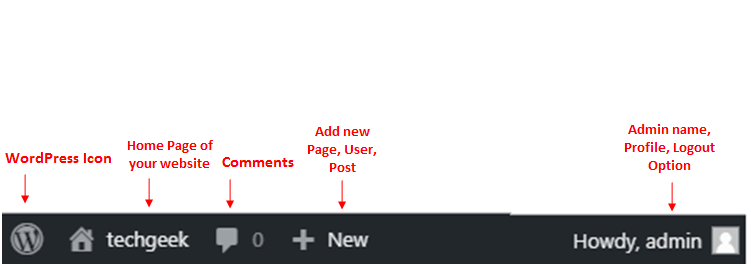
Admin Bar
This is a black bar at the top of the page. It is only displayed when admin is logged in. It contains links to the most commonly used
administrative function and resources.
 Sidebar Menu
This option allows easy access to different areas of your sites. It contains the following options:
- Posts: Manage posts on your blog
- Media: Manage media content libraries like images, audio, and video.
- Pages: Creating and managing posts.
- Comments: It allows your website visitors to have a discussion with you and each other.
- Appearances: Change the appearance of your site.
- Plugins: The primary purpose of plugins is to expand WordPress functionality without coding.
- Users: Shows all users of your site.
- Tools: It contains tools to perform some non-routine management tasks. You can check site’s health, import and export data to and from other CMS.
- Settings: This is the central hub to configure setting for different sections of a WordPress website. It also adds their setting pages as a menu under the setting tab.
- Collapse menu: All nav menu items are collapsed by default, but you have the option to store the collapsed/expanded state for the menus on a user-by-user basis.
Following window shows all widgets of the WordPress dashboard.
How to Create a WordPress Website
- Choose a domain name and host: You need a domain name and a hosting space to get your website online.
- Create new pages: Create new pages for your website.
- Add content: Write the content which you want to display on the webpage.
- Install plugins: There are some necessary plugins which must be installed are as follows-
- Yoast SEO: This is a WordPress SEO It handles the technical optimization of your site and assists with your optimizing content.
- Contact Form 7: It allows you to create and manage multiple contact forms, use Captcha Verification, and ensure that all spam submissions are filtered out with Askimet.
- WordFence Security: It offers a both free and paid version of WordFence Security. It gives you access to an abundance of tools including Malware, virus and backdoor scanning,
Changing Theme of Your WordPress Website
Step 1- Click on
Customize Your Site.
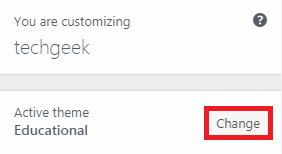
 Step 2-
 Click on
Change button at top left corner of the page.
Here you will get
two options:
Installed themes and
WordPress.org themes (Premium). Installed themes are already downloaded on your system and Wordpres.org themes are required to download. You can choose any one of them by clicking on the Live Preview button.
After this click on
Activate & Publish button at the top left corner of the page. Now a new theme is applied to your website.
How to make a WordPress theme
To build a theme you should have a little bit of knowledge of the following:
- HTML
- CSS
- PHP
- Database
- JavaScript
WordPress Plugins
Plugins are the program written in PHP scripting language that extends the functionality of the website. It provides additional functions to applications.
Choosing a plugin
Before choosing a plugin you should follow the following points:
- Create a list of your requirements.
- Read a review of the plugin which you want to download.
- Check the compatibility of the plugin with currently using WordPress version.
- Take a look at the screenshot of the plugin.
- Read FAQ.
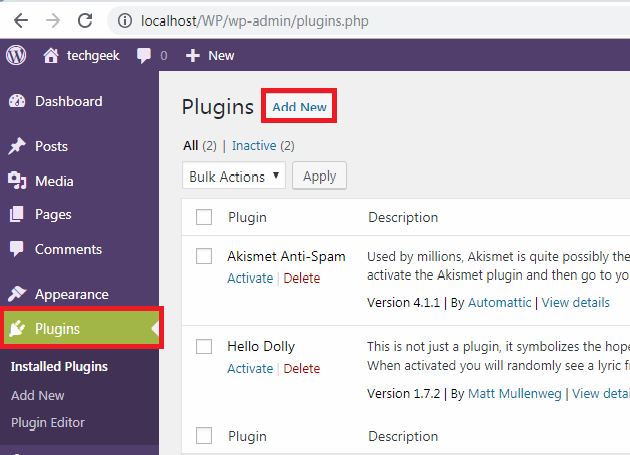
Install WordPress plugin
Step 1- Click on
Plugins menu in the sidebar, and then click on
Add New button.
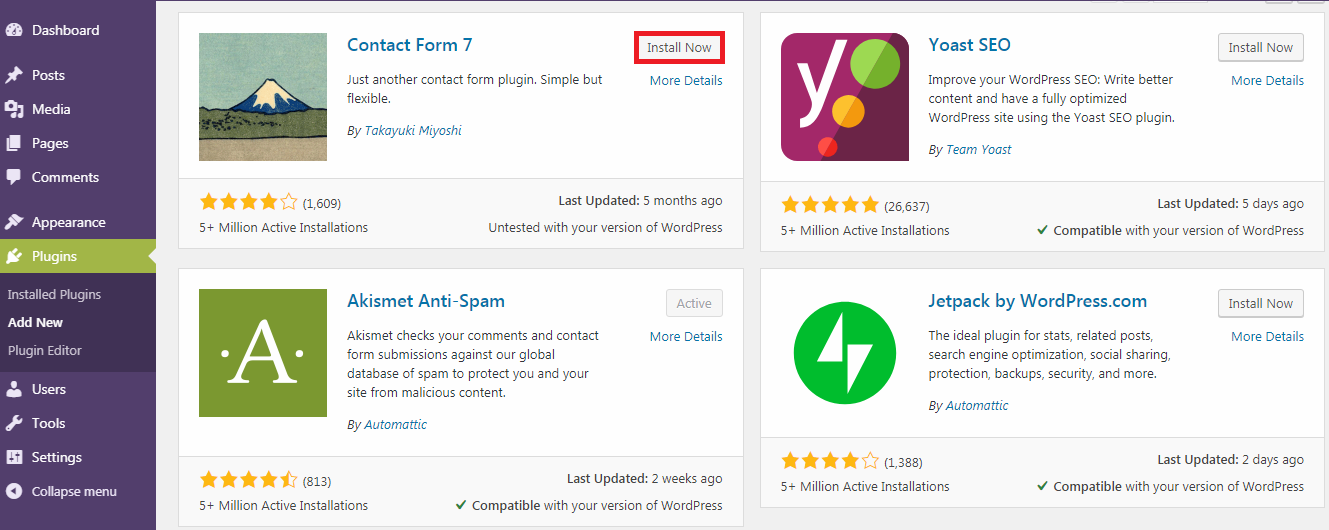
 Step 2-
 A new pages with plugins will appear on the screen, select any one of them which you want to install and click on
Install Now button.
 Step 3-
 After installing the plugin is required to activate. Click on
Activate button.
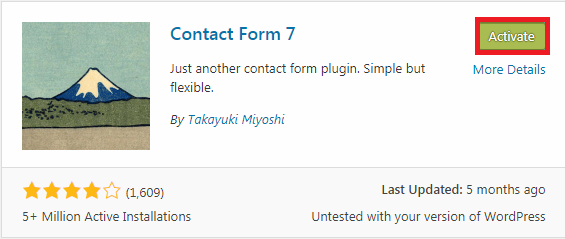
Now the plugin has installed successfully.
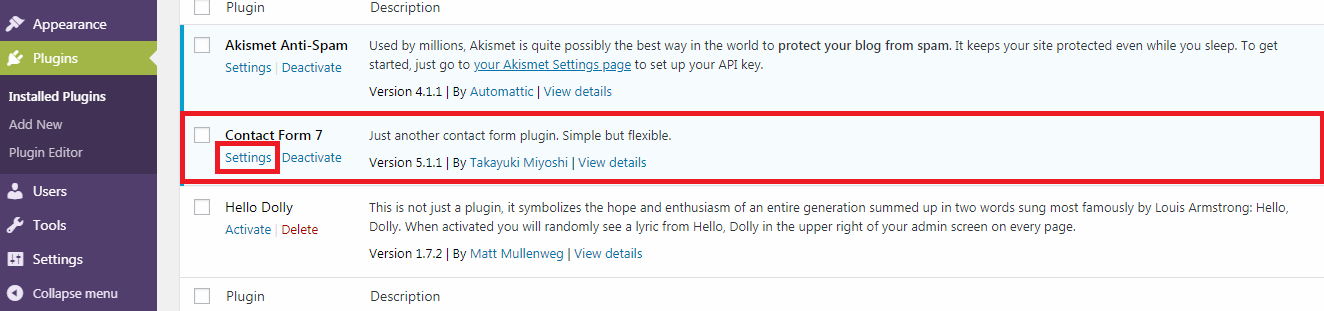
Step 4- Click on
Plugins in
Sidebar menu. All installed plugins will show here. Here we install Contact Form 7. Click on
Setting link of Contact Form 7.
You will get a
shortcode at the top of the page, copy this code and paste into any new page or widget.
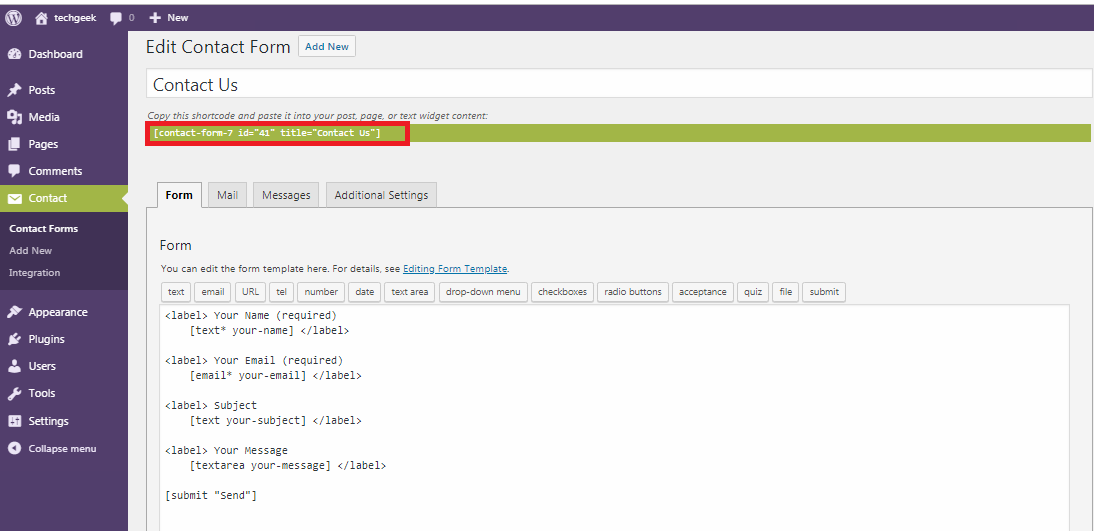
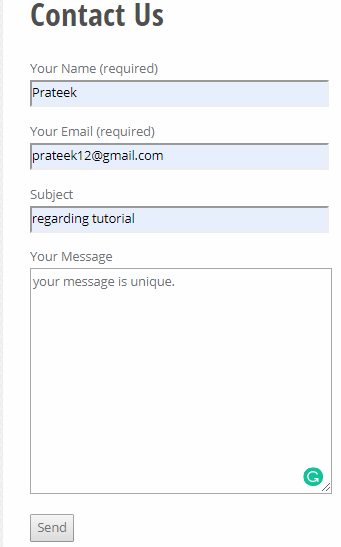
It creates a
Contact Form or
Widgets as shown below.