How to schedule an email in Gmail?
How to schedule an email in Gmail
Imagine scenarios where you send an important message to one of your international clients, and you know the time difference is significant. Earlier, you had to wait until that time so that your client checks your email first thing every morning or else the easy approach is by using the ‘Schedule Email’ feature to schedule and send it later automatically at their precise time.
Topics Covered
- What is Scheduling in Gmail?
- History
- Platforms where Scheduling can be used
- Steps to Schedule, edit and delete a mail on computer
- Steps to Schedule, edit and delete a mail on Android phone
- Frequently Asked Questions/ FAQs
What is Scheduling in Gmail?
‘Scheduling’ is Gmail’s new feature, which allows users to write an email at any time and later, they can set the email with a particular date and time. Gmail will automatically send the scheduled email on the specified date and time.
History
Earlier scheduling was done with the help of third-party application but in 2019, with the bunch of other features Google has introduced ‘Schedule Email’ feature as well. This feature became popular in no time and is widely used for scheduling professional and personal emails.
Platforms where Scheduling can be used
1. Mostly used if you’re want to talk to a client with a different time zone,
2. Nudge somebody about an occasion,
3. Want to remind your future self about something.
4. Set reminder emails for important meetings
5. The user wants to schedule a message prior so they can enjoy their free time later.
Steps to Schedule a mail on computer
Below are the step-by step demonstrations to schedule a mail on desktop:
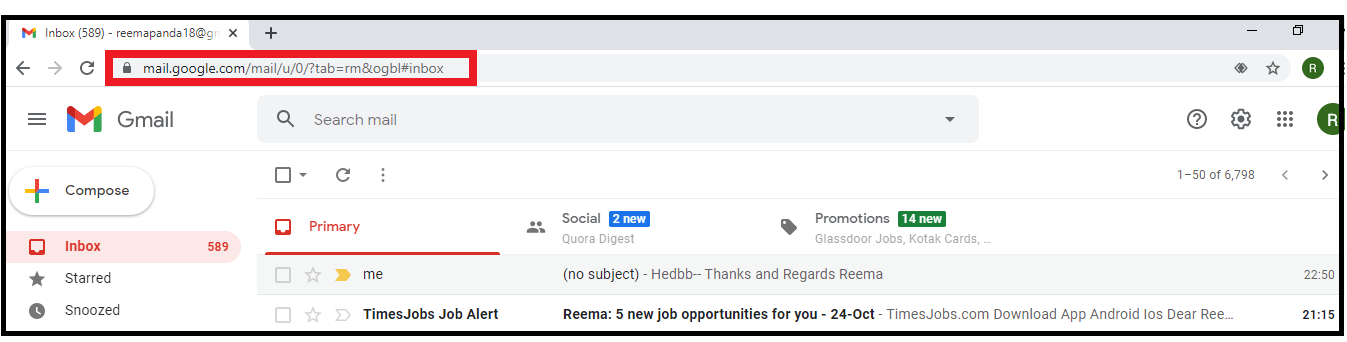
STEP 1: Login to your Email address
- Open the Google Gmail application on your web browser, or you can directly visit the URL: https://mail.google.com/. Login into your account by using your email address and password.
- You will arrive in your Gmail Inbox window.
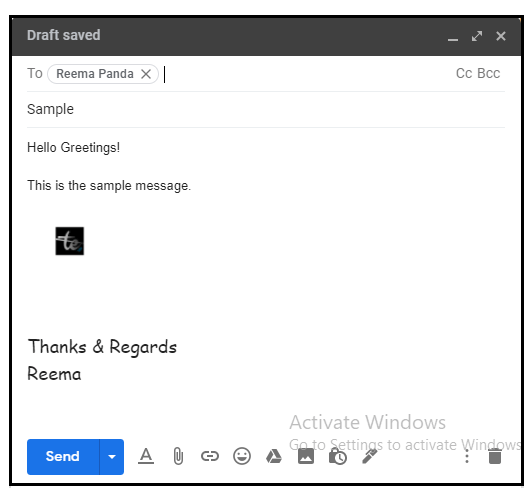
STEP 2: Compose a mail
- Click on the “Compose button” located on the left position of the Gmail webpage.
- The compose window will be prompted—type in the message in the content body and the subject in the subject field for your mail.
- Add valid recipients in the ‘To’ field.
STEP 3: Click on ‘Schedule Send’
- Once your email is ready, come down to the send button located at the compose window's bottom. The send button is divided into two parts i.e., send command and the downward facing arrow.
- Make sure to click on the side where the downward facing arrow resides.
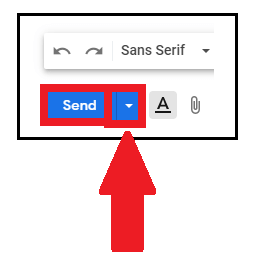
- At the top the ‘Schedule send’ option is prompted. Click on that option.

STEP 4: Schedule Your Email
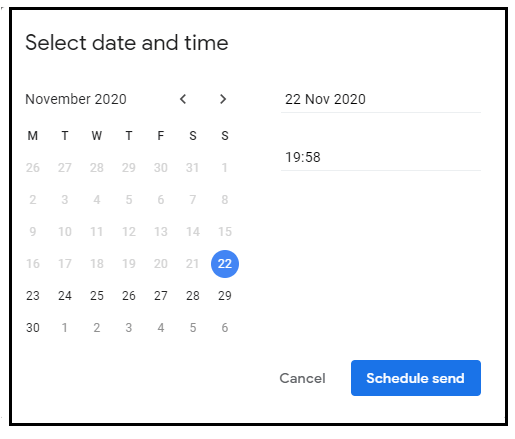
- The following dialog box will be displayed asking to specify the date and time. It will show you three options; you can choose one amongst them if it fits you. Else you create your customized data and time, click on the ‘Select data and time’ options. (Refer to the below screenshot).
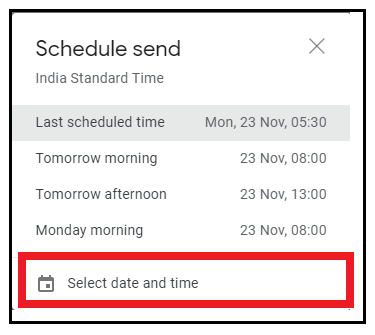
- The Select data and time window will be displayed as shown in the below screenshot.
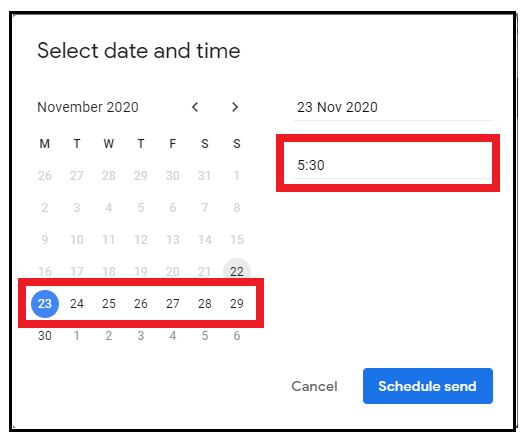
- Specify your customized data and time at which you want your email to be sent. Here in my case, as you can see below, I have selected the date as Nov 23, 2020 and the time as 5:30 am.
- Once done, click on the blue ‘Schedule Send’ button located at the window's bottom right position.
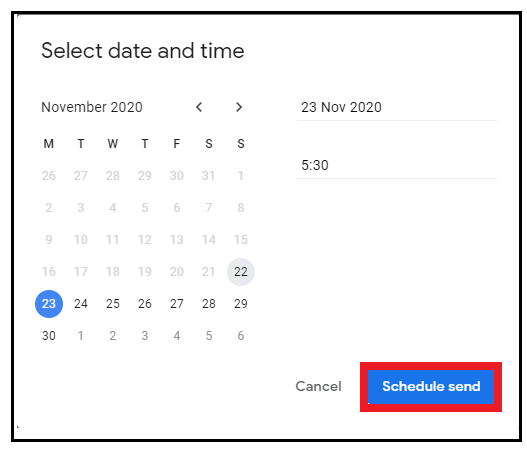
- Gmail will send you the confirmation notifying ‘Send scheduled for Date, Time.’

Steps to Edit the Scheduled mail
Below are the step-by step demonstrations to edit the scheduled mail on a desktop:
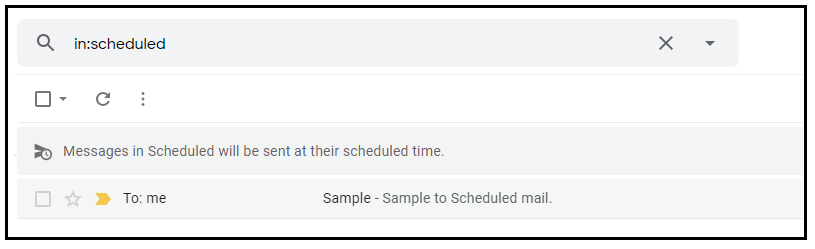
STEP 1: Open Mail and click on ‘Scheduled’ option
- Open the Google Gmail application on your web browser.

- The menu options window will be prompted. Click on the ‘Scheduled’ option.
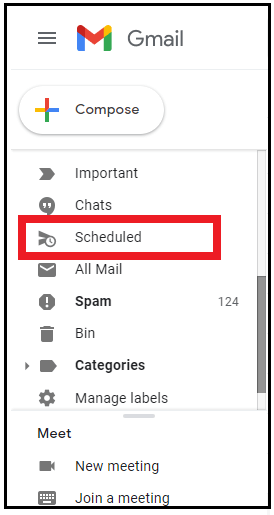
- The Scheduled window will be prompted displaying all your pre-scheduled mail.
STEP 2: Click on ‘Cancel Send’ and Edit the Mail
- Click on the message that you wish to edit. The scheduled mail will open.
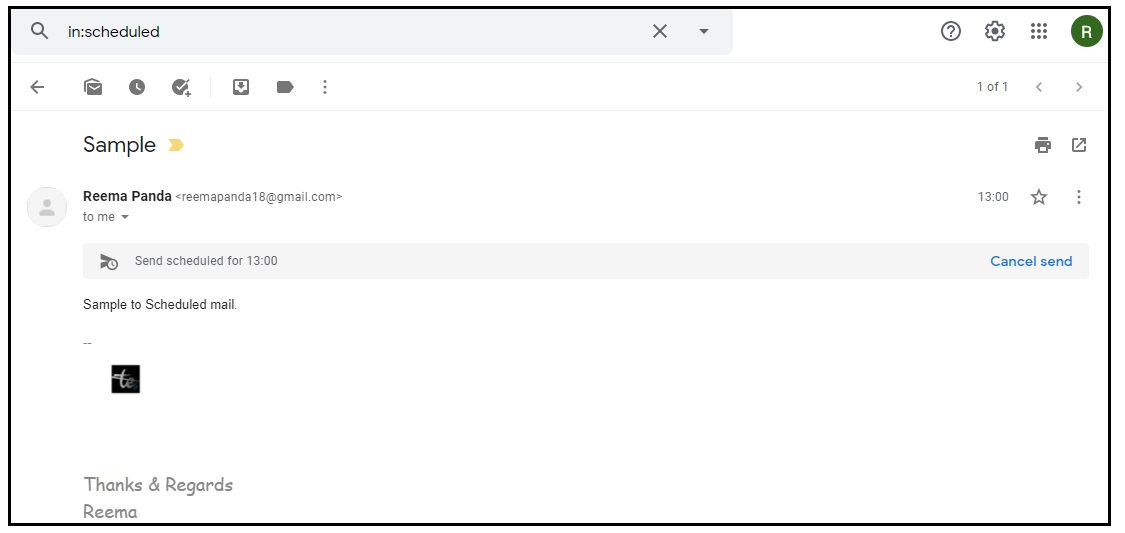
- Click on the ‘Cancel send’ option. It will cancel the scheduled mail.

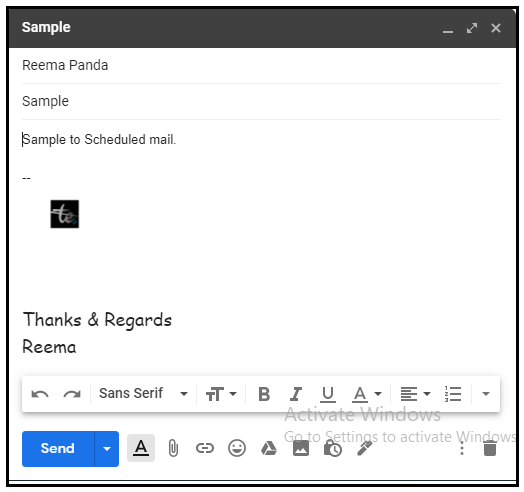
- It will again direct you to the compose mail window, which will contain all your information and your message will be reverted to draft. Edit the mail and again Schedule and the time and date (check the ‘Steps to Schedule a mail on computer’ given above).
Steps to Delete the Scheduled mail
Below are the step-by step demonstrations to delete the scheduled mail on a desktop:
STEP 1: Open Mail and click on ‘Scheduled’ option
- Open the Google Gmail application on your web browser. Click on the three horizontal lines or the “Hamburger menu” icon located in the top-right position of the window.

- The menu options window will be prompted. Click on the ‘Scheduled’ option.
- The Scheduled window will be prompted displaying all your pre-scheduled mail.
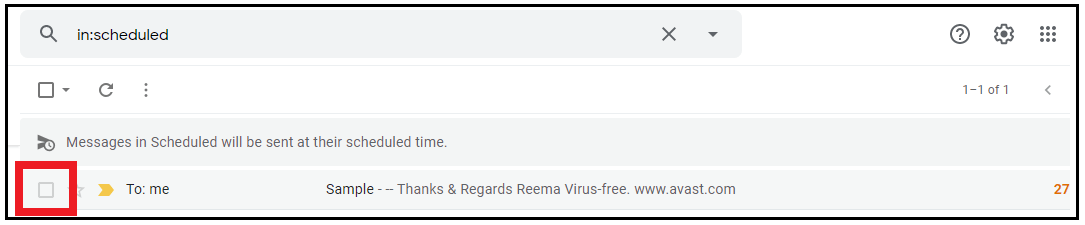
STEP 2: Delete the Mail
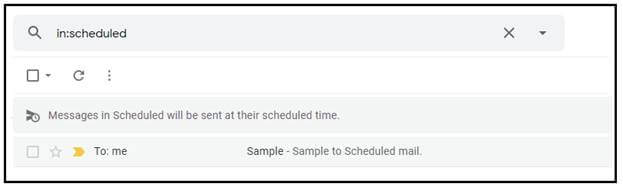
- Place your cursor on the small square window present in front of your scheduled mail. Right-click on the mail to select the mail.
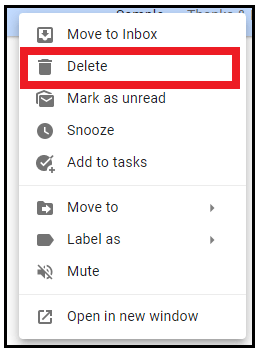
- It will also prompt the window as shown in the below screenshot. Click on the “Delete”option.

- The selected email will be deleted from your schedule folder and will move your scheduled mail to bin.
NOTE: Gmail doesn’t delete the scheduled mail permanently instead it reverts it back to your draft folder.
Steps to Schedule a mail on Android phone
Below are the step-by step demonstrations to schedule an email in Android smartphone:
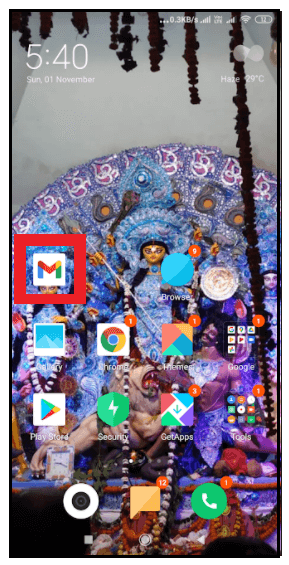
Step 1: Download and Open the Gmail app
- Unlock your android phone. Go to your play store, download the Gmail app. In some smartphones, it comes by default. Once downloaded, double click to open the app.
Step 2: Login or Sign up
Login into your email account by entering your email id and password, and you will be landed on your Inbox page.
STEP 2: Compose a mail
- Click on the compose button located on the left position of the Gmail webpage.
- The compose window will be prompted. Type in the message in the content body and the subject in the subject field for your mail.
- Add a valid recipient in the ‘To’ field.
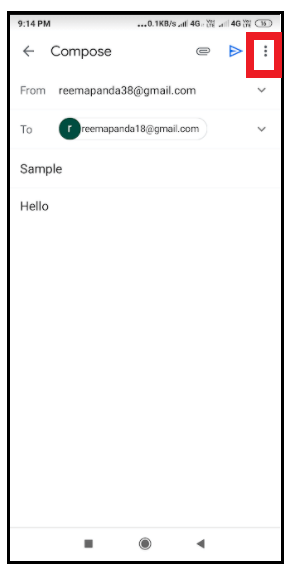
STEP 3: Click on ‘Schedule Send’
- Once your email is ready, click on the three horizontal dots located at the top right position of your screen.

- The following window will be displayed. At the top the ‘Schedule send’ option is prompted. Click on that option.
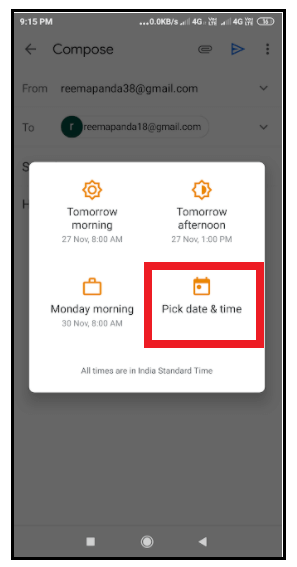
STEP 4: Schedule Your Email
- The following dialog box will be displayed asking to specify the date and time. It will show you three options; you can choose one amongst them if it fits you. Else you create your customized data and time, click on the ‘Pick data and time’ options. (Refer to the below screenshot).
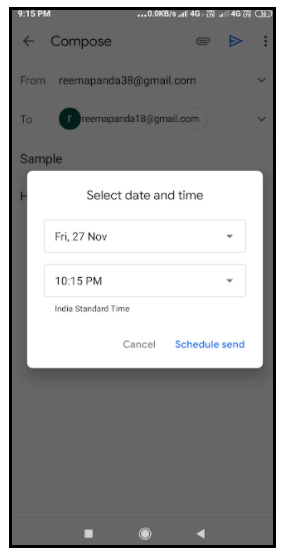
- The Select data and time window will be displayed as shown in the below screenshot. Specify your customized data and time at which you want your email to be sent. Here in my case, as you can see below, I have selected the date as Nov 27, 2020 and the time as 10:15 pm.
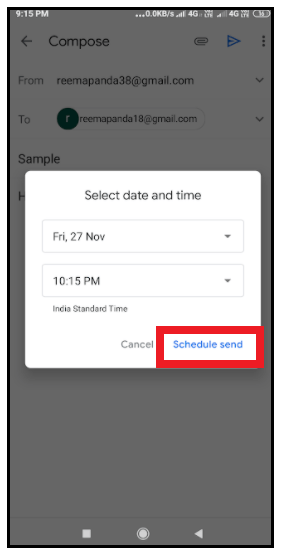
- Once done, click on the blue ‘Schedule Send’ button located at the window's bottom right position.
- Gmail will send you the confirmation notifying ‘Send scheduled for Date, Time.’
Steps to edit the Scheduled mail via Gmail app
Below are the step-by step demonstrations to edit a schedule mail in Android smartphone:
STEP 1: Open Gmail and click on ‘Scheduled’
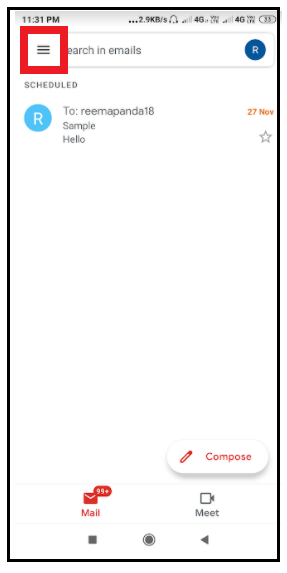
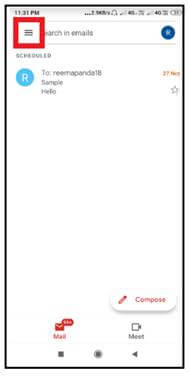
- Open the Gmail app. Click on the three horizontal lines located at the top-left position of the mobile screen.
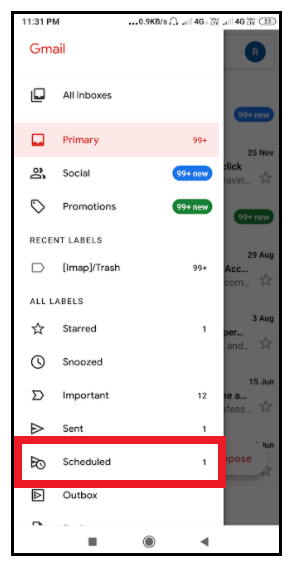
- The menu window will be displayed. Click on the ‘Scheduled’ option.

- It will open the scheduled folder displaying all your scheduled emails.
STEP 2: Click on ‘Cancel Send’
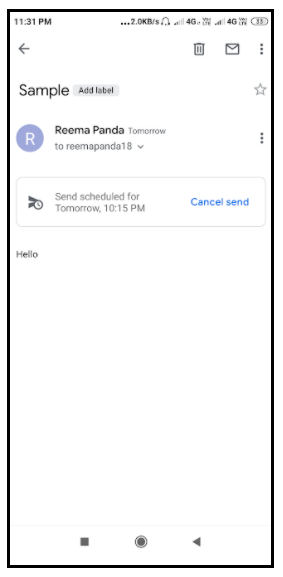
- Open the scheduled mail that you wish to edit.
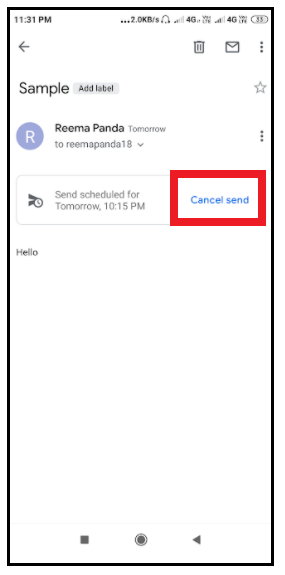
- Click on the ‘Cancel Send’ option (refer to the below screenshot). Your Scheduled mail will be canceled.
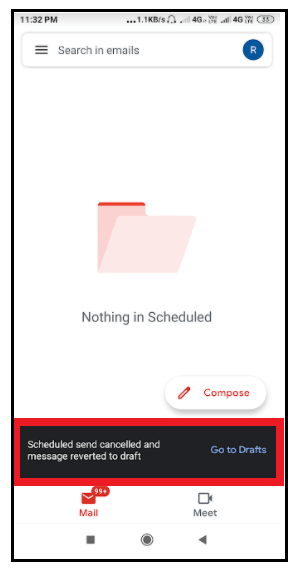
- Your scheduled mail will be canceled and your email will be directed to the draft folder.
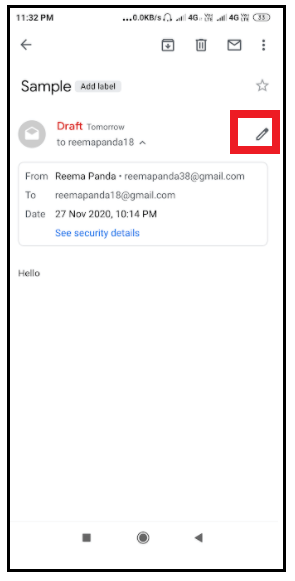
- Open your mail so it can display all your previous information. Edit the mail and again Schedule and the time and date (check the ‘Steps to Schedule a mail on Android phone’ given above).
Steps to delete the Scheduled mail via Gmail app
Below are the step-by step demonstrations to delete a schedule mail in Android smartphone:
STEP 1: Open Gmail and click on ‘Scheduled’
- Open the Gmail app. Click on the three horizontal lines located at the top-left position of the mobile screen.

- The menu window will be displayed. Click on the ‘Scheduled’ option.

- It will open the scheduled folder displaying all your scheduled emails.
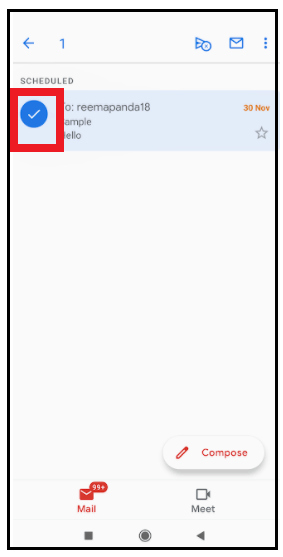
STEP 2: Delete the scheduled mail
- Besides your scheduled mail, you will notice a circle icon. Click on the icon to select the mail.
- From the top of the screen, click on the Cancel Schedule Send option.
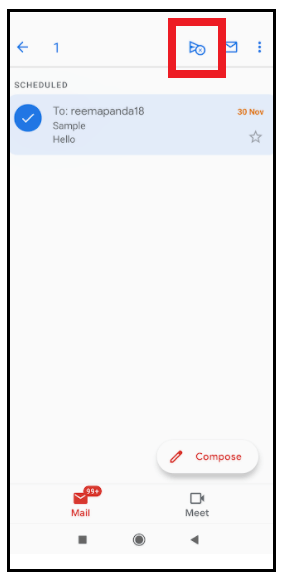
- Your scheduled mail will be successfully deleted in no time and will be moved to the bin.
Frequently Asked Questions/ FAQs
Question 1: Is it possible to cancel or delete the scheduled email?
Answer: Yes, Gmail provides you the option to delete or cancel any scheduled email. We have already discussed the steps to delete the scheduled mail above in the tutorial.
Question 2: It is possible to make changes or edit the pre-scheduled email?
Answer: Yes, Gmail provides the option to change or edit the pre-scheduled email. We have already discussed the steps to edit the scheduled mail above in this tutorial.
Question 3: Is there any limit on the number to compose scheduled emails in our Gmail account?
Answer: Yes, Gmail offers you the flexibility to compose only 100 scheduled emails in our Gmail account.