GraphQL: Installation of Apollo client
Installation of Apollo client
In the previous section, we have completed the installation part of the Apollo server. We have run a query to fetch the data present in the GraphQL server, which is installed in our system. We had also Installed all the required dependencies for the Apollo section.
Now, in this section, we will discuss the Apollo client part installation in the system.
In this section, we will be discussing:
- Installation of the client part of the Apollo
- Working on the Client part of the Apollo
- Building the client-side of the application using Apollo client
What is the Apollo client?
Apollo Client is the tool that is when used with the GraphQL, provides the best environment to build the client-side of the applications.
- Apollo clients have a complete and state management library.
- Apollo clients also have a fully-featured caching supporting GraphQL client for the JavaScript-based applications.
- When we use Apollo clients, we just have to write a GraphQL query into the client-side of the application.
- The Apollo client takes care of the caching and requesting the data.
- The Apollo client also takes care of updating the UI of the application.
- The Apollo client can easily implement and integrate with many technologies like React JS, Vue, Ember, Angular and Meteor etc.
- The Apollo client, when implemented, allows all developers to build an interactive and better UI of application very quickly with the GraphQL.
- We can use this Apollo client implementation to retrieve data from the client-side of the application.
Features of Apollo client
Following are some main and highlighted features of client implementation of Apollo:
- Easy and simple to use: Apollo client is very easy and simple to implement in your application. So that beginners can even work with Apollo client. Even anyone who just started working with GraphQL and Apollo is also able to easily use the advanced features of the Apollo client.
- Compatible with React JS: The Apollo client is designed in such a way that it is easily compatible with React JS. The Apollo client facilitates its developers to take advantage of the rich features present in React JS.
- Apollo client is flexible and small: The apollo client is small so that you are not getting any kind of unnecessary stuff in your device while installing Apollo client. The core of Apollo client is under 25k compressed; therefore, it is very flexible also.
- Data fetching is declarative: The Apollo client allows its users or developers to write the GraphQL query and retrieve the data from the client-side without taking any manual loads from the server-side of the application.
- Open Source Community: The Apollo client has a very large and integrated open source community. The Apollo client community is very active, so we can share our problems and projects and get knowledge from thousands of developers.
- A very excellent developer tools: The apollo client has many tools. These tools are very useful for developers to develop very interactive client sides of application and UI very quickly.
- Incrementally adaptable: The Apollo client is incrementally adaptable, which means we are able to add an existing JavaScript program or application inside our project. With Apollo Client, we can work with our existing JavaScript application and create an interactive UI for it.
- Apollo client is universally compatible: The Apollo client implementation is compatible universally, which means we can build client-side with any kind of setup. We can build any GraphQL server, any setup or any GraphQL schema with the Apollo client.
Supported frameworks for Apollo client:
Following are the different frameworks and platforms, which Apollo client support other than the React JS:
1. JavaScript: The Apollo client supports many kinds of frameworks present in JavaScript. Following are the list of frameworks supported by Apollo client in JavaScript:
- Meteor
- Angular
- Ember
- Vue
2. Web components: Apollo client supports different kinds of web component frameworks. Apollo Element is one of the popular web components supported by Apollo client.
3. Native mobile: The Apollo client also supports frameworks present in the native mobile. Following is the list of components of Native mobile supported by Apollo client:
- Native iOS with Swift
- Native Android with Java
Apollo client set up
Till now, we have seen how much powerful, useful, and efficient tool GraphQL client is. The implementation of Apollo client in the GraphQL application can help us in various ways like a better client-side interference and an interactive UI for the applications.
Let's move forward to the next part of this section, where we will learn how to set up the Apollo client in the GraphQL application present in our system.
In this part, we will learn stepwise how-to setup the Apollo client in the GraphQL. We need to follow these following steps for the installation of Apollo client:
- Run the server application:
As in the last section, we have Installed the Apollo server and implemented it with the GraphQL server. In this part, we need to run the server in order to successfully install the Apollo client application in the system.
Follow these steps to run the server application in your system:
Step 1: Open the node.js command prompt present in your system.
Step 2: Locate the directory of the project folder where we have installed the Apollo server.
Step 3: Run the Apollo server in your system with the following command:
'node server.js.'
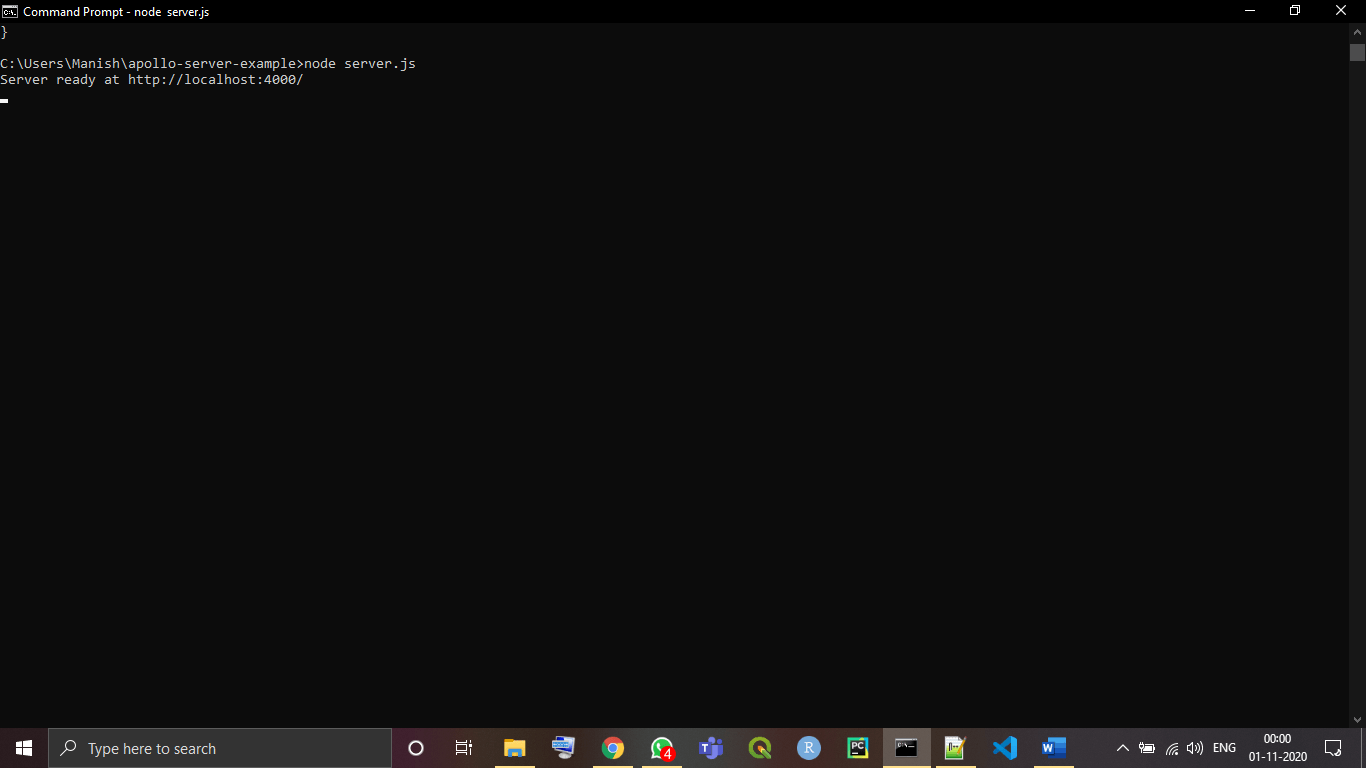
Now, as we can see that in the image, the Apollo server is running in our system; we can check this by writing GraphQL queries on the GraphQL playground we located in the web browser in the previous section.
- Note: As we know, the Apollo server of application will be running on HTTP port 4000, but the client application of Apollo will run on the HTTP Port 3000.
- Create the React application:
As we know, the client-side of the application is built on React JS, as we have to work with the JavaScript build application only.
For this, we first build a React application in our system for working on the client-side of the application.
You need to follow below steps to create a React JS application in the system:
Step 1: Open the command prompt on your device.
Step 2: Write the following command inside the command prompt to build React application in your system:
'npx create-react-app hello-client-world'
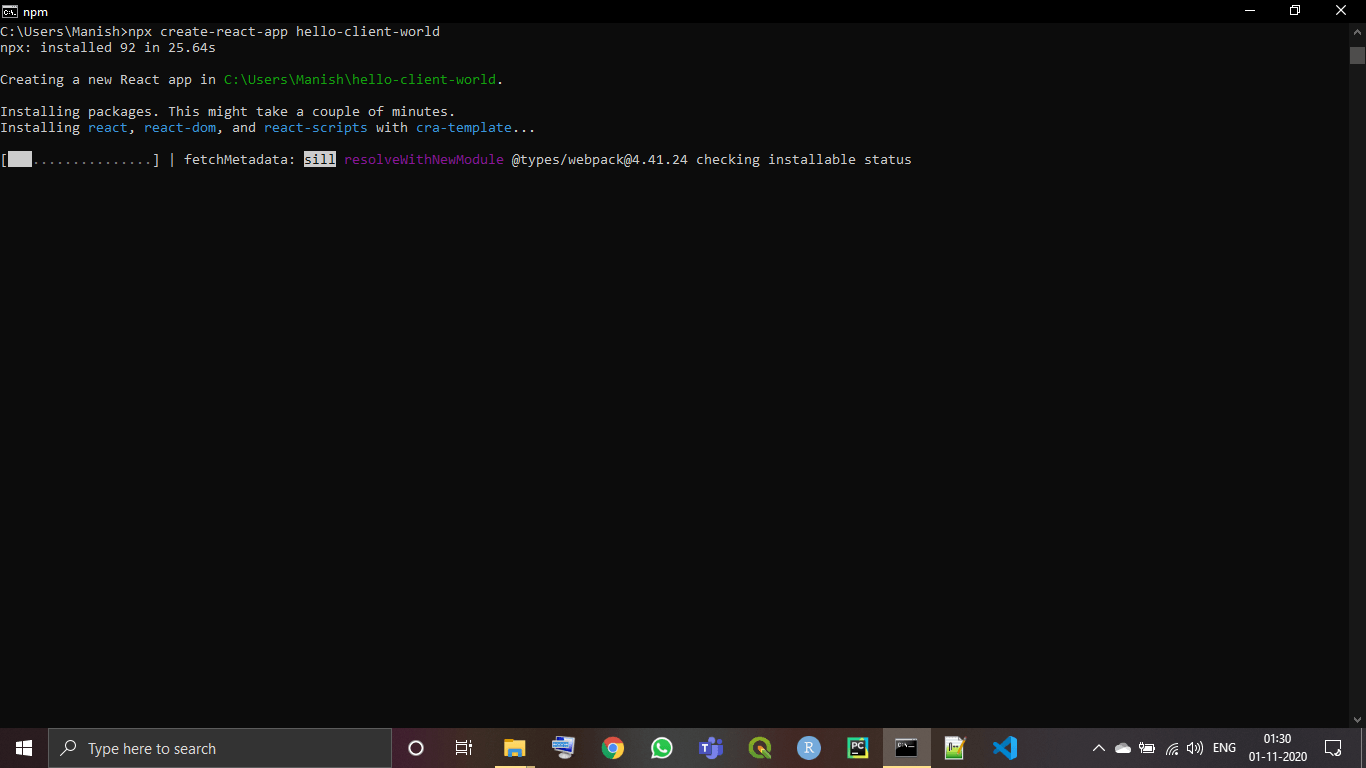
As we can see in the above image:
- We have successfully set up the React application in our system.
- With React application, we have also created a directory folder name 'hello-client-world' where we have created the React Application.
- In the directory 'hello-client-world,' the Apollo client will also be installed inside it.
- We will create the client-side of our project using the 'hello-client-world' directory only where we will have all the required client libraries.
- Start the client:
We have created a directory for our client-side of the application. Now, it's time to start the React client application and see if it is installed properly or not.
Follow these following steps to install the Client application in your system:
Step 1: Open the command prompt in your system.
Step 2: Locate the client directory folder 'hello-client-world' using the following command:
'cd hello-client-world'
Step 3: Now, write the following command to start the client application in your system:
'npm start'
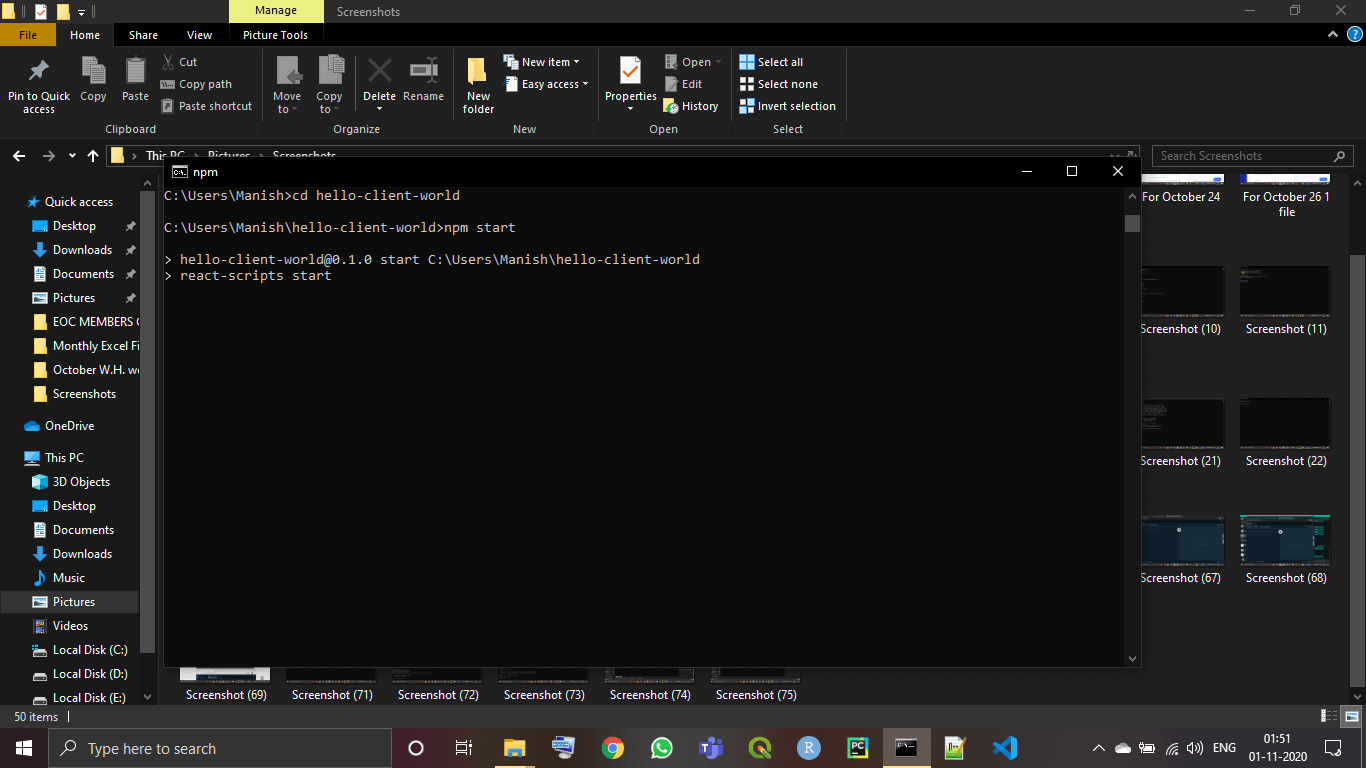
As we can see in the above image, the client application is running on localhost 3000 in our system.
Now, let's verify this by going to the web browser and see if the client application is launched or not.
Step 4: Open the web browser in your system.
Step 5: write the following URL inside the search bar and run it:
'http://localhost:3000'
Step 6: When we run the server, we will see the following output window in our web browser:
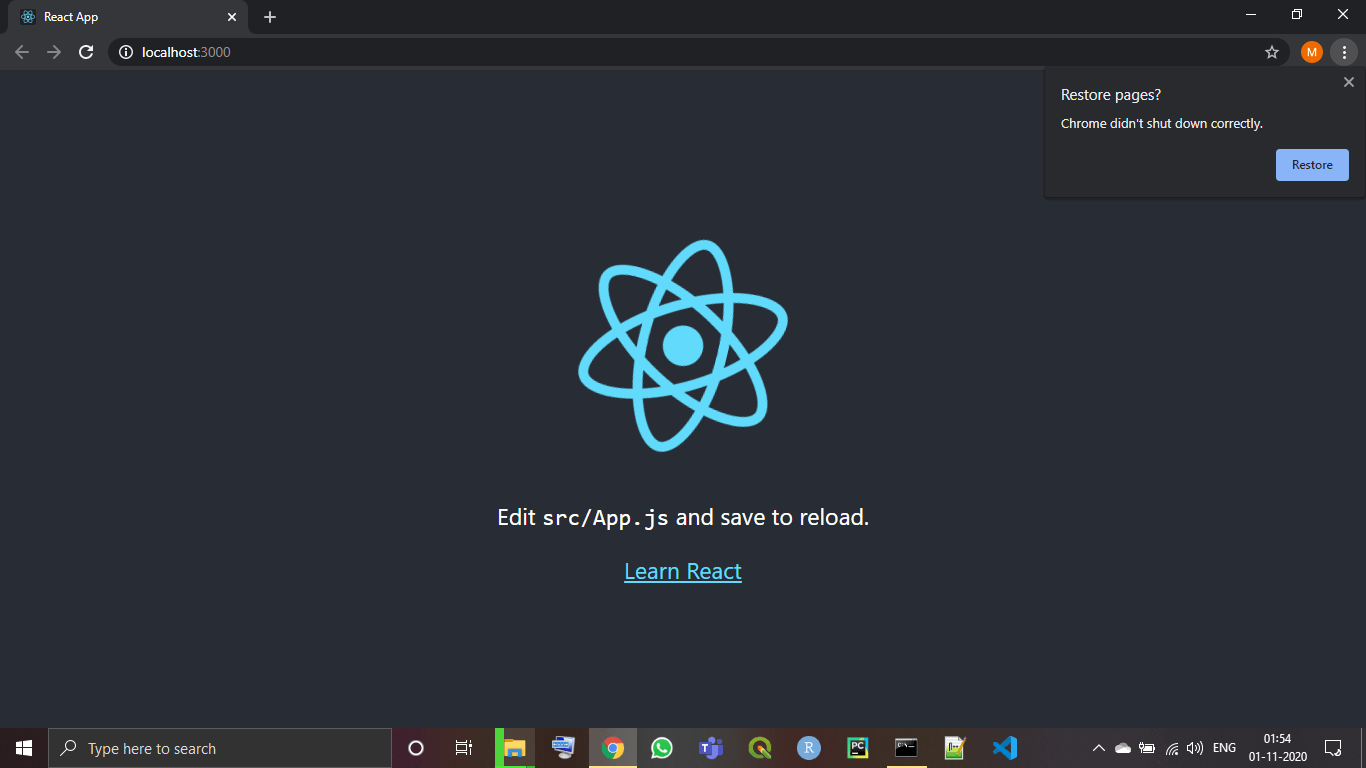
As we can see in the above image, the client application has started in our system.
- Install the libraries for the Apollo client:
Here, we will be installing the libraries for the Apollo client through which we will install and configure the Apollo client in the application in our system.
- Apollo boost: The Apollo boost is one of the best libraries for the configuration the apollo clients.
- The Apollo boost is very simple and easy to configure in the client-side of the application.
- When we install the Apollo boost, it will configure the Apollo client in our system with the recommended settings provided by it.
- The Apollo boost includes all the essential packages which are required for setting up and configuration of the Apollo client in our system.
- Following is the list of some essential packages present in Apollo boost:
- Error handling
- Memory cache
- Authentication
- Local state management
- The Apollo booster can easily handle all these packages very easily and smoothly.
- Follow these steps to install the Libraries for the Apollo client into your project folder:
Step 1: Open the command prompt in your system.
Step 2: Locate the project directory 'hello-client-world' using the following command:
'cd hello-client-world'
Step 3: Write the following command to install the libraries of Apollo client inside the project folder:
'npm install apollo-boost graphql'
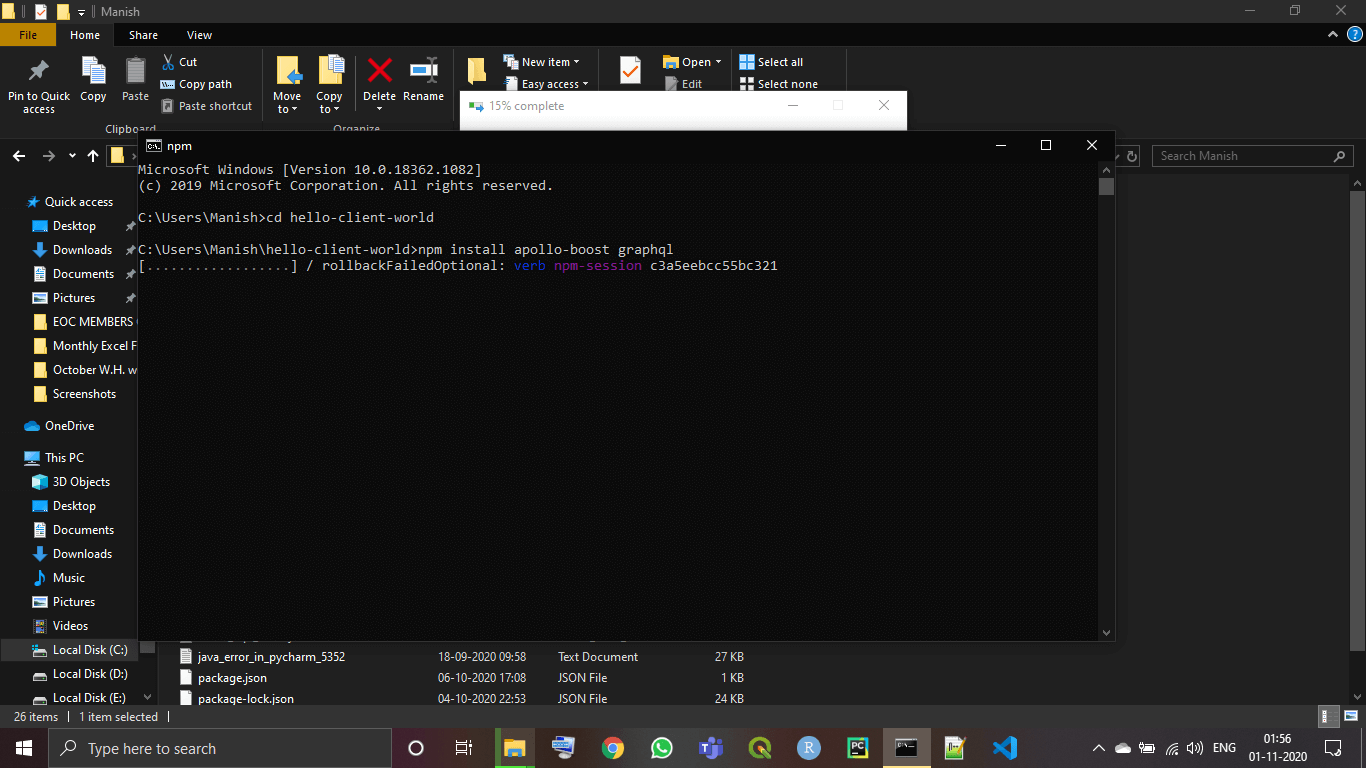
Wait while the libraries of the Apollo client are installed in your system. It may take some minutes, depending upon your system.
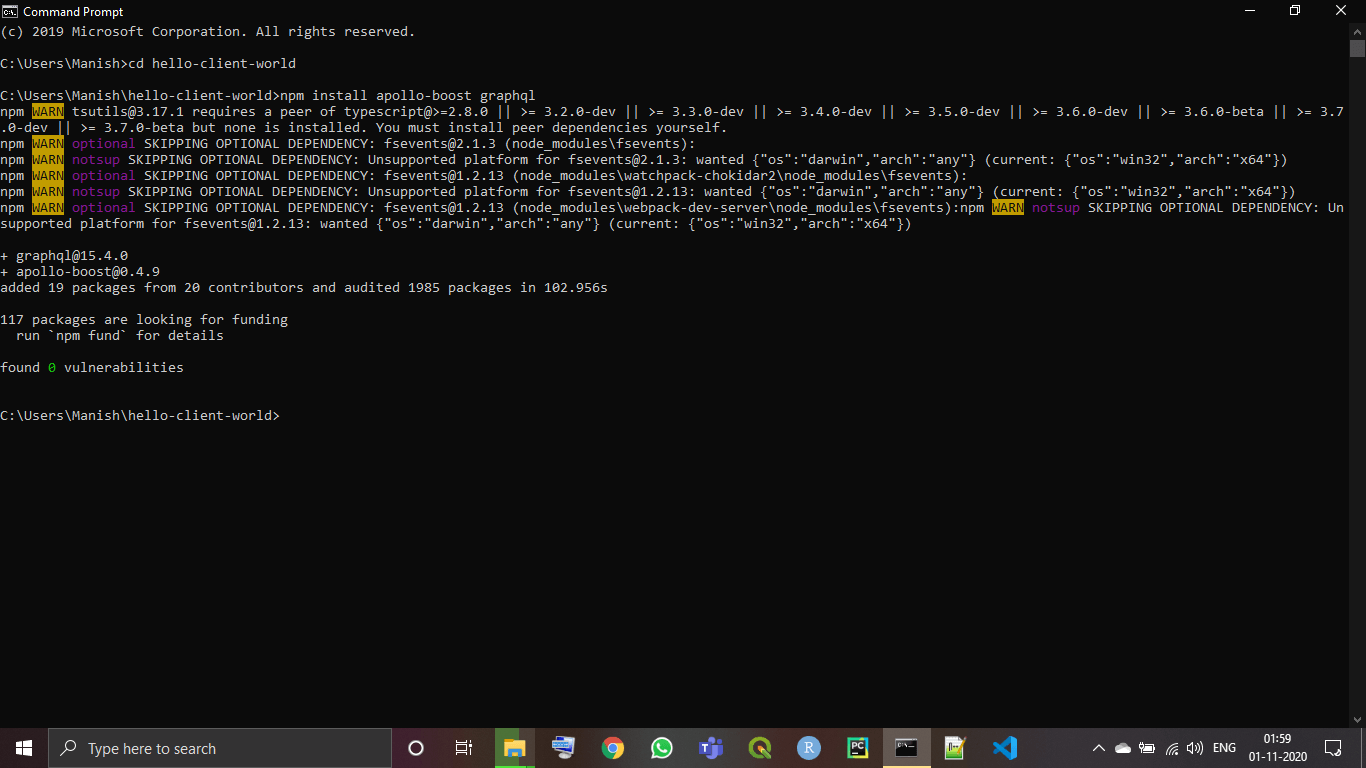
As we can see in the image, Apollo boost libraries are Installed in the project folder, and the Apollo client is set up in the system.
So, we have installed and configured the Apollo client into our project, and we can run queries on this by running this Apollo client on port 3000 and retrieve the results.