Jupyter Notebook Tutorial
The Jupyter Notebook is an open-source web application that allows the user to write code, share documents, and present data science projects. It is also used for data cleaning and transformation, statistical modeling, machine learning, and much more. Now, We are going to discuss the following topics:
- What is Jupyter Notebook?
- History of Jupyter Notebook
- Installation of Jupyter Notebook
- How to run a Jupyter Notebook
- The Dashboard of Jupyter Notebook
- Creating a new Notebook
- User Interface of Jupyter Notebook
- Keyword shortcuts in Jupyter Notebook
- How to write and run a program in Jupyter Notebook
- Cells in Jupyter Notebook
- Components of Jupyter Notebook
- Benefits and limitations of Jupyter Notebook
- IPyWidgets of Jupyter Notebook
What is Jupyter Notebook?
A Jupyter Notebook is a web-based IDE(Integrated Development Environment) application that allows the user to pretext elements, write codes, and present data science projects. Inside the Notebooks, you can write components, title, add links, figures, and others. It will walk you through how to arrange Jupyter Notebooks on your native machine and how to begin using it to do data science projects. A notebook is useful to share collective algorithms with the public by focusing on teaching or acknowledged a technique. Jupyter Notebook is also a proper way to run data analysis.
Jupyter Notebook is a descendent project from the IPython project, which is used to have an IPython Notebook project itself. The name Jupyter comes from the core promoted programming languages that it helps: Julia, Python with the IPython kernel. Jupyter Notebook provides a browser-based REPL(read–eval–print loop) built upon many popular open-source libraries:
- IPython
- jQuery
- MAthJax
- Tornado
- Bootstrap
History of Jupyter Notebook
To fully understand what the Jupyter Notebook is and what features it has to offer, you need to learn how it began.
The Notebook interface was introduced to IPython in 0.12 launch (December 2011), renamed (by Fernando Perez) to Jupyter Notebook in 2015 (IPython 4.0 – Jupyter 1.0). Jupyter Notebook is close to the notebook software of other programs such as Mathematica, Maple, and Sagemath. A computational interface design is originated with Mathematica in the 1980s. Jupyter's curiosity overtook the success of the Mathematica notebook software in early 2018.
Jupyter Notebook Installation
The simple way to get started Jupyter Notebook is by installing Anaconda. Anaconda is the best way to use a Jupyter Notebook, and we mostly recommended to download the Anaconda for using Jupyter Notebook. Firstly, you require to download the latest version of Anaconda for Python3. Anaconda has generally used python distribution for data science and comes with all famous libraries and tools. Jupyter can be installed using conda or pip. Anaconda has its installer tool called conda, and pip has used for Python.
Using Anaconda and conda: Once Anaconda is installed, run the following command in the Terminal or command prompt (Windows) to install Jupyter:
conda install jupyter
Using pip: If you already have installed Python and aren't using Anaconda or conda, you may install the Jupyter Notebook using Python's package, pip:
pip install jupyter
Steps for installing Jupytor Notebook
Step-1: Download the latest version of python 3.7 from https://www.anaconda.com/distribution/ link.

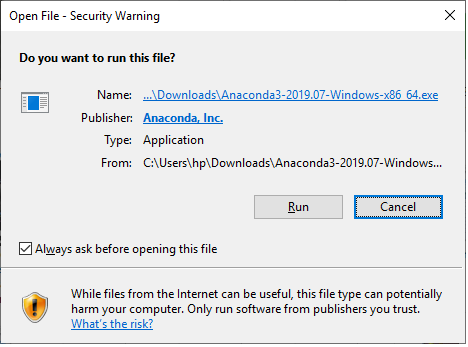
Step-2: Click on the following downloaded file, and then click on the run option.
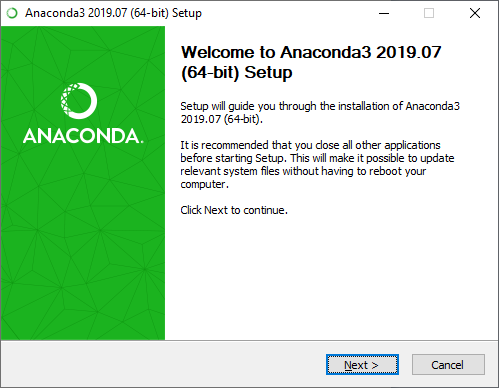
Step-3: After this process, the installation is in the setup progress.
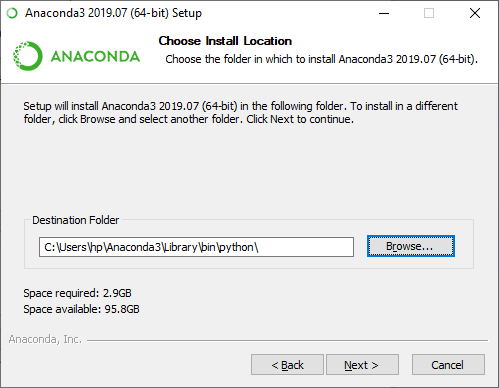
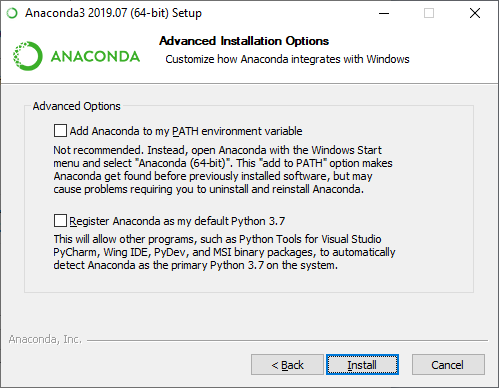
Step-4: Set the path to installation for the Python, and then go for the next step.
Step-5: Once you set the path, then you click install button for installing the python.
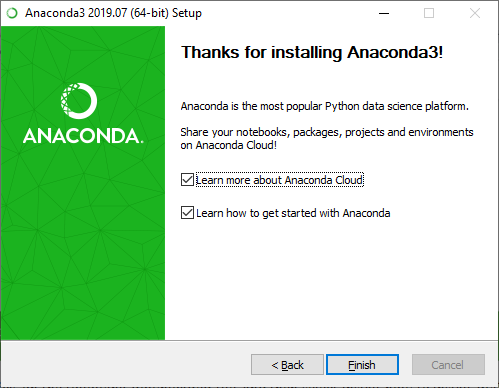
Step-6: Once the installation has been completed, the following window is open, you click on the finish.
Upgrading a Jupyter installation
The Jupyter Notebook used to be known as IPython Notebook. If you are using an old version of the IPython Notebook, then you can upgrade it to the latest version of the Jupyter Notebook.
1. Open the command prompt (cmd command).
2. Copy the path, wherever the Python script is displayed.
Using conda:
conda update jupyter
Using pip:
pip install -U jupyter
How to run Jupyter Notebook
After the installation process is done, you can run your Notebook on the server using the following command in command prompt.
Jupyter Notebook
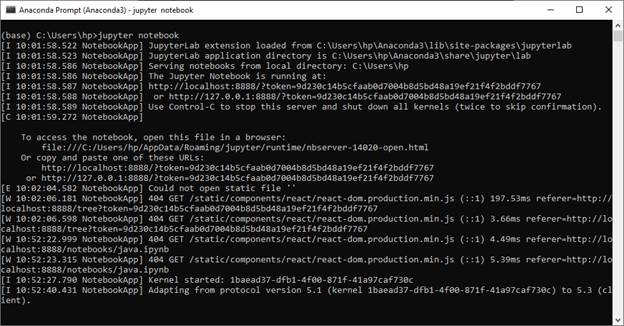
The alert user may have seen that the URL for the dashboard is something like http://localhost:8888/tree. The localhost is not a website but indicates that the content is being served from your local machine: your computer. Jupyter's Notebooks and dashboard are web apps, and Jupyter begins up a local Python server to promote these apps to your web browser, making it genuinely platform-independent and starting the default web browser, which shows the list of all the files.
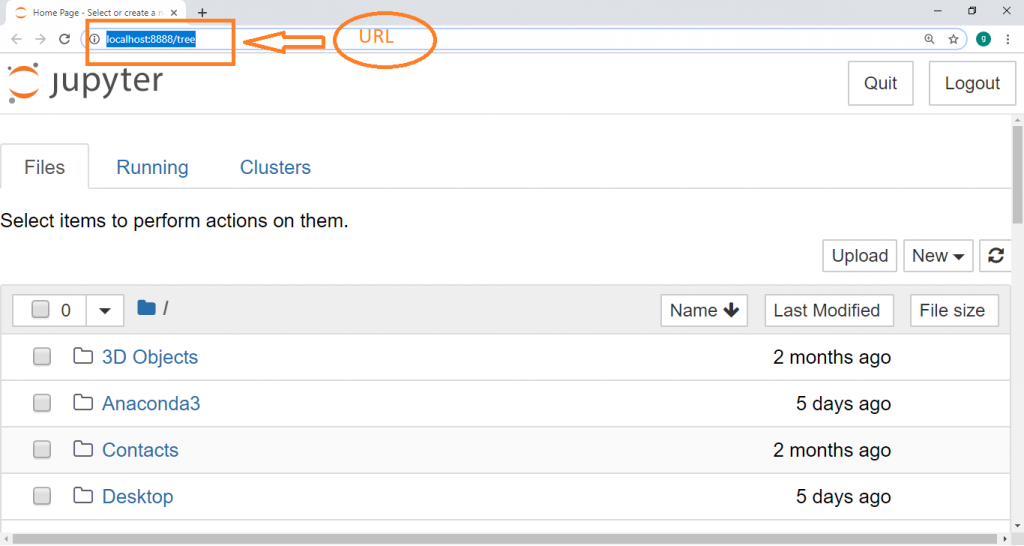
The Dashboard of Jupyter Notebook
The Dashboard of Jupyter Notebook carries three tabs, which is shown in the following screenshot.
Files Tab: The Files Tab is applied to shows all files and folders in the current directory. It also used an upload button to upload a file in the notebook server, and also contain a new button to create a new notebook in the notebook server.
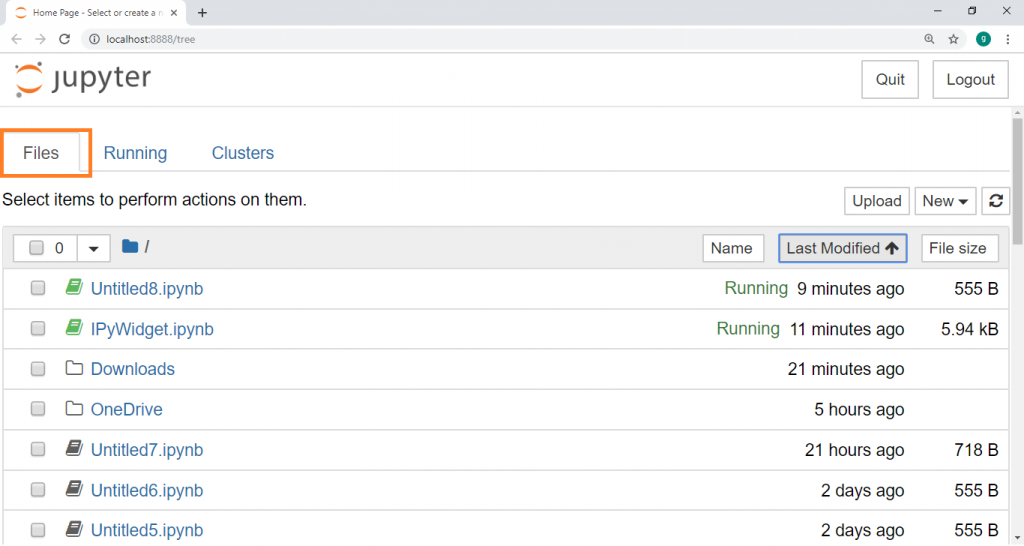
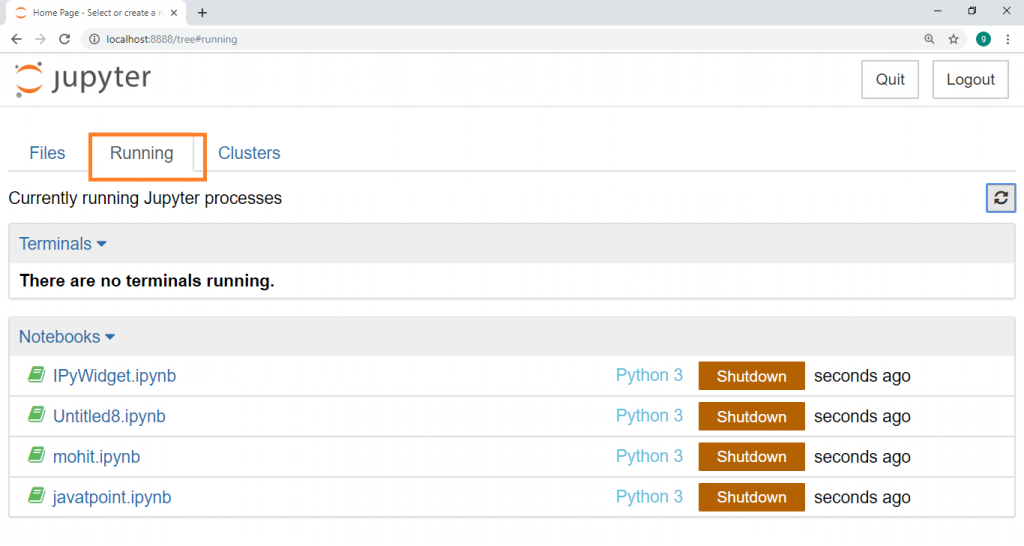
Running Tab: The Running Tab displays all the notebooks which are currently running in the Jupyter Notebook.
Cluster Tab: The Cluster Tab is given in parallel by IPython. IPython is the parallel computing system, an expanded variant of the IPython kernel.

Create a new Notebook
To make a new notebook, click the New drop-down button in the top-right and select Python 3. If you have another Jupyter notebook on your system that you want to use, you can click upload and navigate to that particular file.
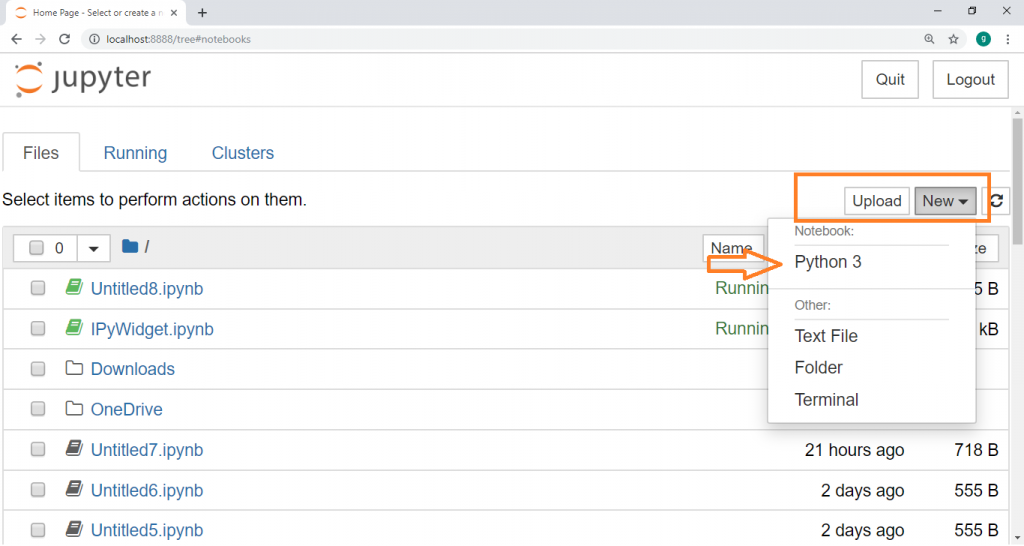
When you click on Python 3, then your new Notebook is created.
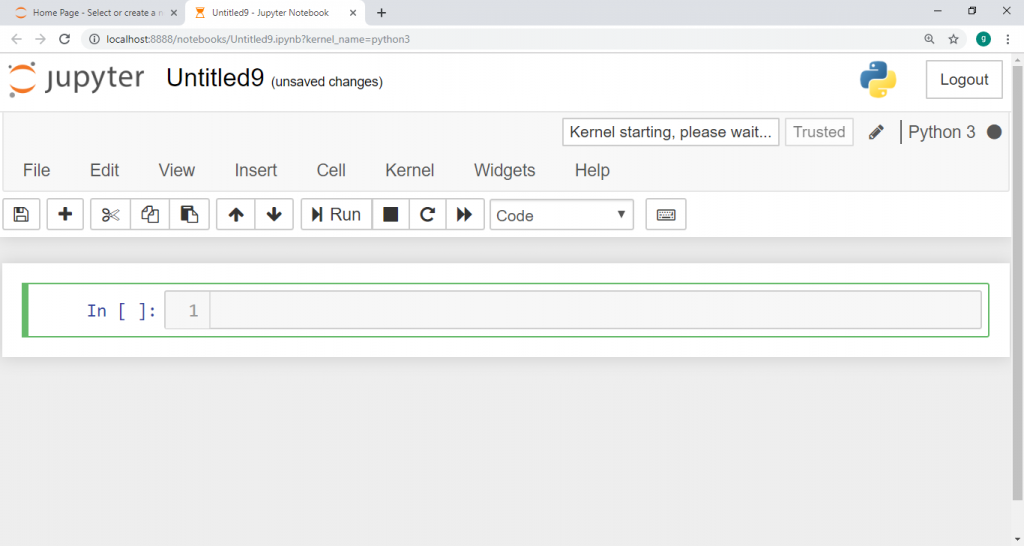
User Interface of Jupyter Notebook
When you start a Jupyter Notebook and create a new notebook, the Notebook will display many interfaces.
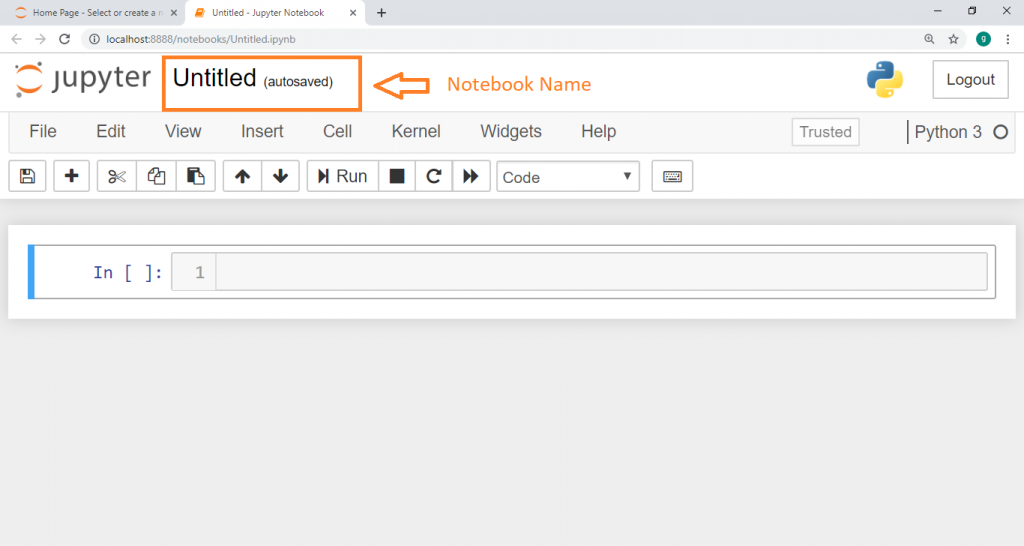
Notebook Name: At the top of the page, Notebook's name is displayed just beside the logo of Jupyter.
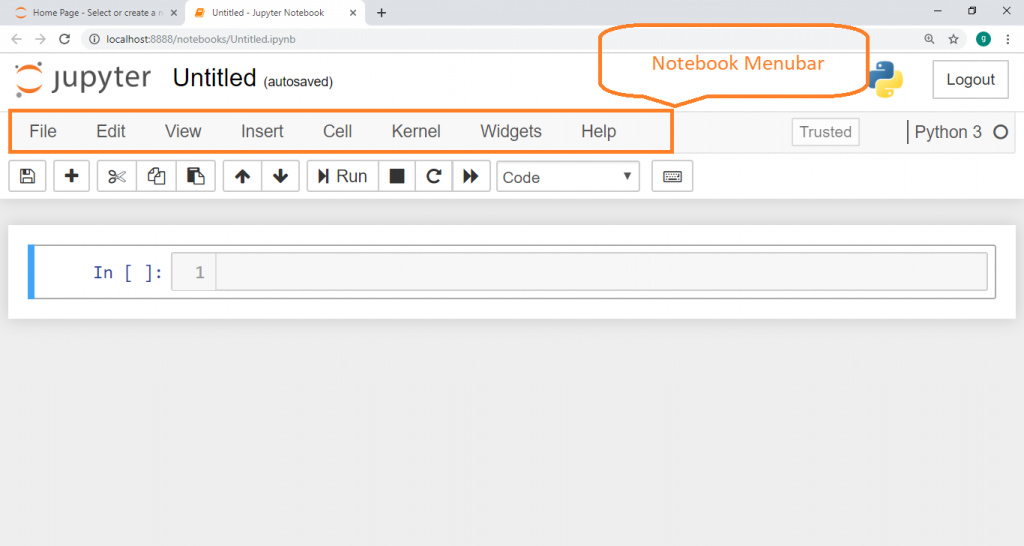
Menu Bar: The menu bar is displayed just below the header. The menu bar shows many options which are used to execute the Notebook function.
- File Menu: File menu is used to create a new notebook. It also used to open an existing file, save, rename, or download a notebook. In this menu, it provides a Save and Checkpoint option. It permits you to generate checkpoints, and if you need them, then you can rollback.
- Edit Menu: Edit menu provides many options to perform cut, copy and paste cells, delete the selected cell, split and merge cells, move cells up and down, find and replace within a Notebook.
- View Menu: View menu is used to toggle the header and toolbar. It also used to toggle line numbers and cell toolbar.
- Insert Menu: Insert menu is used to insert the cell above or below in the Notebook.
- Cell Menu: Cell menu permits you to run one cell, a group of cells, or all the cells. Here you can also change a cell's type.
- Kernel Menu: With the help of the Kernel menu, you can start, shutdown, reconnect, and interrupt the kernel. It can also start a new kernel.
- Widgets Menu: With the help of this menu, you can save and clear widget state. You can also use download or embed widget state option in the widget menu.
- Help Menu: Help menu provides Notebook's keyboard shortcuts, user interface tour, and you can also edit the shortcuts.
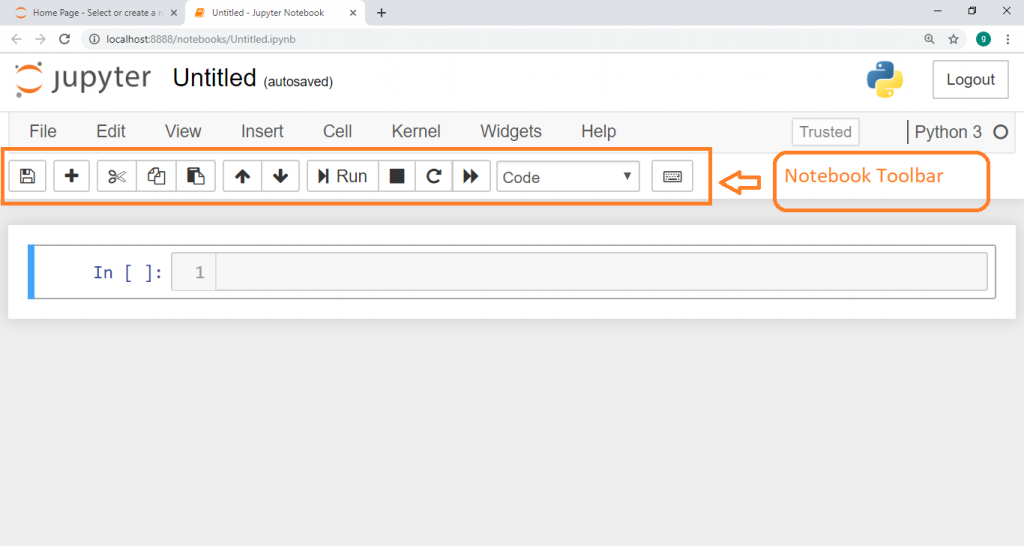
Notebook Toolbar: The toolbar gives a fast way for performing the most-used actions inside the Notebook.
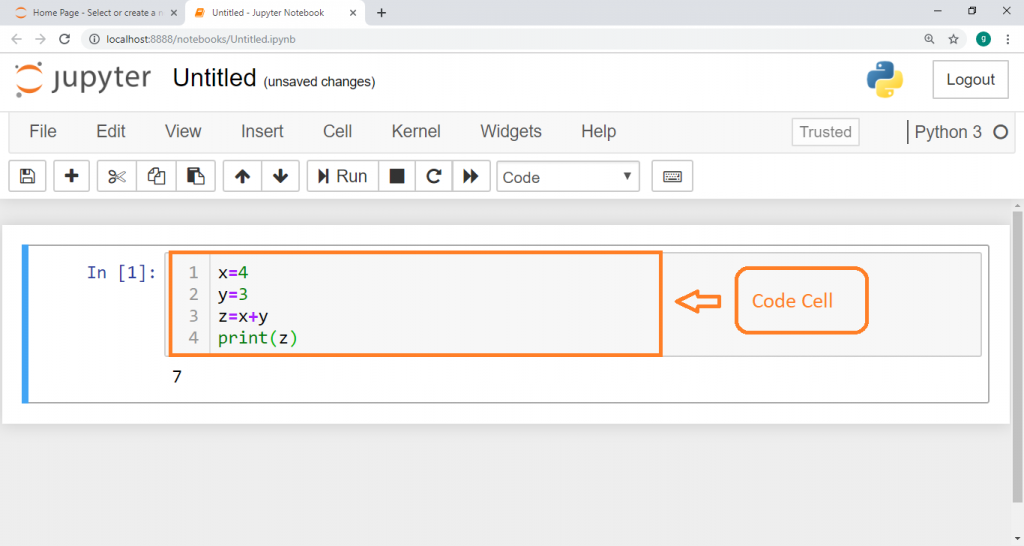
Code cell: A code cell permits you to write the code inside the cell, and shows the output at below of code.
Rename Notebook
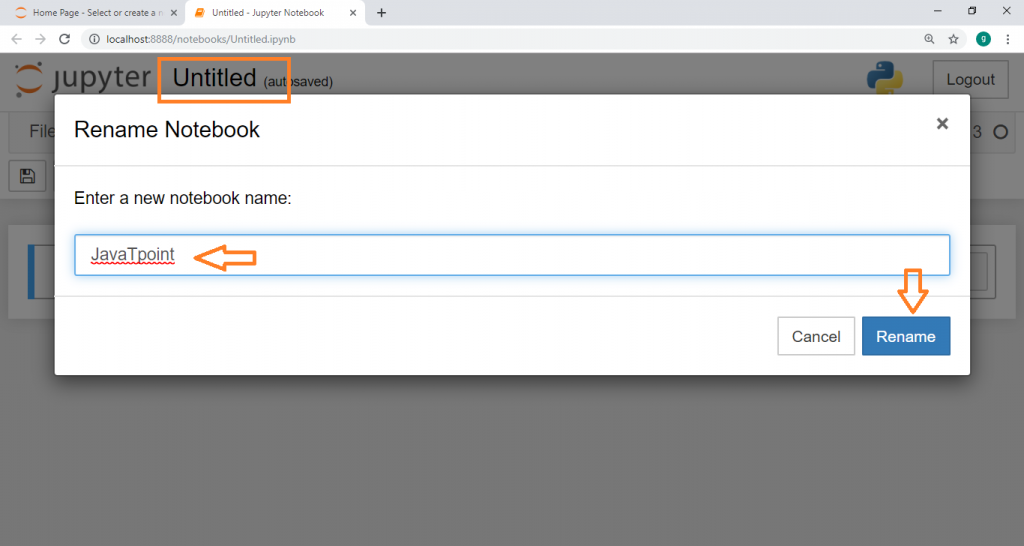
You can apply this same process to rename any existing Jupyter notebook.
At the top of the new Jupyter Notebook, you will view that the file is named Untitled. Double click on the Untitled to change a name, then a new pop-up will be opened asking to rename the file. Enter a new notebook name that you need to add, and then click on the Rename button.
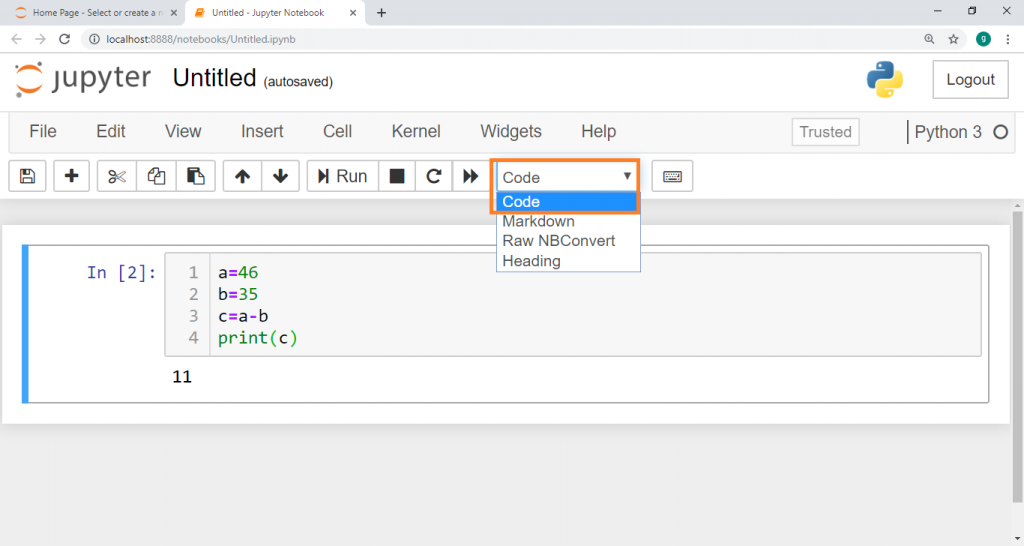
How to write and run a program in Jupyter Notebook
After creating a Notebook, click on the first cell of the Notebook and write the code in the cell. You can run it by using Ctrl + Enter command, or you can run directly by click on the run button. After using the run command, the output shows below the code cell.
The following screenshot shows how to run a program in Jupyter Notebook.

Keyword shortcuts in Jupyter Notebook
Keyword shortcuts are used to perform the various operations quickly.
Jupyter Notebook has two different keyword input mode:
- Command Mode
- End Mode
Command Mode ( Press Esc to enable ):
- Enter: Enter edit mode
- Ctrl + Enter: Run selected cells
- Alt + Enter: Run cell,insert below
- Shift + Enter: Run cell ,Select below
- F: Find and replace
- Ctrl + Shift + P: open the command and palette
- Shift + L: Toggles line numbers in all cells, and continue the setting
- Shift + Space: scroll Notebook up
- Ctrl + S: Save and Checkpoint
- S: Save and Checkpoint
- Shift + K: extend selected cells above
- Shift + Up: extend selected cells above
- Shift + Down: extend selected cells below
- Shift + J: extend selected cells below
- Shift + M: merge selected cells, or current cell with cell below if only one cell picked
- Shift + O: toggle output scrolling of elected cells
- Shift + Space: scroll Notebook up
- Space: scroll Notebook down
- V: paste cell below
- L: toggle line numbers
- O: toggle output of selected cells
- Esc: Close the pager
- I,I: interrupt kernel
- 0,0: restart the kernel
- Z: undo cell deletion
- H: show keyboard shortcuts
- D,D: delete selected cell
- M: to Markdown
- B: insert cell below
- C: copy cell
- A: insert cell above
- X: cut cell
- C: copy cell
- J: select cell below
- K: select cell above
- Y: to code
- R: to raw
- Up: select cell above
- Down: select cell below
- 1: to heading 1
- 2: to heading 2
- 3: to heading 3
- 4: to heading 4
- 5: to heading 5
- 6: to heading 6
End Mode ( Press Enter to enable ):
- Tab: Code completion or indent
- Shift + Tab: tooltip
- Ctrl + Home: go to cell start
- Ctrl + Up: go to cell start
- Ctrl + ]: indent
- Ctrl + [: indent
- Ctrl + A: select all
- Ctrl + Down: go to cell end
- Ctrl + Left: go one word left
- Ctrl + Z: undo
- Ctrl + Right: go one word right
- Ctrl + End: go to cell end
- Ctrl + D: delete whole line
- Ctrl + Shift + P: open the command palette
- Ctrl + U: undo selection
- Insert: toggle overwrite flag
- Ctrl + M: enter command mode
- Ctrl + /: comment
- Esc: enter command mode
- Ctrl + Delete: delete word after
- Ctrl + Shift + F: open the command palette
- Ctrl + Y: redo
- Ctrl + Backspace: delete word before
- Shift + Enter: run cell, select below
- Ctrl + Shift + minus: split the cell at cursor
- Alt + Enter: run cell and insert below
- Ctrl + S: save and checkpoint
- Up: move the cursor up
- Down: move the cursor up
- Ctrl + Enter: run selected cells
Cells in Jupyter Notebook
Jupyter Notebook contains four types of cells.
- Code Cell
- Markdown Cell
- Raw NBConvert Cells
- Heading Cell
Code Cell: The Contents in the code cells are used as comments in the programming language of the modern kernel. Jupyter's kernel is in Python. Then, we can write Python comments and code in a code cell. When you execute the comments and code, its output is displayed below the code. The output may be shown in the way of text, matplotlib plots, image, or HTML tables.
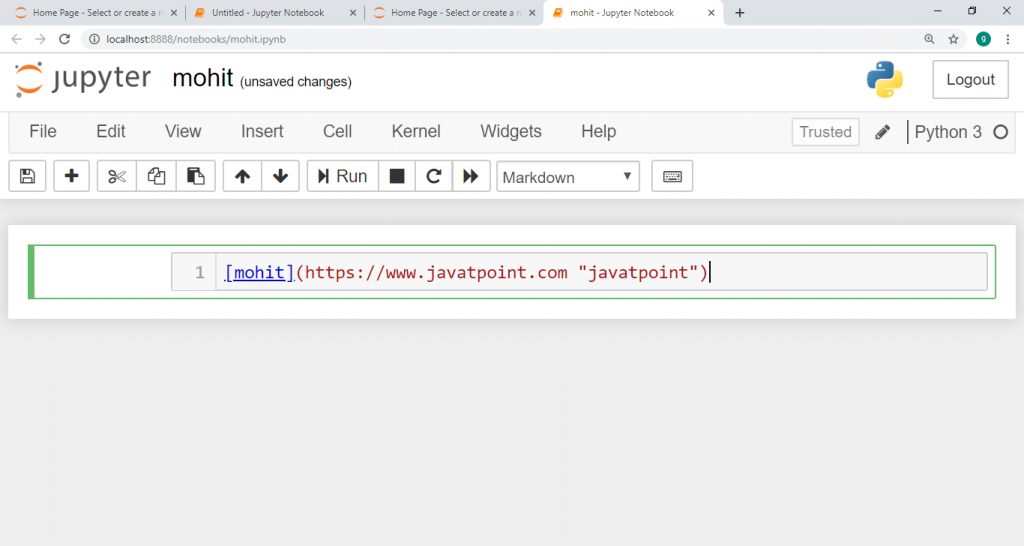
Markdown Cell: Markdown cells give text formatting using Markdown language and make the Notebook very attractive and useful. It contains all types of formatting features like as making text bold and italic, tabular contents, headers, images, Hyperlinks, displaying ordered or unordered list, Bullet lists, etc. Markdown cells are provided with documentation to the Notebook.
1. Hyperlinks: Markdown cell permits you to attach the http or https hyperlinks. To attach the Hyperlink to a text place name in the square brackets [] and write the link inside the parentheses ().
The following screenshot shows how to insert the Hyperlink in the jupyter Notebook.
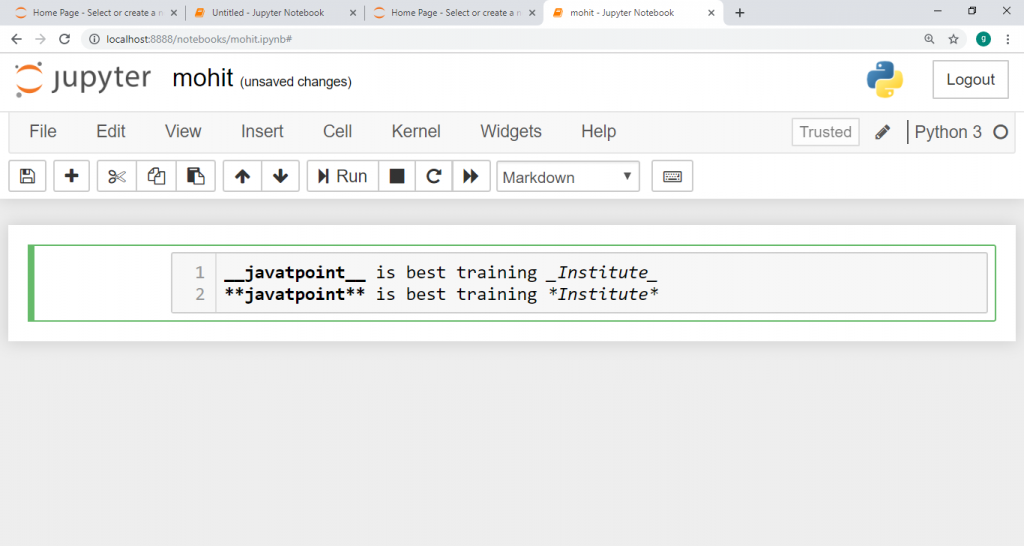
2. Bold and Italic: To make the bold text, write text in between double underscores ( __ ) or two asterisks ( ** ). To make the text italics, write text in the single underscore ( _ ) or one asterisk ( * ).
The given screenshot shows how to make a text bold or italic.
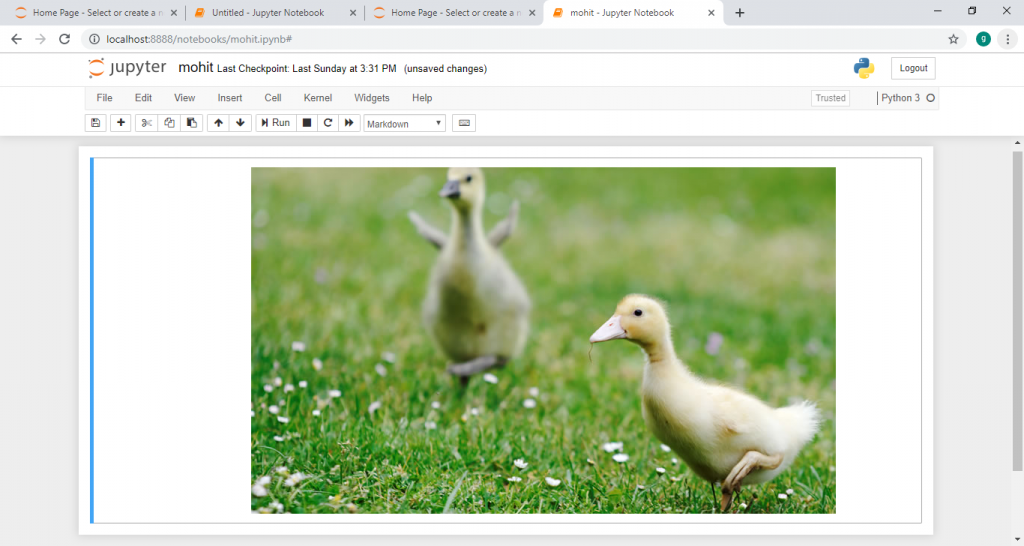
3. Images: To show the images in Markdown cell, firstly, you need to upload the image in the directory. You go to Jupyter Dashboard and thenselect the upload option to upload the image. When the image is uploaded, then you can see the image in the Jupyter dashboard.
The following screenshot shows the syntax for insertion of the image:

Output: The output shows below the Markdown cell.
4. Table: A table can be created in the Markdown cell by using the pipe symbol (|) and dash symbol (-). Pipe symbol (|) is used for making the columns, and the dash symbol (-) is used for making the rows.
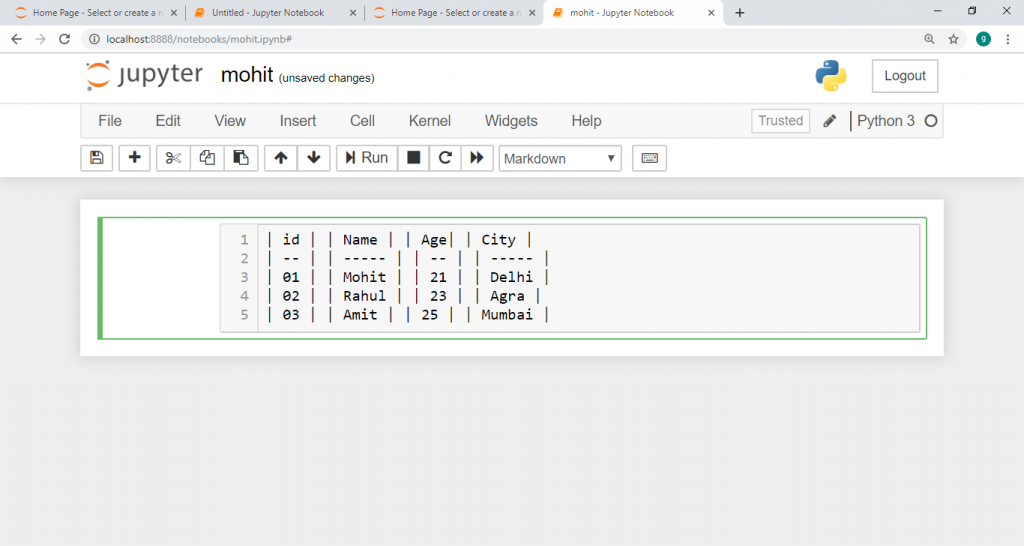
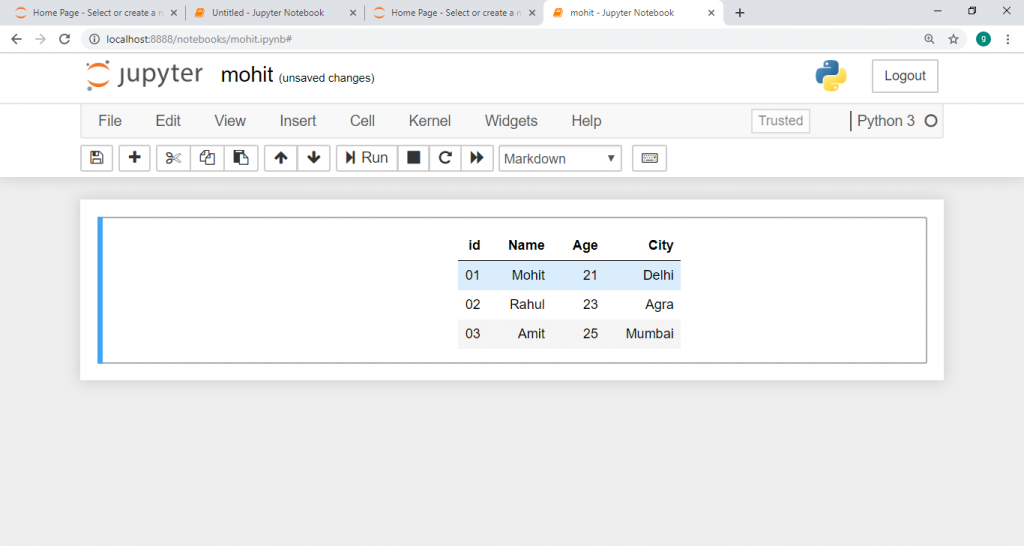
A table is created, i.e., shown below:
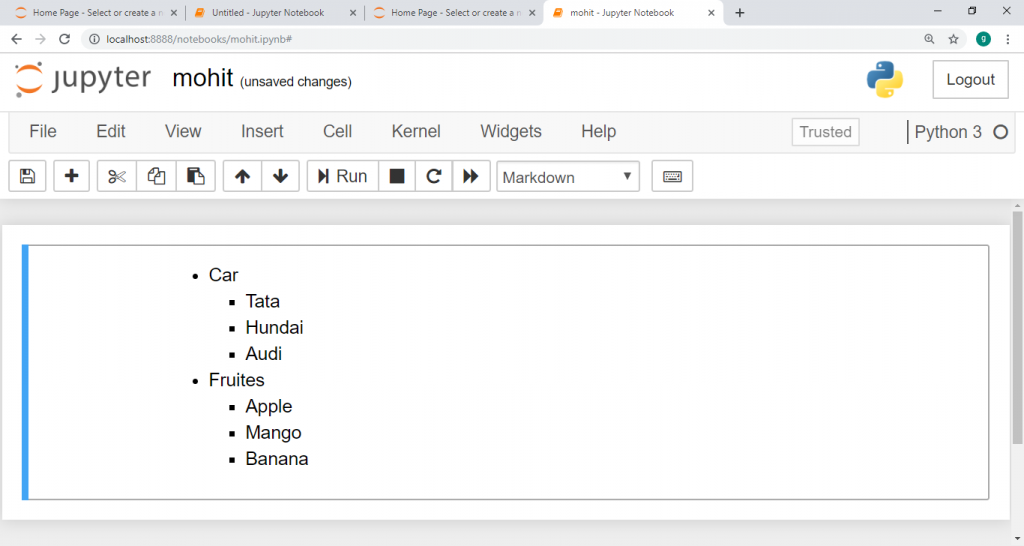
5. Bullet lists: In Jupyter Notebook, if we start the list with a dash (-) symbol, it will display a solid circle, and if we start the list with an asterisk (*) symbol, then it will display a solid square symbol.
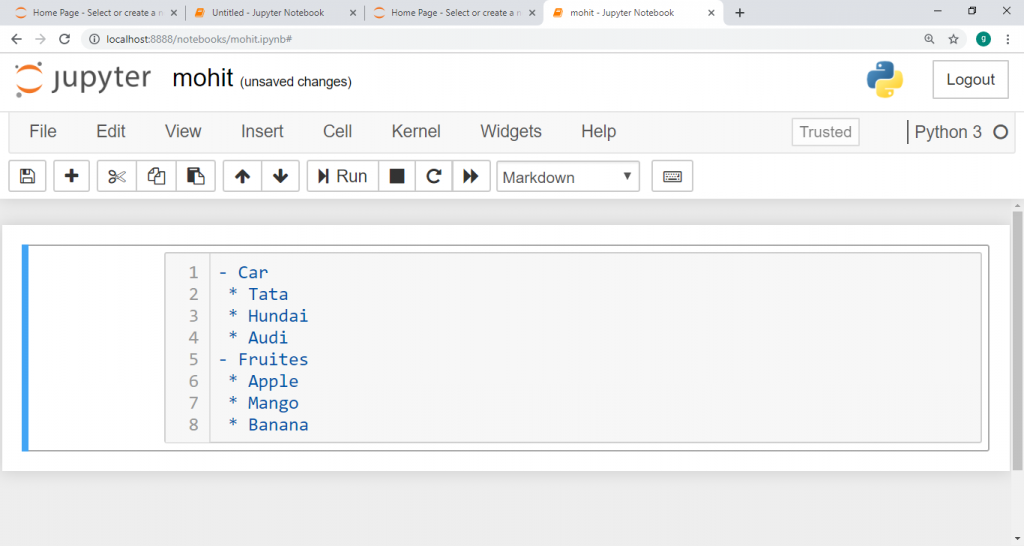
The following screenshot shows the bullet list in the Jupyter Notebook.
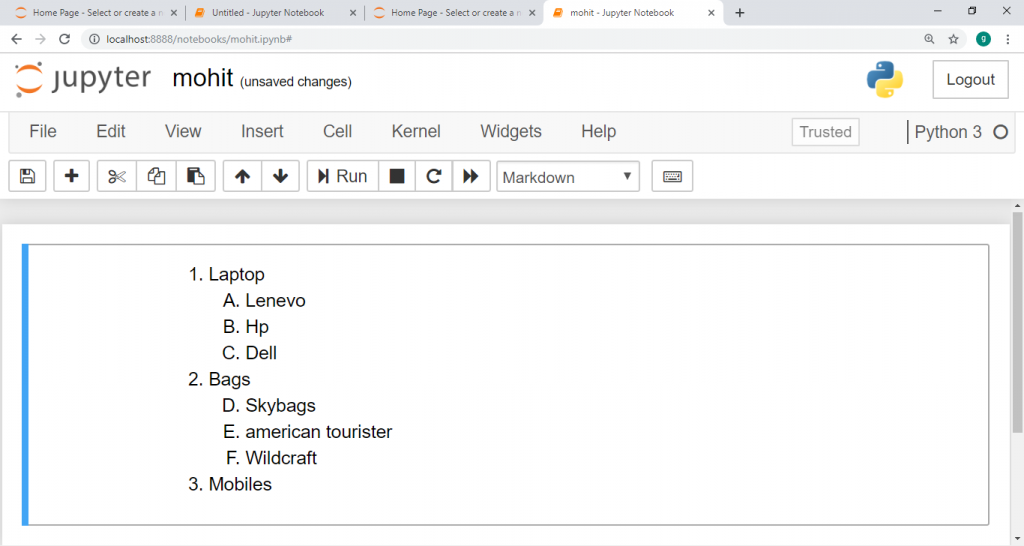
6. Ordered lists: The first item in the ordered directory should be numbered as 1. To display an organized list, press the tab key, and start the first item in all sublist with 1.
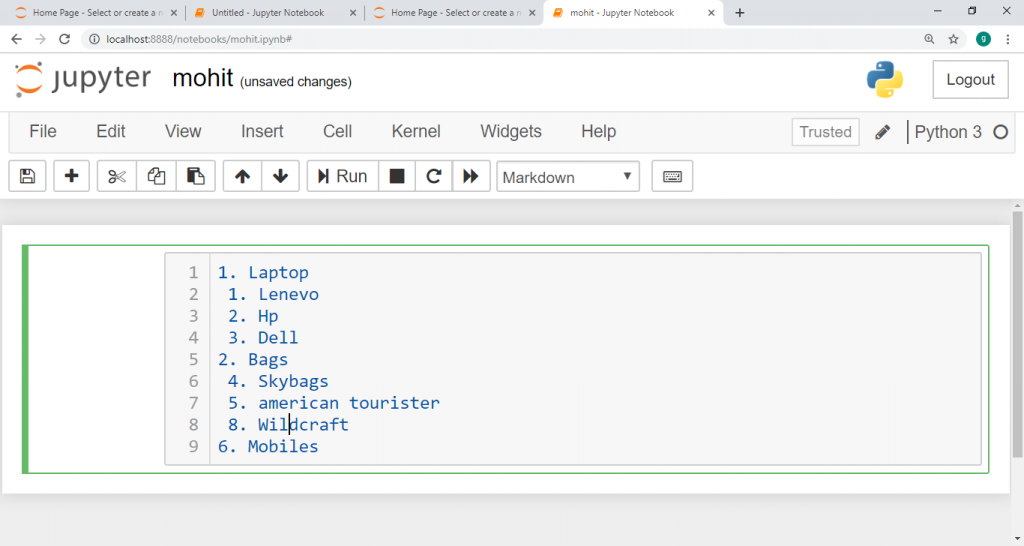
The given screenshot shows the output of the markdown list.
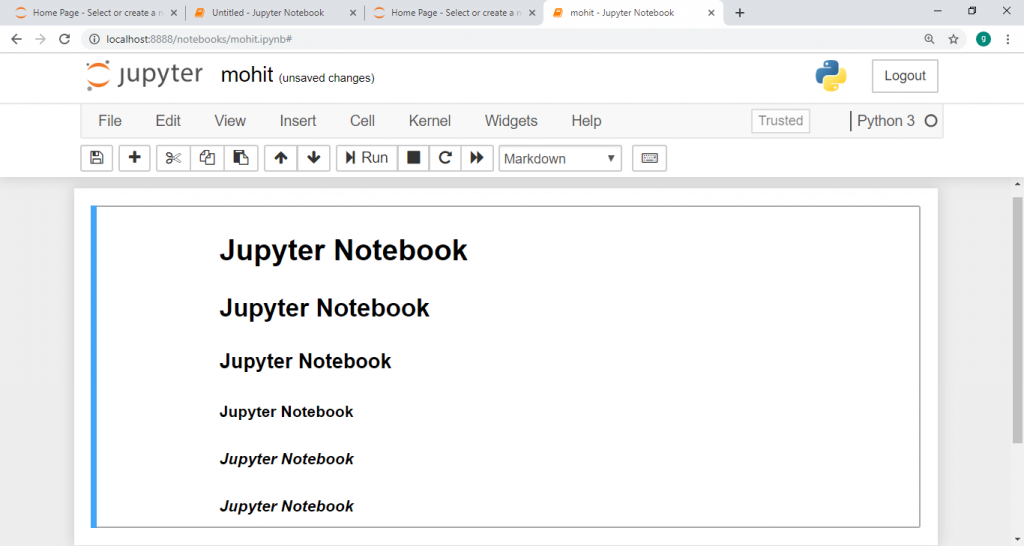
7. Header: Header displays text in 6 sizes. It is just similar to the HTML header. To create a header in the markdown cell, then we start it with a # symbol. The size of the header depends on the number of # symbols. Single # symbolshows the large size of the header, and when we increase the number of # symbols, it decreases the size of the header.
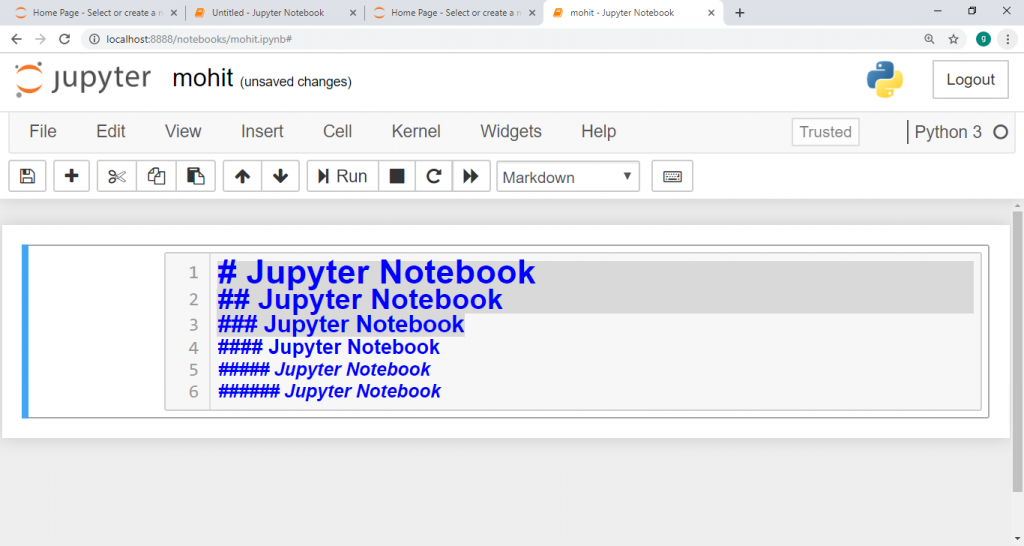
The given screenshot shows the output of the above markdown cell.
Raw NBConvert Cells: Raw cells are not evaluated by notebook kernel. When passed through nbconvert, they will provide a place where you can write output directly. A raw cell is described as a content that should be included unmodified in nbconvert output.
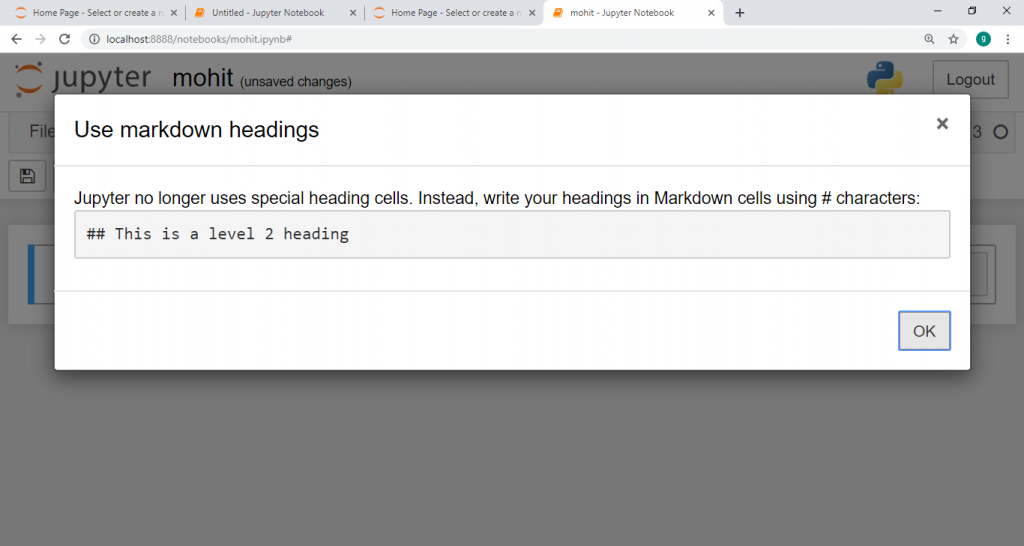
Heading Cell: Jupyter Notebook does not support the Heading cell. When you click on Heading from the drop-down menu, then a new pop-up window will open which displays that the heading cell does not work in Jupyter Notebook, which is shown in the following screenshot.
Components of Jupyter Notebook
Jupyter Notebook has three types of main components:
- The Notebook web application
- Kernels
- Notebook documents
The Notebook web application: This is an interactive web-based application. It is also used to write and run code interactively.
The notebook web application is used for:
- Edit code in your browser with automatic syntax highlighting, tab completion, and indentation.
- See the results of computations with strong media representations, such as HTML, LaTeX, png, pdf, etc.
- Run your browser code with the results of the computations attached to the code that created them.
- Include mathematical equations using the LaTeX notation in Markdown, which are performed in the MathJax browser.
- Create and use interactive JavaScript widgets.
Kernels: Separate processes began with a notebook web application that runs user code in a given language and returns output to a notebook web application. The kernel also handles things like collaborative widget computation, tab completion, and introspection.
Using Jupyter's kernel and communication architecture, the Notebook allows the code to run in many programming languages. For every notebook file that the user opens, the web application starts the kernel that runs the program for that notebook. Every kernel is capable of running code in a single programming language, and kernels are available in the following languages:
- Julia
- R
- Scala
- Go
- node.js
- Ruby
- Python
- Haskell
Notebook documents: Notebook documents provide inputs and outputs for an interactive session, as well as the descriptive text that accompanies the code but is not intended for execution. The efficient output of running code, including HTML, images, video, and graphs, is stored in a notebook, making it a complete, self-contained computing record. If you run a notebook web application on your computer, the notebook documents are just files on your local file system with the extension.ipynb. It helps you to use common workflows to organize your notebooks into folders and share them with others.
Benefits of Jupyter Notebook
1. Easy to convert: Jupyter Notebook comes with a special tool, nbconvert, that converts Notebook to other formats, such as HTML and PDF. Another online tool, nbviewer, allows us to represent publicly available notebook directly in the browser.
2. Live interactions with code: Jupyter Notebook code isn't inactive; it can edit and re-run incrementally in real-time, with feedback given directly in the browser. Notebooks can also embed user controls that can use as data sources for code.
3. HTML and Text: Plain text, or text explained in the Markdown syntax to create HTML, can be inserted into the document at any point. CSS styling can also be entered inline or added to the template used to create the Notebook.
4. Language Independent: The structure of Jupyter is language independent. The decoupling among the user and kernel makes it possible to write a kernel in any language.
5. All in one place: It is a web-based interactive environment that combines code, videos, pictures, strong text, maps, graphical, interactive figures, widgets, and graphical user interfaces in a single document.
6. Easy to Share: In the Jupyter Notebook, the Notebooks are saved as structured text files, which makes them easy to share.
Limitations of Jupyter Notebook
There are the following limitations of Jupyter Notebook:
1. Less Security
2. Jupyter is terrible for running long asynchronous tasks
3. The non-linear workflow of jupyter
4. Very hard to test
5. There is no IDE integration, no code-style correction
6. It is most challenging to enable proper code versioning
IPyWidgets of Jupyter Notebook
IPyWidgets gives many simple user interfaces for searching code and data interactively. It is a Python library of HTML interactive widgets for the Jupyter Notebook. Each user interface function in the library can respond to events and invoke specified event handler function. IPyWidgets are by default installed in Anaconda, and you can also install it by conda.
There are some common IPyWidgets are shown below:
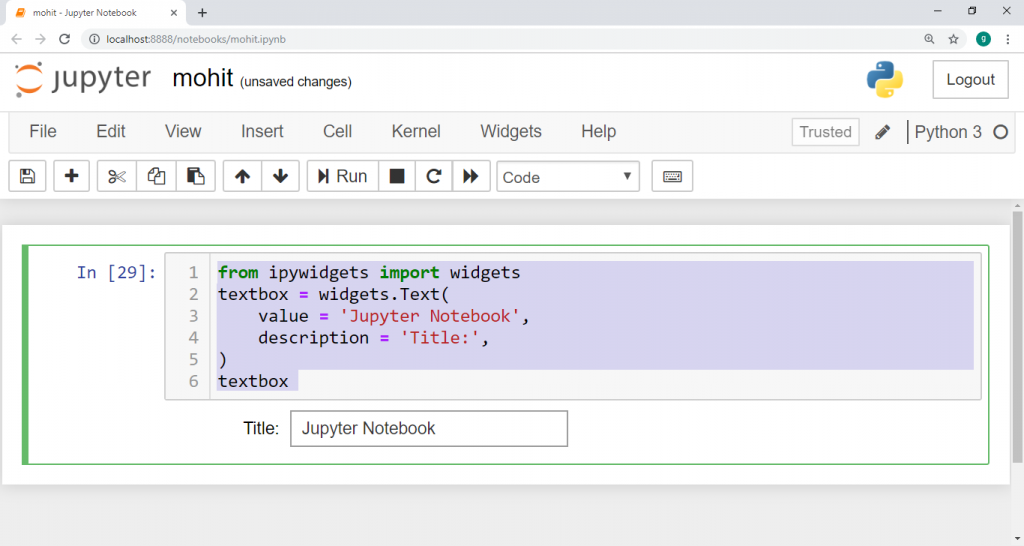
- Text Widget: Widget Text function shows widgets in the Notebook. It is the same as the text box form element in HTML.
from ipywidgets import widgets
textbox = widgets.Text(
    value = 'Jupyter Notebook',
    description = 'Title:',
)
textbox
Output:
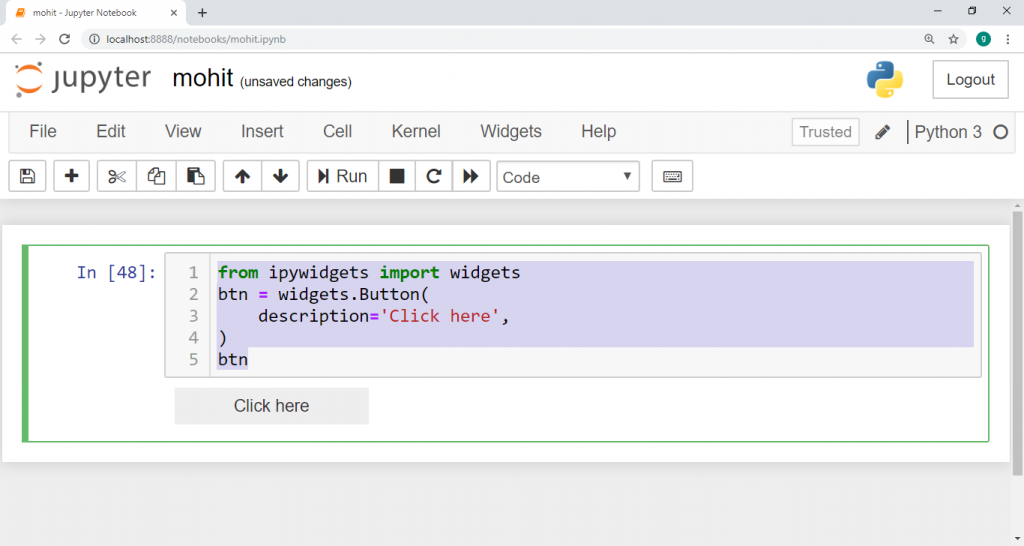
2. Button Widget: It is similar to the HTML button. If you want to create a button, then you can create a button from the code given below.
from ipywidgets import widgets
btn = widgets.Button(
    description='Click here',
)
btn
Output:
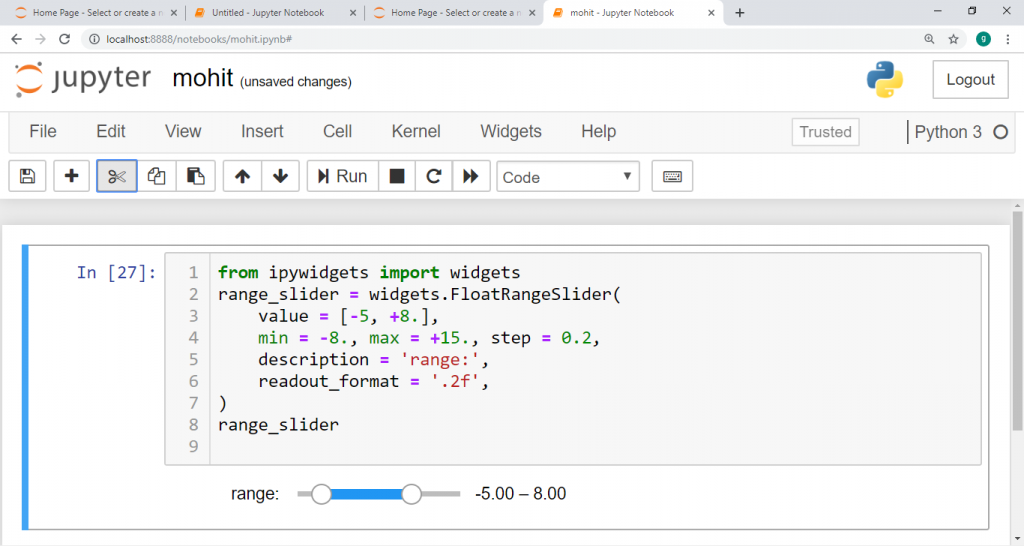
3. Slider: Slider is used to control the range between the float and intRangeSlider. It also shows the incrementing integer values.
from ipywidgets import widgets
range_slider = widgets.FloatRangeSlider(
    value = [-5, +8.],
    min = -8., max = +15., step = 0.2,
    description = 'range:',
    readout_format = '.2f',
)
range_slider
Output:
4. Label Widget: It is used to show non-editable text in the Notebook.
5. Display: Display function is used to display the widget object in Notebook's input cell.
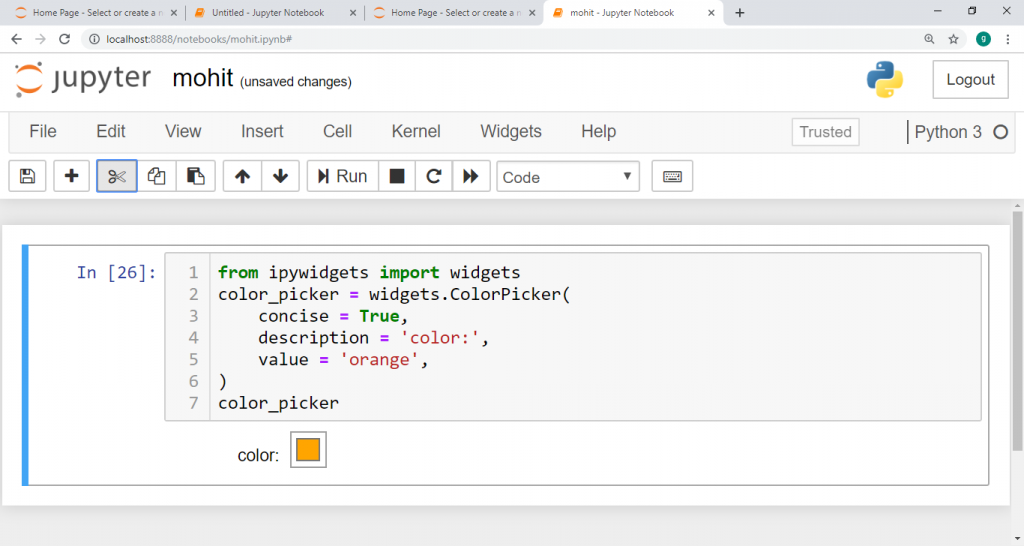
6. Color picker: Color picker is used to select the color as per user requirements. This code shows how to pick a color in Jupyter Notebook.
from ipywidgets import widgets
color_picker = widgets.ColorPicker(
    concise = True,
    description = 'color:',
    value = 'orange',
)
color_picker
Output:
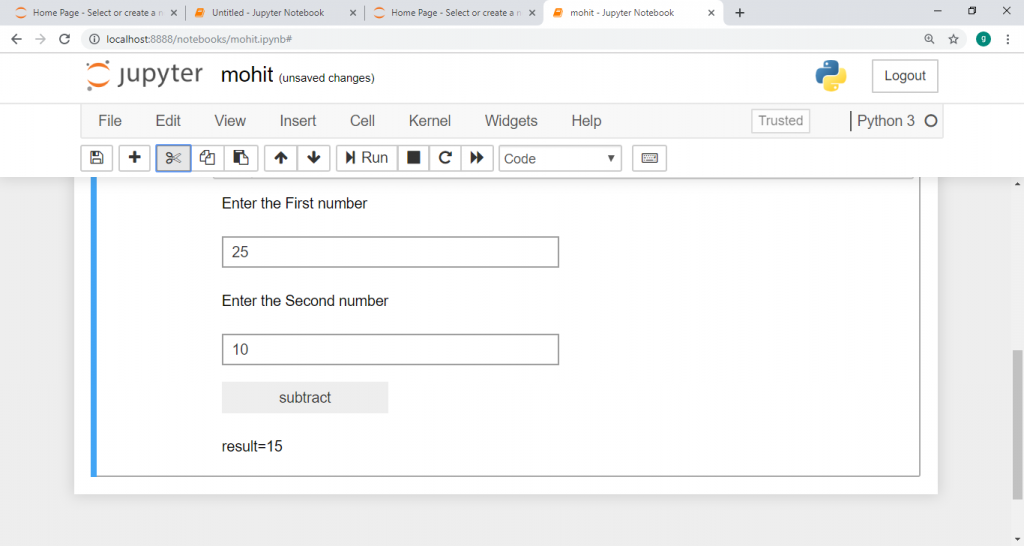
7. Interact: Interact function automatically provides a widget depending upon the type of data argument given to it. The first argument of interact function is the event handler, and the second is a value passed to the event handler itself.
The following example displays three label widgets, two text widgets, and a button with a subtract option. When you click on subtract option, then the output displays below the code.
Example: A program to subtract two numbers.
from ipywidgets import widgets
lb1 = widgets.Label('Enter the First number')
display(lb1)
text1 = widgets.Text()
display(text1)
lb2 = widgets.Label('Enter the Second number')
display(lb2)
text2 = widgets.Text()
display(text2)
btn = widgets.Button(description = "subtract")
display(btn)
lb3 = widgets.Label()
display(lb3)
def subtract(x):
    x = int(text1.value)
    y = int(text2.value)
    lb3.value = 'result='+str(x-y)
btn.on_click(subtract)
Output: