Kubernetes Tutorial
The topics covered in this tutorial are given below:
- Challenges without Container Orchestration
- Need for Kubernetes
- What exactly is & what not?
- How do Kubernetes works?
- Use-case: Kubernetes @ Pokemon Go
- Architecture of Kubernetes
- Hands-on: Deployment with Kubernetes
- Basic commands of Minikube for the beginners
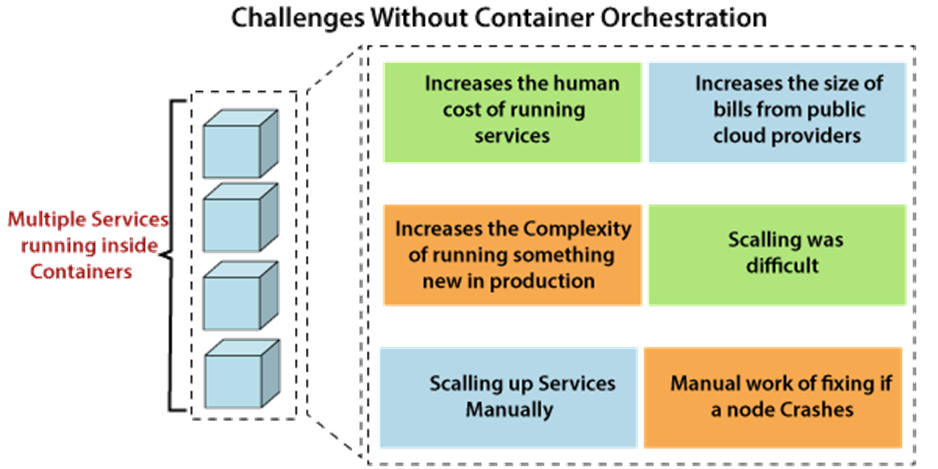
Challenges without Container Orchestration
Kubernetes terminates the manual approach for the deployment of a containerized application. Before the existence of containers in the real world, the programmers and the testers used to fight because of the work at the developer side did not pay off at the tester side or vice versa. The containerization came into existence to avoid situations, for the developers and the tester to be on the same page. It is always a big problem to handle large no of the containers, as some issues used to occur on either side of the developer or the tester. Also, while running the containers at the programmer side may lead to some severe problems which might not happen at the tester's side. These issues pressurized in the introduction of Container Orchestration.
It can be seen from the image given below; that so many services are running inside the container and for that scaling would be needed. It seems to be tougher for some industries as it will not only increase the service cost, but the complexity will also be hiked up. So to avoid such issues, implementation of container orchestration came into existence. It groups multiple containers in such a way that all other primary machines are installed, containers are healthy and is evenly allocated in a cluster.
Need for Kubernetes
A container packages the application and isolates it from everything mainly from the Host, which makes the container faster, reliable, efficient, lightweight, and scalable. Containers are expandable, but it also comes with a problem and so there is a need for Kubernetes.
Even though the containers are scalable, but they cannot be scaled easily. So, for that, let's look at the other way. Let's suppose there is one container and you probably want to scale it to two or three containers, which might be easy to scale but it will take a little bit of manual effort to accomplish it. In a real-world scenario, if you want to scale about fifty containers or more then in that case after you scale it, you need to manage the containers to make sure that they all are actively working. Because if they are active and are not talking to each other, then there is no point to scale them. The servers would not be able to handle the roads if they are not talking to each other. So, they need to be managed when they are scaled up.
What are the problems that occur while scaling up??
- Containers may perhaps not correspond to each other, then the application is not hosted and scaling up is a waste.
- Containers require to be evolving and managing correctly because you cannot have the containers deployed at random places, instead of being plugged in at one particular place.
- Auto-Scaling not possible, which is one of the most prominent benefits with the Kubernetes as it keeps analyzing the traffic and the load is used by the containers.
- Traffic distribution is still a challenge.
Containerization is good and much better than the Virtual Machines, as it was sold on the basis for scaling up. As VM's cannot be scaled up quickly, so the concepts of the containers came into the account and were used by then. But in today's world, our demand is evermore that even the regular containers are not enough. So scaling is something much more than this, so we need something else, and this is what Kubernetes is all about.
Kubernetes is all about an open-source management tool that helps in an automated deployment of the container, container scaling, and de-scaling, and container load balancing. It works brilliantly with all the cloud vendors (public as well hybrid), and also with the premises. It is a Google-developed product, or we can say a brainchild of Google and the head start Kubernetes is going to get the Humongous which makes it one of the best container in the market by so far. The whole product is written on the Go language and has contributed this whole project to the CNCF, which is nothing but a Cloud Native Computing Foundation.
So in short Kubernetes can group like a no of containers into one logical unit for managing and deploying an application or a particular service. It can be used for deploying your application and of course, it is going to be the Docker container. Since a lot of Docker containers are going to be used as a part of the production, Kubernetes are also going to be used to manage the Docker containers. So this is what the concept of Kubernetes is all about.
Features of Kubernetes
The following features of Kubernetes are enlisted in the image given below;

- Automatic Binpacking: Kubernetes collects and schedules the applications based on their available requirements and the resources without losing its availability. It ensures the complete usage of the resources and also to save the unused ones.
- Service discovery and Load Balancing: It assigns the IP addresses automatically to the containers, and one DNS is sent to the set of the containers, so there is no need to worry about networking and communication to load balance the traffic within the cluster.
- Storage orchestration: It helps to arrange the storage system as per one's choice. Both local and private clouds (namely AWS or GCP) can be taken, and also hybrid network can be selected for example; NFS, ICSC, etc
- Self-Healing: One of the most exciting features of Kubernetes is that they can selfheal their selves by automatically restarting the containers when they get failed during the execution or kill the ones which do not respond to the user-defined health checks.
- Batch Execution: It helps in managing the batches if the container fails.
- Secret and Configuration Management: Kubernetes helps in using and correcting confidential applications without restoring our identity.
- Horizontal Scaling: With the help of command CLI, the containers can be scaled-up or scaled-down, accordingly.
- Automatic Rollbacks and Rollouts: Kubernetes make sure that no other instance works while one is already running or is in process, as in that case, it rolls out the changes and updates the configuration.
Myths about the Kubernetes
There is a misconception among the people that the Kubernetes is like Docker, which is a containerization platform which is not true.
What exactly is? & what not?
What Kubernetes is not
- Kubernetes is not to be compared with the Docker because Docker is the containerization platform, whereas the Kubernetes it the container management platform.
- Not to be used for containerizing the applications.
- Also, it is not meant for the applications with simpler architectures, i.e., it is used for complex architecture applications so as to un complex them.
What Kubernetes is
- Robust and reliable, as the Kubernetes cluster is very strong, rigid, and is not going to break so easily because the configuration is specified right at any point in time.
- The best solution for scaling up the containers.
- It is just a container orchestration platform and nothing else.
Kubernetes v/s Docker Swarm
| Features | Kubernetes | Docker Swarm |
| Installation & Cluster configuration | Complicated & time consuming. | Easy & fast. |
| GUI | GUI is available. | GUI is not available. |
| Scalability | Scaling is slow as compared to Swarm; but guarantees stronger cluster rate. | Scaling up is faster, but cluster strength is not as robust. |
| Load Balancing | Load balancing requires manual service configuration. | Provides built in load balancing technique. |
| Updates Rollback | Process scheduling to maintain services while updating. | Progressive updates and service health monitoring throughout the update. |
| Data Volumes | Only shared by the containers in same Pod (a logical grouping of containers). | Can be shared by other containers. |
| Logging & Monitoring | Inbuilt logging & monitoring tools. | Only 3rd party logging & monitoring tools. |
Use-case: Kubernetes @ Pokemon Go
Pokemon Go was powered with the help of Kubernetes. It is a very famous game of 2017, and the reason behind this was the Kubernetes. It was raised by Niantic for Android and IOS devices. It had 50millions downloads and more than 20million daily active users. It was launched in North America, Australia, and New Zealand. It has encouraged users to walk about 5.4 million miles in a year. The backend of this app is written in Java in combination with libGDX and was hosted on Java cloud and Google cloud Bigtable NoSQL database.
The real challenge to almost all the big applications is horizontal scaling. But for Pokémon Go, the major challenge was vertical scaling due to the change in the environment of players in real-time, which has to be reflected all other users. The main challenge taken in account by Kubernetes is to scale the performance and specs for every single user simultaneously. It not only helped in the vertical and horizontal scaling of containers, but it also outperformed in terms of the expectations. The basic expectation for the servers was ready for a maximum of 5X traffic; however, with the help of Kubernetes, it extended up to 50X times.
Architecture of Kubernetes
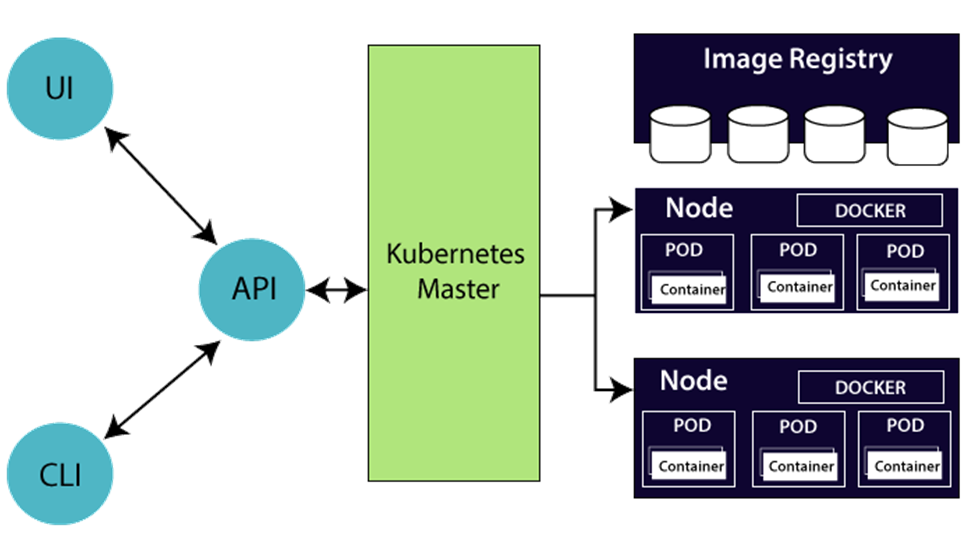
- Master controls the clusters and the nodes inside it.
- Nodes host the containers inside them which reside in separate PODS.
- PODS are a logical collection of containers which interacts with each other for an application.
- Replication Controller is a Master’s resource, and it makes sure that each and every requested POD are running all time.
- Service is an object on the master that provides load balancing across the replicated group of PODS.
Hands-on: Deployment with Kubernetes
To get hands on the usage of the Kubernetes on Windows 10, following are some steps given below:
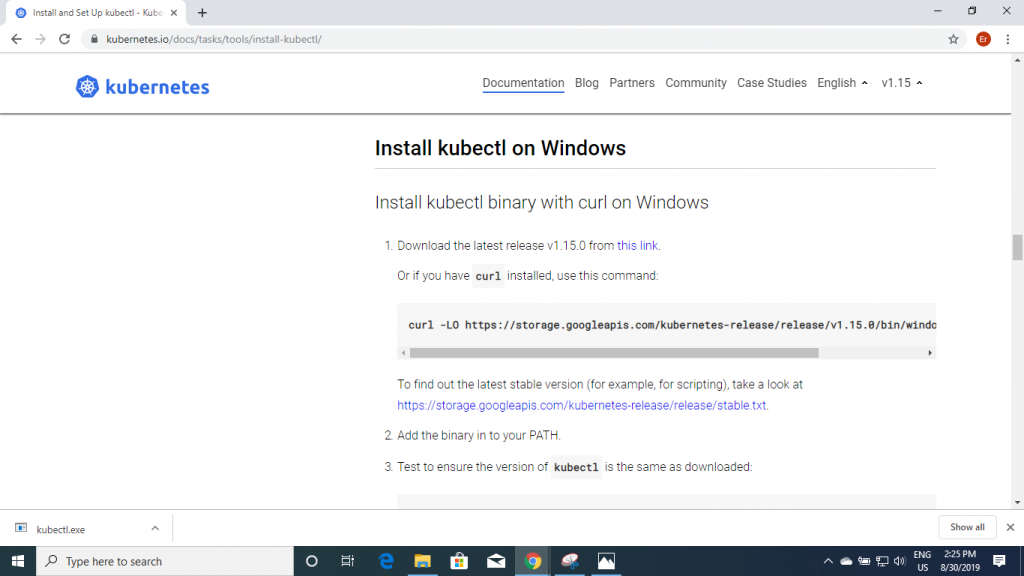
Step 1: Download Kubectl.exe from the link given below: https://kubernetes.io/docs/tasks/tools/install-kubectl/
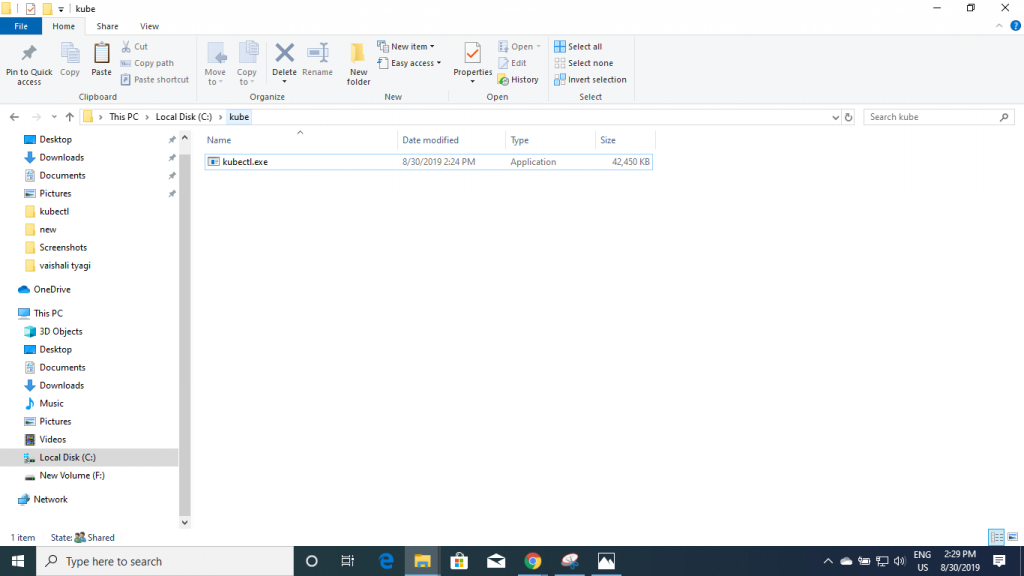
Step 2: Save the kubectl.exe file in the any of the drive.
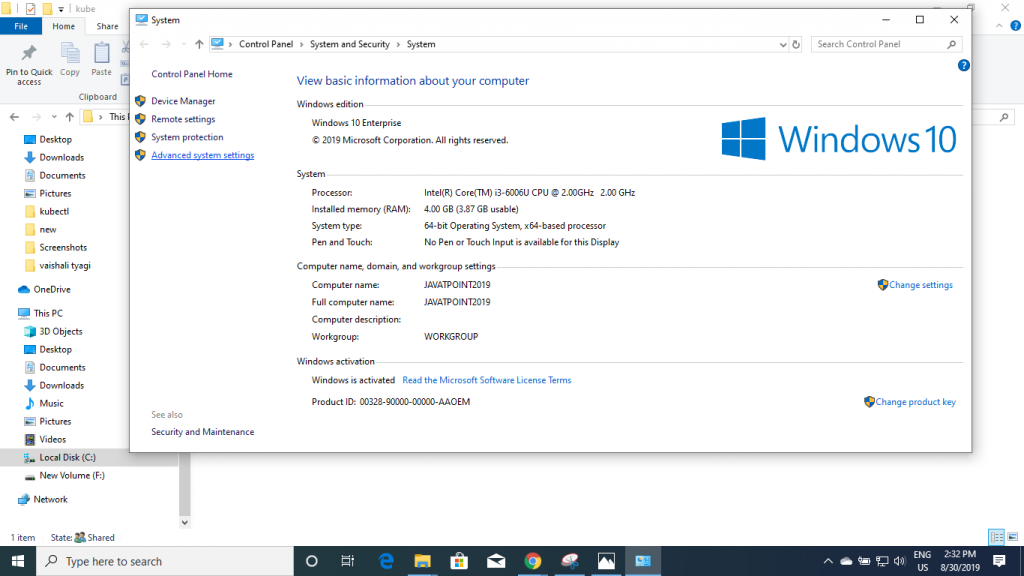
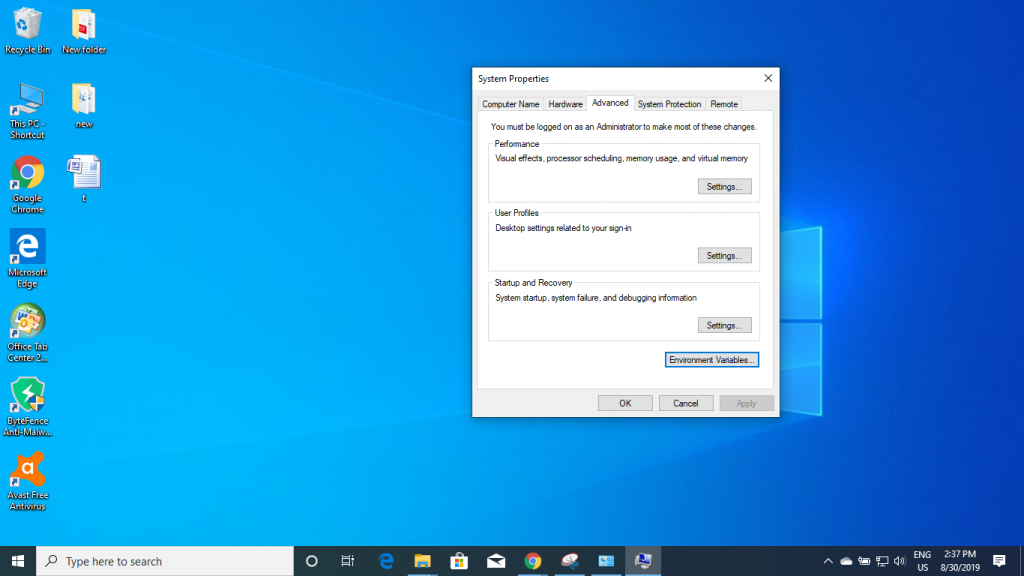
Step 3: Add kubectl.exe folder location in path variable: For that you need to open Control Panel and click on Advanced System Setting.
On clicking Advanced System Settings a System Properties window is displayed, select the Advanced option and then click on Environment Variables.
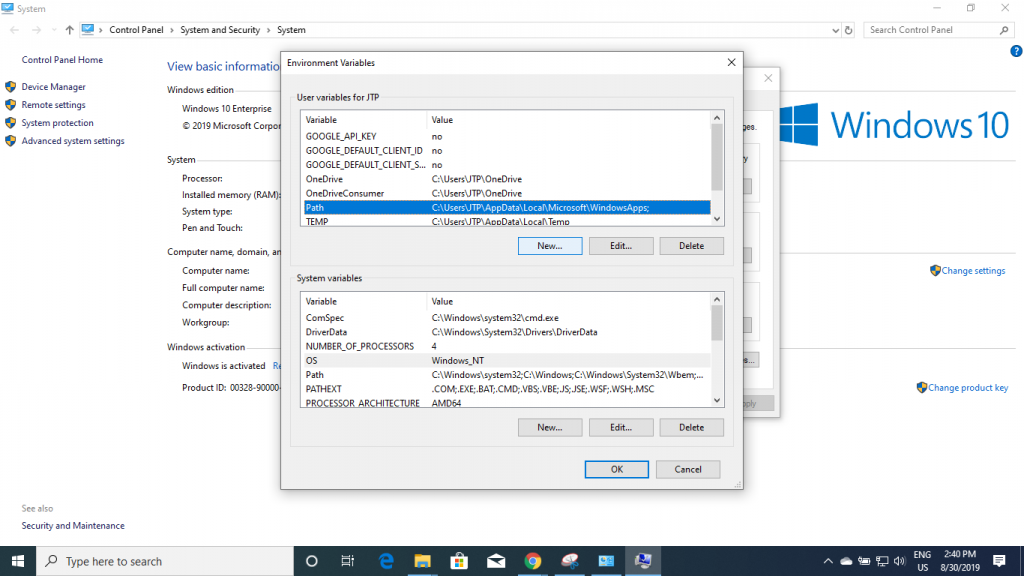
Now click on Path from Environment Variables.
Click on New and add the folder Path to the path variable, where the folder is saved on the path.
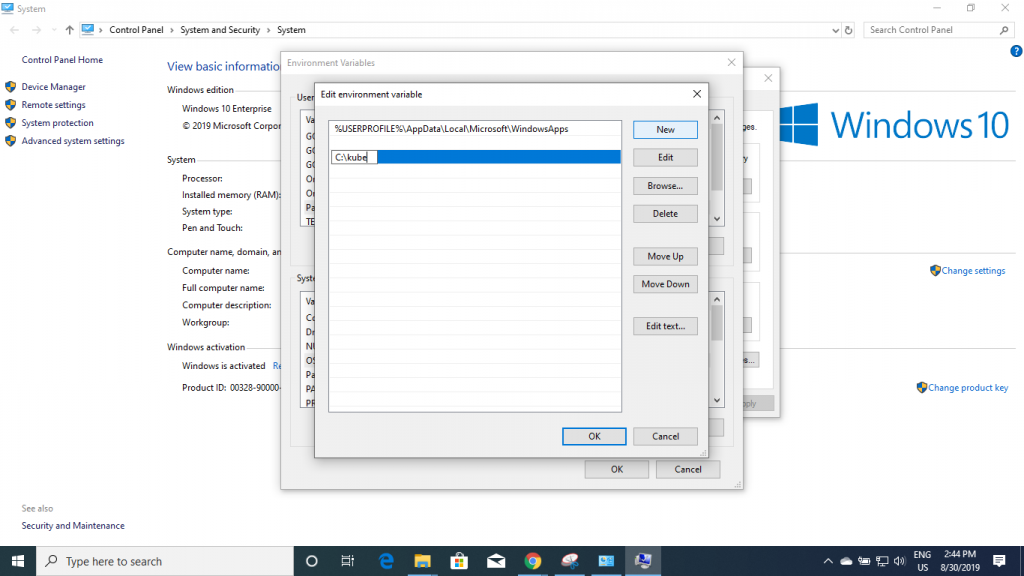
After giving the path click on OK.

Step 4: Open the command prompt and type kubectl.exe; the kubectl.exe supported commands would be displayed.

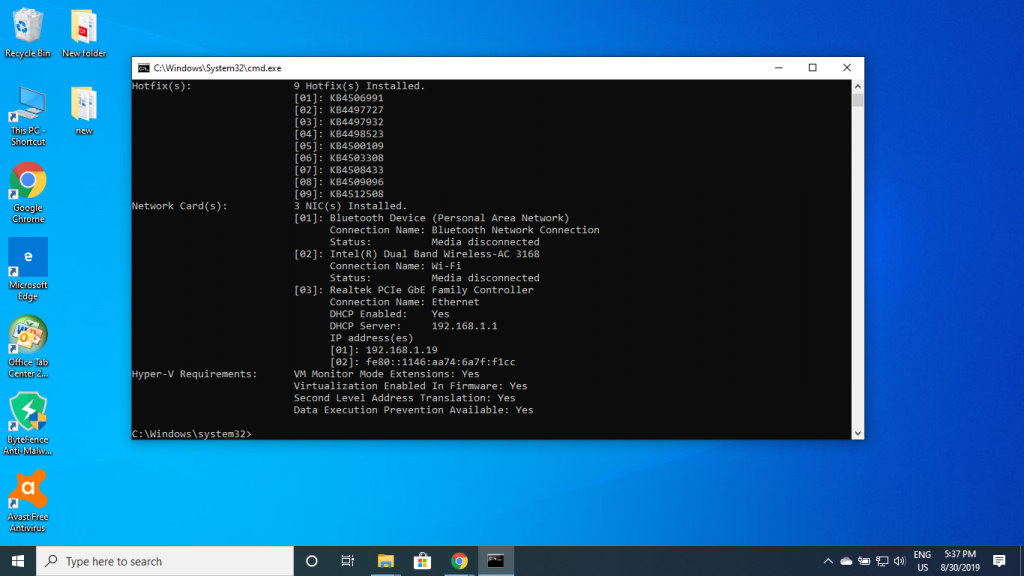
Step 5: To check if virtualization is supported by the window or not, systeminfo command is typed on cmd.
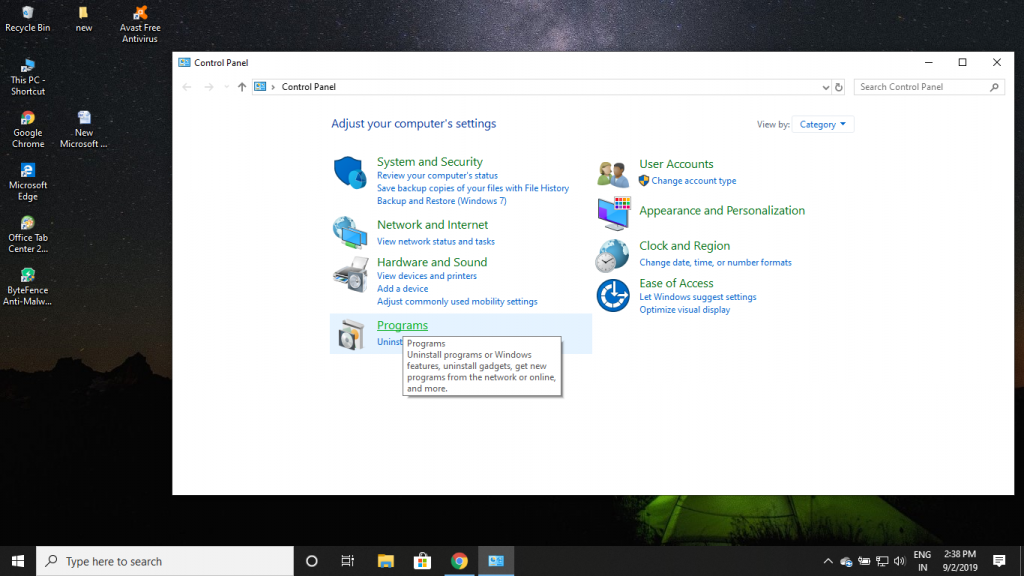
Step 6: Install Hypervisor. Enable Hyper-V so as to create virtual machines on windows 10. Go to Control Panel and click on Programs.
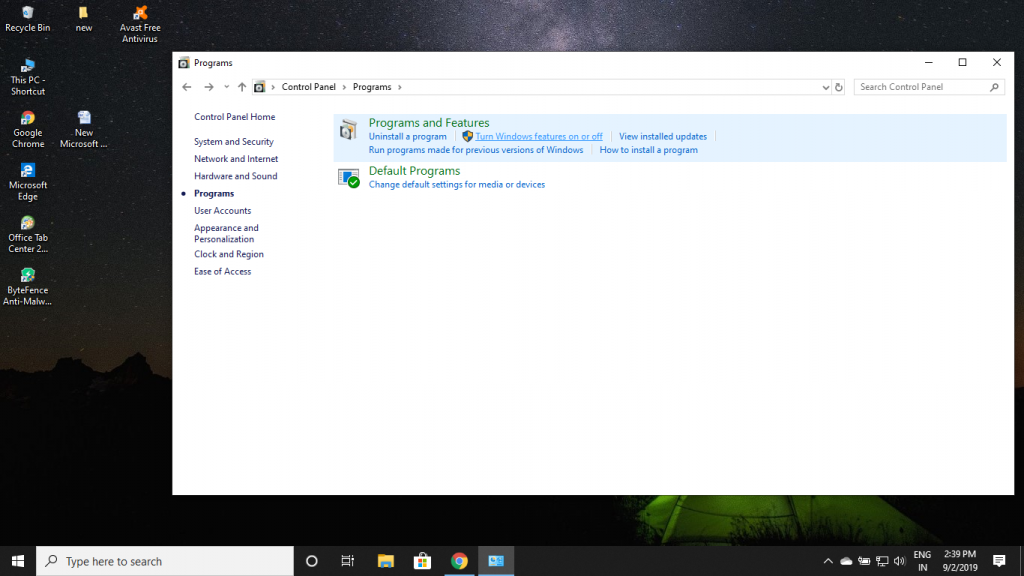
Now select Programs and Features and click on Turn Windows features on or off.
Now select Hyper-V folder.
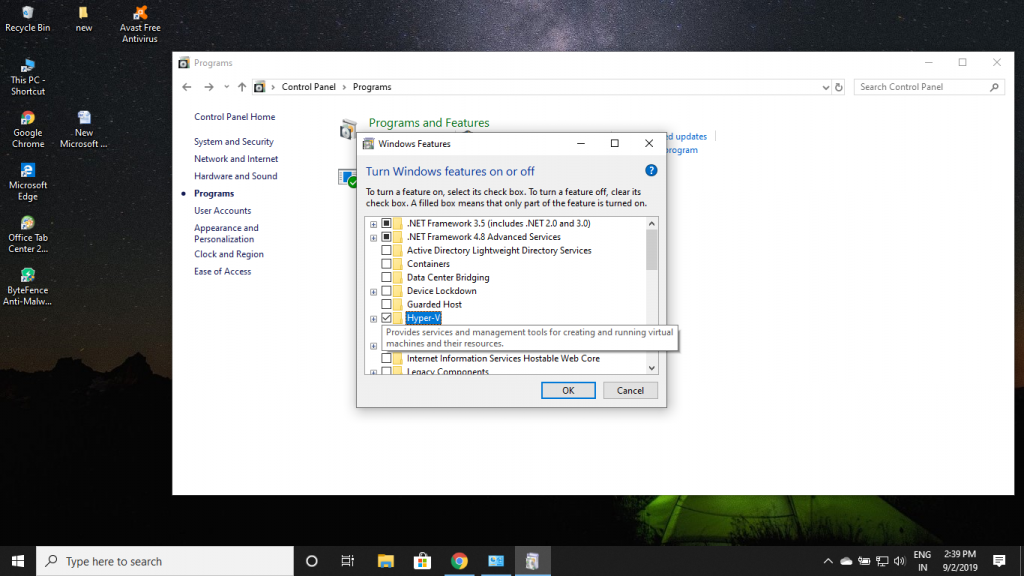
Click OK after selecting Hype-V.
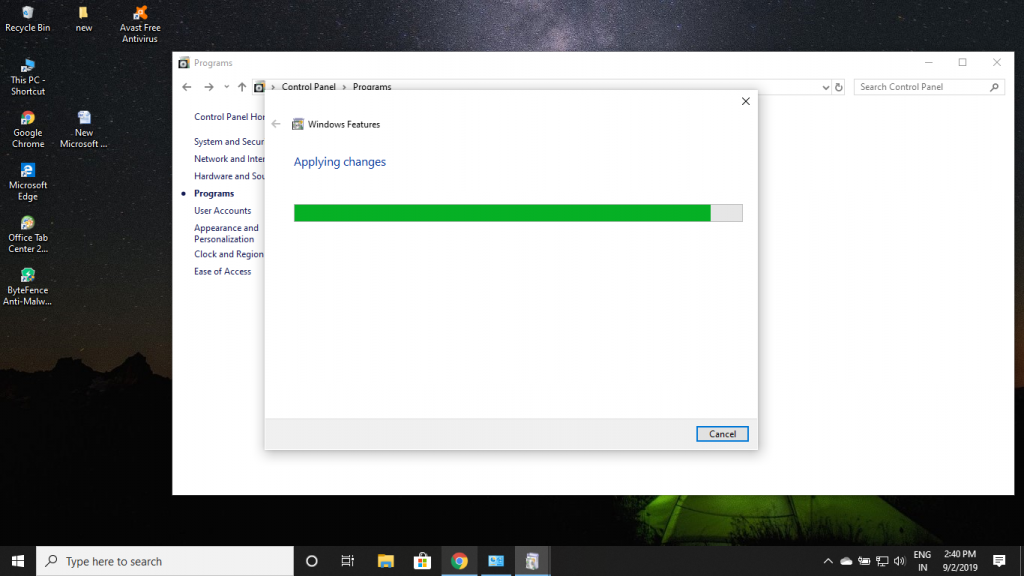
After the processing is done, the window is displayed as;
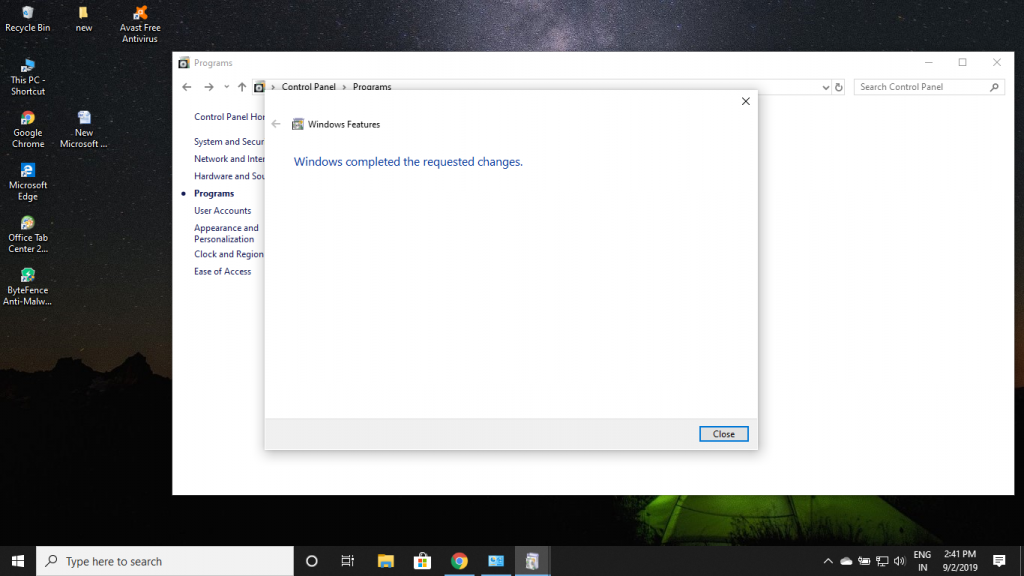
Click on close.
Step 7: To enable Hyper-V with CMD, open the CMD as an administrator and type command; DISM /Online /Enable-Feature /All /FeatureName:Microsoft-Hyper-V

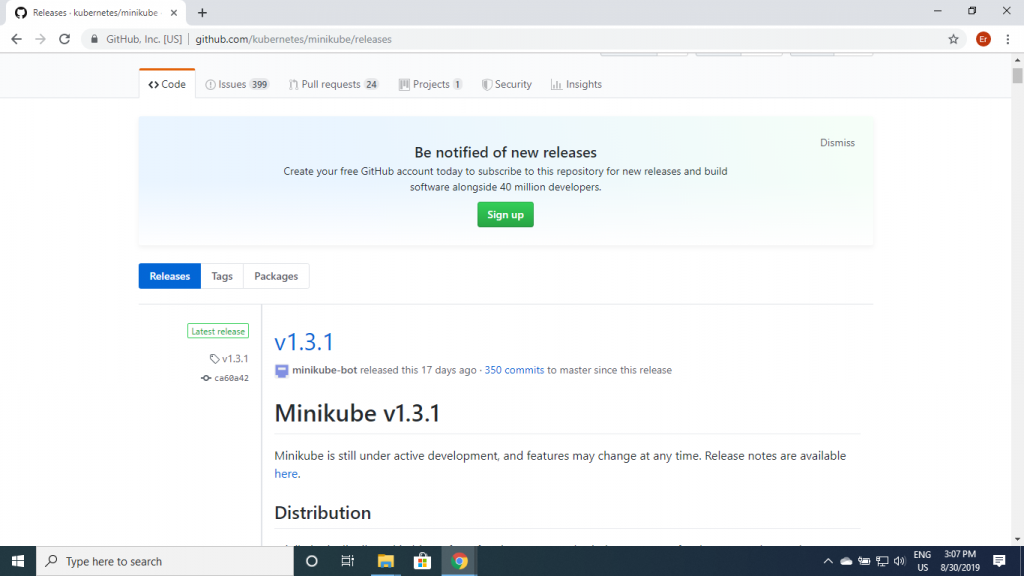
Step 8: Download Minikube.exe from the link given below: https://github.com/kubernetes/minikube/releases
Step 9: Select minikube-windows-amd64.exe and download it.
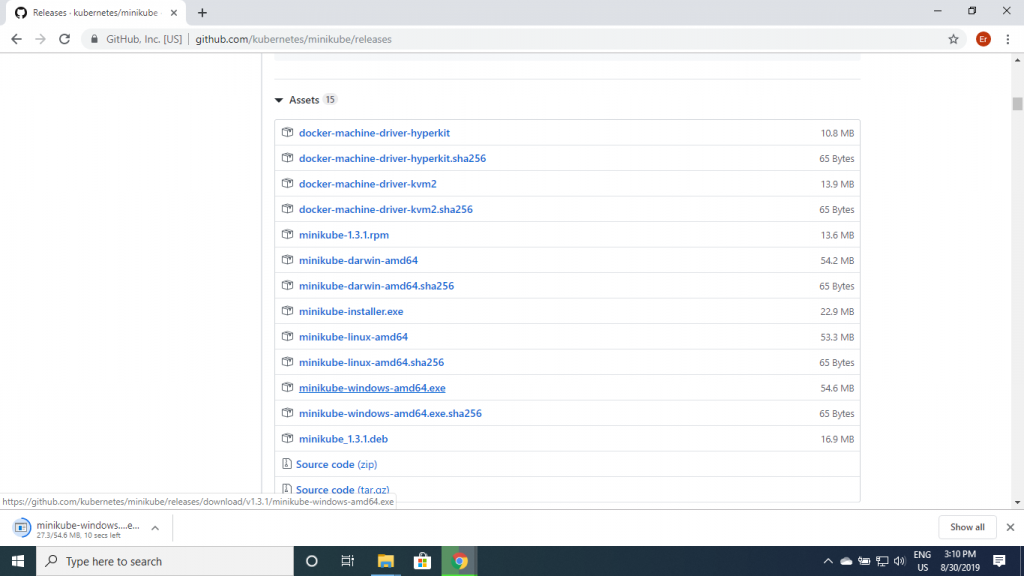
Step 10: Rename the file as minikube.exe and save it into the drive.
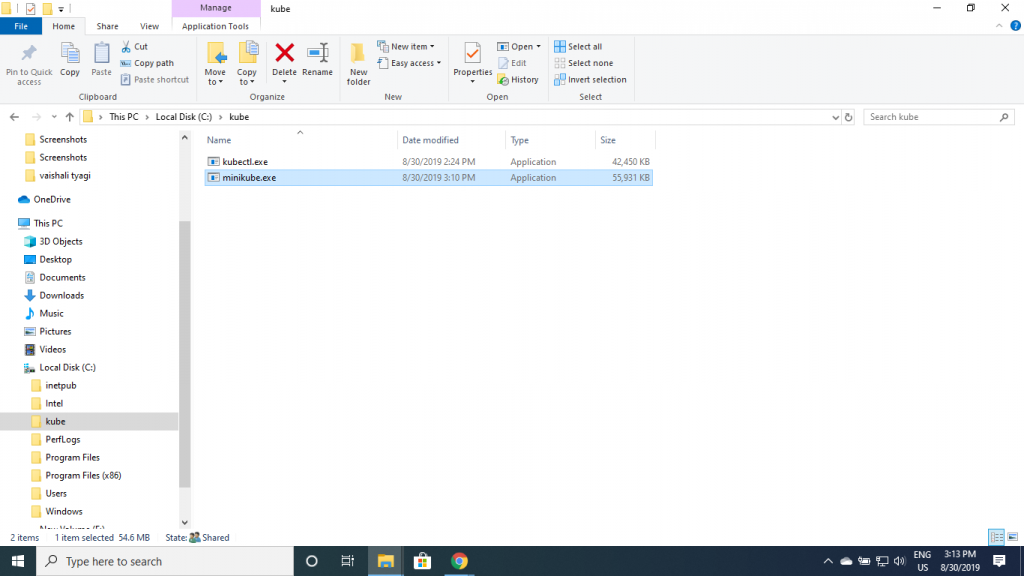
Step 11: Add minikube.exe folder location in path variable: Open Control Panel and click on Advanced System Setting, similarly as done in Step 3.
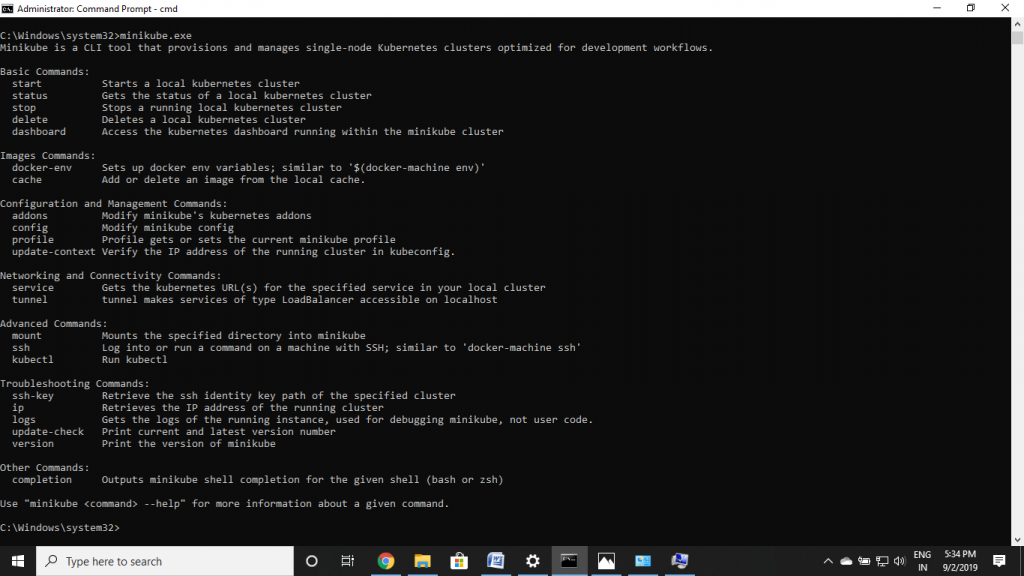
Step 12: Open the command prompt and type minikube.exe, commands supported by the minikube.exe will be displayed.
Basic commands of minkube for a beginner
Some of the basic commands of minikube is given under below, which is going to help the beginners in deploying the kubernetes with an ease.
- Start minikube and create a cluster.
minikube.exe start
- Deploy a sample kubernetes “deployment” to your local minikube
kubectl run hello-minikube --image=k8s.gcr.io/echoserver :1.10 --port=8080
- Expose this deployment to an external network
kubectl expose deployment hello-minikube --type=NodePort
- Lists the pods of this deployment
kubectl get pod
- Access the sample service
minikube service hello-minikube --url
- Delete the Deployment
kubectl delete services hello-minikube
- Stop minikube
minikube stop