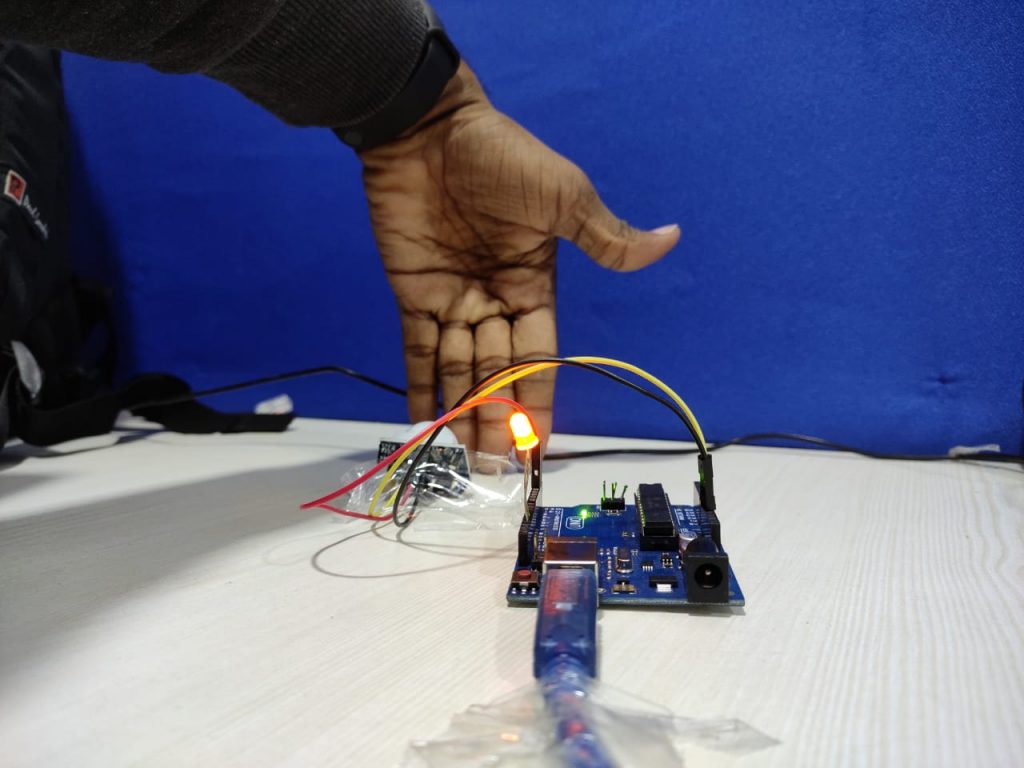
Arduino UNO Board with PIR Motion Sensor

Arduino UNO Board with PIR Motion Sensor

In this project, we will create a simple circuit with an Arduino UNO and PIR motion sensor detects movement. An LED light up when the movement is detected.

Requirements of hardware in this Project:

  1. Arduino UNO  board
  2. PIR Motion Sensor (HC-SR501)
  3. 1 LED bulb
  4. Jumper Cables
  5. A USB cable for connecter Arduino UNO board
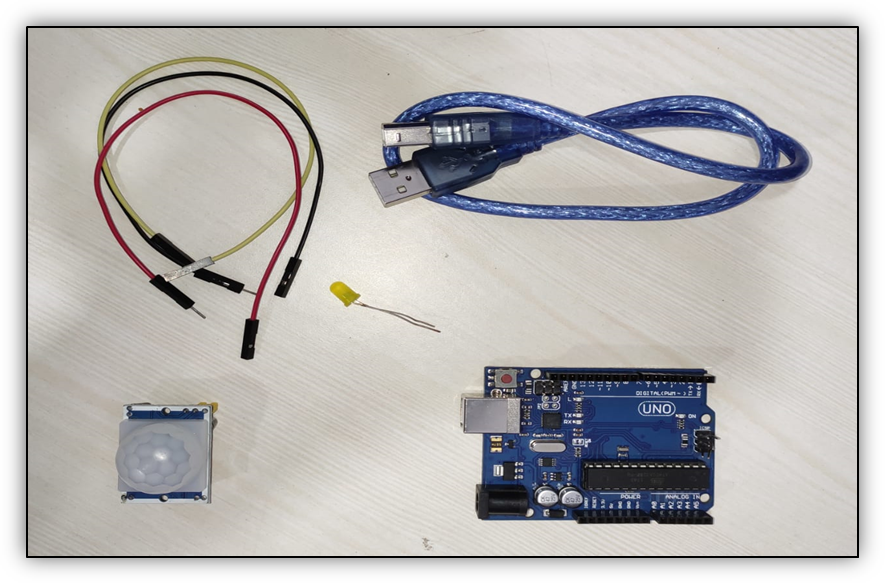
Arduino UNO Board with PIR Motion Sensor

Requirements of software in this Project:

  1. Arduino IDE software

The Working principle of the Project:

The module consists of a Pyroelectric-sensor that generates energy when exposed to heat. It means that when a human or animal body enters in the sensor area, it detects movement and emits heat in the form of infrared radiation. From here comes the name of the sensor, a Passive infra-red sensor. The term "passive" means that the sensor does not use energy for detection purposes. It only works by detecting the energy released by other objects.

Write the following program in the Arduino IDE:

int led = 13;                // LED is attached to
 int sensor = 2;              // Motion sensor is attached to
 int state = LOW;             // by default, no motion detected
 int val = 0;                 
 void setup()
 { 
 pinMode(led, OUTPUT);      // initalize LED as an result
 pinMode(sensor, INPUT);    // initialize sensor as an input
 Serial.begin(9600);        
 }
 void loop() 
 {
 val = digitalRead(sensor); 
 if (val == HIGH)   // check if the sensor is HIGH
 {           
 digitalWrite(led, HIGH);   // turn LED ON 
 delay(100);                // delay 100 milliseconds 
 if (state == LOW) {
 Serial.println("Motion detected!"); 
 state = HIGH;       // update variable state to HIGH
 }
 }  
 else {
 digitalWrite(led, LOW); // turn LED OFF
 delay(200);             // delay 200 milliseconds 
 if (state == HIGH){
 Serial.println("Motion stopped!");
 state = LOW;       // update variable state to LOW
 } 
 }
 } 

Save the program and compile it.
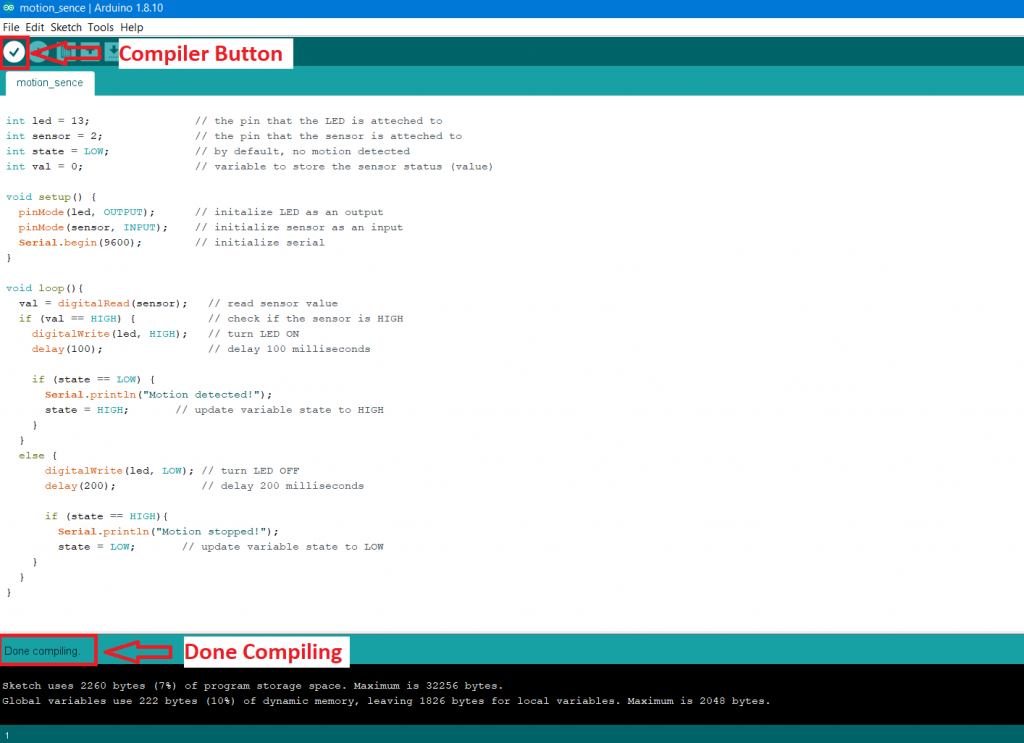
Arduino UNO Board with PIR Motion Sensor2

Connect your Arduino UNO board to your laptop or desktop computer via Arduino UNO USB cable. Remove all other connections with the Arduino UNO board, such as PIR Motion Sensor and LED bulb, and then Upload the program to the Arduino UNO board, as  Shown in the following figure.
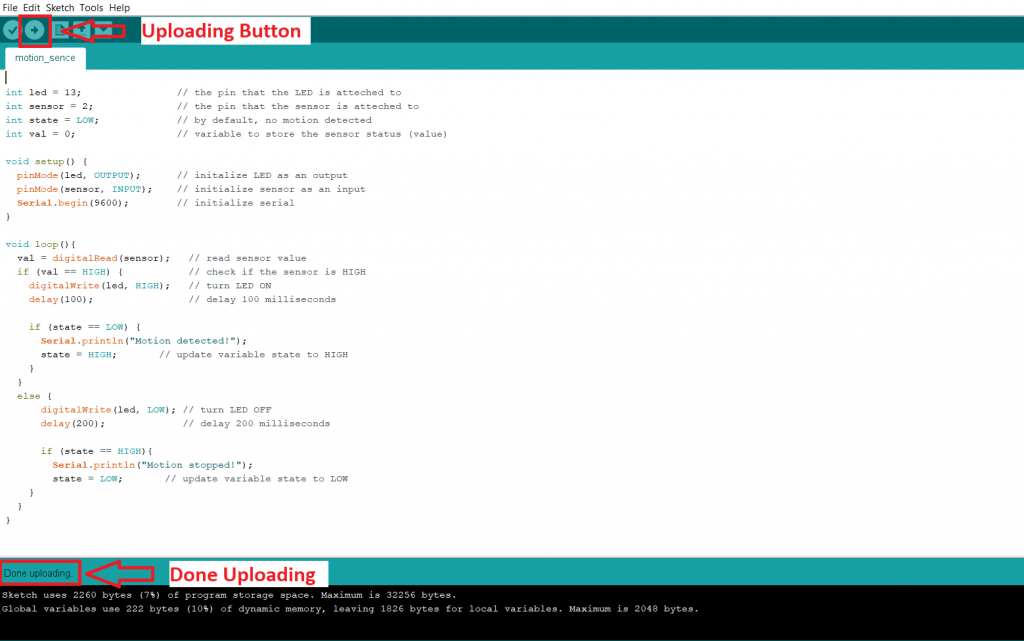
Arduino UNO Board with PIR Motion Sensor3

Before uploading the code to the Arduino UNO board, make sure that your Arduino serial port is selected. Otherwise, it shows an error message Serial port not selected.

To select your serial port in your laptop or desktop:

Open Device Manager -> Ports ->Arduino Uno, and then upload your program.
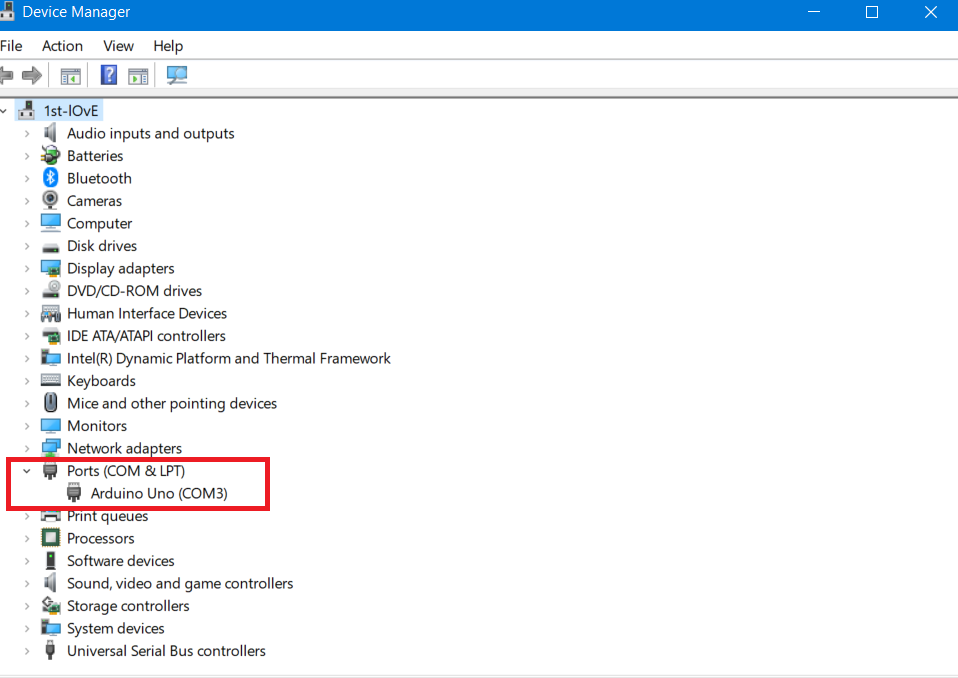
Arduino UNO Board with PIR Motion Sensor4

After uploading the program in the Arduino UNO board, connect all modules with the Arduino UNO board, such as the PIR Motion Sensor and LED bulb. The Digital circuit diagram is shown below.
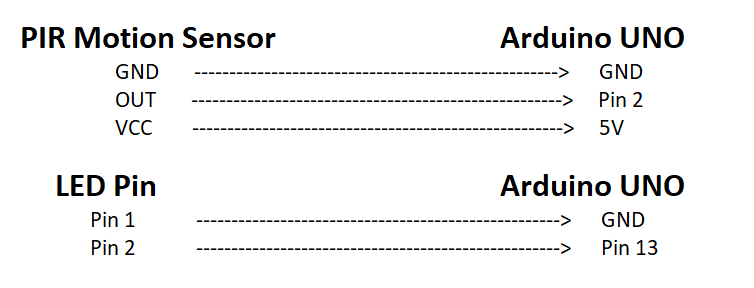
Arduino UNO Board with PIR Motion Sensor5

After all, modules connected to the Arduino UNO board. Then connected the Arduino UNO board with the help of Arduino USB cable.
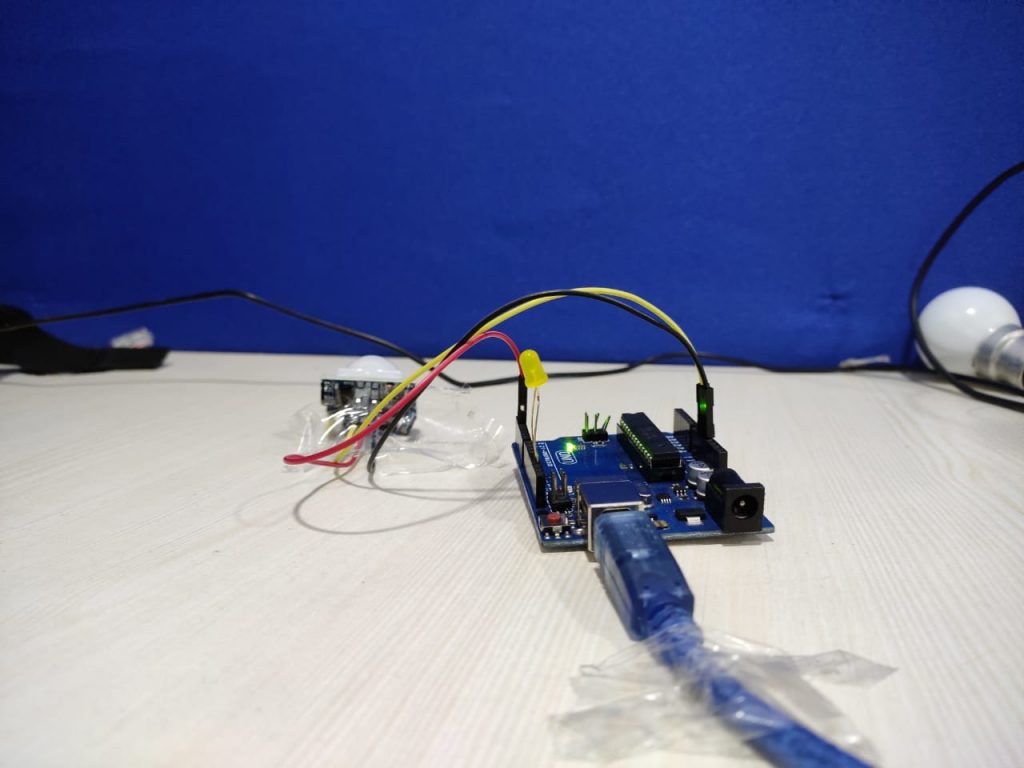
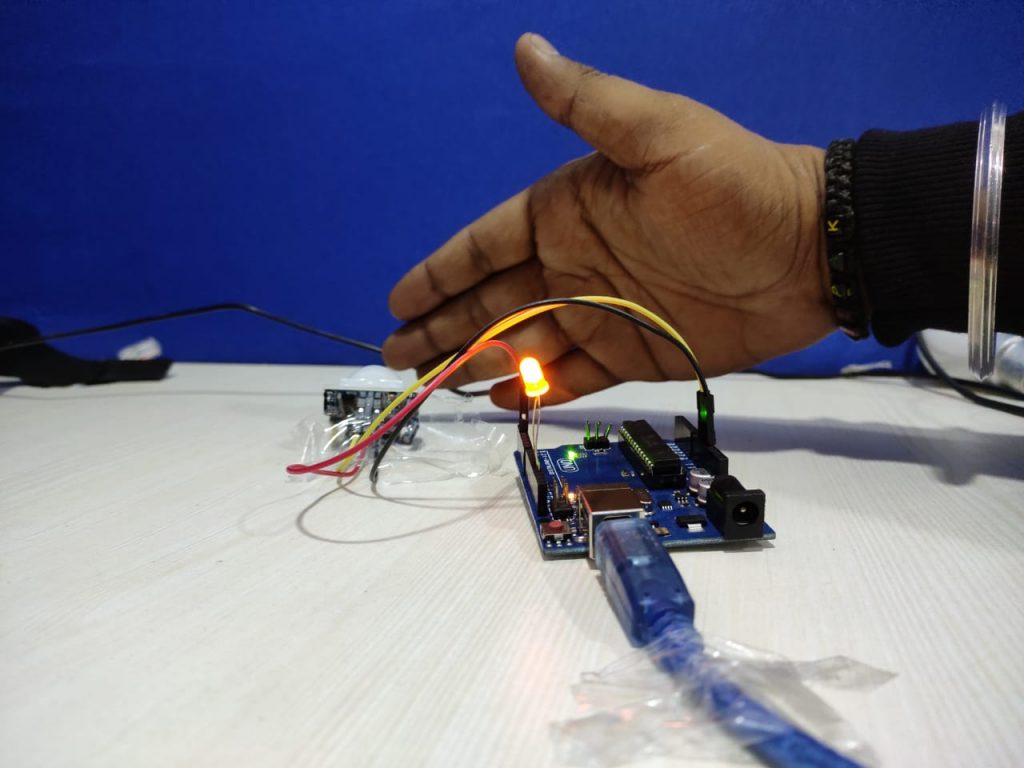
Arduino UNO Board with PIR Motion Sensor6
Arduino UNO Board with PIR Motion Sensor7
Arduino UNO Board with PIR Motion Sensor8

Related Topics

Network layer Protocols

Network layer Encapsulation ProtocolsNetwork Layer Routing Protocols 1. Network layer Encapsulation Protocols a) 6LoWPAN 6LoWPAN stands for IPv6 Over Low-Power Wireless Personal Area Network. It is mostly used standard in this category. It...

2 minutes read.

IoT-ThingWorx

IoT-ThingWorx The ThingWorx is an IoT platform that helps commercial corporations assess and release the value of IoT. It promises the tools and technology necessary to developed. It implements a robust...

2 minutes read.

Arduino UNO Board with PIR Motion Sensor

Arduino UNO Board with PIR Motion Sensor In this project, we will create a simple circuit with an Arduino UNO and PIR motion sensor detects movement. An LED light up when the movement...

2 minutes read.

Detect darkness Using Arduino and LDR Sensor

Detect the darkness with the help of Arduino board and LDR Sensor In this project, Arduino and LDR Sensor turns on lights automatically, when an LDR sensor detects darkness. Requirements of hardware...

2 minutes read.

Skills required for an IoT Developer

"Internet of Things" is about communication between software and devices. An IoT development team should be essentially large, and developers are divided into different areas according to their respective work. Some of these...

1 minute read.

Challenges of IoT

Challenges of IoT There are two categories of challenges to overcome for the IoT organization to grow. It is accepted by all the technologies not only for IoT. Two significant challenges in IoT: Technological...

3 minutes read.

IoT Ecosystem

The following figure shows the seven-layer model of the IoT Ecosystem. The first layer represents the market or application domain that includes smart grid, connected home, smart health, or smart cities, etc.The second layer consists...

1 minute read.

Session Layer Protocols

1) MQTT MQTT stands for Message Queue Telemetry Transport. It was introduced by IBM in 1999 and standardized by OASIS in 2013. It is used for remote monitoring in IoT. Its...

2 minutes read.

IoT GE Predix

The GE Predix stands for the General Electric Predix. GE Predix is a software platform that collects data from industrial instruments. It provides a cloud-based PaaS (platform as a service)...

1 minute read.

Eclipse IoT

Eclipse IoT The two technologies IoT and M2M (Machine to Machine) are becoming trendy in the IT industry. The ability to connect sensors, actuators, and a wide range of devices open up a...

2 minutes read.

Arduino UNO Bluetooth LED Controls

How to Build a Bluetooth controlled LED light Setup Using Arduino UNO board: Let's build an IoT project using Arduino UNO and the Bluetooth module HC-05 to control an LED. In this project,...

2 minutes read.

Contiki OS

Contiki OS Contiki is an open-source operating system (OS) that works on small, low-power microcontrollers. It allows the development of applications. The application allows efficient use of hardware while providing standardized low-power wireless communication...

2 minutes read.

IoT Architecture

Our approach to the IoT architecture is reflected in the IoT architecture diagram that presents the diagram of an IoT system and explains how it is connected to store, collect,...

2 minutes read.

Arduino UNO Distance Project

Ultrasonic Sensor HC-SR04 and Arduino to distance calculation using Processing App: Let's build an IoT project using Ultrasonic HC-SR04 Sensor and Arduino UNO to calculate the distance between the Ultra Sonic HC-SR04 device and...

2 minutes read.

IoT Hardware

IoT hardware includes a wide range of devices, such as routing devices, bridges, sensors, etc. These IoT devices support key tasks and functions such as system activation, security, action specifications, communication, and detection...

2 minutes read.

5G

The next generation of mobile networks is a new global wireless standard after 1G, 2G, 3G, and 4G networks. It enables a new network to connect virtually everyone, including machines,...

5 minutes read.

IoT - Platform

IoT Platform: As in IoT, all IoT devices are connected to other IoT devices and applications to transmit and receive information through protocols. There is a difference between the IoT...

2 minutes read.

What is an IoT Device?

A device in which a sensor is connected and able to transfer data from one device to another over the internet is called an IoT device. IoT devices consist of software, wireless sensors, actuators,...

1 minute read.

Applications of IoT

Smart Home: A smart home encapsulates the connectivity inside our homes. It includes home appliances, smoke detectors, windows, light bulbs, door locks, etc. Smart City: A Smart City is a technically advanced...

2 minutes read.

Download and Install Arduino in Windows

Download and Install Arduino in Windows Step 1. Download  IDE from https://www.arduino.cc/en/Main/Software. Step 2. Scroll down the page and click on Windows app link, as shown in the following figure. Step 3. Click on the...

1 minute read.