React Redux
How to Use Redux with React Hooks
It is an open-source library of JavaScript which is used for managing the application state. React uses the Redux to build the user interface. It was first coined by Dan Abramov and Andrew Clark in 2015.
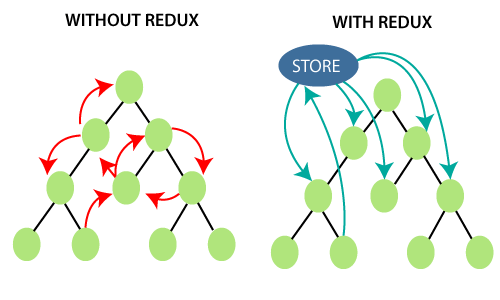
React redux allows the react components to read the data from the redux store, and it also dispatches the actions to the store to update the data. Redux helps the applications to scale by giving them a sensible way to manage the state through a unidirectional data flow model.
The unnecessary complexities from the Flux architecture have omitted in the redux. Redux does not have any dispatcher concept. Redux includes a single store, but flux includes several stores.
Why React Redux required?
The reasons that show the importance of redux are as follows:
- It kept up-to-date on any API change to ensure that the react components are behaving as expected.
- It internally implements many performance optimizations, which allow the components to re-render only when it needs actually.
Redux Architecture
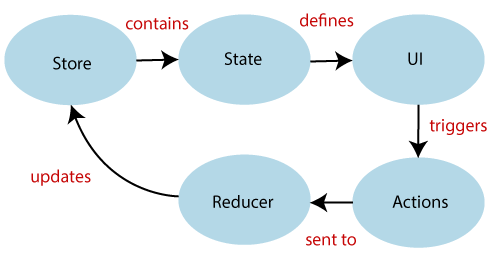
The components of the redux architecture are as follows:
STORE: It is a place where the entire state of your application has listed. It is used to manage the status of the application and has a dispatch (action) function.
ACTION: It is sent or dispatched from the view, which is the payloads, and can be read by the reducers. It is an object which is created to store information about the user's event. It includes information like the type of action, time, and location of occurrence, its coordinates, and which state it has to change.
REDUCER: It reads the payloads from the actions and also updates the store by the state. It is a function that returns a new state from the initial state.
Get started with Redux
Installation React Redux
Requirement: It requires the React 16.8.3 or its later version.
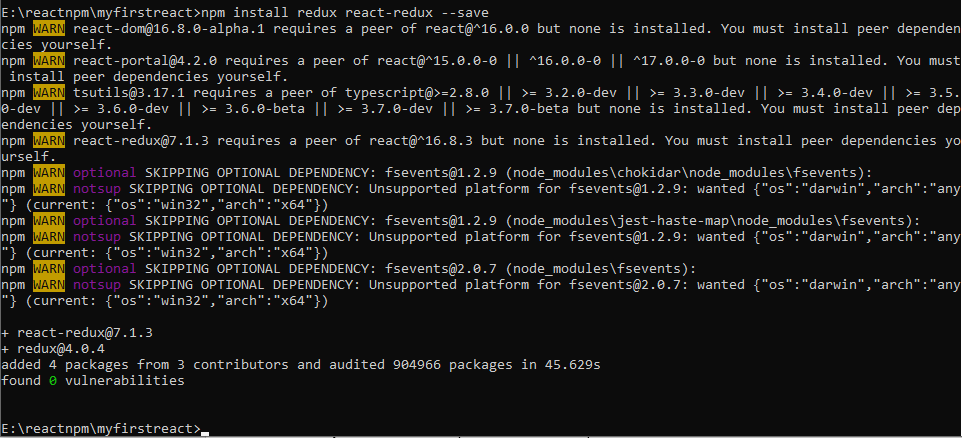
For using the React redux with the React application, you have to run the following command:
npm install redux react-redux –save
React Redux Example
Here, we are showing two examples in which the first example is before using redux, and the second example is after using redux.
Before using Redux
App.js
import React, {Component} from 'react';
import './App.css'
class App extends Component{
state = {
marks:89
}
onIncrease = () =>{
this.setState({
...this.state,
marks:++this.state.marks
})
}
onDecrease = () =>{
this.setState({
...this.state,
marks:--this.state.marks
})
}
render(){
return(
Marks :{this.state.marks}
);
}
}
export default App;
Output:

On click Increasing marks button, you will get:

Similarly, on click the decreasing marks button, you will get:

After using Redux
Let us first understand some terms that are commonly used in the redux application.
Reducer: The reducer is nothing but a function that takes two parameters that are ‘Action’ and ‘State’ to calculate and return the updated state. It reads the payloads from the Actions and updates the store by using the state.
Components: It concerned with how things will look, such as markup, styles. It is responsible for receiving the data and invokes the callbacks exclusively by using props. It does not matter from where the data is coming and how to change the data. It only renders what is providing to them.
Containers: It is a component that concerns how things work, such as fetching the data and updating the state. It gives behavior and data to other container components. It generally uses the redux state to read the data and dispatches the redux action for updating the data.
Store: All of the container components requires access to the Redux store to subscribe to it. For this, you need to pass the store as a prop to every component. However, it gets uninteresting. So, it is recommended to use a special react-redux component, which makes the store available for all of the container components without passing it explicitly. It used once when the root component gets rendered.
Actions: It uses the ‘type’ property for informing about the data which should be sent to the store.
Now, let’s move towards the example using react-redux.
First, create the Store folder in the src folder of your react application. Then, create a reducer.js file within the Store folder.
Now, open your Index.js file and import some packages into it. It is the root file that is responsible for creating the store and rendering our react app component.
Let us try to understand the simplest example of the React-Redux application.
Index.js
import React from 'react';
import ReactDOM from 'react-dom';
import './index.css';
import App from './App';
import * as serviceWorker from './serviceWorker';
import {createStore} from 'redux';
import {Provider} from 'react-redux';
import reducer from './Store/reducer';
const store = createStore(reducer);
ReactDOM.render(
Now, open your App.js file.
App.js
import React, {Component} from 'react';
import './App.css'
import {connect} from 'react-redux';
class App extends Component{
render(){
return(
Marks :{this.props.marks}
);
}
}
const mapStateToProps = (state) => {
return {
marks:state.marks
}
};
const mapDispatchToProps = (dispatch) => {
return{
onIncrease:() => dispatch({type:'INCREASE_MARKS'}),
onDecrease:() => dispatch({type:'DECREASE_MARKS'})
}
};
export default connect(mapStateToProps,mapDispatchToProps)(App);
./Store/reducer.js
const iState = {
marks:89
};
const reducer = (state=iState,action) =>{
const nState ={...state};
if(action.type==='INCREASE_MARKS')
{
nState.marks++;
}
if(action.type==='DECREASE_MARKS')
{
nState.marks--;
}
return nState;
};
export default reducer;
Output:
After the successful execution of code, the output will be:

On clicking the increasing marks button, the output will be:

On clicking the decreasing marks button, the output will be:
