Salesforce Navigating Setup UI
Navigating the Setup UI
The UI in the Salesforce is mainly used by the administrators and the developers, and it is different for a regular users.
The Setup UI does not make use of tabs, global search, the app selector, or the user sidebar. It has its Setup-theme sidebar, and the interaction is limited between the sidebar and the main view area.
The setup sidebar may not appear in the same order as it does. The options can still be found using the Setup search located in the Setup sidebar.
Setup is divided into the following types:
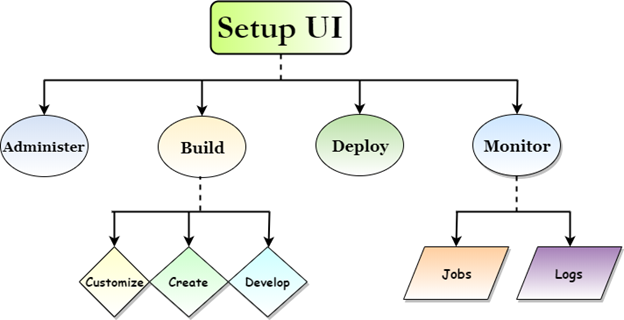
- Administer: Administrators manage security, users, and general access.
- Build: The admins and developers use this option for customizing the given instance that suits the needs of the business.
- Customize: It is used to customize the standard features.
- Create: This is where we can create new items to build functionality around.
- Develop: Develop is used to manage custom code like Apex and Visualforce.
- Deploy: Deploy is used to perform deployments and manage ChangeSets.
- Monitor: Developers and monitors are used in monitoring the health of the instance, and the developers can use these tools for debugging issues which can be arise.
- Jobs: It can view and manage unsynchronized processes.
- Logs: Logs are used to specify and view debug logs that are used in troubleshooting.
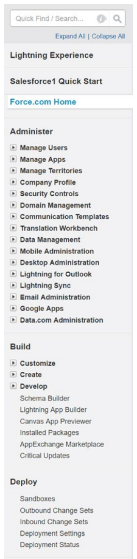
Setting up a Sandbox:
We will be working with production and sandbox environments instead of personal dev orgs.
To access the sandbox creation flow, we are going to use the following steps:
- Click Setup.
- Navigate in the Setup sidebar, which is under Deploy, and then click on the Sandboxes.
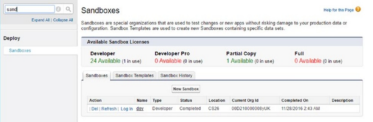
- Now, click on the “New Sandbox” option to create a new sandbox.
- We also give sandbox a name and a description.
The name will be short and descriptive.
In the next step, select “Developer” by clicking the suitable “Next” button here.

- On the next screen, if we like to execute Apex after creation, leave that blank and continue.
Note: Our username of the Sandbox instance will be our production username with the sandbox name that added ".dev."
It will be included at the end of our production username. Changing our name in the production after a sandbox created or refreshed, it will not automatically sync new password to the sandbox.
Once our sandbox is ready, we will receive an email from Salesforce that informs us it is prepared.
Enabling Change Sets
We must allow changesets to be able to move our changes via changesets from our sandbox production.
Changesets are the selected changes that we wish to move between instances.
For enabling changesets, we will do the following:
- Click Setup.
- In the next Setup, navigate to the Deployment Setting, which is under Deploy in the Setup sidebar.
- We can opt to not see that screen again by using the appropriate “Don’t show this page again” checkbox.
- Click on the “Edit” button, which is next to the "dev."
- In the next step, select the “Allow Inbound Changes” checkbox and save.
- Once the change saves, click on “Back to deployment settings” at the top of the page.
- We will now have a green arrow pointing from our “dev” sandbox to our Production instance.
- We can repeat steps 1 through 6 in our sandbox to enable Changesets from production to flow into the sandbox, at that point the arrow would become double-ended to represent bidirectional movement.
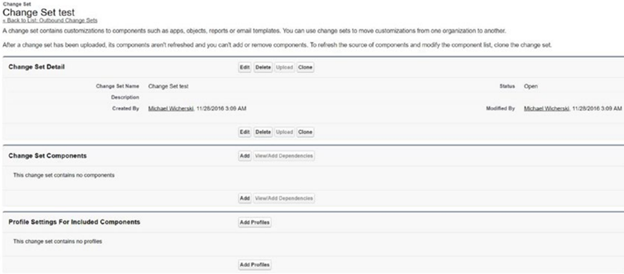
Once we have sandbox and production environments connected this way. We can create Changesets to move changes between our instances by navigating to “Outbound Change sets” under the Deploy section of Setup.
At this point, we would give our ChangeSet a name. Once the ChangeSet is created, we will have the ability to add components by using the appropriate “Add” button.
Once we are done adding the components, click "Upload" and select the correct instance that we wish to deploy from the list. The Changeset will now upload, and we will receive an email when it is ready to be implemented.
Note:
We neither need to enable nor to use ChangeSets if we are deploying our changes by using an IDE.
ChangeSets destination instance navigates “Inbound ChangeSets” under the “Deploy” section of our Setup sidebar. In the section titled “ChangeSets Awaiting Deployment” we will see a list of such ChangeSets. We have the option to delete the pending ChangeSet from here, or we can click its name to bring us to the detail page for that ChangeSet.
We get an error message saying "ChangeSet Unavailable," can wait a few minutes, they take a while to become fully available in the destination instance.
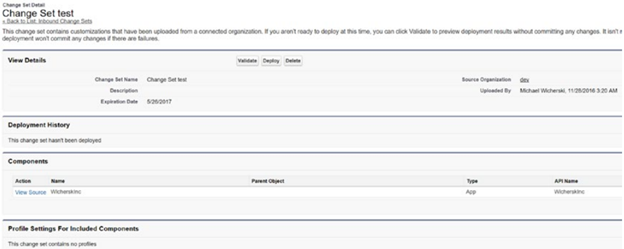
This details screen of the Inbound ChangeSet, we can choose to validate it or deploy it. We click on the option that will proceed to complete the action.
Development Environment Options
The concept of an IDE (Integrated Development Environment) is given below:
IDEs are applications that make a developer's life much easier by grouping standard tools and handling the “nitty-gritty” of programming languages by which the developer can focus on the logic rather than the Setup.
The available IDEs facilitate the connection(s) for downloading, compiling, and uploading from the force.com server(s).
IDEs also tend to have helpful tools such as auto-completion and syntax checking.
Many options choose with regards to an IDE for force.com, the outline of the next sections, and compare the most common ones as well as walk us through how to set them up.