Linux Commands with Examples
Linux Commands with Examples
All the Linux commands are executed on the terminal provided by the Linux system. This terminal is a command-line interface to implement and display command outputs. Linux OS CLI is called terminal, and Windows OS CLI is called command prompt.
We can perform various tasks using the terminal. All the tasks could be divided according to the categories of the commands we are going to discuss like, File commands, Process management, Searching, System info, Compression, Networking, and many more.
Before directly jumping to the commands implementations, we must know some of the shortcuts, and these shortcuts help reduce the time taken in debugging and command execution.
Shortcuts
| Shortcut | Explanation |
| ctrl+c | This shortcut can halt the currently running command. |
| ctrl + z | This shortcut can stop the currently running command. |
| ctrl + d | This shortcut helps to log out of the current session. |
| ctrl + w | This shortcut can erase the last word entered on the command line. |
| ctrl + u | This shortcut can erase the complete line in one attempt. |
| ctrl + r | This will search and bring the recent command. |
| !! | This is to execute the last command again. |
| exit | This is to get out of the current session. |
Now, we have discussed the most used Linux commands. All these commands are used by beginners as well as professionals because these commands are the base of the Linux system.
Linux File Commands
- ls Command
The primary use case of the ls command is to list the directory content using various options.
Syntax:
#ls <option>
Output:
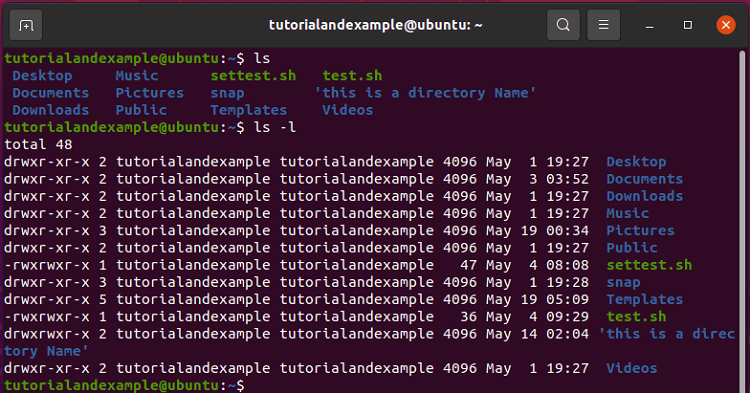
First, we tried with only the ls command and then with the –l option for more information about the content.
- cd command
This command is used to change the current directory to the specified directory.
Syntax:
#cd <directory path>
Output:

We can also change to the home directory of the user without providing the directory path.
#cd
Output:

This syntax is a shortcut to change the current working directory to the home directory.
- pwd Command
Implementation of this command is very regular to know the current working directory of the user.
Syntax:
#pwd
Output:

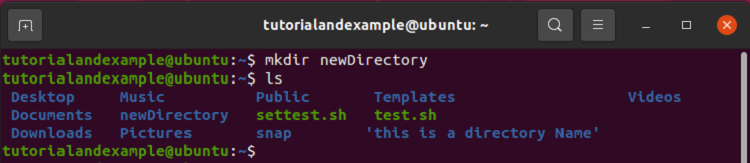
mkdir command
This command helps in creating new directories in the current as well as at specified locations. This can also create multiple directories at one time.
Syntax:
#mkdir <directory Name>
Output:
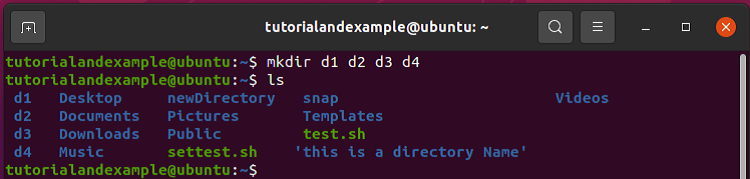
For creating multiple directories use the below syntax.
Syntax:
#mkdir <dir1> <dir2> <dir3>
Output:
- cat
This command is a multitask command. It could print the content of a file on the terminal, and it could add data to the file.
Example 1
Here, the cat command will display the content of a file.
Syntax:
#cat fileName
Output:
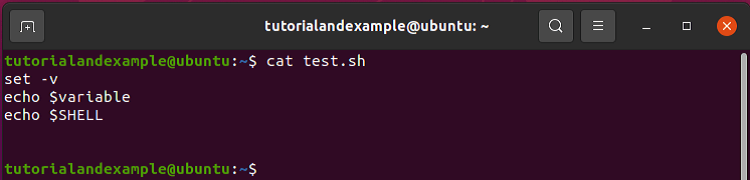
The output is displayed on the terminal.
Example 2
We can also put the standard input inside the file and write content in the file.
Syntax:
#cat > fileName
Output:

If you want to append in the initial file, then use “>>” instead of “>” in the above command.
- more
This command is very much similar to cat, but it displays the content of the file according to the screen size.
Syntax:
#more filename
Output:
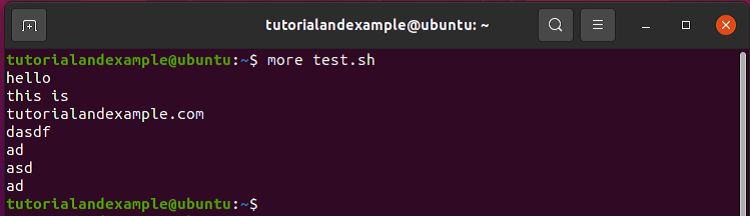
If you want to read the next page after command execution, press ‘Enter.’ More is used for long files.
- head
This command is helpful in displaying limited content on the terminal. It displays the initial 10 lines for the file you are opening.
Syntax:
#head filename
Output:
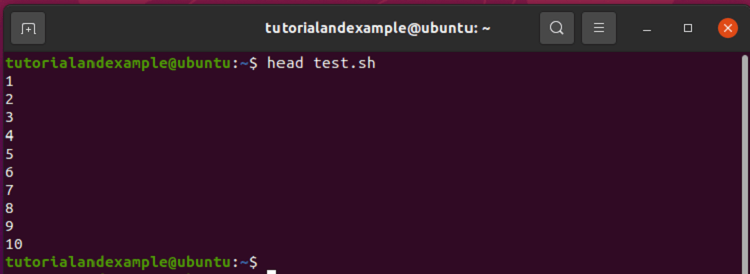
Before printing, we have edited the test.sh file with the serial number for each line.
- tail
This command is used to list the last 10 lines of the file you select. These kinds of commands are beneficial in reading and analyzing log files.
Syntax:
#tail fileName
Output:
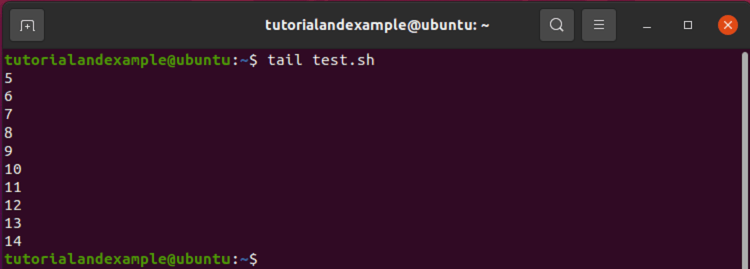
This shows the last 10 lines, which start from the 5th line because there are only 14 lines in this file.
- touch
The touch command is used to create and update any kind of file present on the Linux system. The updates are of “modification date” and “access date” of the file.
Syntax:
#touch fileName
Output:
 #touch file.txt
#ls
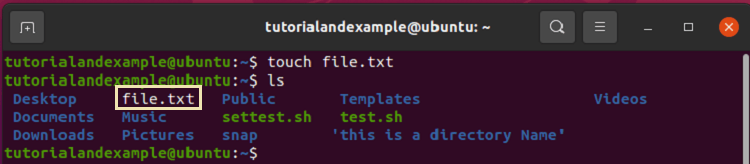
The highlighted box shows that the file has been created successfully. You can also create multiple files with the help of the touch command.
Syntax:
#touch <file1> <file2> <file3>
Output:
 #touch f1.txt f2.txt f3.txt
#ls
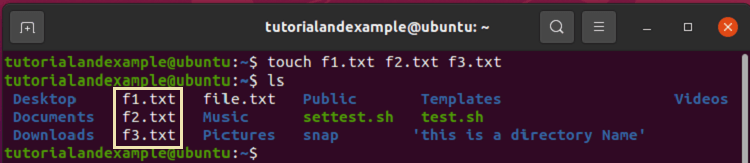
You can also see the modification time of files and compare if any changes take place after the command execution.
- rm
The primary use case of the rm command is to delete files from the Linux system.
Syntax:
#rm fileName
Output:
 #ls
#rm file.txt
#ls
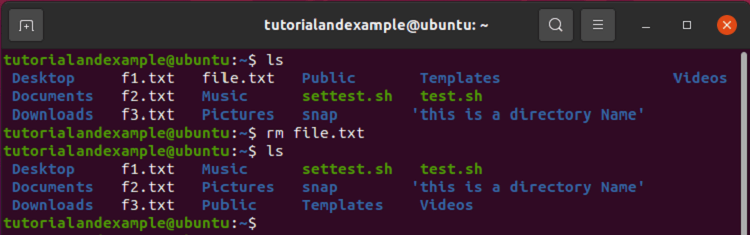
You can also delete directories using the rm command with the –r option.
Syntax:
#rm –r <directoryName>
Output:
 #ls
#rm –r newDirectory
#ls
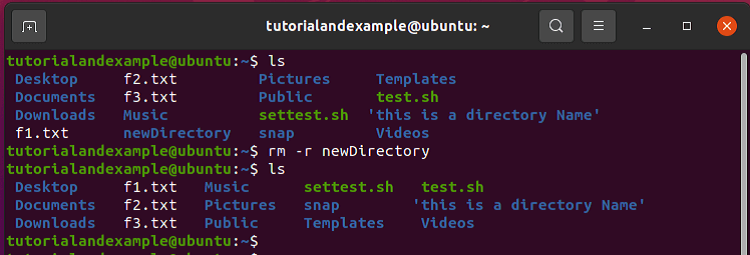
The –r stands for recursive deletion of the files and directories present in the directory mentioned.
- cp
The cp command is used to copy the content. You can copy one file to the other, and you can also copy one directory to the other directory using this command.
Syntax:
#cp <file1> <file2>
Output:
 #cat f1.txt
#cat f2.txt
#cp f1.txt f2.txt
#cat f2.txt
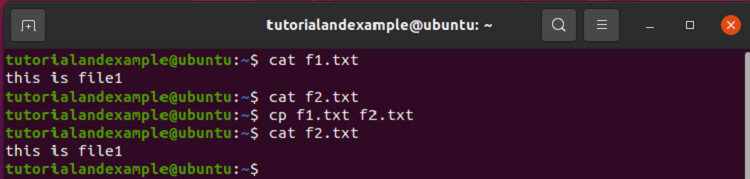
The above screenshot shows that initially, the “f2.txt” was empty, and after executing the copy command, all the content of the “f1.txt” has been transferred to the “f2.txt.”
Now, copying the directory.
Syntax:
#cp –r <dir1> <dir2>
Output:
 #ls
#ls d1
#ls d2
#cp –r d1 d2
#ls d2
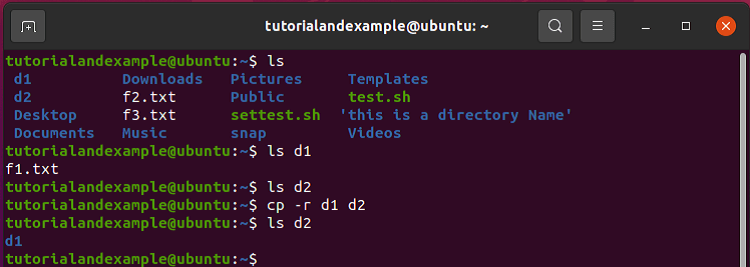
The directory will be created if not present and then get copied. In the above screenshot, we had two directories d1 and d2. d1 is copied to d2.
- mv
This command is used to move the content from one place to another by specifying the path. You can also use it to rename the files and directories.
Syntax:
#mv <file> <destinationPath>
Output:
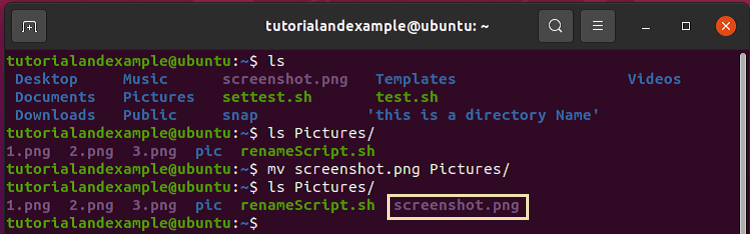
 #ls
#ls Pictures/
#mv screenshot.png Pictures/
#ls Pictures/
Renaming the file.
Syntax:
#mv <oldName> <newName>
Output:
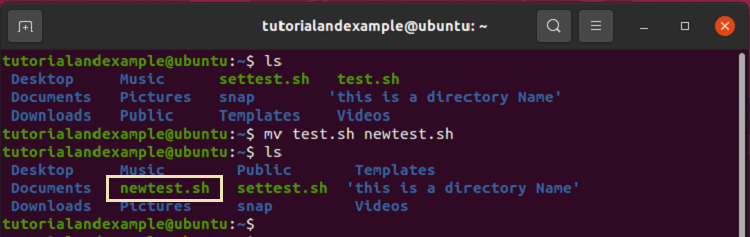
 #ls
#mv test.sh newtest.sh
#ls
- ln
This command is used to link files to each other. For example, if you link file1 to file2 and open any of the files, you will get the same content on both files.
Syntax:
#ln <option> <file1> <file2>
Output:
 #ls
#cat f1.txt
#cat f2.txt
#ln –f f1.txt f2.txt
#cat f2.txt
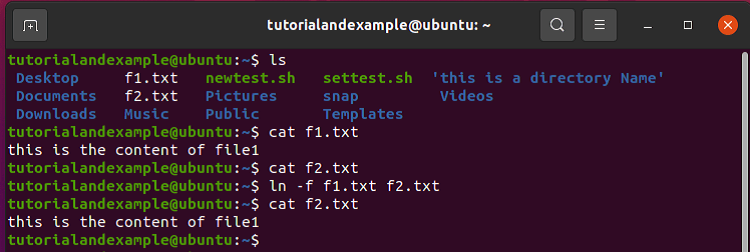
In the above screenshot, we used the –f option to force the command execution for existing files.
Process Management Commands
- ps
This command is used to display the information of the process running. The result displayed by this command is non-interactive.
Syntax:
#ps
Output:

The output shows that two main processes are running; one is the bash shell on which the commands are executed, and the other is the ps command process.
You can also search for any specific process with the help of the process ids.
Syntax:
#ps <processID>
Output:

The output will only provide details of the specified process id.
- top
This command is also used to view the system processes, but it provides an interactive result, unlike the ps command.
Syntax:
#top <options>
Output:
#top
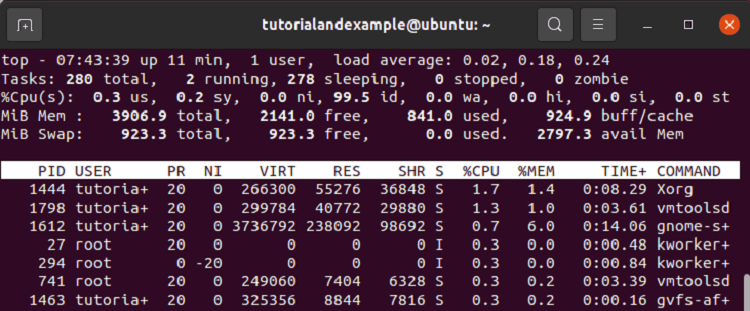
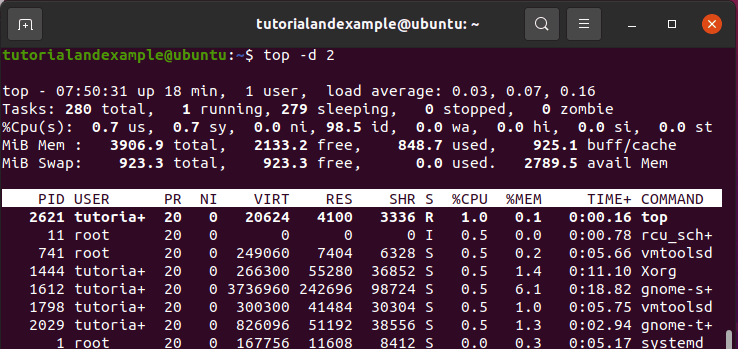
This is the interactive result, it gets updated automatically. You can also change the frequency of the update. For delaying the update you can try the below example.
Syntax:
Top –d <Seconds>
Output:
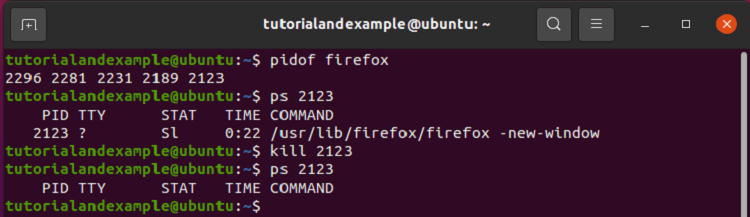
- kill
This can help you to kill any specific process. Sometimes you need to kill the process for various reasons.
The actual use case of kill command is to send various kinds of signals to the process specified. The default signal is for termination of the process.
Syntax:
#kill <option> <processID>
Output:
- pkill
The pkill command can also be used to send a signal to the process. It can terminate any process on the basis of the name of the process and some other attributes, butthe kill command can only terminate commands when the process id is mentioned.
Syntax:
#pkill <Options> <processFeature>
Output:
In this example, we have firefox running in the system, and we tried to terminate the firefox process using the pkill command. The pidof command helped us to find the process ids of the firefox. After termination of the process, no ids are shown by the pidof command.
 #pidof firefox
#pkill firefox
#pidof firefox

- bg
This command is used when the user wants to move the jobs to the background of the system. This can be used to restart a job and put it into the background.
Syntax:
#bg <Job>
Output:
In this example, we have created a job and intentionally stopped the job. Then, we used the bg command to restart the job and put it in the background.
 #jobs
#sleep 500
#jobs
#bg %1
#jobs
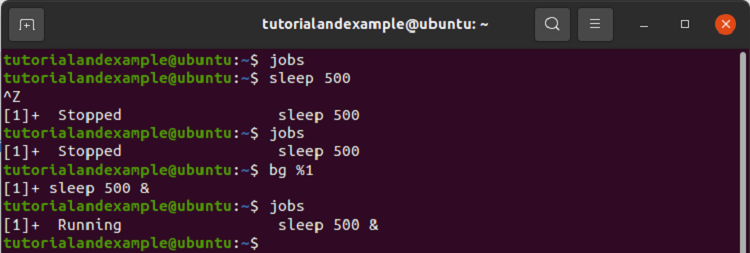
First, there were no jobs running. We then ran a job sleep 500 and stopped that by the shortcut ctrl+Z, and then we tried to bring the job sleep back to running but in the background using the bg command.
- fg
This command is used when the user wants to move the job to the foreground of the system.
Syntax:
#fg <job>
Output:
In this example, we will continue the last example. Here we will bring the sleep 500 command to the foreground, which is running in the background.
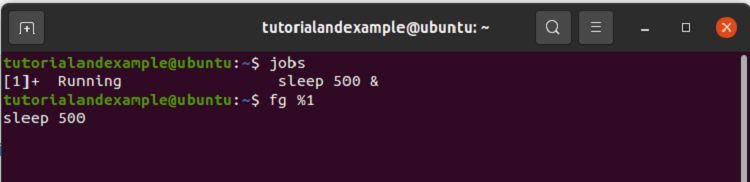
The job has been brought to the foreground successfully.
File Permission Commands in Linux
- chmod
The chmod command is very common in the Linux shell use cases. This command is used to provide various permissions to the files. Several permissions could be given to a file for further uses like reading, writing, and executing.
| Octal | Decimal | Permission | Representation |
| 000 | 0 | No Permission | --- |
| 001 | 1 | Execute | --x |
| 010 | 2 | Write | -w- |
| 011 | 3 | Write + Execute | -wx |
| 100 | 4 | Read | r-- |
| 101 | 5 | Read + Execute | r-x |
| 110 | 6 | Read + Write | rw- |
| 111 | 7 | Read + Write + Execute | rwx |
Syntax:
You can use any of the representations from the table given above, but we are using the octal.
#chmod <octal> <fileName>
Output:
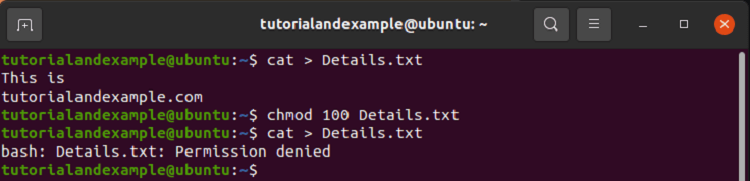
Let us understand what we did in the above screenshot? We first created a text file and wrote something in it. This means the file has read and write permission. Then we changed the permissions to read-only and got permission denied when we tried to write something again.
Searching Commands
- grep
The actual use case of the grep command is to print lines. It will display those lines which match the pattern mentioned in the command. There are several other commands which perform a similar task.
Syntax:
#grep <option> <pattern> <file>
Output:
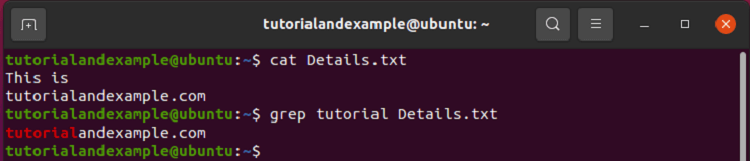
 #cat Details.txt
#grep tutorial Details.txt
In this example, we had a text file named Detailed.txt, and we tried to implement the grep command on this file to search for the word “tutorial” in the file. After the implementation, the line has been recovered with the word and also highlighted the word with red.
You could also use regular expressions in the pattern. In the below screenshot, we tried to capture and print lines that start with capital letters.
#grep “^[A-Z]” Details.txt

- locate
The locate command is used to search or find the files over the Linux system. This is helpful when you know the name of the file.
Syntax:
#locate <option> <Pattern>
Output:
 #ls
#locate f1.txt
In this example, we first created a text file named f1.txt and then tried to find it using the locate command.
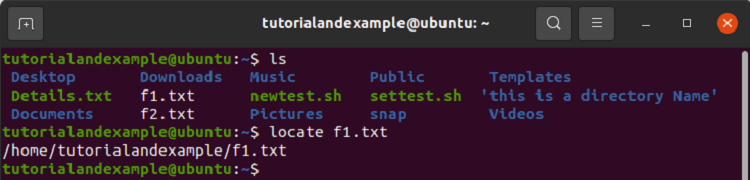
Hence we found the location of the file.
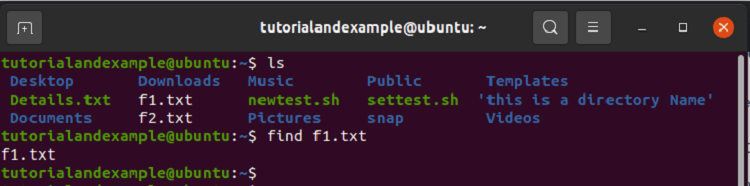
- find
The find command is also used to search for the files. The find can help to search files on the basis of various features like age, size, owner, file type, and many more.
Syntax:
#find <option> <file>
Output:
 #ls
#find f1.txt
- egrep
The egrep command is the better version of the grep command. This stands for “Extended Global Regular Expression Print.” The egrep can interpret more characters and provide them a special meaning than the grep command.
Syntax:
#egrep <option> <Pattern> <file>
Output:
 #egrep  “+”  Details.txt
#grep  “+”  Details.txt

This shows that the “+” is interpreted in the egrep command to read all the lines, but in grep, it is not interpreted; it is considered as a pattern.
System Info
- date
This command is used for two reasons; one is to print or display, and the other is to set the date and time.
Syntax:
#date <option> <+format>
Output:
To print date and time both.
#date

To print the year only.
#date +%Y

#date +%y

To see the time, use the below command.
#date +%H%M

- cal
This command is used to display or print the calendar and date on the terminal. It can also show the calendar according to the Julian calendar.
Syntax:
#cal <option> <format>
Output:
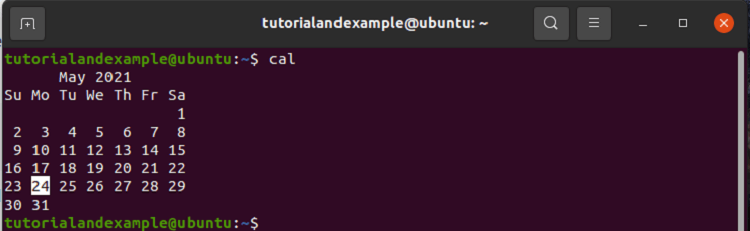
The current month with date highlights. You can also block the date highlight with an option present in the help of the command.
#cal
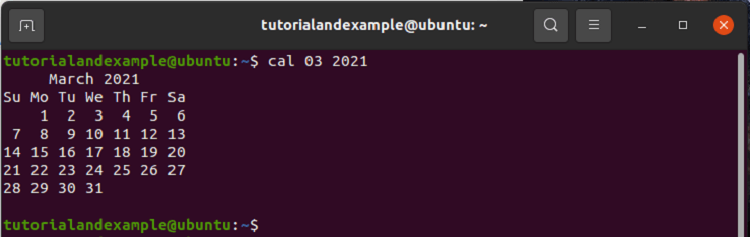
To get a specific month of a specific year.
#cal 03 2021
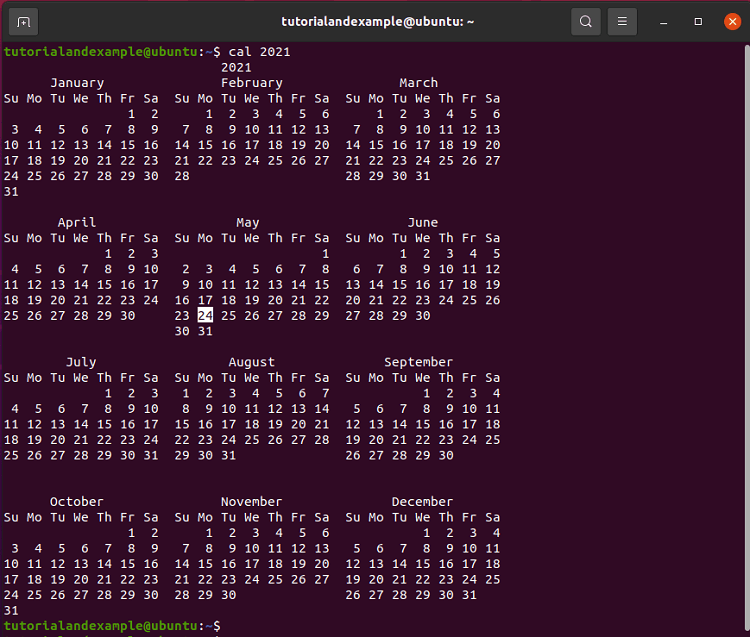
To see the complete calendar of a specific year.
#cal 2021
- uptime
This is a simple command which displays the uptime of the system. Uptime is the total time the system is in running condition or has not been shut down.
This command provides various features like the time, total running time, number of logged users, system loads.
Syntax:
#uptime <option>
Output:

- w
The actual function of the w command is to display the logged-on users and also explain what they are doing on the system.
The first line of the w command output is actually the same output displayed by the uptime command.
Syntax:
#w <option> <user>
Output:
#w

- uname
The uname command is used to print or display the system details on the terminal.
Syntax:
#uname <option>
Output:
To print the type of the system, use the below command.
#uname

To print detailed information about the system use the below command.
#uname -a

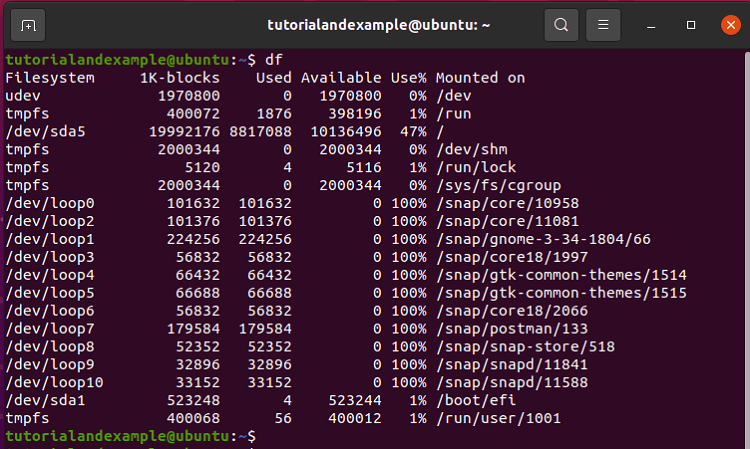
- df
The df command is used to display disk space usage.
Syntax:
#df <option> <file>
Output:
To print all the features available, use the below command.
#df
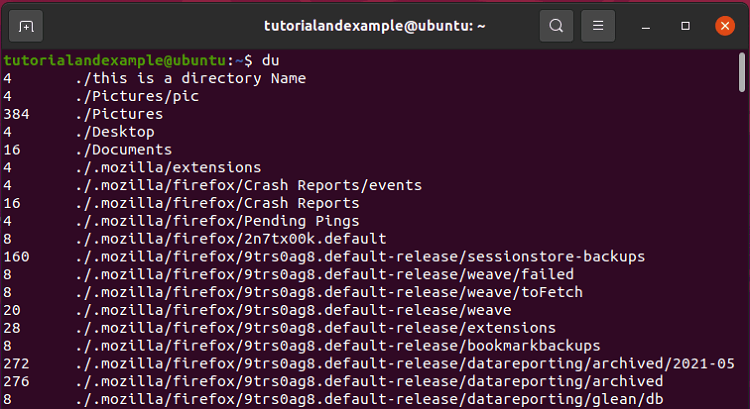
- du
The du command is to calculate the space usage of the files.
Syntax:
#du <option> <file>
Output: