Spring MVC Regular Expression Validation
Example of Regular Expression Validation
Here, we are going to create an example of regular expression validation.
Following are the steps to create an example of a regular expression:
- Create a request page
In this step, we are going to create a request page named index.jsp for the web application.
index.jsp
<html>
 <body>
 <h2> Spring MVC Web application </h2>
 <a href = "cust-regis-form"> Customer Registration Form </a>
 </body>
</html>
- Create the Model class
In this step, we are going to create the Model class named Customer.java, which stores the data.
Customer.java
 import javax.validation.constraints.Max;
 import javax.validation.constraints.Min;
 import javax.validation.constraints.NotNull;
 import javax.validation.constraints.Pattern;
 import javax.validation.constraints.Size;
 public class Customer {
                 private String fname;
                 @NotNull
                 @Size(min = 3, message = " This field is required ")
                 private String lname;
                 @Min(value = 1, message = "Tickets must be greater than or equal to 1 ")
                 @Max(value = 100, message = "Tickets must be smaller than or equal to 100")
                 private int movie_tick ;
                 @NotNull(message = "is Required")
                 @Pattern(regexp = "^[a-zA-Z0-9]{6}", message = "must be of 6 char/digit")
                 private String postal_code;
                 public String getpostal_code() {
                                 return postal_code;
                 }
                 public void setpostal_code(String postal_code) {
                                 this.postal_code = postal_code;
                 }
                 public int getMovie_tick() {
                                 return movie_tick;
                 }
                 public void setMovie_tick(int movie_tick) {
                                 this.movie_tick = movie_tick;
                 }
                 public String getFname() {
                                 return fname;
                 }
                 public void setFname(String fname) {
                                 this.fname = fname;
                 }
                 public String getLname() {
                                 return lname;
                 }
                 public void setLname(String lname) {
                                 this.lname = lname;
                 }
 }
- Create the Controller
In this step, we are going to create a Controller class named MainCustomer.java, which returns the JSP pages.
MainCustomer.java
 import javax.validation.Valid;
 import org.springframework.beans.propertyeditors.StringTrimmerEditor;
 import org.springframework.stereotype.Controller;
 import org.springframework.ui.Model;
 import org.springframework.validation.BindingResult;
 import org.springframework.web.bind.WebDataBinder;
 import org.springframework.web.bind.annotation.InitBinder;
 import org.springframework.web.bind.annotation.ModelAttribute;
 import org.springframework.web.bind.annotation.RequestMapping;
 @Controller
 public class MainController {
                 @InitBinder
                 public void initBinder(WebDataBinder dataBinder) {
                                 StringTrimmerEditor stringEditor = new StringTrimmerEditor(true);
                                 dataBinder.registerCustomEditor(String.class,stringEditor );
                 }
                 @RequestMapping("/cust-regis-form")
                 public String showCustomerForm(Model m) {
                                 m.addAttribute("customer", new Customer()) ;
                                 return "customerform" ;
                 }
                 @RequestMapping("/processForm")
                 public String showCustomerData( @Valid @ModelAttribute("customer") Customer custom,
                                                 BindingResult thebindingresult) {
                                 System.out.println("Last Name: |" +  custom.getLname() + "|");
                                 if (thebindingresult.hasErrors()) {
                                                 return "customerform" ;
                                 }
                                 else {
                                                 return "customerformdata" ;
                                 }
                }
   }
- Add the entry of Controller in the web.xml
In this step, we are going to add the entry of the Controller in the web.xml.
web.xml
 <?xml version = "1.0" encoding = "UTF-8"?>
 <web-app xmlns:xsi = "http://www.w3.org/2001/XMLSchema-instance"
                 xmlns = "http://xmlns.jcp.org/xml/ns/javaee"
                 xsi:schemaLocation = "http://xmlns.jcp.org/xml/ns/javaee http://xmlns.jcp.org/xml/ns/javaee/web-app_3_1.xsd"
                 id = "WebApp_ID" version = "3.1">
                 <display-name>spring-mvc-demo</display-name>
                 <absolute-ordering />
                 <!-- Spring MVC Configs -->
                 <!-- Step 1: Configure Spring MVC Dispatcher Servlet -->
                 <servlet>
                                 <servlet-name>dispatcher</servlet-name>
                                 <servlet-class>org.springframework.web.servlet.DispatcherServlet</servlet-class>
                                 <init-param>
                                                 <param-name>contextConfigLocation</param-name>
                                                 <param-value>/WEB-INF/spring-servlet.xml</param-value>
                                 </init-param>
                                 <load-on-startup>1</load-on-startup>
                 </servlet>
                 <!-- Step 2: Set up URL mapping for Spring MVC Dispatcher Servlet -->
                 <servlet-mapping>
                                 <servlet-name>dispatcher</servlet-name>
                                 <url-pattern>/</url-pattern>
                 </servlet-mapping>
 </web-app>
- Add the entry of Model class in another XML file
In this step, we are going to add the entry of Model/ Bean in another XML file (spring-servlet.xml).
spring-servlet.xml
 <?xml version = "1.0" encoding = "UTF-8"?>
 <beans xmlns = "http://www.springframework.org/schema/beans"
                 xmlns:xsi = "http://www.w3.org/2001/XMLSchema-instance"
                 xmlns:context = "http://www.springframework.org/schema/context"
                 xmlns:mvc = "http://www.springframework.org/schema/mvc"
                 xsi:schemaLocation = "  http://www.springframework.org/schema/beans
 http://www.springframework.org/schema/beans/spring-beans.xsd
 http://www.springframework.org/schema/context
 http://www.springframework.org/schema/context/spring-context.xsd
 http://www.springframework.org/schema/mvc
 http://www.springframework.org/schema/mvc/spring-mvc.xsd">
                 <!-- Step 3: Add support for component scanning -->
                 <context:component-scan base-package = "com.app.SpringMVCValidation" />
                 <!-- Step 4: Add support for conversion, formatting and validation support -->
                 <mvc:annotation-driven/>
                 <!-- Step 5: Define Spring MVC view resolver -->
                 <bean
                                 class="org.springframework.web.servlet.view.InternalResourceViewResolver">
                                 <property name = "prefix" value = "/WEB-INF/view/" />
                                 <property name = "suffix" value = ".jsp" />
                 </bean>
 </beans>
- Create all the view pages
In this step, we are going to create all the view pages (JSP pages) require in the project.
customerform.jsp
 <%@ taglib prefix = "form" uri = "http://www.springframework.org/tags/form" %>
 <!DOCTYPE html>
 <html>
 <head>
 <meta charset = "ISO-8859-1">
 <title> Customer Form </title>
 <style>
      .error {color:blue }
 </style>
 </head>
 <body>
 <h3><i>The field with Asterisk(*) mark is required.</i></h3>
 <form:form action = "processForm" modelAttribute = "customer" >
 FIRST NAME: <form:input path = "fname" />
 <br></br>
 LAST NAME (*): <form:input path = "lname" />
   <form:errors path = "lname" cssClass = "error" >
   </form:errors>
 <br> </br>
 TICKETS: <form:input path = "movie_tick" />
      <form:errors path = "movie_tick" cssClass = "error">
     </form:errors>
     <br> </br>
 POSTAL CODE: <form:input path = "postal_code" />
    <form:errors path = "postal_code" cssClass = "error">
    </form:errors>
 <br></br>
 <input type = "submit" value = "Submit" />
  </form:form>
 </body>
 </html>
customerformdata.jsp
<%@ taglib prefix = "c" uri = "http://java.sun.com/jsp/jstl/core" %>
<!DOCTYPE html>
<html>
<head>
<title>Customer data</title>
</head>
<body>
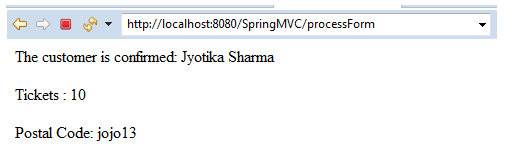
The customer is confirmed: ${customer.fname} ${customer.lname}
<br> </br>
Tickets : ${customer.movie_tick}
<br> </br>
Postal Code: ${customer.postal_code}
</body>
</html>
Output
Below are given the outputs of the application:
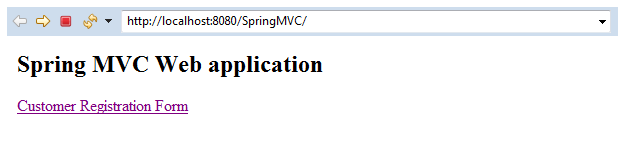
In the above output, a link (Customer Registration Form).
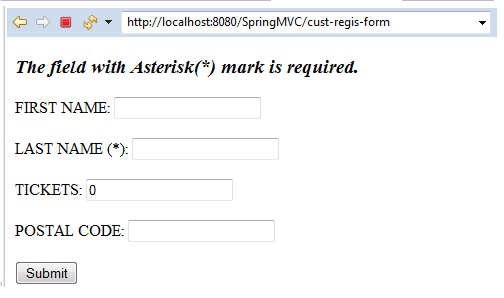
In the above output, we have added a new field POSTAL CODE in which we have applied the @Pattern annotation, and the rest fields are the same as of the previous example.
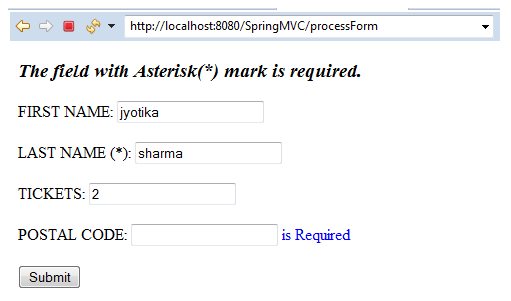
The above output shows that the POSTAL CODE test field is required. We cannot pass empty values in it.

The above output shows that the postal code must be of 6 letters (characters and digits). But we have provided 3-digits, that’s why it is showing the error “must be of 6 char/digit”.
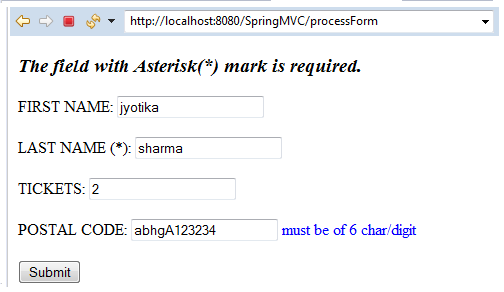
In the above output, we have provided an 11-digit postal code to the POSTAL CODE text field. That is why it is showing an error.
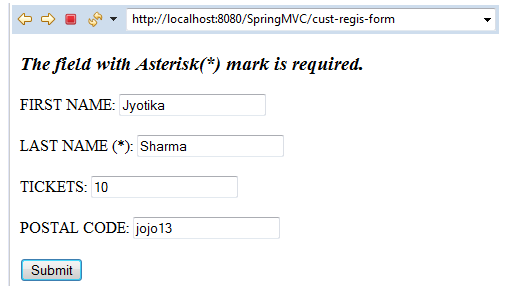
In the above output, we have provided the 6-digit postal code, which is going to pass the validation.