Spring Boot Tutorial
Introduction
Spring Boot is a Java-based open-source framework that is used for developing Micro Services. Pivotal Team is the company that is behind it. Spring Boot is something that makes it simple to construct standalone, production-ready spring apps. Spring Boot includes extensive infrastructure support for constructing micro-services, allowing you to construct enterprise-ready applications that can also be "simply run".
It's a tool that helps coders create web applications and microservices with Spring Framework more quickly and easily auto-configured. Configuration is all you can do with a point of view. You can define it as the ability to develop stand-alone apps.
This tutorial is for Java developers who all want to learn how to comprehend and construct production-ready spring apps with minimal setup. It delves into key Spring Boot features like Starters, Auto-configuration, Beans, Actuator, and so on. After completing this tutorial, you will be able to understand the basics of Spring Boot.
What exactly is a Micro Service?
Micro Service design is something that enables developers to create and deploy services independently. Each running service has its process, resulting in a lightweight paradigm for supporting all other kinds of business applications.
Pros
Microservices provide the following benefits to their developers:
- Simple to implement
- Scalability is simple
- Container Compatibility
- The bare essentials
- Production time is reduced
What exactly is a Spring Boot?
Spring Boot is a great platform for Java developers to create ready-to-run, self-contained, production-ready Spring applications. You can start with several configurations instead of a complete Spring configuration.
Why used?
With the help of Spring Boot, developers get the benefits of the following features:
- We use Spring Boot as spring applications are very simple to comprehend and build.
- Boosts productivity
- Cuts down on development time
Goals
When Spring Boot was created, it was created with the following goals:
- In Spring, to avoid extensive XML configuration
- To make it easier to create production-ready Spring applications.
- To bring down development time and make an application independent.
- Making it straightforward to get started with the application.
Aim
Spring Boot is a good option because of the characteristics and benefits it provides, which are listed below.
- You can configure JavaBeans, XML configuration, and database transactions in a tailoring way.
- Maintains REST endpoints and offers robust batch processing.
- Each thing is automatically configured with Spring Boot, no human changes are required.
- Spring application that is annotation-based.
- Makes managing dependencies easier
- That comes with an Embedded Servlet Container.
How does it function?
Spring Boot uses the @EnableAutoConfiguration annotation that helps to automatically arrange your application based on the dependencies you add to your project. If you have a MySQL database on your classpath but no database connection defined, Spring Boot will create an in-memory database for you.
The main method and the @SpringBootApplication annotation are the entry points for the spring boot application.
The @ComponentScan annotation spontaneously scans every element in the project.
Starters for Spring Boots
For large projects, managing dependencies is a demanding issue. Spring Boot overcomes this problem by giving developers a set of dependencies.
If you wish to utilize Spring with JPA for database access, for example, including the spring-boot-starter-data-JPA requirement in your project is sufficient.
Every Spring Boot starter uses a similar naming style: spring-boot-starter *, where * indicates that the application is of a particular type.
Configuration
Boots for Spring Auto Configuration manages your Spring application based on the JAR dependencies which is included in your project. If you have a MySQL database on your classpath but no database connection specified, Spring Boot will create this in an in-memory database for you.
To use this, we have to add the @EnableAutoConfiguration annotation or @SpringBootApplication annotation in the main class file. Once we do that, our Spring Boot application sets up by itself.
Spring Boot Application
As we get into the Spring Boot Application, primarily it’s the class containing the @SpringBootApplication annotation. For running the @SpringBootApplication, the class must have the main method. @SpringBootApplication annotation consists of the Auto-Configuration, Component Scan, and Spring Boot Configuration.
You have to make sure that if you have attached the @SpringBootApplication annotation in your class, there is no need of putting the @EnableAutoConfiguration, @ComponentScan, and @SpringBootConfiguration annotation. The @SpringBootApplication is a kind of annotation that will include all other annotations.
Component Scan
The Spring Boot application works by scanning every bean and package declaration when initialization is completed in the application. To filter the components of your project, you need to add the @ComponentScan annotation to your class file. In other words, you only add them, and you're done.
Spring Boot Features

Spring Application
The main aim of the SpringApplication class is to bootstrap and it also helps to launch the Spring application with the assistance of its main method. In some cases, you can also use the static SpringApplication.run method like below:
public static void main(string args[])
{
SpringApplication.run(ThisIsFirst.class, args);
}
By default, logging information messages are displayed every time a Spring application is started. These start-up info logging messages can be disabled by setting spring.main.log-start-up-info to false.
Lazy Initialization
In a Spring Boot environment, SpringApplication helps lazy initialization of Spring applications. We can conclude with its enablement that beans are generated on-demand instead of application start-up time and expedition of application’s execution. If it is enabled in a web application, some of the web elements are not initialized until you receive an HTTP request.
There are three ways with the help of which we can enable the lazy initialization:
- It can be done with the lazyInitialization() method of the Spring-Application-Builder class.
- In SpringApplication class It can be done using the setLazyInitialization() method.
- Last, it can be done by using the property spring.main.lazy-initialization.
For example
spring.main.lazy-initialization= true
Admin Features
When we talk about the Spring Boot framework, you can enable administrator-related features by specifying the spring.application.admin.enabled property. Expose the SpringApplicationAdminMXBean interface on the MBeanServer platform. It is also used to implement the Wrapper service and manage Spring Boot applications.
Security
In this feature, we get to know that Spring Boot applications are based upon the Spring applications. Therefore, Spring Boot applications are very secure and are fully based on the strategy of Spring Security.
We use the @EnableGlobalMethodSecurity annotation for adding the security of the method level to your web application.
Logging
This is the feature in which the Spring Boot framework uses Commons-logging for all its internal logging and a Java-based programming model service and other toolkits for logging. Logging also helps in providing default configurations for Log4J2, Logback, and Java Util Logging.
Caching
Caching is one of the other features offered by the Spring Boot framework. This also applies to application methods, so the count of execution is reduced depending on the availability of the information in the cache. If caching support is enabled using the @EnableCaching annotation, Spring Boot automatically configures the cache.
Kotlin Support
This feature of Spring Boot provides Kotlin Support. You might have it studied earlier, it is a programming language for backend, Android, mobile cross-platform, and even web development. It is designed for the JVM and several other platforms, this will allow you to write brief and straightforward code and provides integration of other existing Java libraries.
Validation
It is a kind of feature that is headily supported by the Spring Boot framework. It allows bean methods to be annotated with javax.validation binding on fields and their return values. Annotation of the target class is done by the @Validated on the level type and then it is checked for validation with the help of the validator.
JSON
It provides combinations with three JSON mapping libraries mentioned below:
- Gson: Configuration for the Gson is offered by default and because of this it gets configured automatically when Gson is available at the classpath. There are several spring.gson.* configuration properties to modify the configuration.
- Jackson: The spring-boot-starter-JSON repository is integrated into the Jackson. It is provided by default in the same way as Gson. If Jackson is on the classpath, the ObjectMapper Bean will be configured automatically. It also provides some configuration properties for customizing the ObjectMapper's configuration.
- JSONB: Automatic configuration for JSONB is also provided by default. It is configured automatically when its implementation and JSONB API are on the classpath. We can relate it to Jackson which is the default, preferred JSON library.
Testing
In terms of testing, it provides many utilities and annotations that can help in the testing of the applications. In Spring Boot Framework we are having two modules that give support in testing, first is spring-boot-test, containing each of the basics and another is spring-boot-test-autoconfigure which supports automatic configuration to perform testing.
Task Execution and Scheduling
Executor bean plays a major role because if it is missing from the context, Spring Boot will set up a ThreadPoolTaskExecutor by itself. We can either change the Executor bean to a ThreadPoolTaskExecutor or provide both the ThreadPoolTaskExecutor and the AsyncConfiguration depending on the target.
Limitations of Spring Boot
Some of the limitations of Spring Boot are:
- Include some extra dependencies that are useless because you are using Spring Boot Starters (root dependencies).
- Unnecessary dependencies used by the application greatly increase the size of the application.
- It usually takes some time to convert a Spring Framework application to a Spring Boot application, which could be considered the major limitation of Spring Boot.
Components of Spring Boot
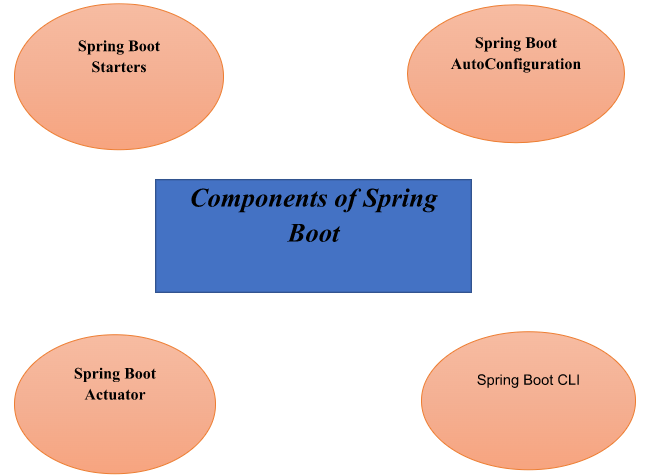
As I said earlier, the Spring Boot IDE is an updated Spring Environment project with some additional features and components. The four core components of Spring Boot are:
- Spring Boot Starters
- Spring Boot Auto Configuration
- Spring Boot CLI
- Spring Boot Actuator
In addition to the core components listed above, two additional components are available for Spring Boot i.e.:
- Spring Initializer
- Spring Boot IDE
Spring Boot Starters
Spring Boot Starters are one of the core components of the Spring Boot framework. Link two or more dependencies in a group. It also reduces the number of manually added dependencies by combining multiple dependencies into one. So instead of specifying many dependencies, we add a starter.
For example, when creating a Spring MVC application, you need a lot of dependencies like
- Spring Core
- Spring Web MVC
- Spring Web
In addition to the above dependencies, we need a few more dependencies. Manually adding dependencies introduces a lot of noise to your code. Here Spring Boot has come up with a solution to this problem.
Spring Boot makes things easier because it only adds root dependencies or seed dependencies. When you add an initial dependency to your application, Spring Boot automatically adds all the necessary dependencies to your application.
Spring Boot Auto-Configuration
Spring Boot Auto-configuration is also an important component of the Spring Boot Framework. When you create a spring application, you need a lot of configuration code, such as XML-based, Java, or annotation-based configuration code. For most applications, this creates a lot of confusion and time-consuming code.
So, Spring Boot Auto-configuration came out to solve the problem. It serves to reduce the spring configuration. When building a Spring Boot application, you don't need to define any configuration (XML-based) or reduce the use of an annotation-based configuration (almost useless). With Spring Boot Auto-Configuration, the program is simple and fast because no configuration is required.
For example, if you use the "spring-boot-starter-web" starter in your application, Spring Boot will automatically configure any beans or classes.
Spring Boot CLI
The Spring Boot command-line interface (CLI) is a command-line interface for Spring Boot-based applications. You can use the CLI to launch Spring Boot applications on demand. It is also used to test Spring Boot applications from the command line. You can also use the Spring Boot CLI to run Groovy code with similar Java syntax.
When running some Spring Boot applications via CLI, it internally uses Spring Boot Starter and Spring Boot Auto-Configuration components to fix all dependencies and start the application.
Spring Boot Actuator
The Spring Boot Actuator is also an essential component of the Spring Boot framework. It also works as a subproject (tool) of Spring Boot. It provides many features for the Spring Boot framework, but is mainly responsible for two main functions, that are:
- Provides an administrative (HTTP) endpoint for all Spring Boot applications.
- Also use these HTTP endpoints to manage production applications.
Spring Boot Actuator automatically provides the hostname as "localhost" and port number as "8080" whenever you use the Spring Boot CLI to deploy your Spring Boot application. Here we usually use the HTTP request method (GET or POST) to represent the EndPoint using Spring Boot Actuator.
: Spring Boot Actuator is primarily used to access internal application information such as metrics, dumps, status, etc.
Spring Initializer
Spring Initializer is a web interface for creating, configuring, and creating Spring applications. In other words, it's a tool you use to quickly start a JVM-based project with an implementation. You can create projects in a variety of languages, including Groovy, Kotlin, and Java. It also provides Maven for building applications.
Spring Boot IDEs
The Spring Boot platform supports many IDEs used to build applications, including Eclipse, IntelliJ IDEA, and Spring Tool Suite (STS).
Spring Boot Tutorial Index
- Spring Boot Tutorial
- Spring Boot Features
- Spring Boot Architecture
- Spring Boot JPA
- Spring Boot Actuator
- Spring Boot Annotations
- Spring Boot Download
- Spring Boot Starter Test
- Spring Boot Starter Web
- Spring Boot without Parent POM
- Spring Data JPA
- Spring Boot DevTools