
React Native stack navigation
You must know about the stack data structure. Stack is one of the important data structures which works in the FILO(first in last out) method.
As you know, mobile apps are generally not made of only one page, and there are transitions between pages as per user activity. Even a very basic app consists of multiple pages, so the transition is the important part where we need to work keenly. Stack navigation provides a way of transition where a new screen is always placed on the top of the stack. Its implementation can be done in javascript. one thing to keep in mind is that we can customize react-native stack navigation as needed. Animations can be added too and can be controlled. You will be learning how screens are stacked on each other.
Let's work with stack navigation.
We need to install some packages before using the stack navigator, so open your terminal and execute the following command -
- npm install @react-navigation/stack
- npm install react-native-gesture-handler
- npm install react-native-screens
- react-native-safe-area-context
Make one folder named screen and add three more folders home, options and menu.
Home.js code :
import React, { Component } from 'react';
import { Button, View, Text } from 'react-native';

class Home extends Component {
  render() {
    return (
      <View style={{ flex: 1, alignItems: 'center', justifyContent: 'center' ,backgroundColor:'#ffb3b3',justifyContent: "space-around",flexDirection: "row",padding:10}}>

        <Button
          title="go to options"
          onPress={() => this.props.navigation.navigate('Blog')}

        />
        <Button
          title="Go to menu"
          onPress={() => this.props.navigation.navigate('BlogDetails')}

        />


      </View>
    );
  }
}

export default Home;
Menu.js code:
import React, { Component } from 'react';
import { Button, View, Text } from 'react-native';

class menu extends Component {
  render() {
    return (
      <View style={{ flex: 1, alignItems: 'center', justifyContent: 'center',backgroundColor:'#ffcce0' }}>
        <Text>menu screen</Text>
        <Button
          title="Go to Home"
          onPress={() => this.props.navigation.navigate('Home')}
        />
        <Button
          title="Go to options"
          onPress={() => this.props.navigation.navigate('Blog')}

        />
      </View>
    );
  }
}

export default menu;
Options.js code :
import React, { Component } from 'react';
import { Button, View, Text } from 'react-native';

class options extends Component {
  render() {
    return (
      <View style={{ flex: 1, alignItems: 'center', justifyContent: 'center' }}>
        <Text>option Screen</Text>
        <Button
          title="Go to Home"
          onPress={() => this.props.navigation.navigate('Home')}
        />
        <Button
          title="Go to menu screen"
          onPress={() => this.props.navigation.navigate('BlogDetails')}
        />
      </View>
    );
  }
}

export default options;
App.js code:
import React from 'react';
import { NavigationContainer } from '@react-navigation/native';
import { createStackNavigator } from '@react-navigation/stack';

import Home from './Home';
import Blog from './Options';
import BlogDetails from './Menu';

const Stack = createStackNavigator();

function NavStack() {
  return (
     <Stack.Navigator
        initialRouteName="Home"
        screenOptions={{
          headerTitleAlign: 'center',
          headerStyle: {
            backgroundColor: '#ff66a3',
          },
          headerTintColor: '#fff',
          headerTitleStyle :{
            fontWeight: 'bold',
          },
        }}
      >
      <Stack.Screen
        name="Home"
        component={Home}
        options={{ title: 'welcome to Home screen' }}
      />
      <Stack.Screen
        name="Blog"
        component={Blog}
        options={{ title: 'welcome to option screen' }}
      />
      <Stack.Screen
       name="BlogDetails"
       component={BlogDetails}
       options={{ title: 'welcome to menu screen' }}
      />
    </Stack.Navigator>
  );
}

export default function App() {
  return (
    <NavigationContainer>
      <NavStack />
    </NavigationContainer>
  );
}

console.disableYellowBox = true;
Output :
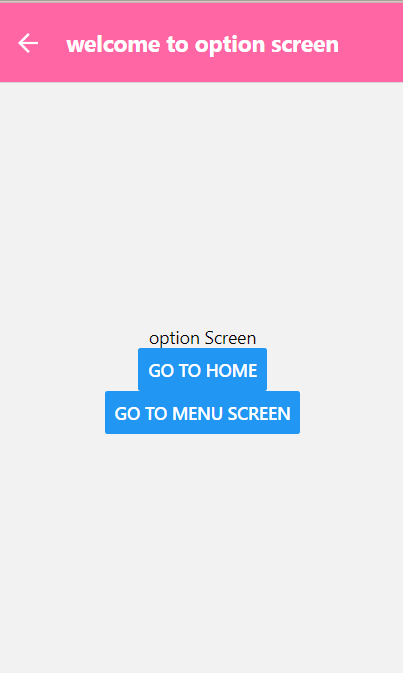
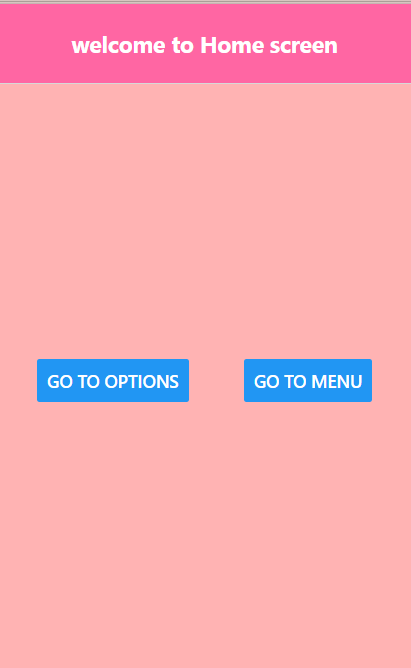
Explanation :
Home.js, options.js, and menu.js files are identical. If you understand any one of them, then the other two can be understood very clearly.
Lets look at menu.js code class component-
class menu extends Component {
  render() {
    return (
      <View style={{ flex: 1, alignItems: 'center', justifyContent: 'center',backgroundColor:'#ffcce0' }}>
        <Text>menu screen</Text>
        <Button
          title="Go to Home"
          onPress={() => this.props.navigation.navigate('Home')}
        />
        <Button
          title="Go to options"
          onPress={() => this.props.navigation.navigate('Blog')}

        />
      </View>
    );
  }
}


export default menu;
Here we have defined the class name as the menu, we have given some necessary styling, and then we have defined the text component, then the main factor is the button, and onPress defines what will happen after clicking the on the button.
<Button
          title="Go to Home"
          onPress={() => this.props.navigation.navigate('Home')}
        />
After clicking on the button, we will be directed to the Home screen.
 />
        <Button
          title="Go to options"
          onPress={() => this.props.navigation.navigate('options')}

        />
After clicking on this, we will be directed to options.
The reason for elaborating this is that suppose if you are on the home page, then you navigated to the options page, and then you navigated to the menu page. You can witness a back option there, so what will happen if you press back now? Where will you be navigated?
So the answer is you will be navigated to the last visited page and so on. That's why it is called stack operation.
So hereafter, clicking back, you will be navigated to the options page, and again after clicking it, you will be navigated to home.