
React Native Toast
Introduction: It is a message that will be displayed on the screen for a short span of time to interrupt the user. Primarily it is displayed by any user action. Toast can be displayed to indicate any operation's failure or success or for warning purposes. After some time, toast disappears automatically. Only android supports this feature. The toast feature is not available for IOS.
It generally takes two parameters, message, and duration, as- shown (message, duration)
Message: A string of words will be displayed as text. Whatever would be passed as a message will be displayed on our screen as toast, and it will disappear after some time.
Duration: it decides how long the toast will stay on screen, but we cannot decide by passing any specific time. We can do this by ToastAndroid.SHORT or ToastAndroid.LONG method.
Severity: We can use severity to decide which part of the screen toast will appear. It can be passed along with message and duration as (message, duration, severity).there can be three possible portions where toast can be displayed top, bottom, or center. We can specify this using ToastAndroid.TOP, ToastAndroid.BOTTOM or ToastAndroid.CENTER.
Importing toast in react native app:
You can import ToastAndroid as - import { ToastAndroid} from 'react-native' .
Types of toast methods-
Generally, there are three types of toast methods
Show: Here we can only specify the message and duration.
Show With Gravity: Here we can specify severity along with the message and duration.
Show With Gravity and Offset: Here we can specify the x and y-axis along with the message, duration, and severity.
Let's learn toast with a practical example :
App.js code:
import React from 'react';
import {
  SafeAreaView,
  Text,
  View,
   TouchableHighlight,
  StyleSheet,
   ToastAndroid,
} from 'react-native';


const App = () => {
  const toast_With_Duration_Handler = () => {
    ToastAndroid.show(
      'Hi I am Simple Toast nice to see you', ToastAndroid.LONG
    );
  };

  const toast_With_Duration_Gravity_Handler = () => {
    ToastAndroid.showWithGravity(
      'Hi I am center gravity Toast nice to see you',
      ToastAndroid.CENTER,
      ToastAndroid.CENTER,
    );
  };

  const toast_With_Duration_Gravity_Offset_Handler = () => {

    ToastAndroid.showWithGravityAndOffset(
      'Hi I am Toast with garavity and offset nice to see you',
      ToastAndroid.LONG,
      ToastAndroid.BOTTOM,
      25,
      500,
    );
  };

  return (
    <SafeAreaView style={styles.container}>
      <View style={styles.container}>
        <Text style={styles.titleStyle}>
        Example of  React Native Toast
        </Text>
        <TouchableHighlight
          style={styles.buttonStyle}
          onPress={toast_With_Duration_Handler}>
          <Text style={styles.buttonTextStyle}>
            Generate Toast number 1
          </Text>
        </TouchableHighlight>

        <TouchableHighlight
          style={styles.buttonStyle}
          onPress={toast_With_Duration_Gravity_Handler}>
          <Text style={styles.button_TextStyle}>
            Generate Toast number 2
          </Text>
        </TouchableHighlight>

        <TouchableHighlight
          style={styles.buttonStyle}
          onPress={toast_With_Duration_Gravity_Offset_Handler}>
          <Text style={styles.button_TextStyle}>
            Generate Toast number 3
          </Text>
        </TouchableHighlight>
      </View>
    </SafeAreaView>
  );
};
export default App;

const styles = StyleSheet.create({
  container: {
    flex: 1,
    alignItems: 'center',
    justifyContent: 'center',
    backgroundColor: 'gray',
    padding: 25,
  },
  buttonStyle: {


flexDirection: 'row',
flex:1,
width:80,
height: 1,
alignItems: 'bottom',
borderRadius: 25,
borderWidth: 10,
borderColor: 'pink',
backgroundColor: '#2bd64d',
},

  button_TextStyle: {
    color: 'white',
    textAlign: 'center',
  },
  titleStyle: {
    color: 'black',
    textAlign: 'center',
    fontSize: 15,
    marginTop: 15,
    fontweight: 'bold',
      backgroundColor: 'white',
      borderRadius: 25,
borderWidth: 5,
borderColor: 'pink',
  },
});
Output:
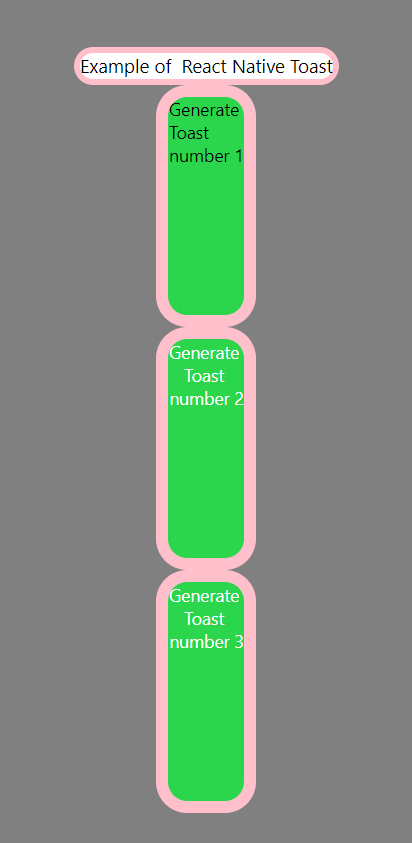
Here three buttons are available. When you click on them, you will get respective toasts.
Here three buttons are available. When you click on them, you will get respective toasts.
Explanation of code :
We have given the example of all three available methods here show, Show With Gravity and Show With Gravity and offset .firstly er have imported all the necessary components, including the toaster toast android.
Method used in First button: here simple toast method is used just look at the code
  const toast_With_Duration_Handler = () => {
    ToastAndroid.show(
      'Hi I am Simple Toast nice to see you', ToastAndroid.LONG
    );
We have used the show method and passed two parameters first is a string and the second one is duration. The passed string is 'Hi, I am Simple Toast. Nice to see you. And this will stay on the screen for some time and will not disappear frequently. It will stay for a few seconds as a long parameter is passed in the method. This was our first button's method. If the first button is pressed, this simple toast will appear on the screen.
The method used in the second button is the toast with gravity method. Just look at the code.
  ToastAndroid.showWithGravity(
      'Hi I am center gravity Toast nice to see you',
      ToastAndroid.SHORT,
      ToastAndroid.CENTER,
    );
  };
We have used the show with gravity method. Here three parameters are passed string, duration, and severity. If the user clicks on the second button, the passed string 'Hi I am center gravity Toast nice to see you' will be displayed for a short duration, and then it will disappear, and the toast will appear at the center of the screen because of ToastAndroid.CENTER, is passed by default. The toast appears at the bottom.
The method used in the third button: here toast with Gravity and offset method is used look at the code.
 ToastAndroid.showWithGravityAndOffset(
      'Hi I am Toast with garavity and offset nice to see you',
      ToastAndroid.LONG,
      ToastAndroid.BOTTOM,
      25,
      500,
    );
  };
We have used the show with gravity offset method and passed five parameters to the method, which is similar to the previous one. The last two parameters add offset in the pixel. The passed string will appear as toast on the screen, and here it will stay for a long duration as long is passed.
Creation of button: we have created button using touchable highlights and all the three buttons are responsive .
<TouchableHighlight
          style={styles.buttonStyle}
          onPress={toast_With_Duration_Handler}>
          <Text style={styles.buttonTextStyle}>
            Generate Toast number 1
          </Text>
        </TouchableHighlight>
onPress decides that what will the button’s response when it is pressed so here we have called show method and this show method will display toast which we have already discussed.rest two buttons terminology is also same as the first one.
Styling
We have styled the components using a stylesheet as per our choice. You can even add animation to this.