Struts 2 ValueStack
Struts ValueStack:
The value stack in the struts application is nothing but a stack that contains a collection of objects such as action object, model object, temporary object, and named object.
1. Action Object:
It shows the object of the current action which is currently executing.
2. Model Object:
It is preferred to place the current model object before the action in the stack.
3. Temporary Objects:
Various temporary objects are generated while executing a page.
4. Named Objects:
Different objects such as #request, #session, #application, #parameters, correspond to servlet scope and are called Named objects.
JSP tags are used to access the value stack. We can obtain the value stack object as,
ActionContext.getContext().getValueStack()
Methods used with value stack object are:
1. Object findValue (String expression):
The expression is evaluated against the stack and the value is found using this method.
2. Object peek():
The object located on the top of the stack is obtained with these methods without any change in the stack.
3. Object pop():
This method removes the object from the top of the stack. It causes a change in the stack.
4. void push (Object obj):
This method is used to insert the object on the top of the stack.
5. void set (String key, Object obj):
This method is used to insert the object along with the given key on the stack. Later using the findValue method we can retrieve the object.
6. void setValue (String expr, Object value):
With the help of the given expression, this method sets the property on the bean present in the stack.
7. int size():
This method returns the number of objects currently present in the stack.
8. String findString (String expr):
This method evaluates the given expression and according to it finds the matching string.
Struts ValueStack example:
To get input from the user create the index.jsp file:
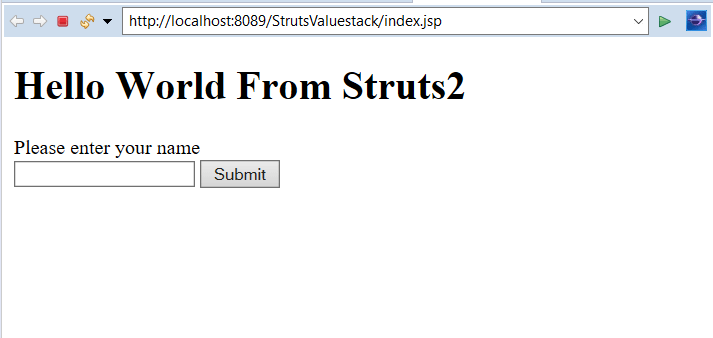
The index.jsp page takes the input from the user. Then the user will enter the name. Then after clicking on the Submit button, it will redirect to the next resource. It contains one textfield and one button on the form with the link to Action class
<%@ page language = "java" contentType = "text/html; charset = ISO-8859-1"
   pageEncoding = "ISO-8859-1"%>
<%@ taglib prefix = "s" uri = "/struts-tags"%>
   <!DOCTYPE html PUBLIC "-//W3C//DTD HTML 4.01 Transitional//EN"
   "http://www.w3.org/TR/html4/loose.dtd">
<html>
   <head>
      <title>Hello World</title>
   </head>
   <body>
      <h1>Hello World From Struts2</h1>
      <form action = "hello">
         <label for = "name">Please enter your name</label><br/>
         <input type = "text" name = "name"/>
         <input type = "submit" value = "Submit"/>
      </form>
   </body>
</html>
Create HelloWorld.jsp file to denote success:
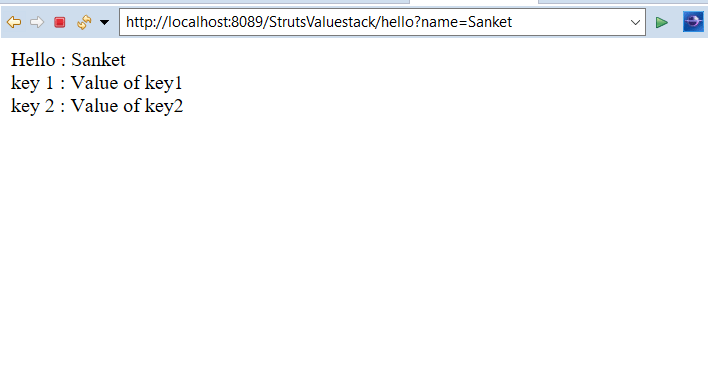
The HelloWorld.jsp page is used to display Welcome message when execute method return success string along with passed key values.
<%@ page contentType = "text/html; charset = UTF-8" %>
<%@ taglib prefix = "s" uri = "/struts-tags" %>


<html>
   <head>
      <title>Hello World</title>
   </head>

   <body>
      Hello : <s:property value = "name"/><br/>
      key 1 : <s:property value = "key1" /><br/>
      key 2 : <s:property value = "key2" /> <br/>
   </body>
</html>
Create the action class HelloWorldAction.java:
The Action class HelloWorldAction.java contains name field with their getter and setters. It contains the execute method. On success, it will go to the HelloWorld.jsp page with 2 keys and their values.
import java.util.*;


import com.opensymphony.xwork2.util.ValueStack;
import com.opensymphony.xwork2.ActionContext;
import com.opensymphony.xwork2.ActionSupport;


public class HelloWorldAction extends ActionSupport {
   private String name;


   public String execute() throws Exception {
      ValueStack stack = ActionContext.getContext().getValueStack();
      Map<String, Object> context = new HashMap<String, Object>();


      context.put("key1", new String("Value of key1"));
      context.put("key2", new String("Value of key2"));
      stack.push(context);


      System.out.println("Size of the valueStack: " + stack.size());
      return "success";
   }


   public String getName() {
      return name;
   }


   public void setName(String name) {
      this.name = name;
   }
}
Construct struts.xml file:
In the struts.xml file, make the entry of the action class and link for it and result pages. The result determines what browser will display after the execution of the action. Results have optional names like success, input and error.
<?xml version="1.0" encoding="UTF-8" ?>
<!DOCTYPE struts PUBLIC "-//Apache Software Foundation//DTD Struts
Configuration 2.1//EN" "http://struts.apache.org/dtds/struts-2.1.dtd">


<struts>
   <constant name = "struts.devMode" value = "true" />
   <package name = "helloworld" extends = "struts-default">


      <action name = "hello"
         class = "HelloWorldAction"
         method = "execute">
         <result name = "success">/HelloWorld.jsp</result>
      </action>


   </package>
</struts>
web.xml file is created inside WEB-INF folder in WebContent folder:
The web.xml file in the WEB-INF folder specify how elements are processed. The entry of FilterDispatcher is done in the web.xml file. /* specifies all urls will be parsed. This task is done by struts filter.
<?xml version="1.0" encoding="UTF-8"?>
<web-app xmlns:xsi="http://www.w3.org/2001/XMLSchema-instance" xmlns="http://java.sun.com/xml/ns/javaee" xsi:schemaLocation="http://java.sun.com/xml/ns/javaee http://java.sun.com/xml/ns/javaee/web-app_3_0.xsd" id="WebApp_ID" version="3.0">
  <display-name>StrutsValuestack</display-name>
  <welcome-file-list>
    <welcome-file>index.html</welcome-file>
    <welcome-file>index.htm</welcome-file>
    <welcome-file>index.jsp</welcome-file>
    <welcome-file>default.html</welcome-file>
    <welcome-file>default.htm</welcome-file>
    <welcome-file>default.jsp</welcome-file>
  </welcome-file-list>
  <filter>
    <filter-name>struts2</filter-name>
    <filter-class>
    org.apache.struts2.dispatcher.ng.filter.StrutsPrepareAndExecuteFilter
   </filter-class>
  </filter>
  <filter-mapping>
    <filter-name>struts2</filter-name>
    <url-pattern>/*</url-pattern>
  </filter-mapping>
</web-app>
Output:
In order to run the application, right-click on the project -> Click on the option Run As -> then select Run on Server. It will show a label for entering the name and the Submit button.
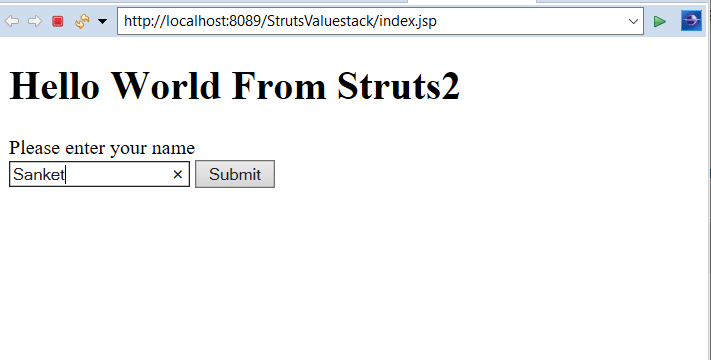
Enter the name. Then click on the submit button.
On success, it will redirect to HelloWorld.jsp page displaying Hello: username and two keys. The size of the valuestack is printed 3 on the console.