
Hatch command in AutoCAD
In AutoCAD, the Hatch command is used to fill patterns inside an enclosed region. Hatched, gradient, and solid fill designs are available.
A gradient pattern is a seamless transition between two colours.AutoCAD has a number of hatch patterns.
We may select the required design from the list of patterns based on the specifications. The Hatch Pattern Scale may be used to change the amount of hatch lines depicted in any pattern.
The Hatch Design Scale represents the space between lines in a certain pattern.
Step 1: At the top of the working screen, there is a ribbon with many different types of tabs such as Home, Annotation, View, and others for managing different commands in this software; below this, we have a working window in which we can see our current work; and below this working window, there is some navigation command for handling our work during the drawing process.
Step 2: Create a sketch for adding a hatch on it. I photograph the front and top views of an engineering component like this. Because I want to show the cross-section of this component, I'll use a hatch.
Step 3: Now click on the Hatch command of the Draw menu of the Home tab, or you can press the H button then press enter button of the keyboard for the Hatch command.
Step 4: Once you take the hatch command, the Hatch creation tab will be open at the command section of this software. Choose the pattern of the hatch which you want to apply on your object from the Pattern tab of the Hatch Creation tab.
Step 5: Now, you can apply a hatch on your object by two methods. We will see both one by one. First, click on this Pick Points icon.
Step 6: Now, it will ask you to select a point inside the object on which you want to apply the hatch, and when you take your cursor inside that object preview of the hatch will be visible to you, and once you make click inside the object your hatch will apply to your object.
Step 7: The second method is Select, so click on the Select icon.
Step 8: Then it will ask you to select the boundary of the object on which you want to apply the hatch, and when you click on the boundary hatch will apply to your object like this.
Step 9: There is a difference between both methods when you use the Select method; then it will cover all portion which is inside the boundary of your selected object.
Step 10: But if you go with the Pick Point method, it will only apply a hatch on the selected object and leave the object inside your selected object. So you can take any method according to your requirement.
Step 11: You can apply more than one pattern of the hatch on different objects. To apply two different hatch patterns, apply the first pattern on the first object by the same method as we did in previous, then exit from command and again go to hatch command, then apply different hatch patterns on another object.
Step 12: You can change the color of the hatch line from this option. Click on the drop-down arrow button and choose your desired color from here then the color of the hatch line will be changed into your selected color. Such as I choose red, then the hatch color line will change into red color.
Step 13: You can change the fill color of the hatched block from this option; just click on the drop-down arrow button of this option and choose your desired color. I will choose a yellow color then the hatch block color will change into yellow color.
Step 14: If you want to increase the density of the hatch, then increase the scale of the hatch. You can increase the scale from this option. For example, I increase the value to 2 after selecting my hatch.
Step 15: Then, the size of my hatch block will increase like this.
Step 16: You can also change the angle of your hatch pattern. For changing the angle, select your hatch and enter the value of hatch angle in the box of Angle option; then, the angle of the hatch will be changed like this.
Step 17: If you want to decrease the visibility of the hatch line, then decrease the value of the Hatch Transparency option after selecting your desired hatch. I will change the value to 60.
Step 18: Then, the visibility of my selected hatch will decrease like this.
Step 19: If you want to copy your applied hatch of any object on another object of your drawing, click on the Match Properties option icon.
Step 20: Then select the hatch which you want to copy by click on it.
Step 21: Then make click on the boundary of the object on which you want to paste this hatch.
Step 22: You can set all these parameters at the time of applying a hatch on your object. Just click on the Settings option of the hatch command, which is at the end of the working window in the parameters box of this command.
Step 23: Once you make click on this option, a Hatch settings box will be open like this. You can make your desired settings in this box and see the preview by clicking on the Preview tab of this box.
Step 24: If you want to remove any particular hatch from your drawing, then click on the Remove button of the Hatch Creator tab.
Step 25: And click on the boundary of the object of which hatch you want to remove, then press enter button of keyboard and your hatch will be removed from your object.
Consider the below image:

The steps to fill hatch pattern are listed below:
1. From the ribbon panel select the Hatch icon, as shown in the below::
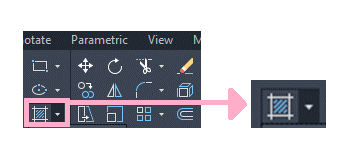
Or
On the command line or command prompt type H and press Enter.
Pick internal points of any object.
Or
Select objects.
Here, we have picked an internal point inside a circle. We can pick any point inside a circle.
A hatch pattern will be generated inside the circle, as shown below:
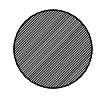
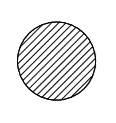
To modify the lines, we have increased the Hatch Pattern Scale.
The figure will now appear as:
We can also select the desired patterns from the list of patterns, as shown below:

The greater the hatch pattern Scale, the higher will be the distance between the lines in the hatch pattern.
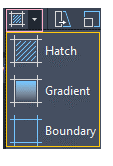
When we click on the arrow near the Hatch Icon, a drop-down list appears, as shown in the below image:
Gradient
Consider the below image:
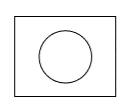
The steps are listed below:
Select the Gradient Icon from the drop-down list of the hatch.
Pick internal points of any object or select objects. Here, we have picked an internal point outside the circle.
A gradient will be created inside the rectangle, as shown below:
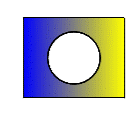
Let's consider another gradient pattern. It will look like the below image:
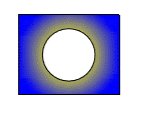
We can also select the desired patterns from the list of patterns, as shown below:
