Firebase Tutorial
Firebase by Google is a platform that offers different functionalities for creating web and mobile applications. Firebase was an independent company, but was acquired by Google in 2014. It is considered as a Baas or Backend as a service that provides the below-listed backend services to mobile and web developers:
- Firestore: Firebase offers a NoSQL database for data storage that scales automatically, has high performance, and increases the ease of building an application without worrying about setting up a backend and a database management system.
- Hosting: Firebase offers free hosting for static web pages and SPA (single page applications). The sites can be deployed very easily
There are other services like Authentication, Realtime Database, Storage, Cloud Functions, Performance Monitoring, and Machine Learning that Firebase provides.

Firebase Project setup
This section will look into how to set up a firebase project through which we can use the above-listed services offered by Firebase.
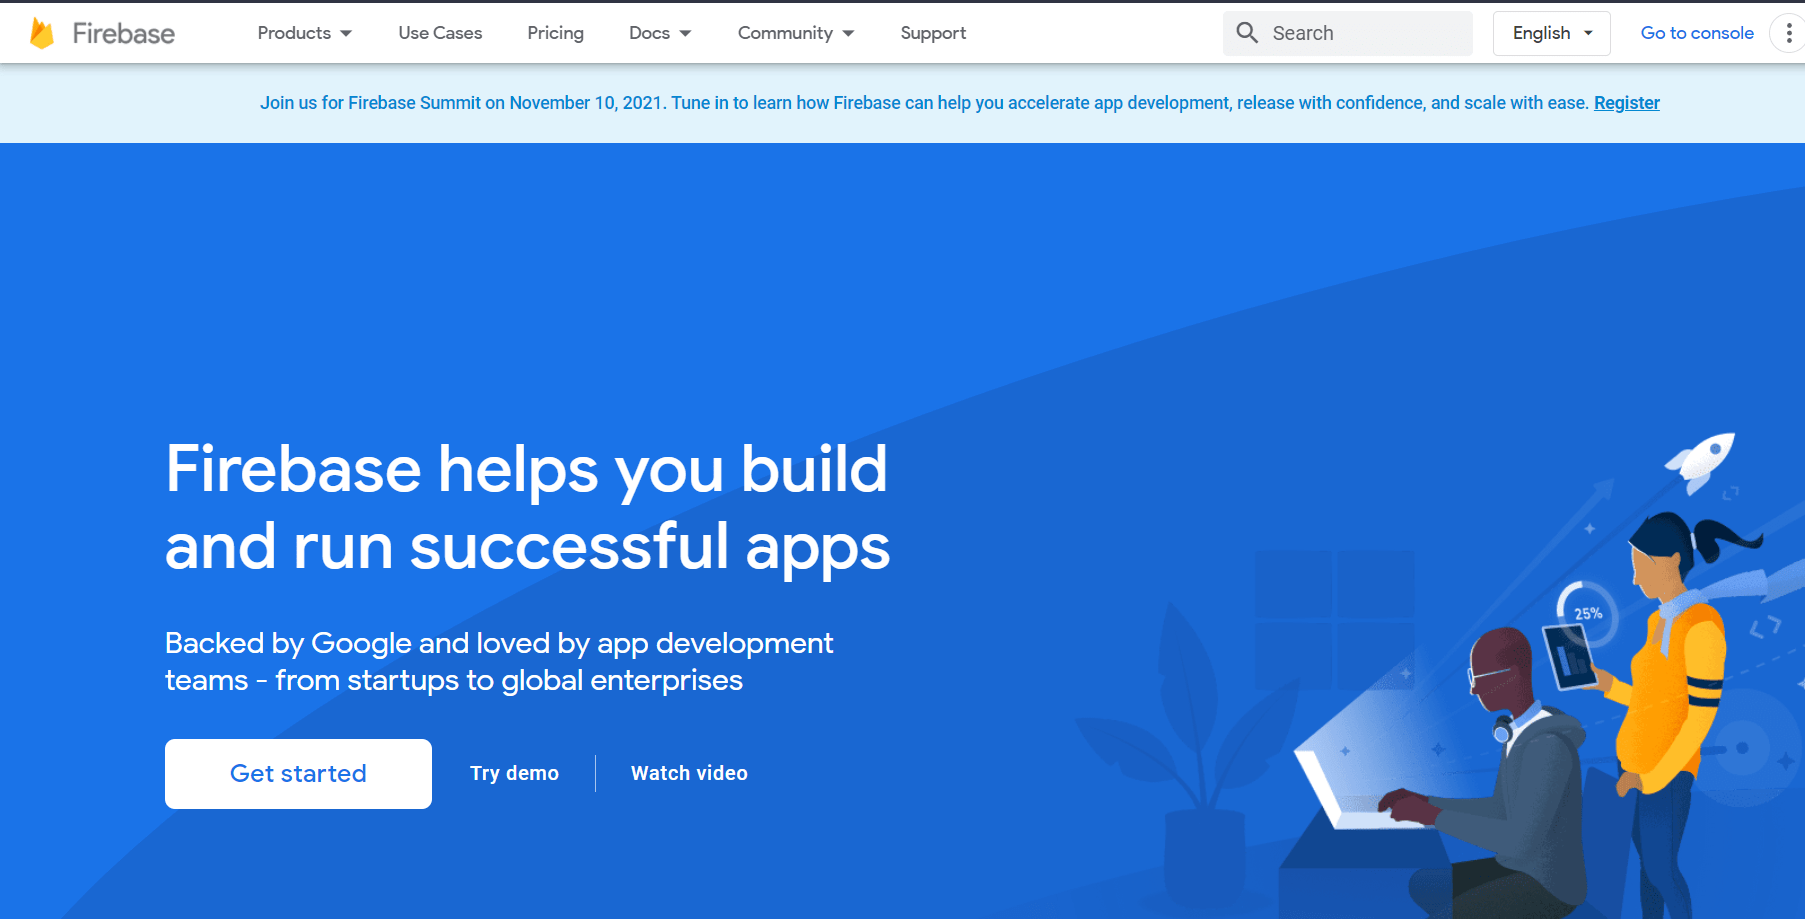
Step1: Go to "https://firebase.google.com/". This web page is the main landing page for Firebase, and here we can find documentation, pricing, etc. Click on the "Get Started" button to continue.
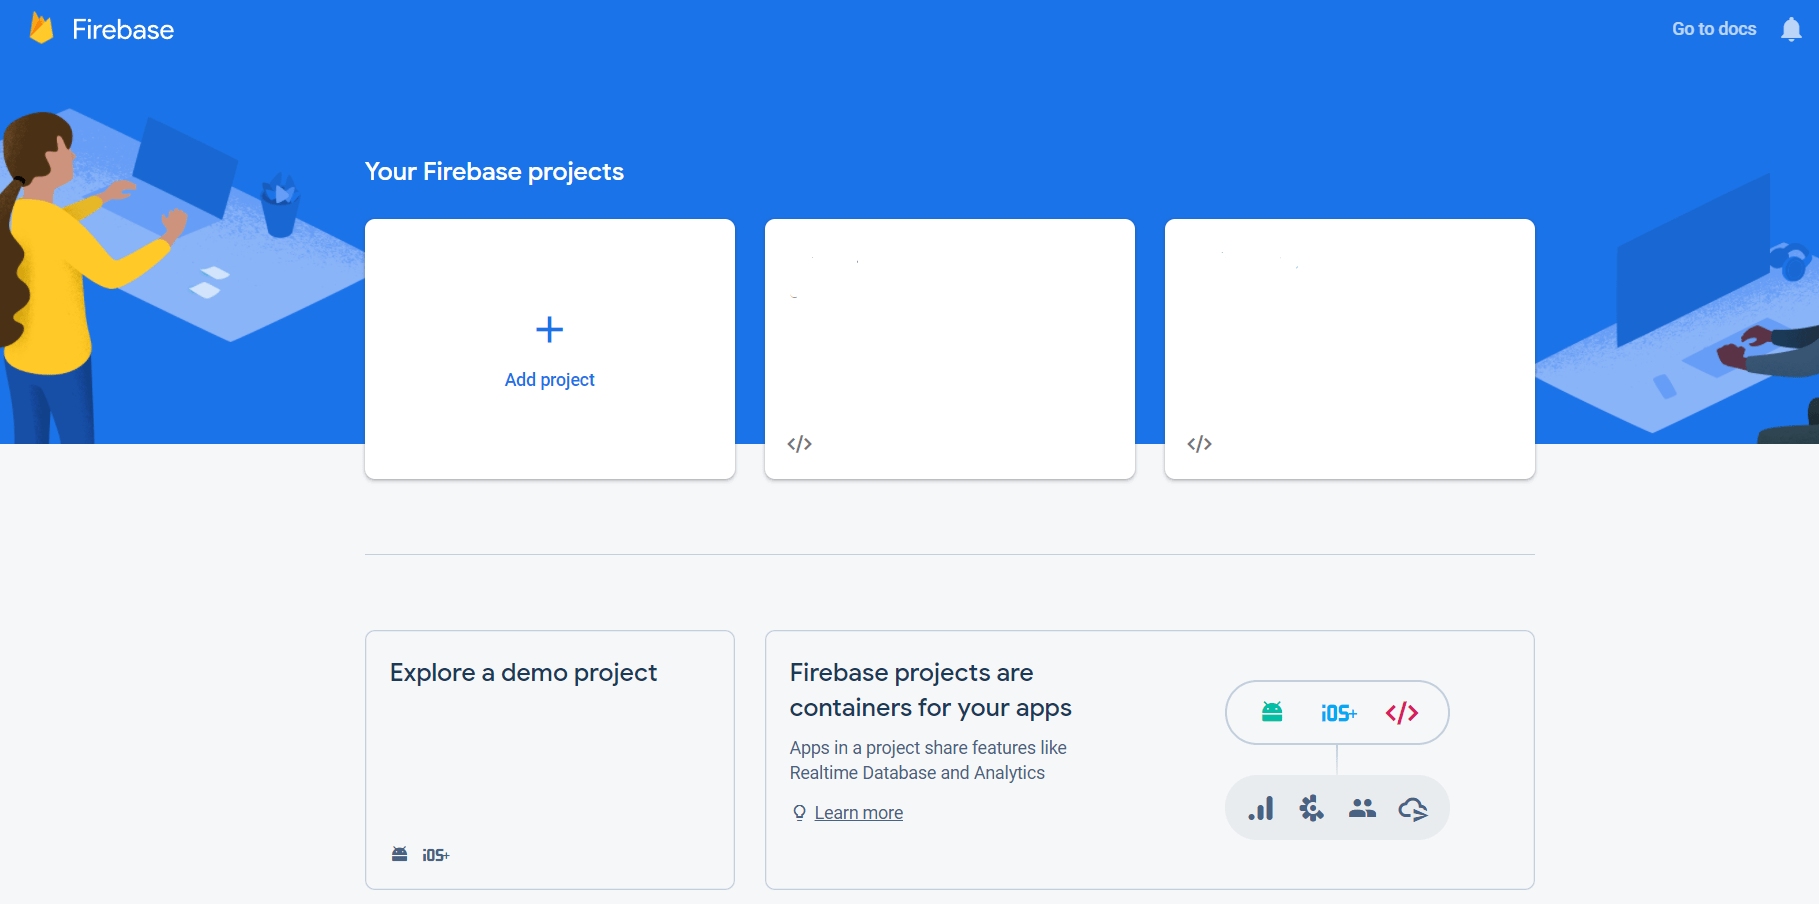
Step 2: Now, we will reach the Firebase console, where all our projects will be available. Click on "Add project" to create a new project.
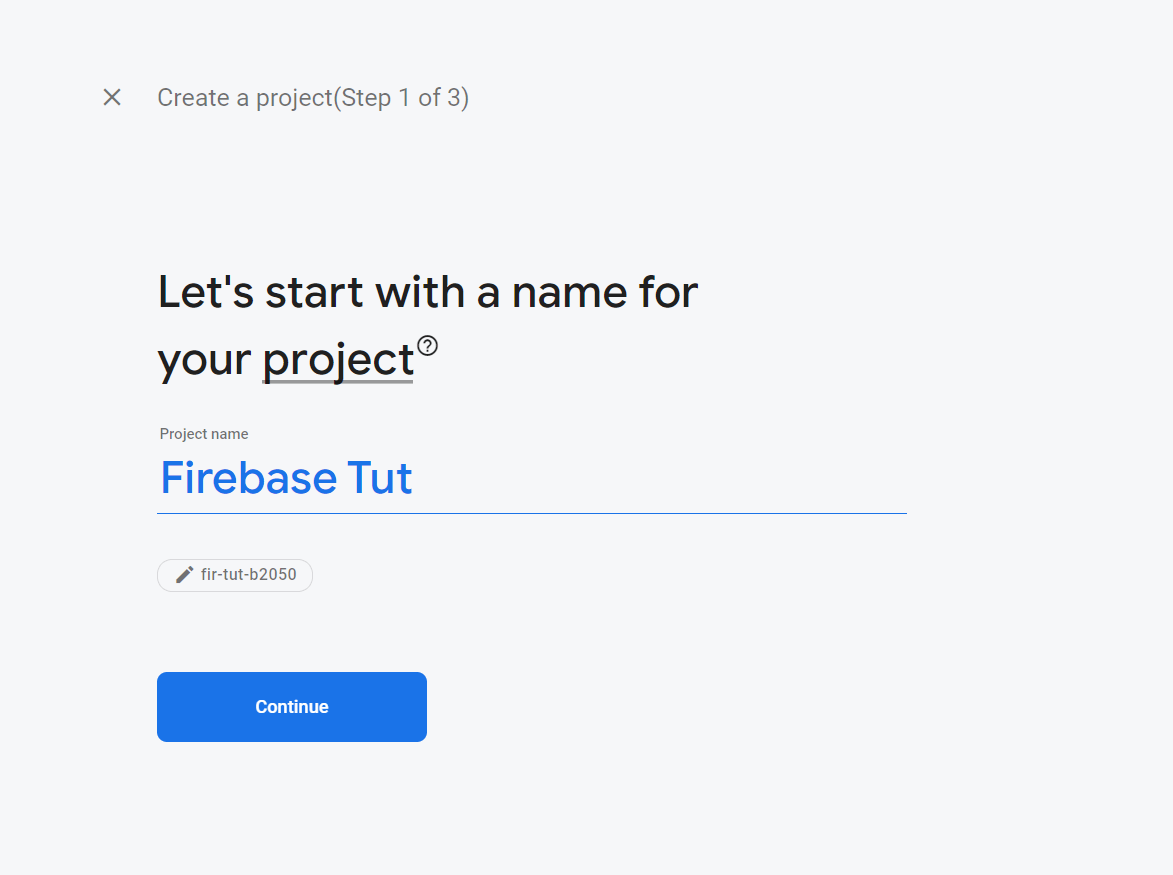
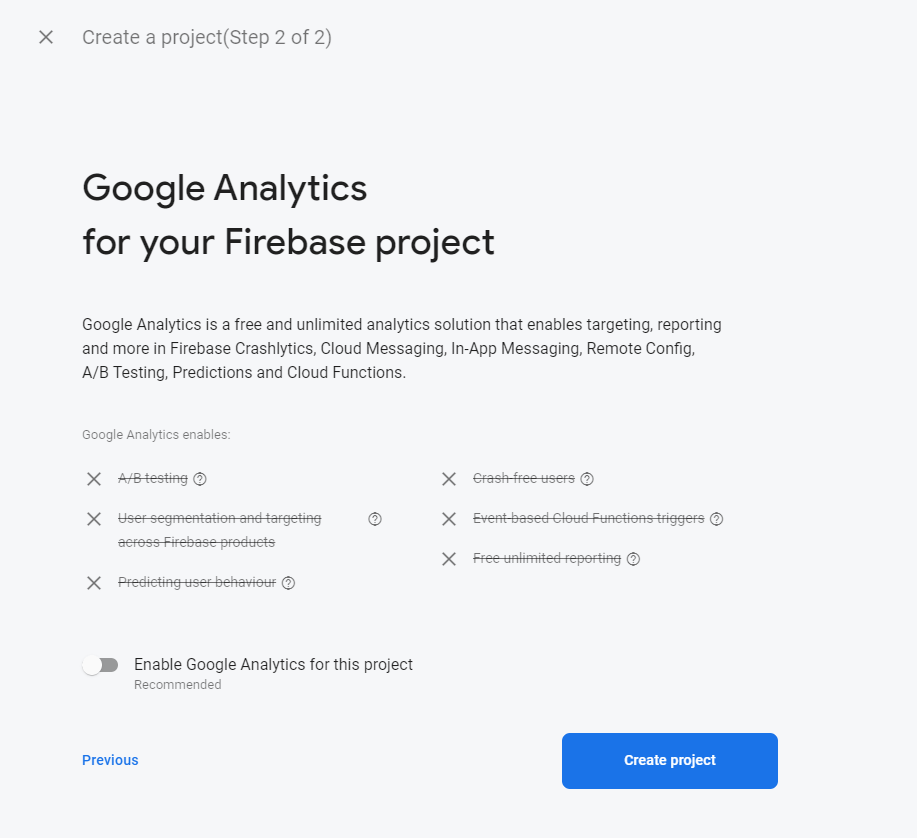
Step 3: Now, we need to provide a name for the project. Then we can optionally enable Google Analytics for the project. After this, Firebase will take some time to set up the project.
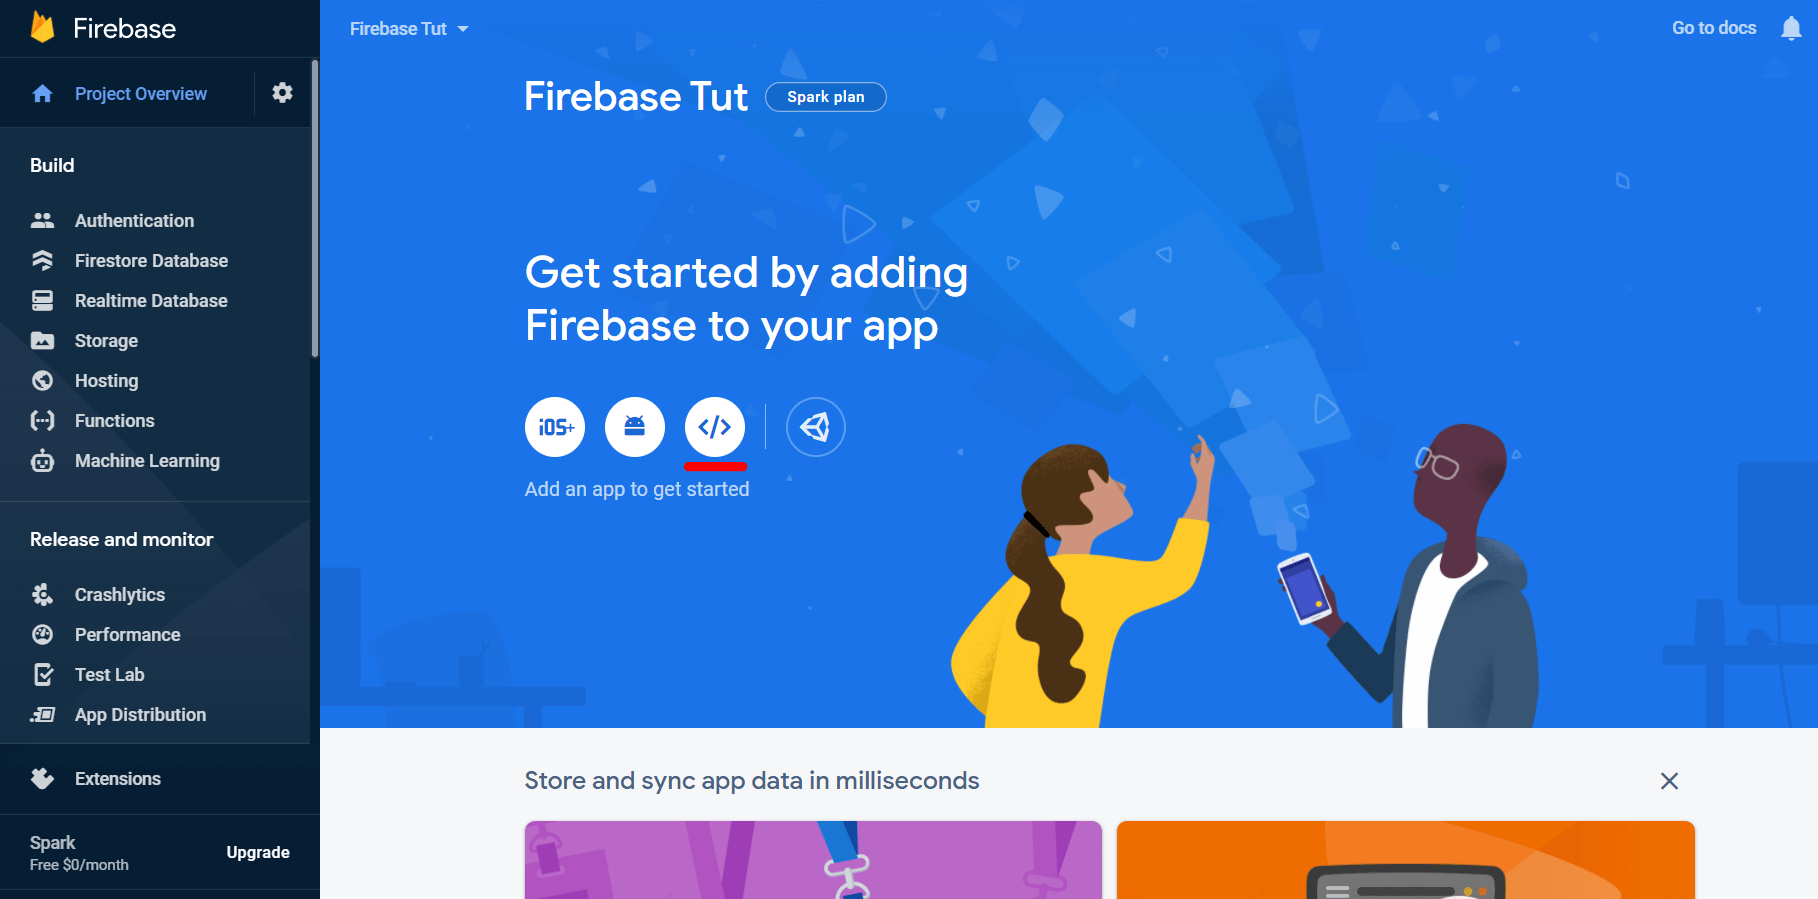
Step 4: Now, we need to add an app to generate credentials for our web app. Click on the "</>" icon in the hero section to add a web app to the project.
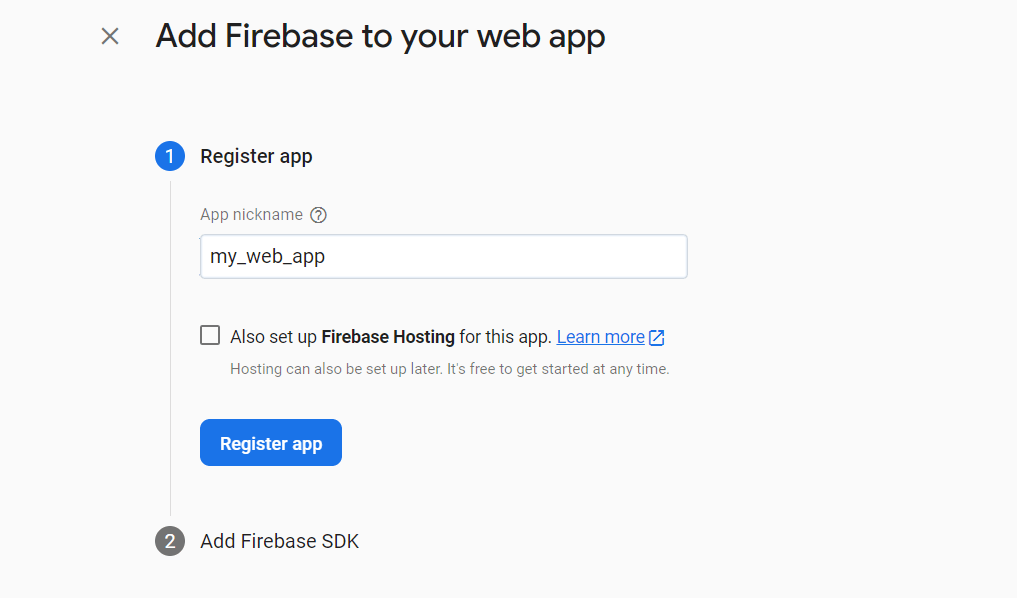
Step 5: Give a nickname to the app and register it by clicking the "Register App" button.
Step 6: We need to add the firebase modules either through npm or by using CDN script tags. In this example, we will be using the CDN scripts to add the firebase modules into our app. Copy the <script> tags provided after registering the app and paste that in the body of the index HTML file of the app. A sample of the <script> tag is provided below:
< ! - - The core Firebase JS SDK is always required and must be listed first - - >
    < script src = "https://www.gstatic.com/firebasejs/8.4.1/firebase-app.js" > </ script >
< ! - - Your web app's Firebase configuration  - - >
< ! - -  For Firebase JS SDK v7.20.0 and later, measurementId is optional  - - >
< script >
const firebaseConfig = {
  apiKey: " ........................ " ,
  authDomain: "........................" ,
  projectId: " ........................ " ,
  storageBucket: "........................ " ,
  messagingSenderId: " ........................ " ,
  appId: "........................ " ,
  measurementId: "........................ " ,
} ;
firebase.initializeApp( firebaseConfig ) ;
</ script >
Note: The configuration credentials are hidden in this sample. When you register for the app, you will receive your credentials unique to your app.
With this, the setup required for adding Firebase to our web app is done.
Firestore
Firestore is a NoSQL database for data storage that scales automatically, has high performance, and increases the ease of building an application without worrying about setting up a backend and a database management system.
This section will look into how to add Firestore to our Firebase project, add, edit, and delete entries of the Firestore database.
ADDING FIRESTORE TO OUR PROJECT
To add Firestore to our web app, we need to add the CDN script tag for firestore after the Firebase CDN script tag. After adding our "index.html" file should look like this:
Index.html file:
<html lang="en">
<head>
  <meta charset="utf-8">
  <meta property="og:title" content=" firebase example ">
  <meta property="og:type" content="website">
  <meta name="viewport" content="width=device-width, initial-scale=1">
  <title> firebase example </title>
  <meta name="description" content=" firebase example ">
  <meta name="author" content="tutorial and example">
  <meta property="og:description" content=" firebase example ">
  <meta property="og:image" content="image.png">
  <link rel="shortcut icon" type="image/x-icon" href="./favicon.ico" />
  <style>
  </style>
</head>
<body>
    < ! - - The core Firebase JS SDK is always required and must be listed first - - >
    < script src = "https://www.gstatic.com/firebasejs/8.4.1/firebase-app.js"  > </script >

    < ! - -  Firestore module    - - >
    < script src="https://www.gstatic.com/firebasejs/8.4.1/firebase-firestore.js" > </ script >
< ! - - Your web app's Firebase configuration  - - >
< ! - -  For Firebase JS SDK v7.20.0 and later, measurementId is optional   - - >
< script >
const firebaseConfig = {
  apiKey: " ........................",
  authDomain: " ........................",
  projectId: " ........................ ",
  storageBucket: " ........................ ",
  messagingSenderId: "........................",
  appId: "........................ ",
  measurementId: " ........................ ",
} ;
firebase.initializeApp( firebaseConfig ) ;
const db = firebase.firestore( ) ;
</script>
</body>
</html>
Here, we have added all our < script > tags at the end the < body > tag. The first < script > tag needs to be the core Firebase SDK, and after that, we need the module that we need to use, which in this case is Firestore. The last < script > tag is the script that will contain all the credentials and the logic for using the Firestore module.
Let us look into the last < script > tag. The first step is to use the configurations and credentials provided by Firebase and initialize our firebase project with these configurations. Now, we will instantiate a firestore database object which we require to perform the CRUD operations.
Now, we need to create a database on the Firebase console.
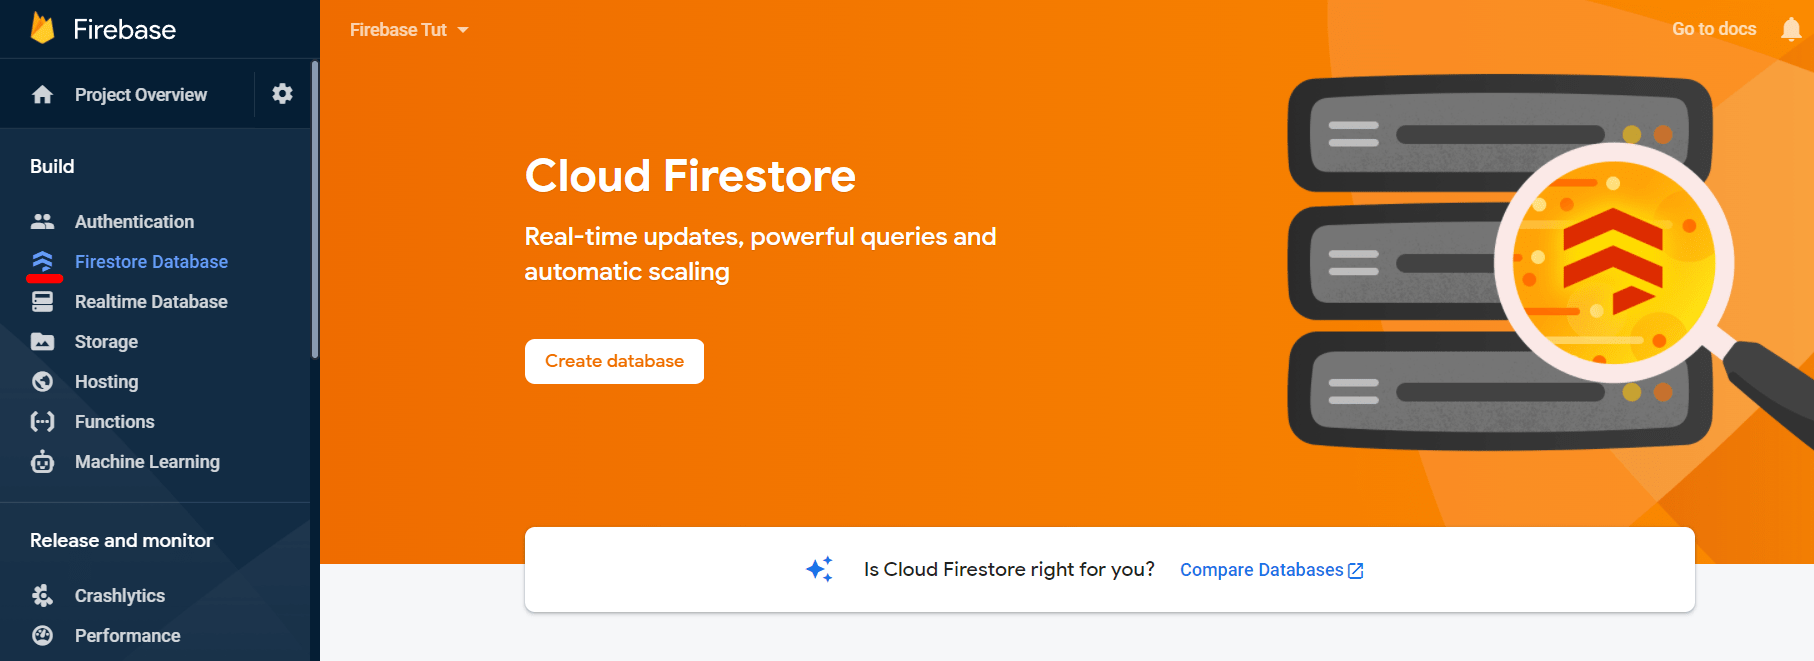
Step 1: Go to your Firebase console and select "Firestore Database" from the side menu.
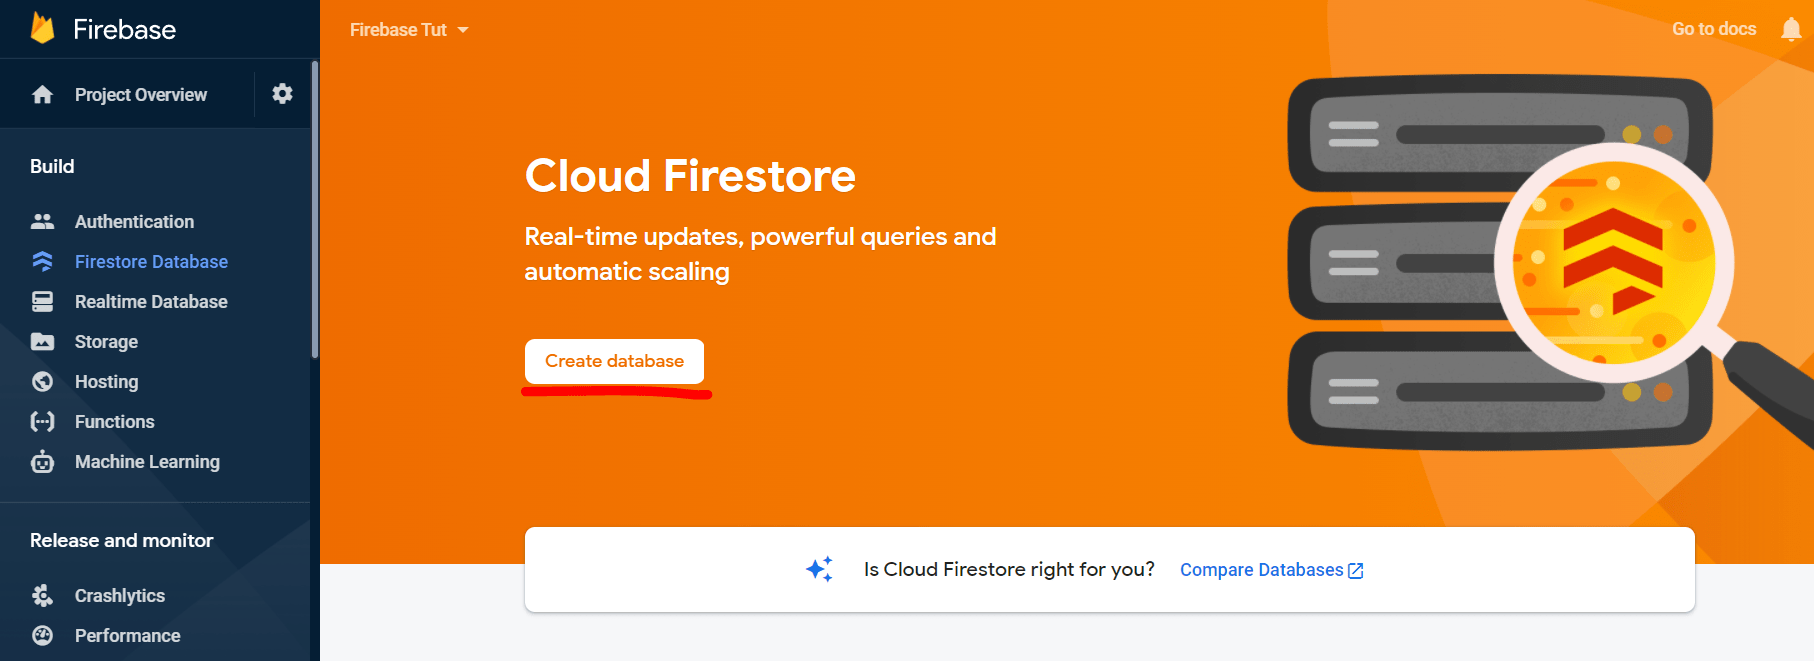
Step 2: Now select the "Create database" button to continue with the creation of a database.
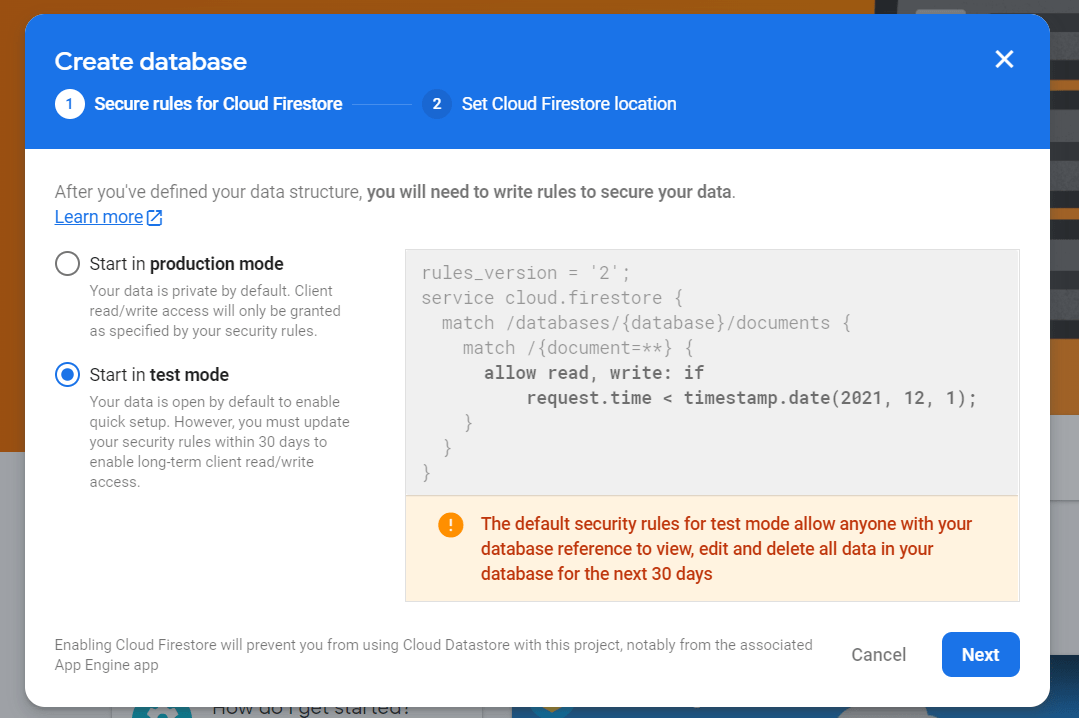
Step 3: Now select the "Test mode" option and continue with the database creation.
Step 4: Now select the Firestore cloud server location. In this example, we will continue with the default location and enable the database. Firebase will take some time to configure our request.
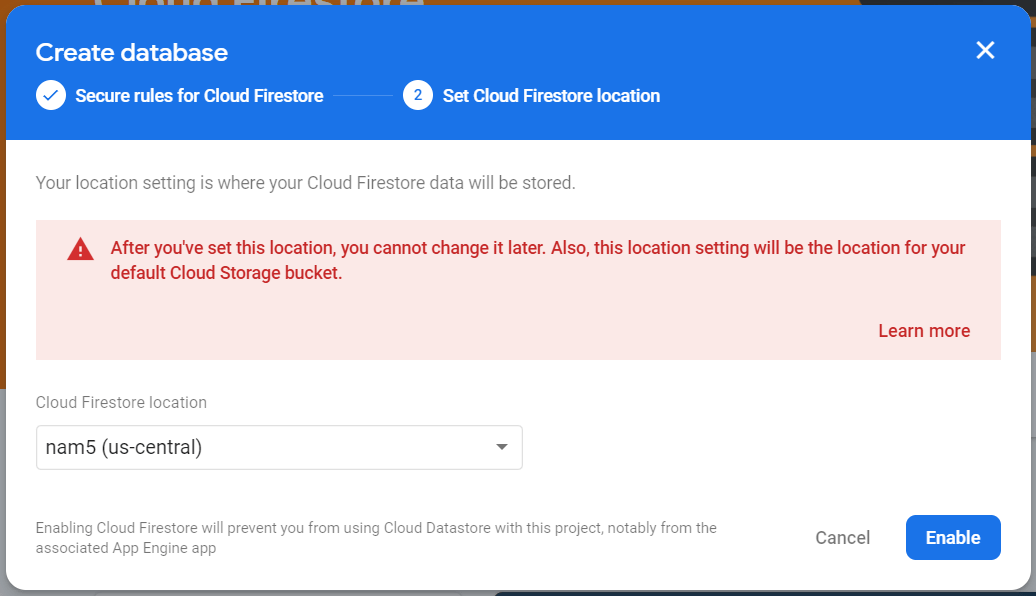
NOTE: You can not change the location for the Cloud Storage after setting it here.
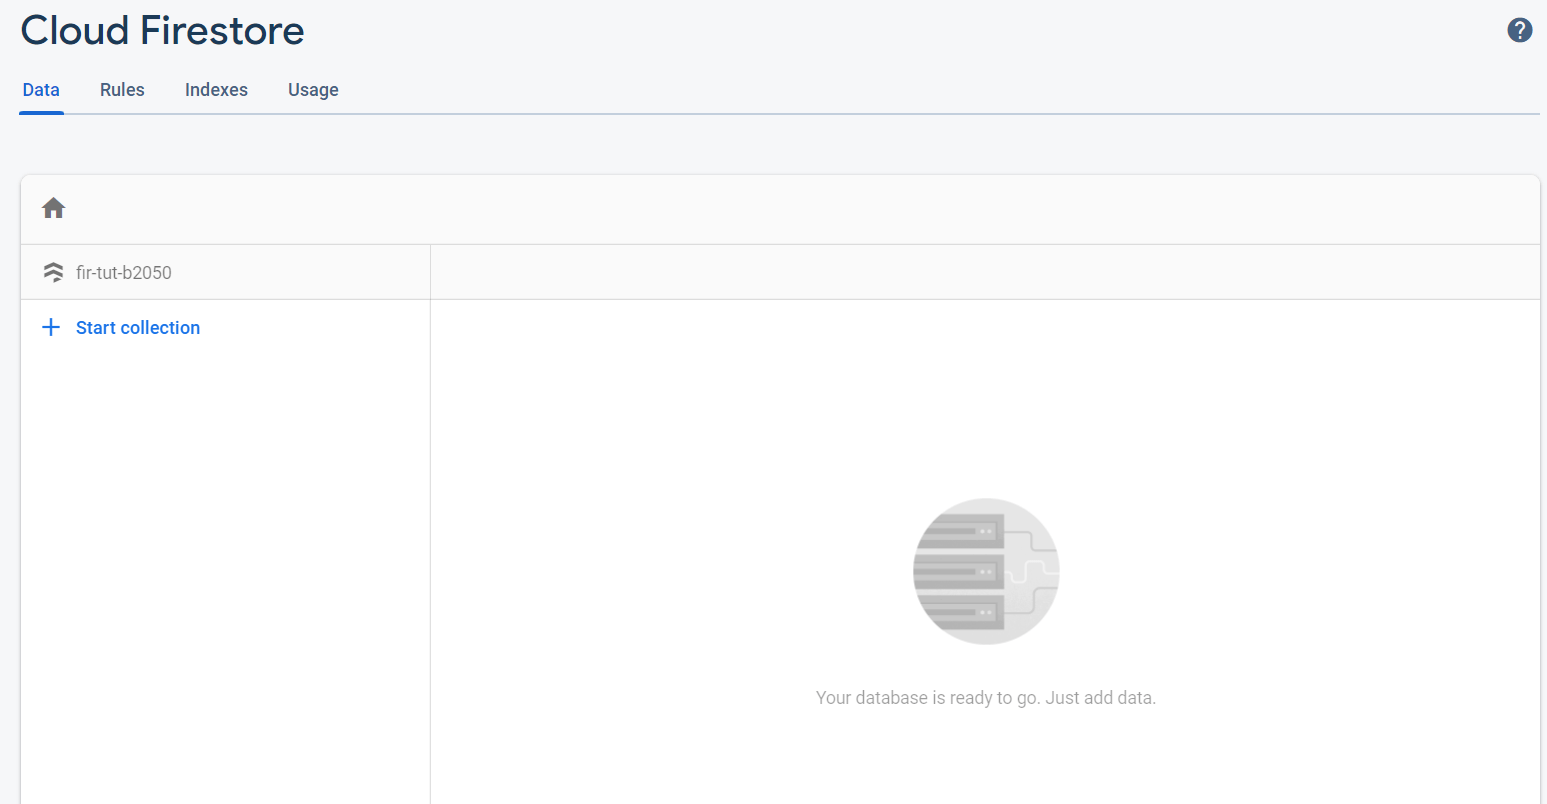
After this step, the setup for Firestore is complete, and we will be greeted with an empty database.
ADDING DATA TO OUR FIREBASE DATABASE
To start adding data, we can do it in the console itself or write some code to do this operation.
- Using Firebase console
To add data using the console, we need to click on "+ Start collection", which is available in the Firestore Database section of the console.
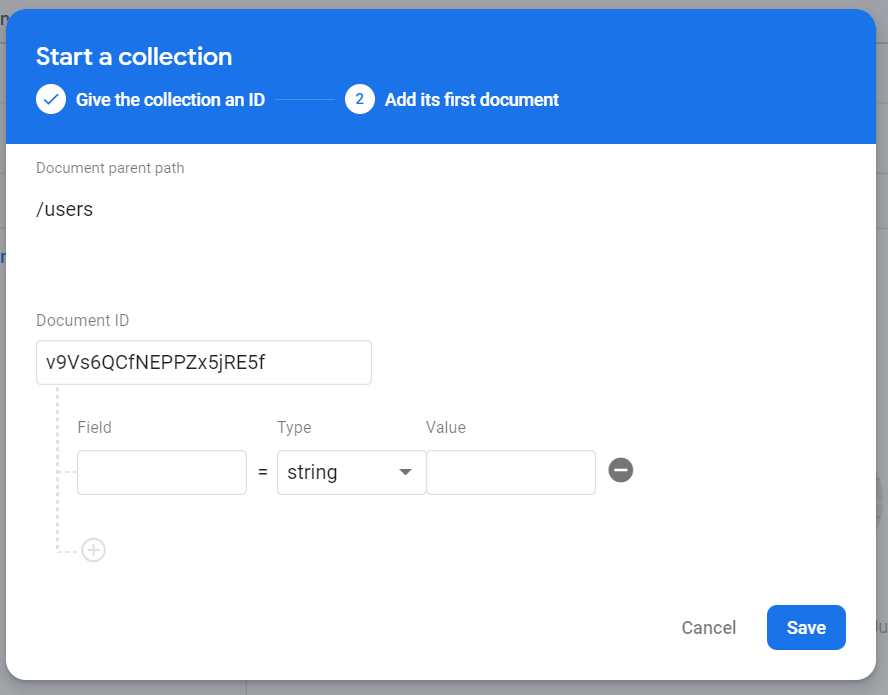
The popup will ask for a name for the parent directory, and you can provide any name signifying the contents of the database. We can set the Document ID to auto-generate as it is a unique identifier. Add any fields that you want, for example, name and email, and provide values corresponding to that field, and hit the "Save" button.

After hitting the "Save", we have successfully generated an entry into the database using the console.
- Using the SDK and code
We can get a similar result using the ".add()" method available on the ".collection()".
Minimal example:
db.collection( "users" ).add( { name: " Edison ", email: " [email protected] "} )"users" is the name of the collection, and inside the ".add( )" we have added the field names with their respective values in the form of a javascript object. This code will result in a similar addition of values inside the "user" collection in our firestore database.
UPDATE DATA OF OUR FIREBASE DATABASE
To update any user from our database, we need to know the doc ID, which is the unique identifier of our user. Below are two minimal examples of how to update a unique user from our database:
db.collection( "users" ).doc( "........................
" ).update( { name: " Thomas Edison ", email: " [email protected] " } )
This is an example to update every field in the user document. But, we can also update a single field.
Example:
db.collection( "users" ).doc( "........................
" ).update( {name: " T. Edison " } )
GETTING DATA FROM OUR FIREBASE DATABASE
To retrieve any user from our database, we need to know the doc ID, which is the unique identifier of our user. Below is an example to retrieve a user from our firestore database:
db.collection( "users" ).doc( "........................
 ") .get().then( doc => console.log( doc.data( ) ) )
MAIN PROJECT FOR FIRESTORE
This section will look into a real-life example in which we will use FIRESTORE to create users in our database and retrieve them.
Let’s look at the html file.
INDEX.HTML
<html lang="en">
<head>
  <meta charset="utf-8">
  <meta property="og:title" content=" firebase example ">
  <meta property="og:type" content="website">
  <meta name="viewport" content="width=device-width, initial-scale=1">
  <title> firebase example </title>
  <meta name="description" content=" firebase example ">
  <meta name="author" content="tutorial and example">
  <meta property="og:description" content=" firebase example ">
  <meta property="og:image" content="image.png">
  <link rel="shortcut icon" type="image/x-icon" href="./favicon.ico" />
  <style>
  </style>
</head>
<body>
    <h1> Fill the below form to register</h1>
   <form>
       <label for="name" > Name: </label>
       <input type="text" id="name" />          <br/>
       <br/>
       <label for="name" > Email: </label>
       <input type="email" id="email" />
       <br/>
       <br/>
       <button id="submit-btn" > Submit </button>
    </form>
    <br/>
    <button id="showUsers"> Show registered Users</button>

    <div id="output"> </div>
    <!-- The core Firebase JS SDK is always required and must be listed first -->
    <script src = "https://www.gstatic.com/firebasejs/8.4.1/firebase-app.js"  > </script>

    < ! - -  Firestore module    - - >
    <script src="https://www.gstatic.com/firebasejs/8.4.1/firebase-firestore.js"> </script>
< !- - Your web app's Firebase configuration   - - >
< ! - -  For Firebase JS SDK v7.20.0 and later, measurementId is optional   - - >
<script src="./app.js" > </script>
</body>
</html>
Output:
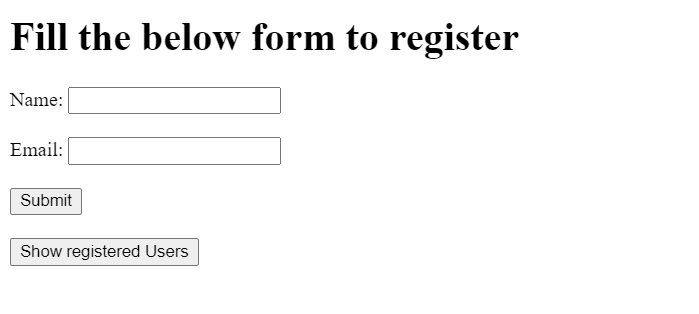
The output is an HTML web page with a form containing Name and Email inputs and a submission button. There is also a button to show all the registered users, and these registered users will be fetched from the database and displayed in the empty div with the ID of "output".
The web page has also included the CDN <script> tags for Firebase SDK and Firestore module. We will be writing all our javascript code in the "app.js" file, which is also linked through a <script> tag.
APP.JS
const firebaseConfig = {
  apiKey: " ........................",
  authDomain: " ........................ ",
  projectId: " ........................ ",
  storageBucket: " ........................ ",
  messagingSenderId: " ........................ ",
  appId: " ........................ ",
  measurementId: "........................ ",
};
firebase.initializeApp( firebaseConfig ) ;
const db = firebase.firestore( ) ;
The first step in the app.js file is to initialize Firebase using our project credentials and configurations. Then we need to make an instance of the firestore database.
With this, the setup for our project is complete, and we can move forward with writing the code for adding the data and retrieving the data from Firestore.
const firebaseConfig = {
  apiKey: " ........................",
  authDomain: " ........................ ",
  projectId: " ........................ ",
  storageBucket: " ........................ ",
  messagingSenderId: "........................",
  appId: " ........................ ",
  measurementId: " ........................ ",
} ;
firebase.initializeApp( firebaseConfig ) ;
const db = firebase.firestore( ) ;
const submitBtn = document.querySelector( "#submit-btn" ) ;
const nameField = document.querySelector( "#name" ) ;
const emailField = document.querySelector( "#email" ) ;
submitBtn.addEventListener( "click" , ( e ) => {
  e.preventDefault() ;
  if ( nameField.value.length == 0 && emailField.value.length == 0 ) {
    alert( "Fill your name and email" ) ;
    return;
  } else if ( nameField.value.length == 0 ) {
    alert( "Fill your name" ) ;
    return ;
  } else if ( emailField.value.length == 0 ) {
    alert( "Fill your email" ) ;
    return ;
  } else if ( !emailField.value.includes( "@" ) ) {
    alert( "Fill a correct email" ) ;
    return ;
  }
  try {
    const docRef = db.collection( "users" ) ;
    docRef
      .add( {
        name: nameField.value ,
        email: emailField.value ,
      } )
      .then( ( ) => {
        nameField.style.display = "none" ;
        emailField.style.display = "none" ;
        submitBtn.style.display = "none" ;
        document.querySelector('label').style.display = "none" ;
        document.querySelector('form').style.display = "none" ;
        alert( "Thank you for registering" )
      } ) ;
  } catch ( e ) {
    console.error( "Error adding document: " , e );
  }
After initializing the database, we have used the querySelectors to select the name input, the email input, and the submit button nodes from the DOM.
We added an event listener for "click" on the submit button to execute our logic on submit. We have prevented the default action on the submit and wrote a small validation script to check for any empty fields or incorrect emails using if-else statements.
Then we have used a try-catch block to execute our async addition of data request and catch any errors while its execution.
We have used the " .collection( "users" ) " to get a document reference for the user collection, which has multiple methods. One of these methods is " .add( ) ", which is used to add documents to the collection. Inside the " .add( ) " method, we have added a javascript object with field names as the keys with their respective values.
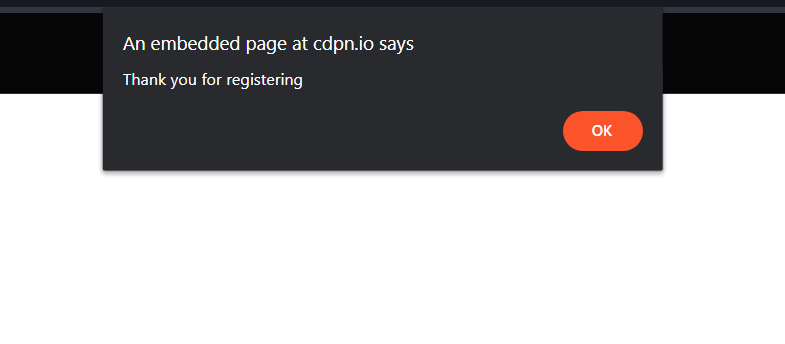
We have set the display of the input fields and the submit button to none to hide them after submission. Finally, we alert the user with a message thanking them for registering.
Let us try adding a user using the above program:
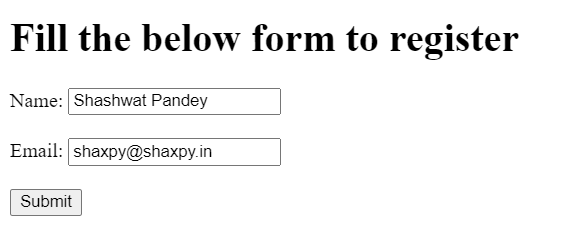
We have filled the name and the email fields, and hitting submit gives an alert.
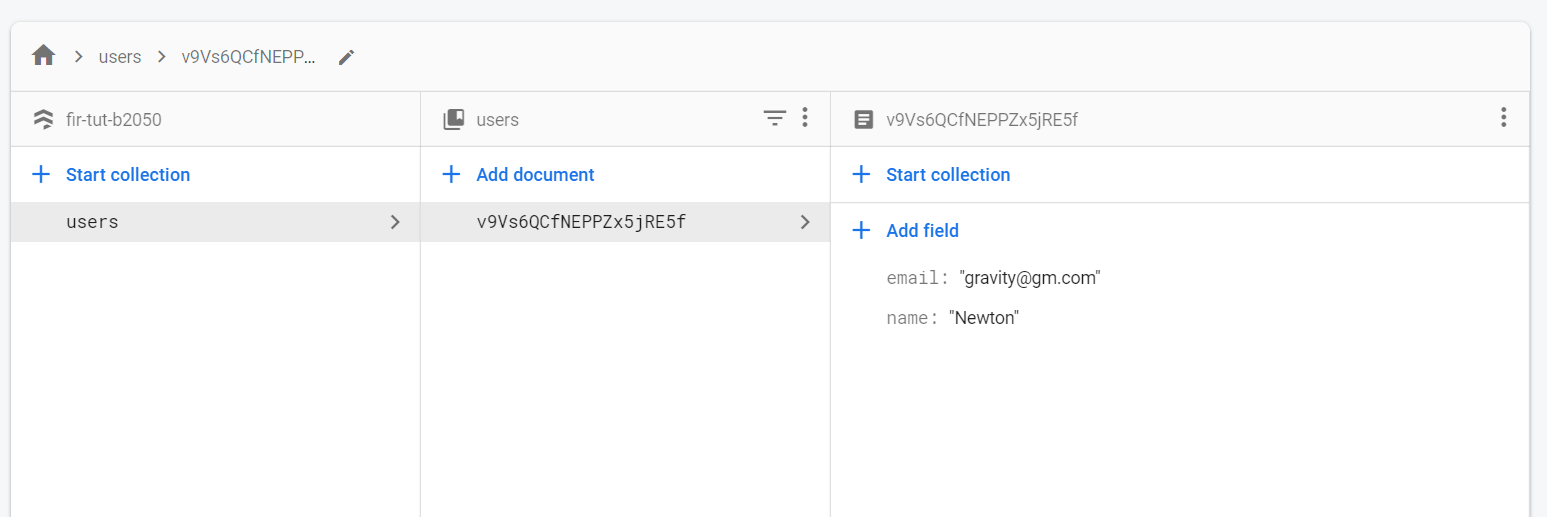
Let us check our database on the Firebase console to check if this entry has been added or not.
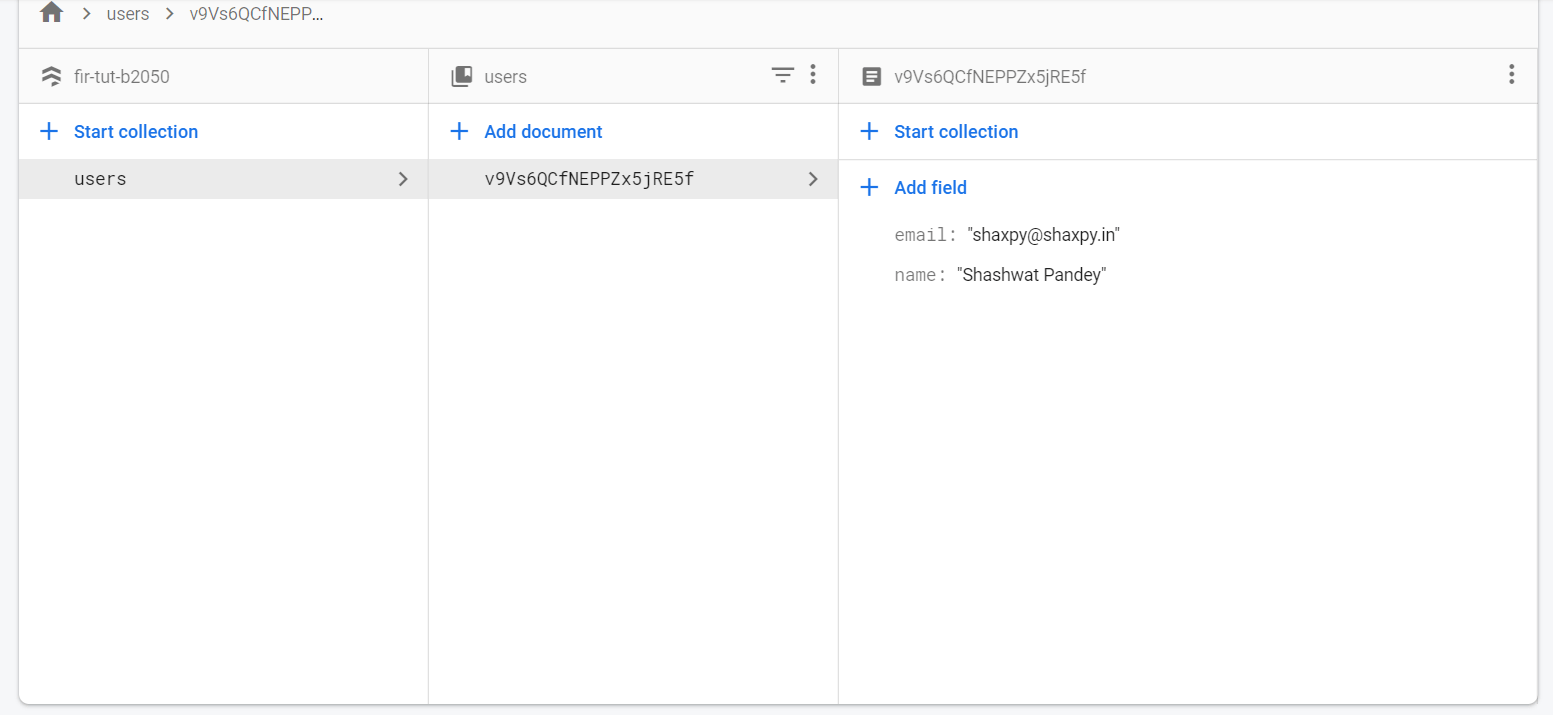
As you can see, the entry of the user made by our web app was successful. Our document was created with an auto-generated document ID.
Now moving on to the second feature of our app that is retrieving the registered users.
APP.JS
const firebaseConfig = {
  apiKey: "........................ " ,
  authDomain: " ........................ " ,
  projectId: " ........................" ,
  storageBucket: " ........................ " ,
  messagingSenderId: " ........................ " ,
  appId: " ........................ " ,
  measurementId: "........................ " ,
} ;
firebase.initializeApp( firebaseConfig ) ;
const db = firebase.firestore( ) ;
const submitBtn = document.querySelector( "#submit-btn" ) ;
const nameField = document.querySelector( "#name" ) ;
const emailField = document.querySelector( "#email" ) ;
const showUsersBtn = document.querySelector( "#showUsers" ) ;
const outputDiv = document.querySelector( "#output" ) ;
submitBtn.addEventListener( "click" , ( e ) => {
  e.preventDefault() ;
  if ( nameField.value.length == 0 && emailField.value.length == 0 ) {
    alert( "Fill your name and email" ) ;
    return;
  } else if ( nameField.value.length == 0 ) {
    alert( "Fill your name" ) ;
    return ;
  } else if ( emailField.value.length == 0 ) {
    alert( "Fill your email" ) ;
    return ;
  } else if ( !emailField.value.includes( "@" ) ) {
    alert( "Fill a correct email" ) ;
    return ;
  }
  try {
    const docRef = db.collection( "users" ) ;
    docRef
      .add( {
        name: nameField.value ,
        email: emailField.value ,
      } )
      .then( ( ) => {
        nameField.style.display = "none" ;
        emailField.style.display = "none" ;
        submitBtn.style.display = "none" ;
        document.querySelector('label').style.display = "none" ;
        document.querySelector('form').style.display = "none" ;
        alert( "Thank you for registering" )
      } ) ;
  } catch ( e ) {
    console.error( "Error adding document: " , e );
  }
}
showUsersBtn.addEventListener( "click" , ( e ) => {
  e.preventDefault( ) ;
  try {
    let output = ''
    db.collection( "users" ).get( ).then( ( querySnapshot ) => {
    querySnapshot.forEach( ( doc ) => {
        let data = doc.data( );
        output += ` <p> ${data.name} - ${data.email} </p> `;
    });
    outputDiv.innerHTML = output ;
});
  } catch ( e ) {
    console.error( "Error adding document: " , e ) ;
  }
}
To retrieve the data, we selected the show registered users button and the output div from DOM using querySelectors.
We added another event listener for clicking on the show registered users to execute our logic to retrieve the data.
The first step is to prevent the default behavior of the button and then use a try-catch block to execute our logic and catch any potential errors. We have used the ".get( )" method available on the collection reference object and used the response to loop over every document and add that to the output <div>.

As we can notice, the Firestore database contained one entry, and that entry has been retrieved and displayed in the output <div>.
This concludes the main project for Firestore, in which we learned how to create a database using the Firebase console, add and retrieve data from that cloud-based NoSQL database. There are other ways to perform CRUD operations using Firestore and can be looked up at the Firestore Documentation.
Firebase Hosting
Firebase offers free hosting for static web pages and SPA (single-page applications). The sites can be deployed very easily with a single command. Whether static or dynamic, the web apps are deployed to a global content delivery network (CDN).
KEY FEATURES OF FIREBASE HOSTING
- Content delivery on a secure connection: The Firebase Hosting comes with zero configuration SSL inbuilt. Modern web apps need to be secure, so Firebase Hosting makes sure the content on the web app is delivered securely.
- Static + Dynamic + Microservices: From static HTML – CSS web pages to dynamic React applications or Express.js APIs and microservices, Firebase Hosting supports all kinds of hosting services.
- Fast content Delivery: Every file uploaded is cached and compressed using the latest technology. Best compression techniques are used automatically according to the uploaded content so that no matter where the user is, content is always delivered fast.
- Check before going live: The content can be viewed and tested on a locally hosted link with an imitated backend server. This link can be shared among teammates as temporary preview URLs.
- GitHub Integration: Firebase Hosting provides easy Github Integration for an easy and fluid preview of the content.
- Deploy latest versions with single command: The Firebase Command Line Interface (Firebase CLI) allows us to deploy our app in seconds with just one command. The Command Line tools has different features to facilitate the app building process.
This section will look into installing the Firebase command line interface to our React project and deploying this project using Firebase Hosting.
INSTALLING THE FIREBASE COMMAND LINE INTERFACE
To install the command line interface, we need to have Node.js installed on our system, which will allow us to install the command line interface as a global module.
Head to the terminal of your system and enter the following command:
npm install -g firebase-toolsWait until the module is completely downloaded and installed, and then we need to move to the next step, which is to log in to Firebase using the command line interface.
To log in to Firebase using the command line interface, enter the following command:
firebase login This command will open up a new tab in the browser and prompt us to log in to our account. Log in to the account and test if the command line is properly working by entering the following command:
firebase projects:listThis command will provide you access to all your Firebase projects that exist on the Firebase console.
We will use "create react app" to create a new React application. We will be deploying the base React application that comes after using the following command:
npx create-react-app hosted-appThis command will download all the necessary npm modules required for a React application, and we can see the application on the localhost using the following command:
npm startOutput:

This is the out-of-the-box application that comes with the "create react app". We will be using this application for our deployment example.
INITIALIZING OUR FIREBASE PROJECT
Now, we need to initialize our firebase project using the Firebase command line interface. To do this, we have to head to the terminal in the React application folder and enter the following command:
firebase init
This command will take us through a setup to initialize our local Firebase project.

Select the Hosting Feature using Space and Enter to continue.
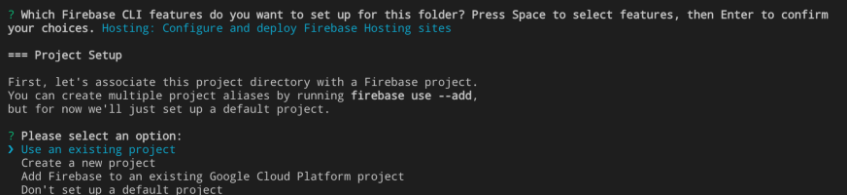
Select "Use an existing project" and select your Firebase Project that exists on the Firebase Console.
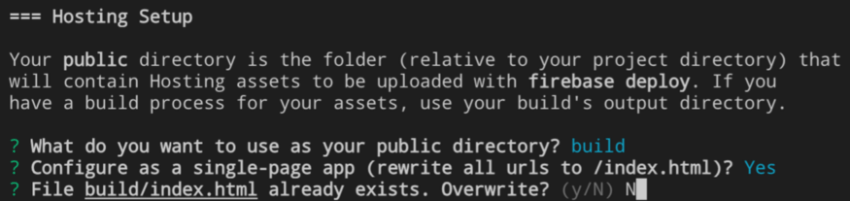
Since we want to deploy the build version of the React app, we will specify the "build" folder as the directory containing all the hosting assets.
After this setup is complete, the file structure will look like this:
hosted-app/
+ - node_modules/
+ - public/
¦  + - favicon.ico
¦  + - index.html
¦  + - logo192.png
¦  + - logo512.png
¦  + - manifest.json
¦  + - robots.txt
¦  + - robots.txt
+ - src/
¦  + - App.css
¦  + - App.js
¦  + - App.test.js
¦  + - index.css
¦  + - index.js
¦  + - logo.svg
¦  + - reportWebVitals.js
¦  + - setupTests.js
+ - .firebaserc
+ - .gitignore
+ - firebase.json
+ - package-lock.json
+ - package.json
+ - README.md
The "firebase.json" file has all the configurations related to our firebase project, and the ".firebaserc" file stores up all the project aliases associated with them.
DEPLOYING THE PROJECT
To deploy the react application, we need to run the build command.
npm run buildAfter running this command, the production build will be generated inside the build folder, and now we are ready to deploy.
To deploy the react project using Firebase Hosting. With the following command, we will be able to deploy all the content inside the build folder:
firebase deployWith this step, Firebase will store all the files needed to be hosted in the cloud and provide us with the LIVE link or URL.
Conclusion
This article looked into various topics like Firebase, Firestore, and Firebase Hosting. We also understood how to use these technologies using real-life examples. Firebase is a great commodity to learn and have under the belt as a developer as it makes things that are very time comsuming, super quick, and easy to do. Hope you will use these technologies in your projects.