Install PostgreSQL on Windows
Download and Installation Set-Up
To use PostgreSQL in your machine, you need to install:
1. Postgres database server
2. A graphical tool to administer and manage the database PgAdmin is the most popular GUI tool for Postgres.
 Note: If you download and install the bundled installer that will take care of configuration settings.
You could download and install the individual database server and graphical tool but coupling the setting between these components will be a challenge.
Note: If you download and install the bundled installer that will take care of configuration settings.
You could download and install the individual database server and graphical tool but coupling the setting between these components will be a challenge.
Note: If you download and install the bundled installer that will take care of configuration settings.
You could download and install the individual database server and graphical tool but coupling the setting between these components will be a challenge.Following steps indicate how to download and install PostgreSQL in windows machine:
Step 1 :
 Step 2:
 When you click on download, the download begins.
 Step 4:
 Step 5:
 Step 6:
 Step 7:
 Step 8:
 Step 9:
 Step 10:
 Step 11:
 Step 12:
 Wait until set up installs entirely on your machine....
 Step 13:
You will see the stack builder stack after complete installation
Step 13:
You will see the stack builder stack after complete installation
 Step 14:
To launch PostgreSQL, go to the START menu
Step 14:
To launch PostgreSQL, go to the START menu
 Step 15
 Step 16:
 Step 17:
 Now you can interact with Postgres database in two ways
 Step 19:
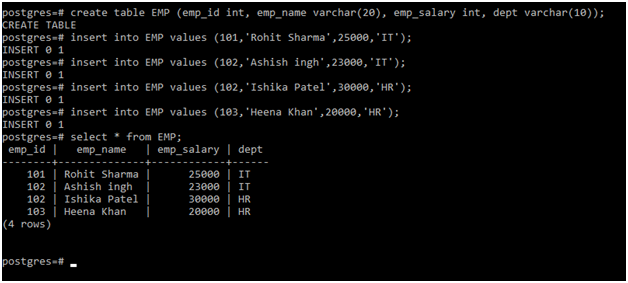
 Example:
Let us see, an example of create table, inserting data into the table and display the same.
Create table Query
Syntax:
Create table table_name (column_name1 data_type, column_name1 data_type, ……);
Example:
Create table EMP (emp_id int, emp_namevarchar(20), emp_salary int, dept varchar(10));
Insert into Query
Syntax:
Insert into table_name values (‘value1’, ‘value2’, …… );
Example:
Insert into EMP values (101, ‘Rohit Sharma’, 25000, ‘IT’);
Display table content
Syntax:
Select * from table_name;
Example:
Select * from EMP;
Example:
Let us see, an example of create table, inserting data into the table and display the same.
Create table Query
Syntax:
Create table table_name (column_name1 data_type, column_name1 data_type, ……);
Example:
Create table EMP (emp_id int, emp_namevarchar(20), emp_salary int, dept varchar(10));
Insert into Query
Syntax:
Insert into table_name values (‘value1’, ‘value2’, …… );
Example:
Insert into EMP values (101, ‘Rohit Sharma’, 25000, ‘IT’);
Display table content
Syntax:
Select * from table_name;
Example:
Select * from EMP;
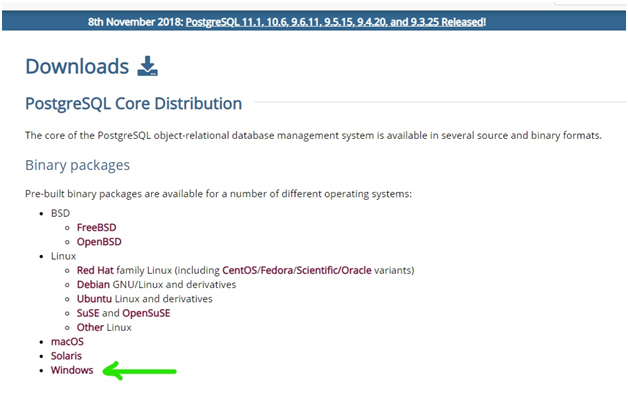
- Visit the link https://www.postgresql.org/download to download the latest release of PostgreSQL.
- Select the Windows option.
Step 2:
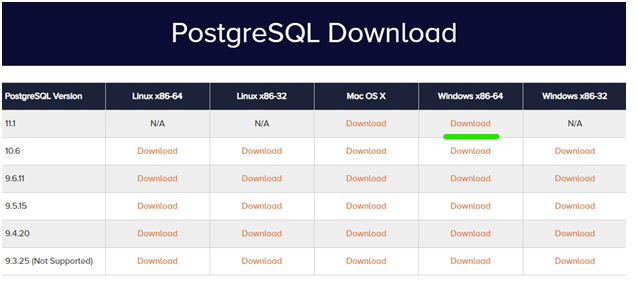
- Click on the download the installer
- Check the latest version of PostgreSQL for your operating system and click on a download
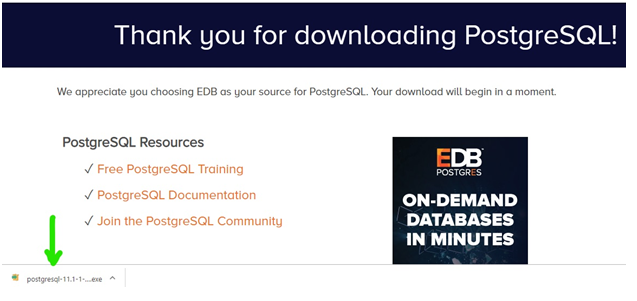
When you click on download, the download begins.
Step 4:
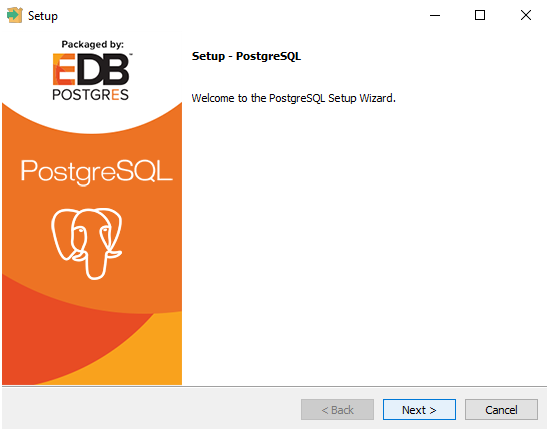
- Double click on the downloaded .exe file that will open the setup wizard, click on Next to proceed with an installation
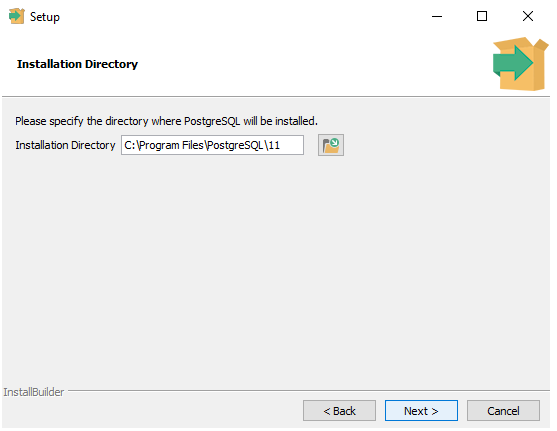
Step 5:
- You can change the installation directory here if you want to
- Click on Next
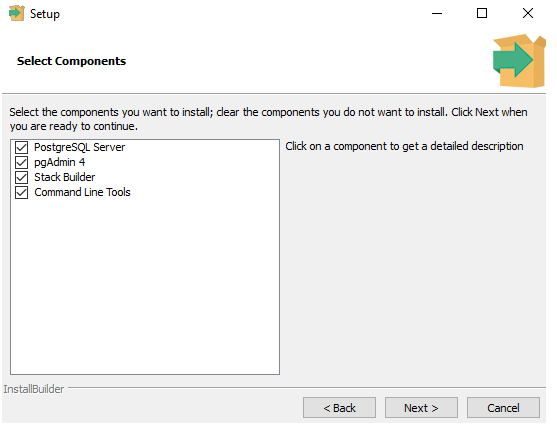
Step 6:
- Select the components you want to install
- Click on Next
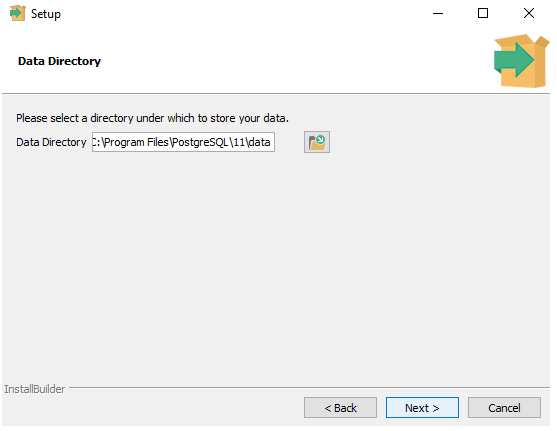
Step 7:
- leave the default directory or change the directory in which you want to store data
- Click on Next
Step 8:
- Enter the superuser (Postgres) password
- Click on Next
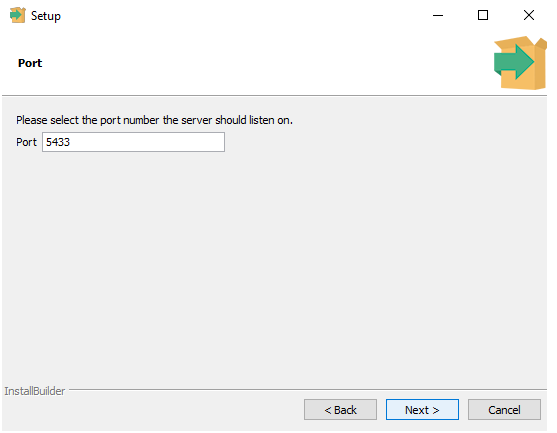
Step 9:
- Click on Next, don’t change the default port number
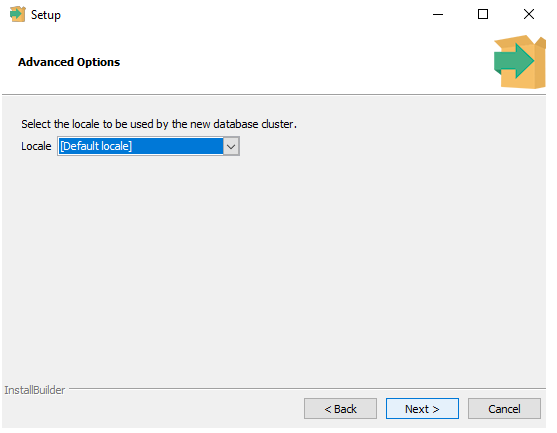
Step 10:
- Leave the default option as it is
- Click on Next
Step 11:
- This is the pre-installation summary
- Click on Next
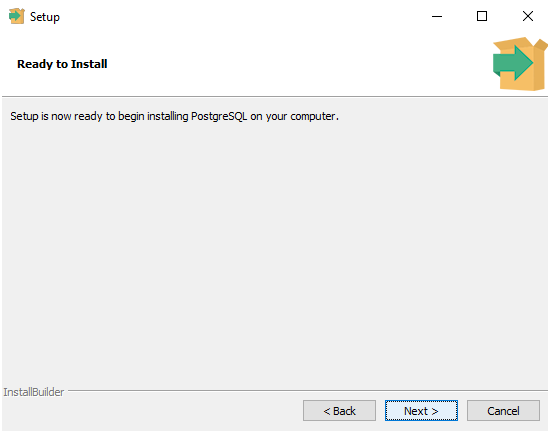
Step 12:
- The set-up is now ready to install
- Click on Next
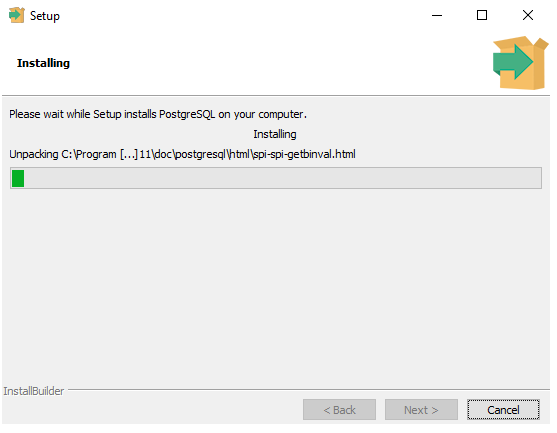
Wait until set up installs entirely on your machine....
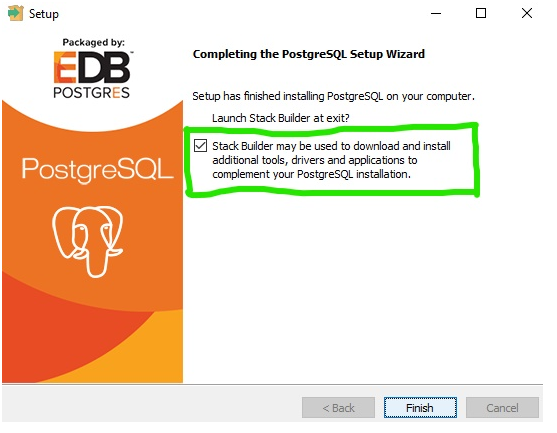
Step 13:
You will see the stack builder stack after complete installation
- Uncheck the stack builder option that will ask you for additional installation
- Click on Finish
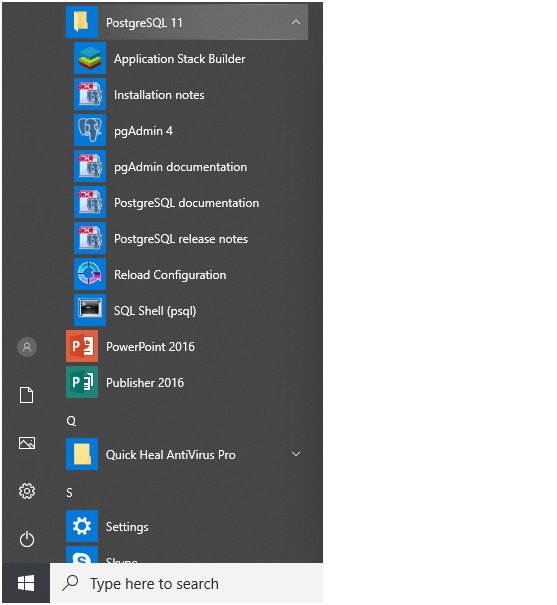
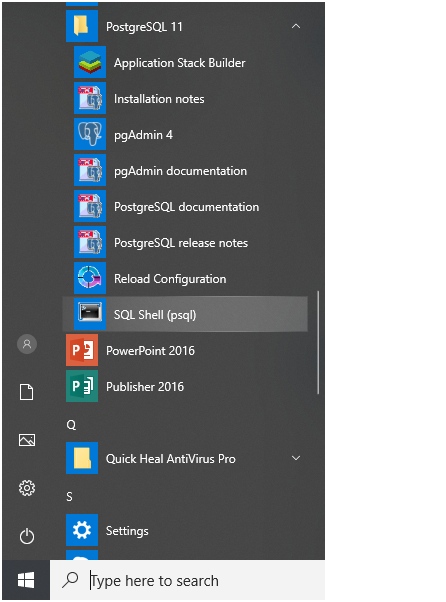
Step 14:
To launch PostgreSQL, go to the START menu
- Select PgAdmin 4
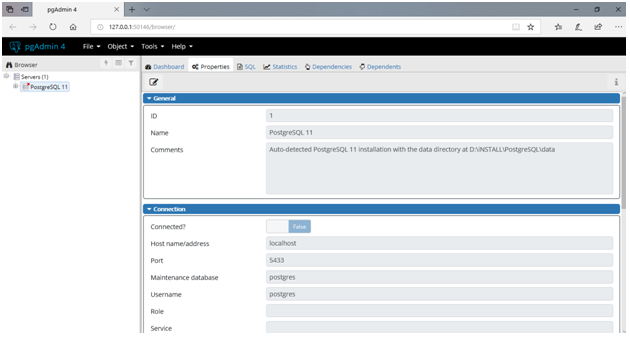
Step 15
- You will see PgAdmin homepage
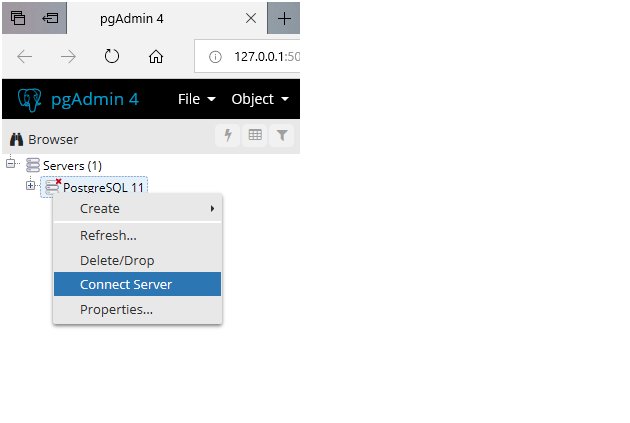
Step 16:
- Select Servers -> PostgreSQL (11)
- Right click on it and select connect Server
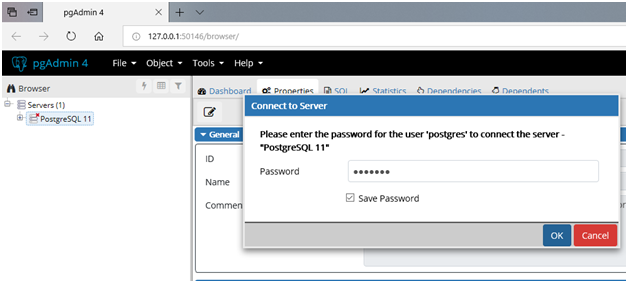
Step 17:
- Enter the password to connect with the server
- Click on OK
Now you can interact with Postgres database in two ways
- Using PgAdmin, i.e. GUI tool
- SQL shell (psql) through command prompt
- Open START menu
- Click on SQL shell
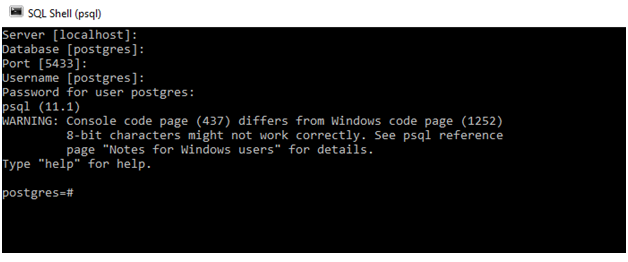
Step 19:
- Press Enter Key until prompt for the password
- Enter the password
Example:
Let us see, an example of create table, inserting data into the table and display the same.
Create table Query
Syntax:
Create table table_name (column_name1 data_type, column_name1 data_type, ……);
Example:
Create table EMP (emp_id int, emp_namevarchar(20), emp_salary int, dept varchar(10));
Insert into Query
Syntax:
Insert into table_name values (‘value1’, ‘value2’, …… );
Example:
Insert into EMP values (101, ‘Rohit Sharma’, 25000, ‘IT’);
Display table content
Syntax:
Select * from table_name;
Example:
Select * from EMP;
Summary
- It is open-source object-oriented DBMS
- The source code is freely available
- It is a community project
- It is written in C language
- There is no maximum limit on database sizes