SSIS Tutorial
SQL Server Integration Services (SSIS)
The SQL Server Integration Services (SSIS) is a powerful ETL tool. This tool is used for building enterprise-level data transformation and data integration solutions.
SSIS provides the ability to:
- retrieve data from any source
- load data into any source
- define a workflow
- perform various transformations on the data: e.g., convert data from one type to another, perform calculations, etc.
Note: SSIS is the platform for Data Integration and workflow applications.
Data Integration – It is the process of combining data from different resources into a single unified view.
Workflow – It is used to automate the maintenance of SQL Server databases and update the multidimensional analytical data.
Before learning about the SSIS, you must have a basic knowledge of SQL Server and data integration.
Why do we use SSIS tool?
There are the following reasons to use the SSIS tool:
- It contains a GUI (Graphical User Interface) that help users to transform data easily rather than writing the large programs.
- It includes many in-built features and transformation to solve the complex business problems by building high-performance data integration packages.
- It can easily move millions of data from one data source to another in few minutes.
- It includes graphical tools & wizards for performing workflow functions like FTP operations, Sending emails, data source, and destination.
- It helps us to merge data from various data stores.
- It helps users in identifying, capturing, or analyzing the data.
- It provides an advanced level of structured error handling.
- It is cheaper than other ETL Tools.
- It provides tight integration with other products of Microsoft.
History of SSIS
Before the SSIS, SQL Server came with the Data Transformation Services (DTS), which was the part of SQL Server 7 and 2000.
- SQL Server 2005 - Integration Services are introduced
With the SQL Server 2005, Integration Services was launched. It was a radical change with DTS and quickly became a popular ETL tool due to its flexibility, speed, and its support for the various sources.
- SQL Server 2008 – Performance is improved
In SQL Server 2008, lots of performance improvements were made to the SSIS tool, and new sources were introduced as well. The SQL Server 2008 didn’t introduce any noticeable changes.
- SQL Server 2012 – Project Deployment model is introduced
SQL Server 2012 introduced the concept of the project deployment model, where the entire project and their packages were deployed to the server, instead of an individual package. Now, the SSIS of SQL Server 2005 and 2008 are referred to as the package deployment model. SSIS 2012 made it easier to configure package and came with a centralized storage and management utility.
- SQL Server 2014 – CodePlex (an open-source code website) is introduced
In SQL Server 2014, new sources and transformations were added to the product. This was done by downloading the CodePlex separately or through the SQL Server Feature Pack.
Examples of SQL Server 2014 are the Azure feature pack and the balanced data distributor.
- SQL Server 2016 – Microsoft introduces new features
SQL Server 2016 allows us to build critical applications and advanced programs by using a hybrid database platform. It includes the new features such as Always Encrypted, Dynamic Data Masking, Real-time Operational Analytics, Polyase, Enhancement to AlwaysOn, Row Level Security, and JSON Support.
The following table shows the SSIS versions and their visual studio versions.
| SSIS Version | Visual Studio Version |
| SSIS 2005 | VS 2005 – templates were referred to as Business Intelligence Development Studio (BIDS) |
| SSIS 2008/2008R2 | VS 2008 (BIDS) |
| SSIS 2012 | VS 2010 – templates were renamed to SQL Server Data Tool (SSDT). SSDT tool came with the SQL Server installation media. VS 2012 – templates were renamed to SQL Server Data Tool for Business Intelligence (SSDT-BI). |
| SSIS 2014 | VS 2013 – SQL Server Data Tool for Business Intelligence (SSDT-BI) used for the separate download. |
| SSIS 2016 | VS 2015 – business intelligence tools and database tools are combined into a single product. |
Architecture of SSIS tool
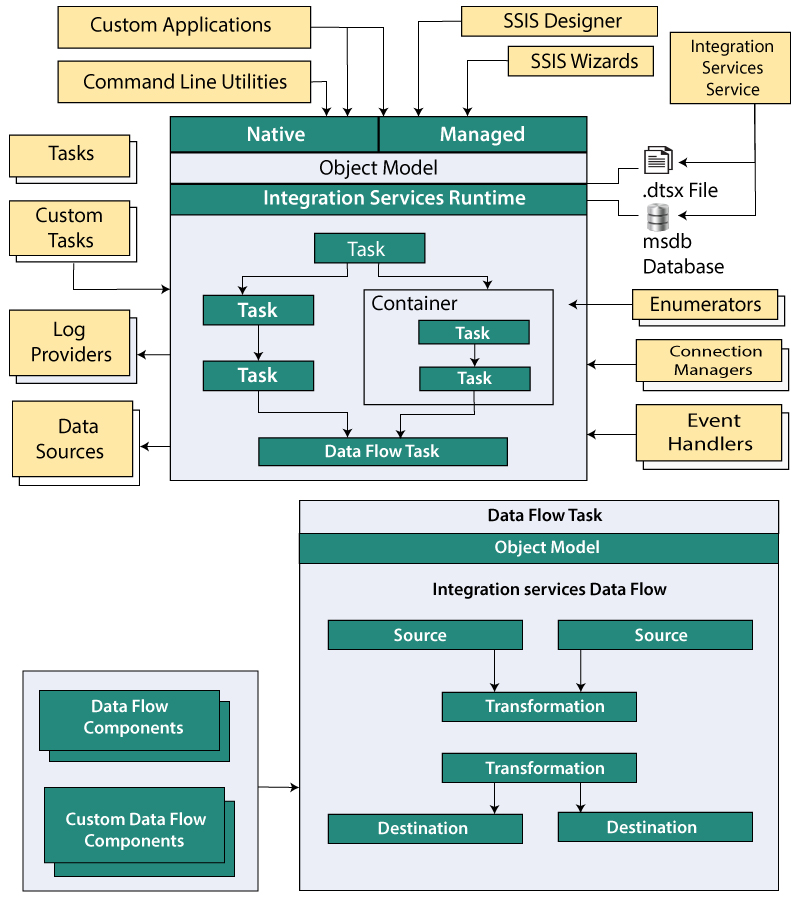
SSIS Architecture consists of the following parts:
Packages
A package is a collection of control flow elements, data flow elements, variables, event handlers, and connection managers. Initially, when you create a package, it is an empty object that does nothing. But when you create the basic package, you can add advanced features such as log providers and variables to extend package functionality in the package.
Control flow
A control flow contains one or more container and task, and they execute when the package runs.
Data flow
A data flow contains the source and destination which are used to modify and extend data, extract and load data, and the paths that link sources, transformations, and destinations. A data flow task is executable within the SSIS package that creates, runs, and orders the data flow.
Connection managers (connections)
A connection manager is a link between the package and the data source. It defines the connection string for accessing the data. The package includes at least one connection manager.
Event Handlers
The event handler is a workflow that runs in response to the run-time events raised by a package, container, or task.
Log Providers and logging
The log is a collection of information about the package that is collected when the package runs.
Variables
Variables are used to evaluate an expression at the runtime.
Integration Services supports the two types of variables –
- System variable – A system variable provides useful information about the package at run time.
- User-defined variable – A user-defined variable supports a custom scenario in the package.
Tasks
A task can be explained as an individual unit of the work. You can write custom tasks using the programming language that supports COM, such as Visual Basic, C#, or a .NET programming language.
Precedence Constraints
Precedence constraints are the arrows in a Control flow of a package component that direct tasks to execute in a predefined order and manage the order in which the tasks will execute.
Transformations
Transformations are the key components within the Data Flow that allow changes to the data within the data pipeline.
Containers
Container is the core unit in the SSIS architecture for grouping tasks together logically into units of work. It allows us to declare variables and event handlers.
There are the following types of containers in SSIS:
- Sequence Container
- For loop Container
- Foreach loop container
Destinations
SSIS destination is used to load data into a variety of database tables/views/SQL commands. The destination editor provides an ability to create a new table.
Components of SSIS
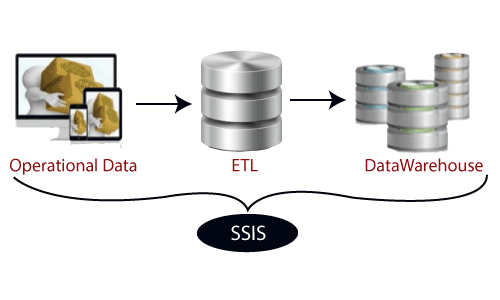
SSIS consists of three major components –
- Operational Data
Operational Data is a database designed to integrate the data from multiple sources and also performs the operation on the data.
It is the place where most of the data is used in the current operation.
- ETL
ETL stands for Extract Transform and Load. It is the process of extracting the data from various sources, transforming this data to meet the requirement and then loading into a target data warehouse.
- DataWarehouse
DataWarehous is used for assembling and managing data from various sources for the purpose of answering business questions. Hence, it helps in marketing decisions.
Advantages of SSIS tool
There are the following advantages of the SSIS tool –
- Tight Integration with the other Microsoft SQL family.
- Better for the multi-step operations, complex transformations
- Aggregating data from different data sources and provide structured exception handling.
- Easier to maintain and load package configuration.
- Can handle data that occurs from heterogeneous data sources at the same package.
Disadvantages of SSIS
There are the following disadvantages of the SSIS tool –
- SSIS sometimes create issues in non-windows environments.
- Vision and strategy are not clearly defined.
- It requires high memory and conflicts with SQL.
- In case of CPU allocation, it is a problematic case when you have more packages to run parallel.
Create SSIS package in Visual Studio
To create the SSIS package in Visual Studio, first we need to install the SQL Server.
There are the following steps to install the SQL Server:
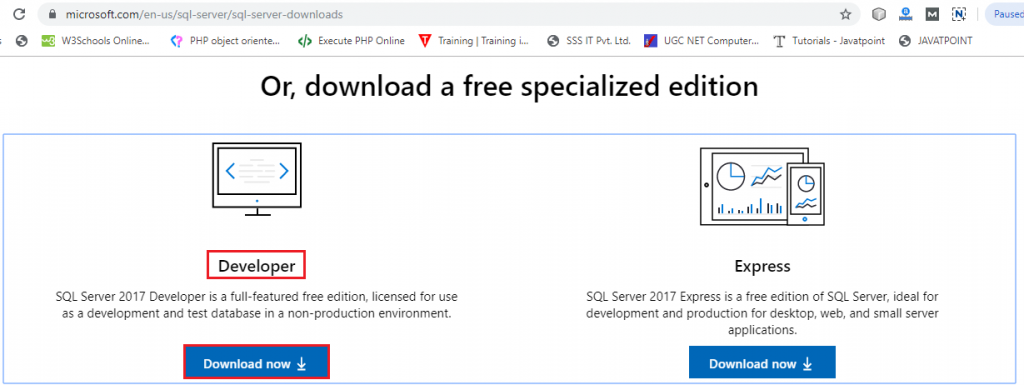
Step1: Click on the link given below to download the SQL Server:
https://www.microsoft.com/en-in/sql-server/sql-server-downloads
Step2: Select the edition that you want to download. For free use, select a developer and then click on Download now.
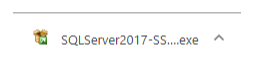
Step3: After downloading is completed, a setup appears, click on that setup.
Step4: when you click on the setup, the screen appears which is shown below. Select custom installation because it allows you to choose what you want to install from the extended tools.

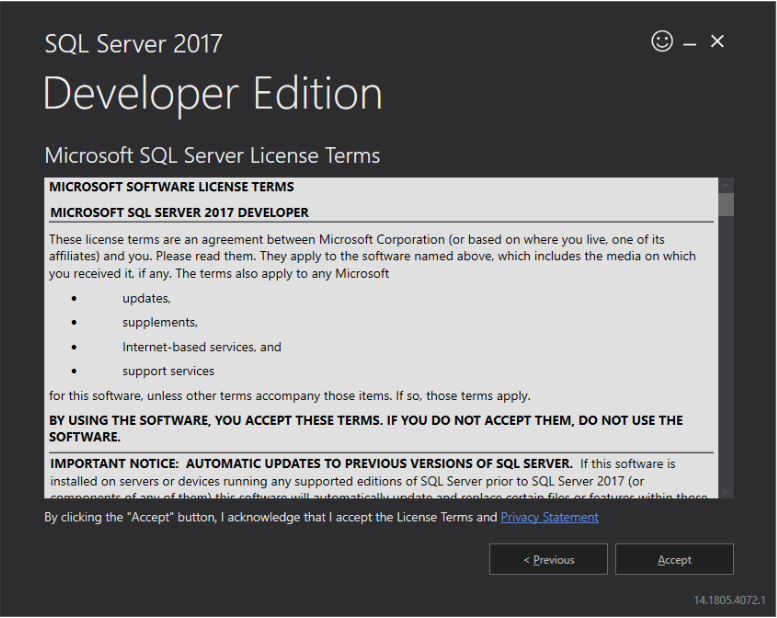
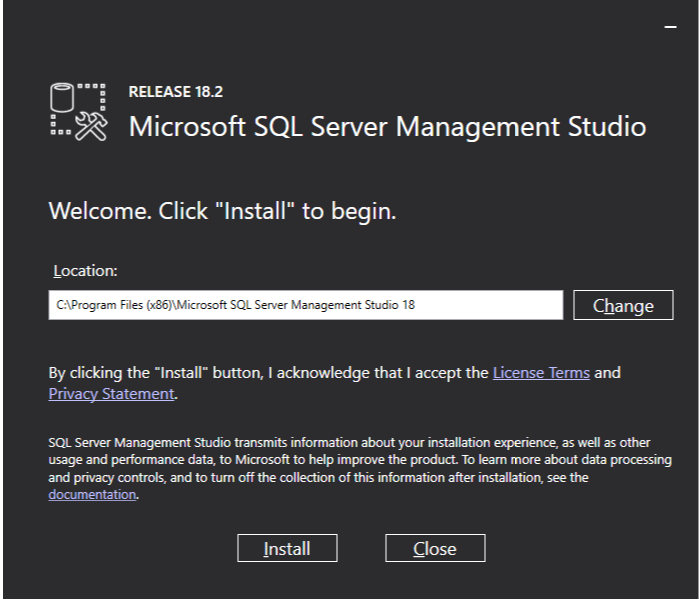
Step5: Now, Microsoft SQL Server Licence Terms page is appears on the screen. To Accept the licence, click on accept.
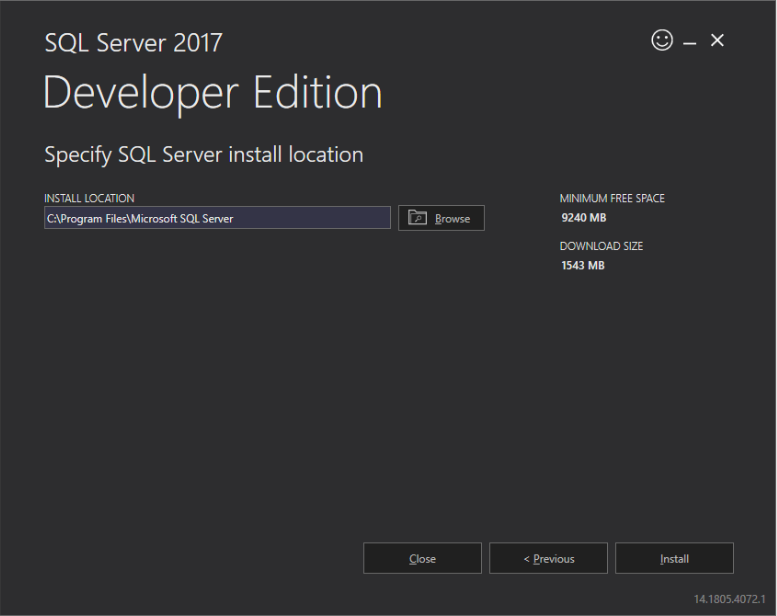
Step6: Browse the location where you want to install the Microsoft SQL Server and then click on install.
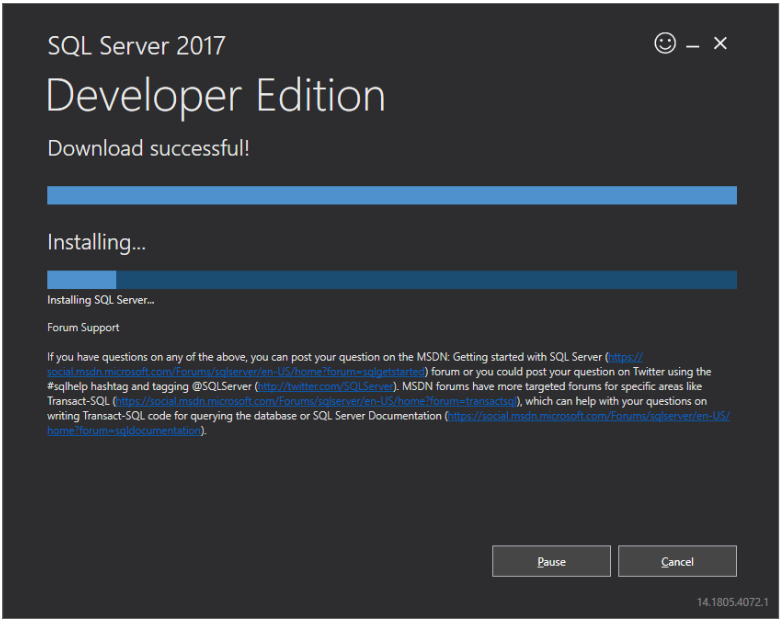
Step7: SQL Server 2017 Developer Edition download successful, and installing process takes a few minutes.
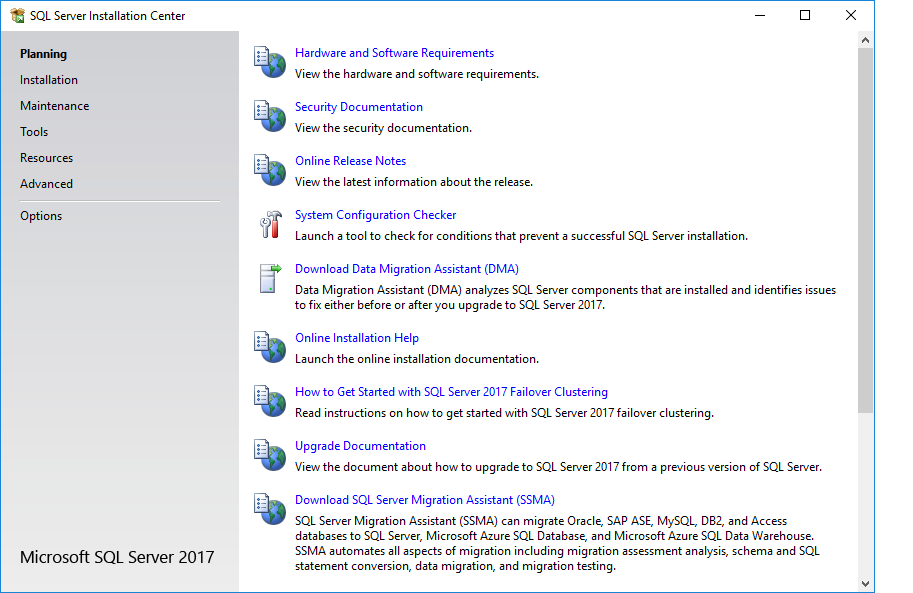
Step8: Once the installation is completed, the following page appears on the screen.
Step9: Now, click on the Installation on the left side of the panel, and Select New Server Stand-alone installation.

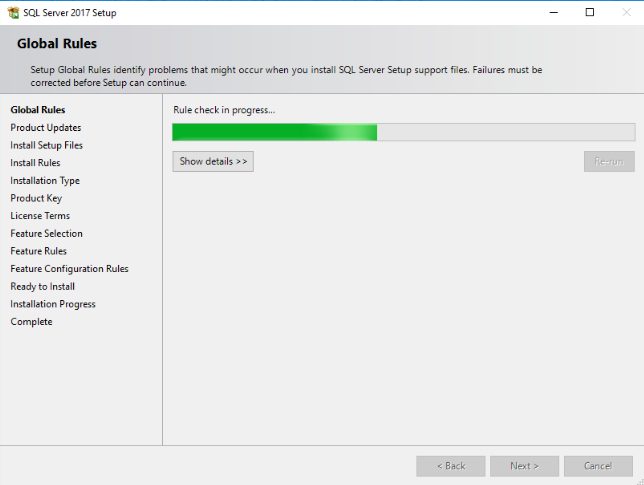
Step10: On the next screen, you’ll see Global Rules. Once it completes, click Next.
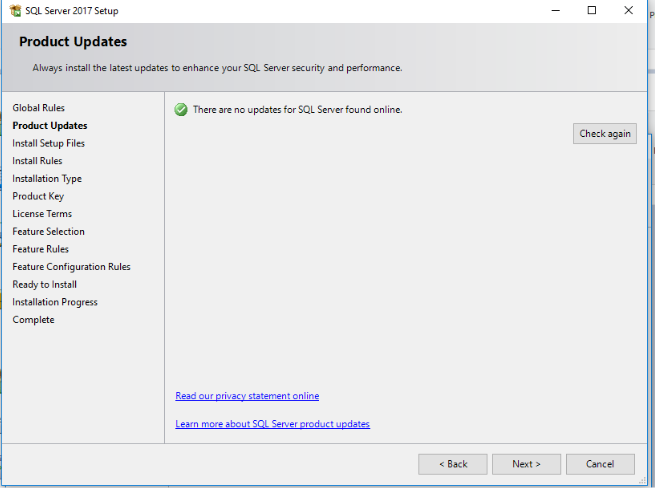
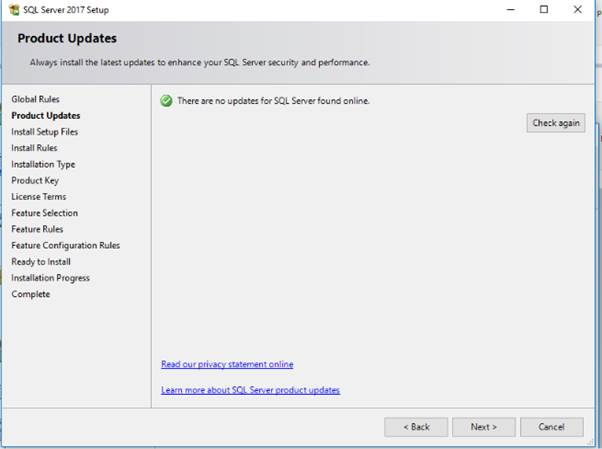
Step11: Once the Product Updates completes, click Next.
Step12: On the next screen, you’ll see Setup files. Once it completes, click on Next.
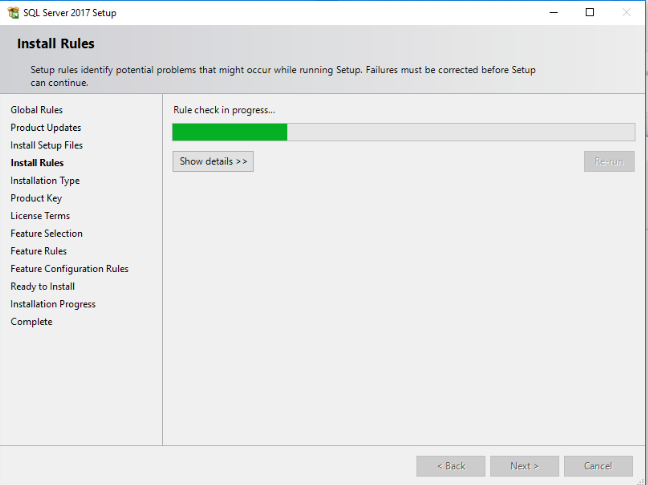
Step13: On the next screen, you will see the install Rules. Once it completes, click on Next.
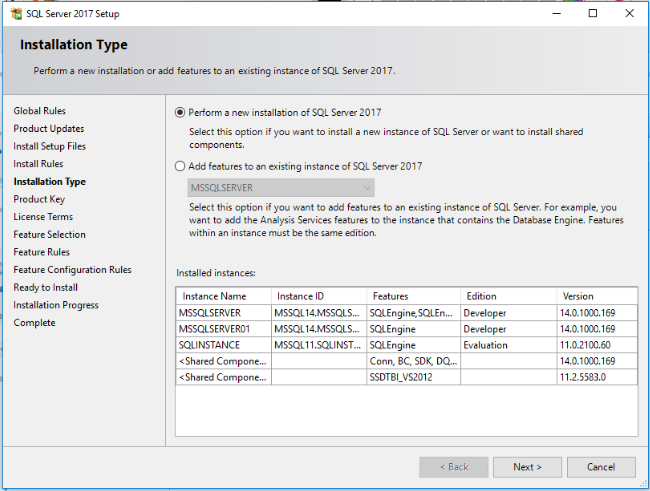
Step14: Now, the installation type will appear on the screen once it completes, click on the Next.
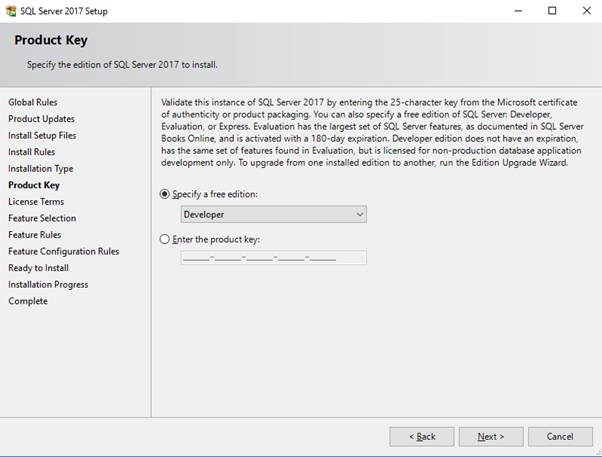
Step15: In 2 to 3 seconds you will see one more new pop up that comes up, you will see the pop up given below screenshot. Specify a free edition as a developer. Then click on NEXT.
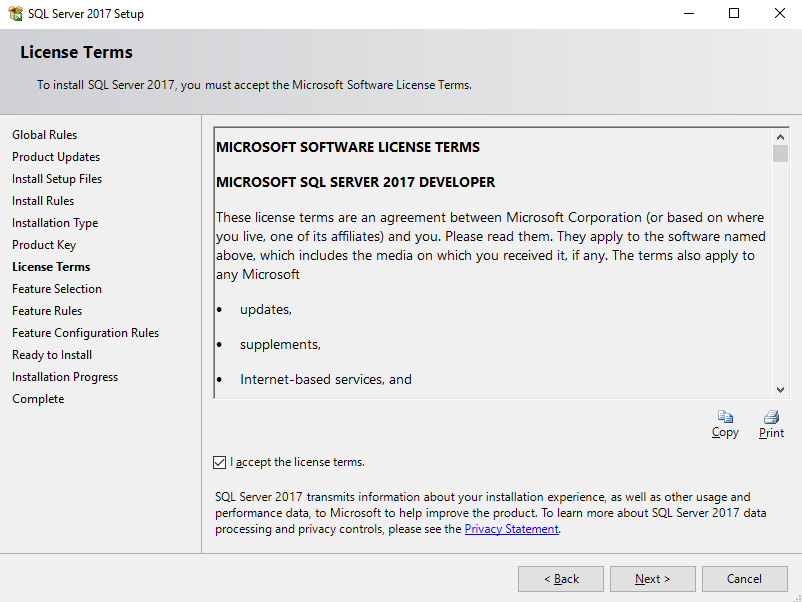
Step16: Accept the License Terms then click on NEXT.
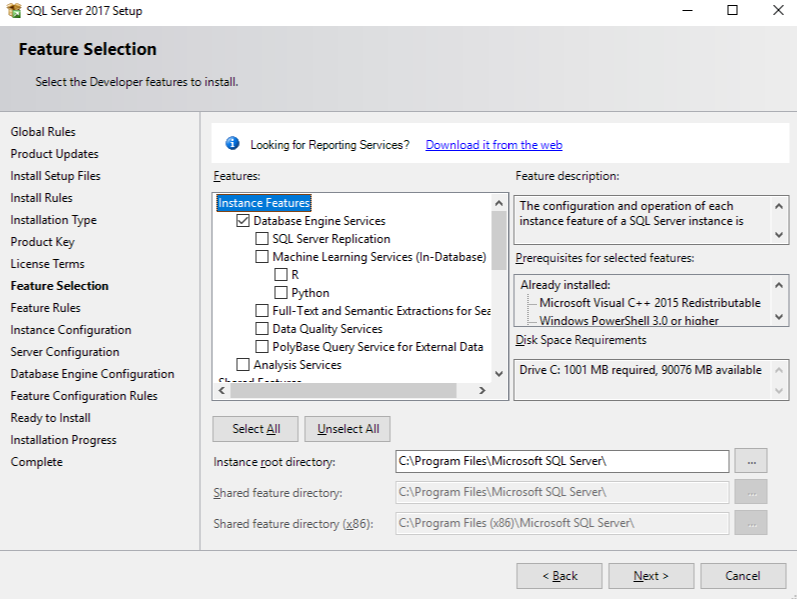
Step17: On the next page, you will see the Feature Selection screen, where you can choose custom SQL Server 2017 features you would like to install. For example, you can choose Database Engine Services for creating SSIS packages.
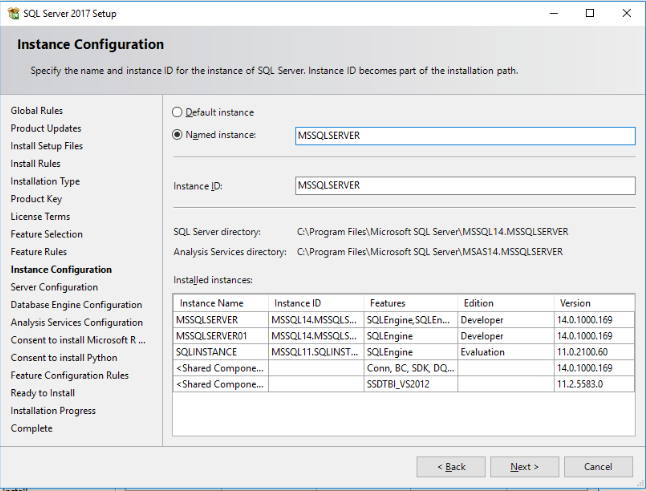
Step18: Once the selection process is completed, future rules pop up and directly moves to the Instance configuration.
In Instance configuration, you may specify a Named instance for your installation. In our example, a Named instance is MSSQLSERVER. You can also go with the Default instance. Then click on Next.
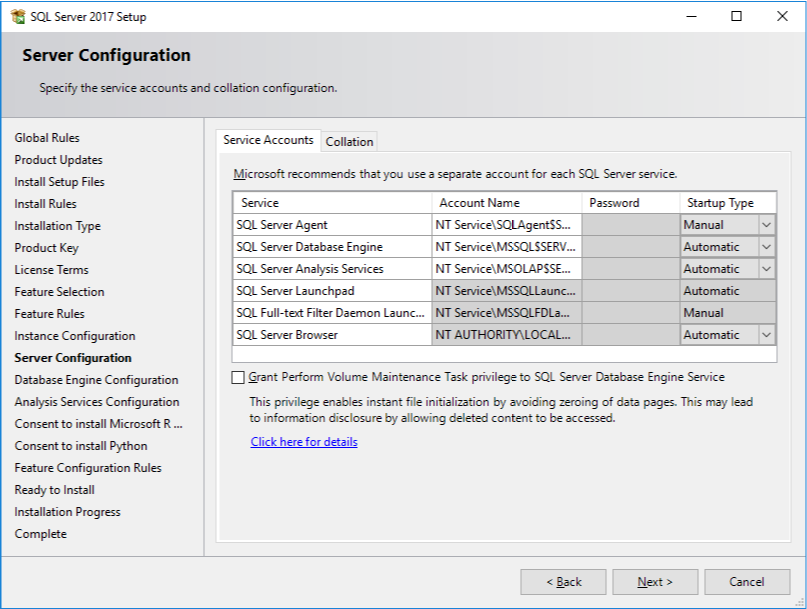
Step19: Now, you will be taken to the Server Configuration screen. You simply click on Next in the screen given below:
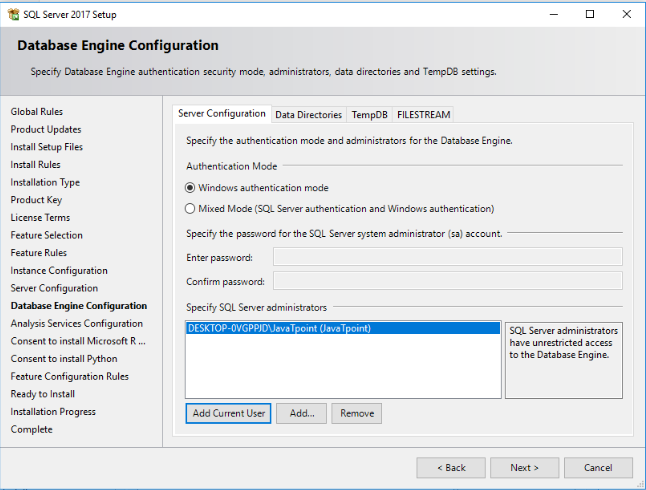
Step 20: Now, you will see the Database Engine Configuration setting. Select the windows authentication mode and click on Add Current user then click on the Next.
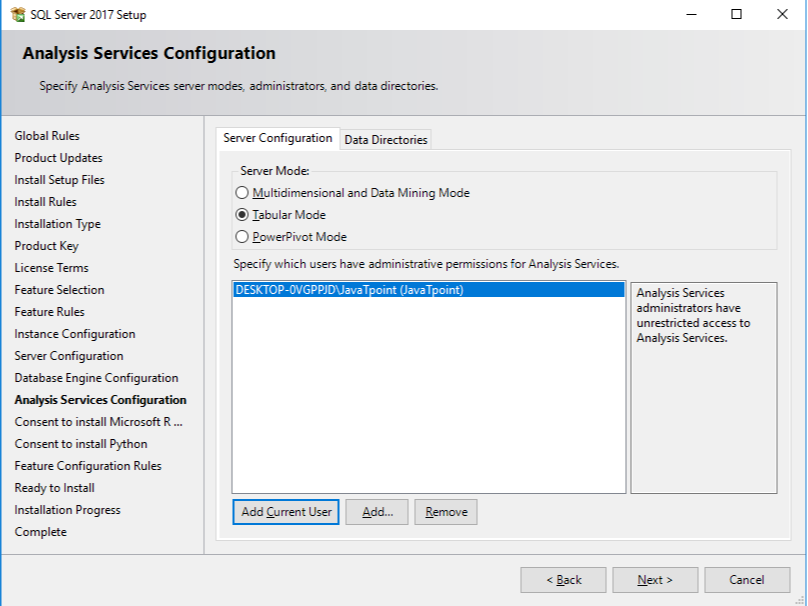
Step21: Analysis Services configuration is used to analyze the SQL services. Click on Tabular mode, and click on add Current User then click on the Next.
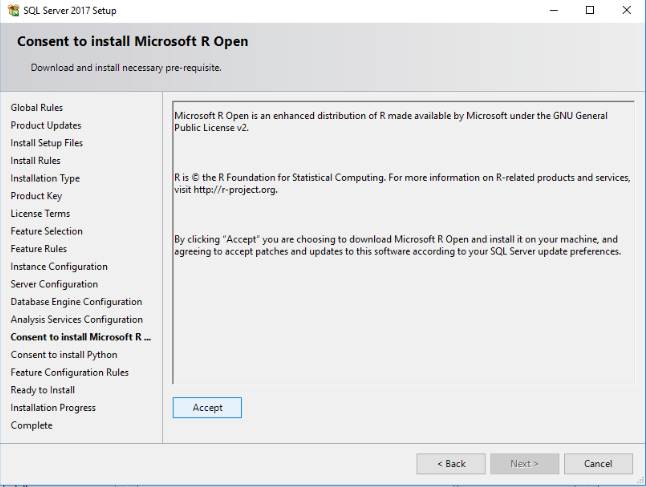
Step22: Click on the Accept and then Next button.
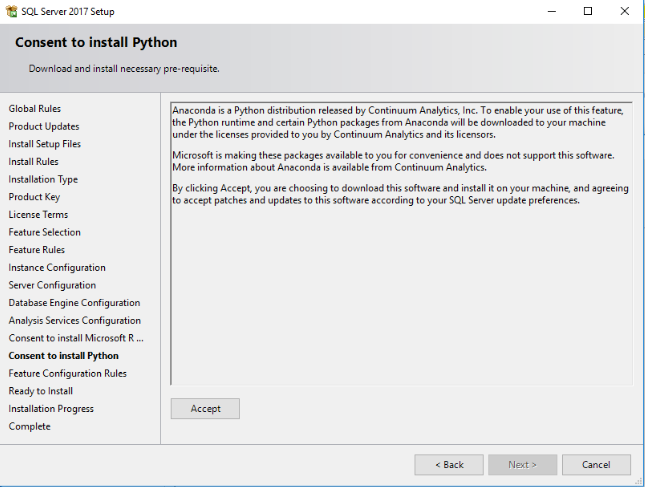
Step23: Click on Accept and then click on Next button.
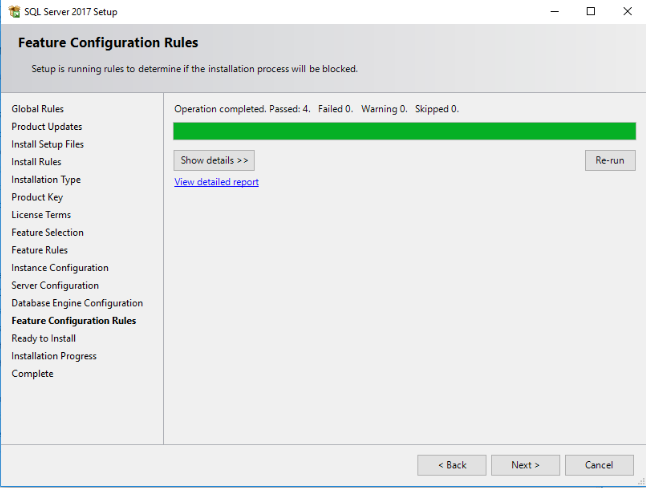
Step24: Click on the Next.
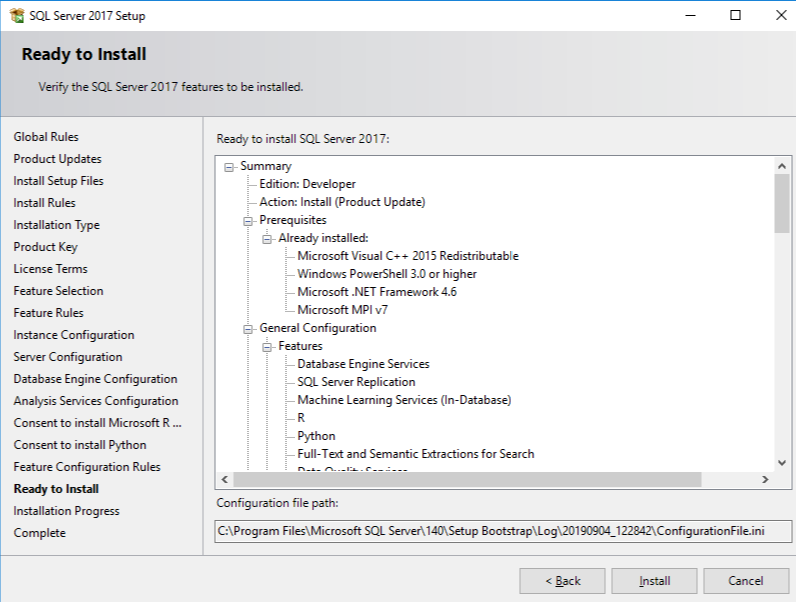
Step25: Click on the Install button, as shown in the screenshot given below:
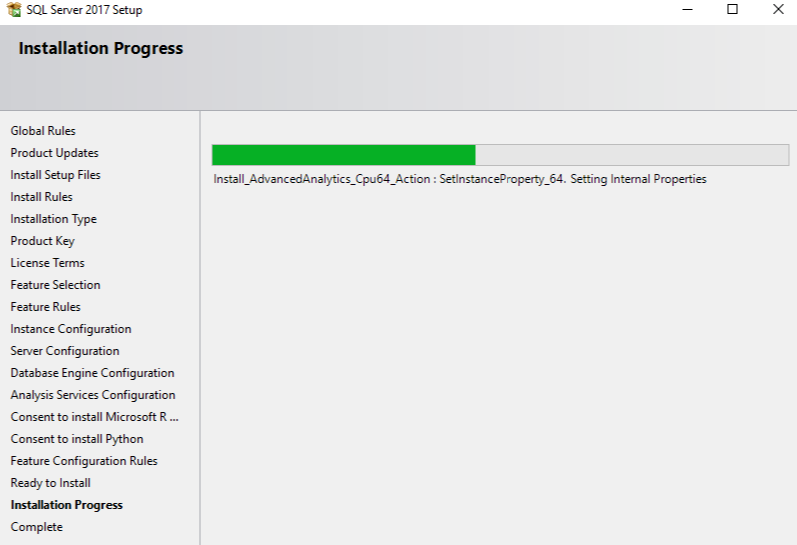
Step26: Now, you can see the installation process is running.
Step27: Once the installation of the SQL Server database Engine is completed, the following image appears:
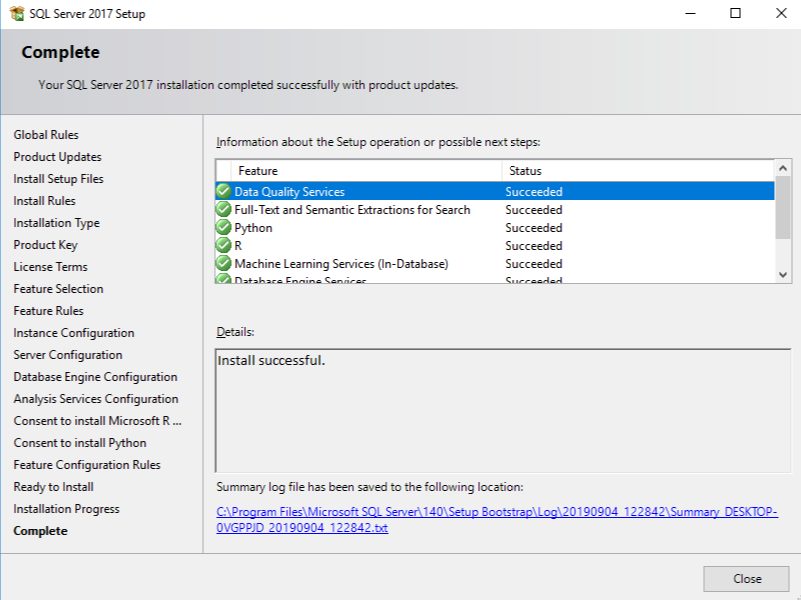
Once the installation of SQL Engine is completed, click close to finish.
How to do Installation of Microsoft SQL Management Tool?
The SQL Server Management Tool is a GUI (Graphical User Interface) program that allows you to manage your database quickly and easily.
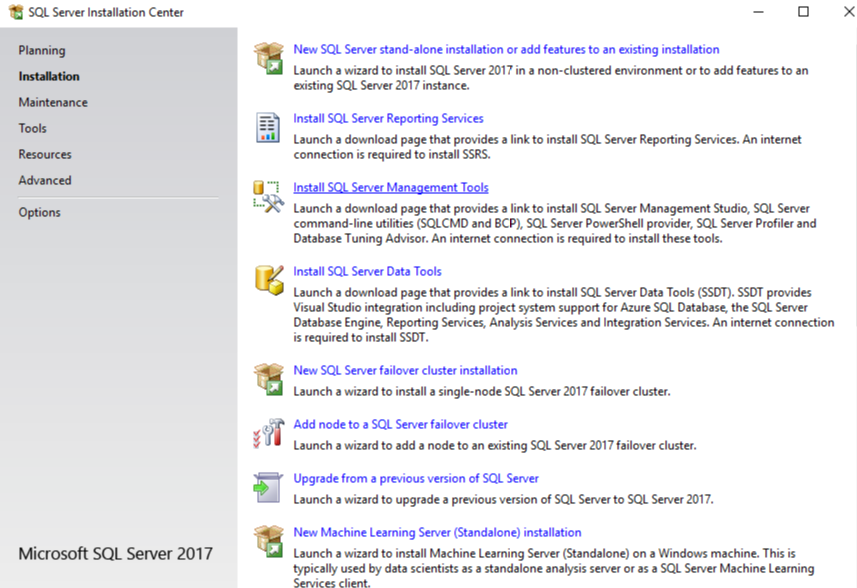
Step1: In the above screenshot, click on the close. You will be directed to the following page. In this page, go to installation and then click on the Install SQL server management tool.
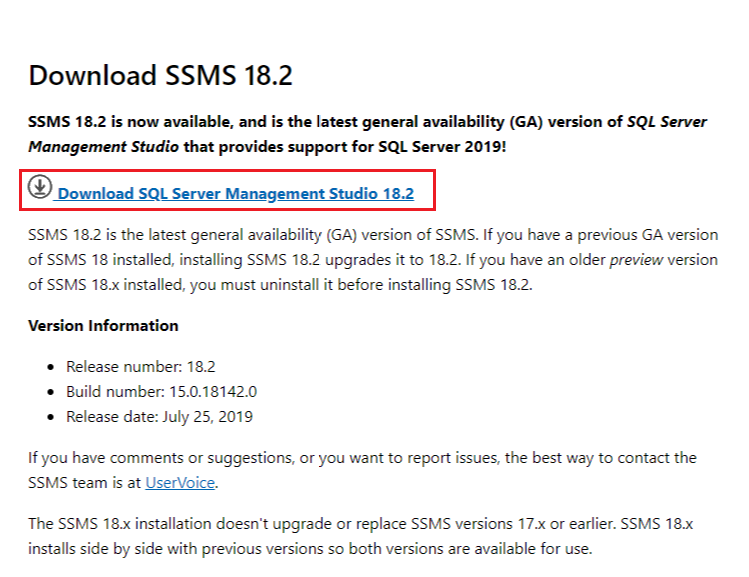
When you click on the Install SQL Management tool, the following page appears. Click on download.
Once the downloading is completed, the following pop up will come. Click the install.
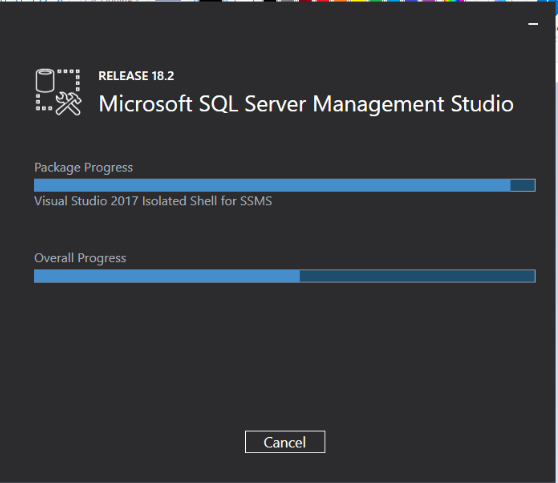
The Installation process is started.
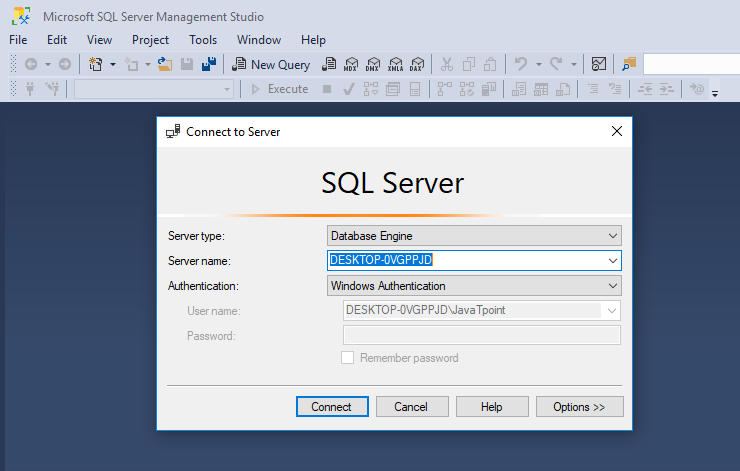
Now, you will see Connect to Server window. Select the server name through you want to connect. Click the Connect.
Creating a First SSIS Project
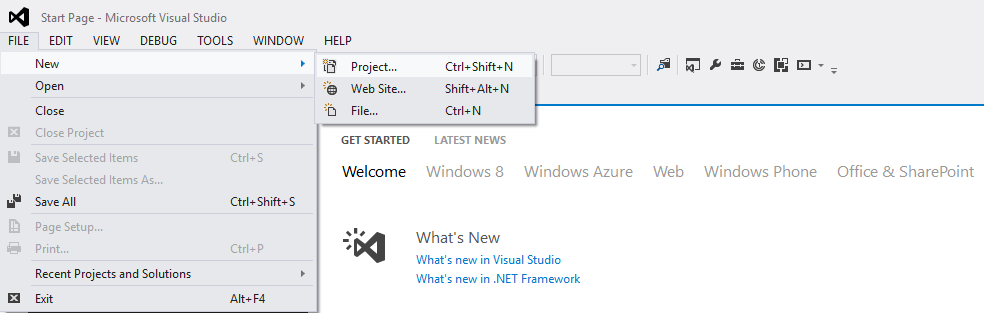
To create the SSIS project, Open the Visual Studio. Then go to File -> New -> Project.
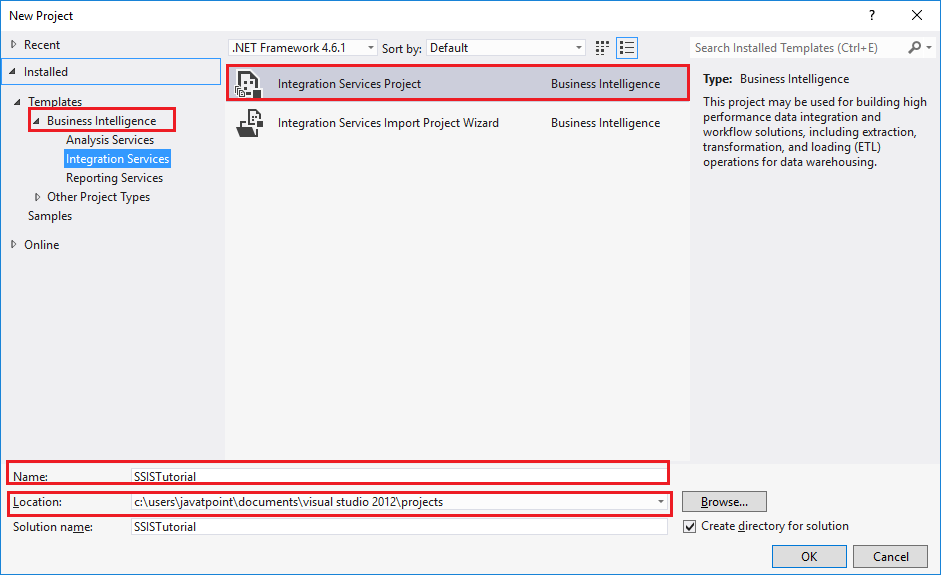
In the New Project, Select “Integration Service” under the Business Intelligence, enter the name for the project and specify the location to save the project then click on OK.
When you create a project, Visual Studio creates a solution and add the project on that solution. By default, the solution name is the same as the project name.
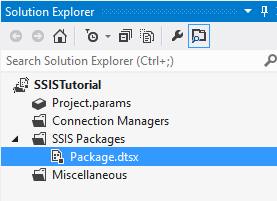
Once you click on OK, you’ll get your project and solution will create a default package named ‘Package.dtsx’ as shown in below screenshot.
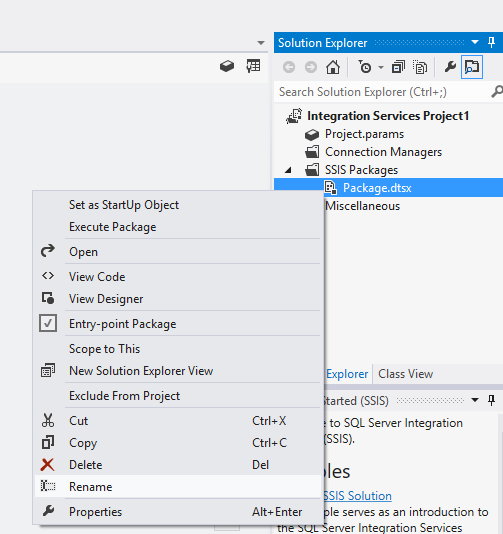
Now Right-click on the Package.dtsx and choose Rename to change the name to “Hello World.dtsx”.
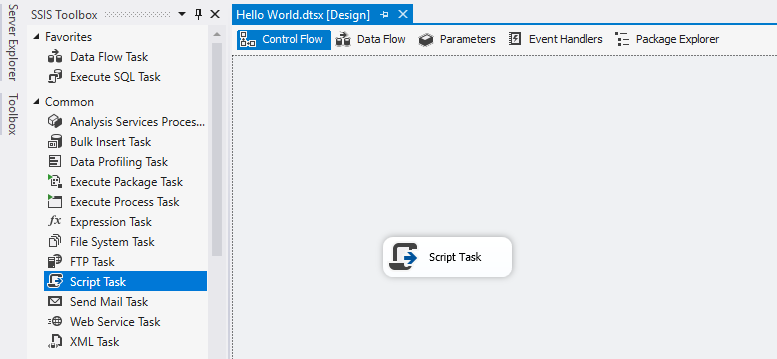
Go to control flow, drag and drop the “Script Task”.
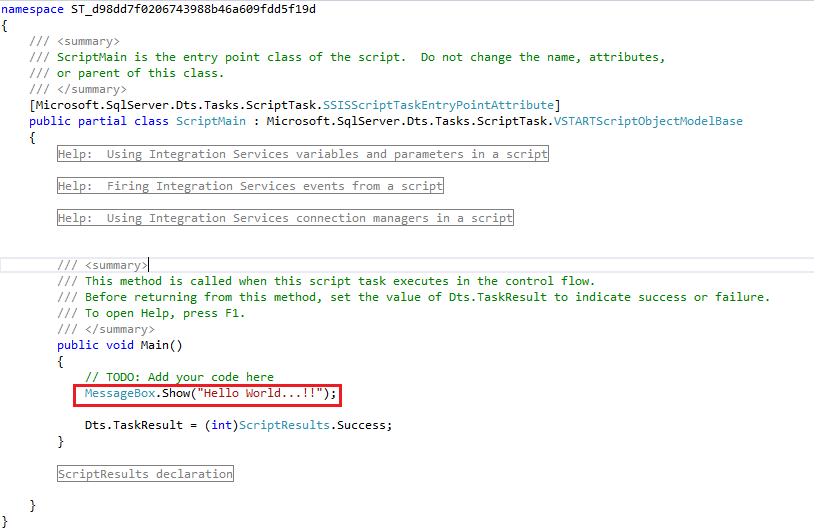
Double click on the Script Task and choose “Edit Script” to open the ScriptMain.cs.
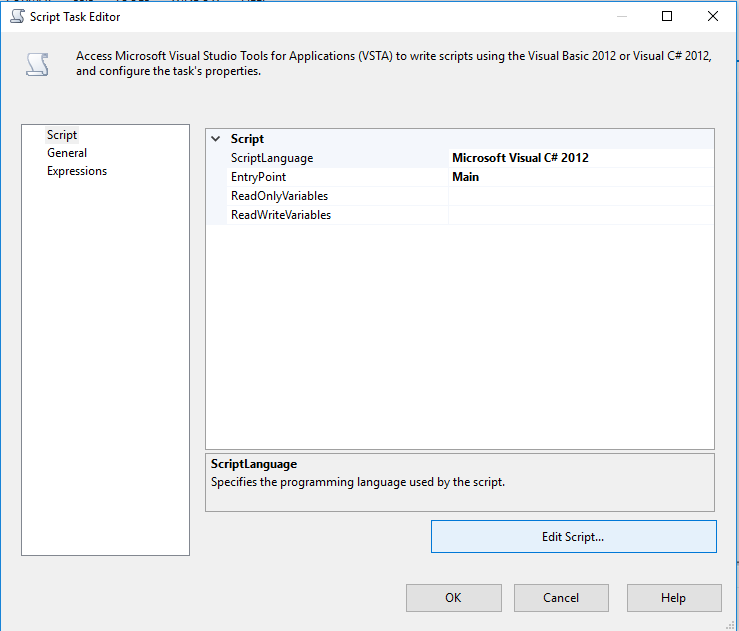
In ScriptMain.cs, edit the code by giving command MessageBox.Show(“Hello World…!!”); followed by the message that you want to display.
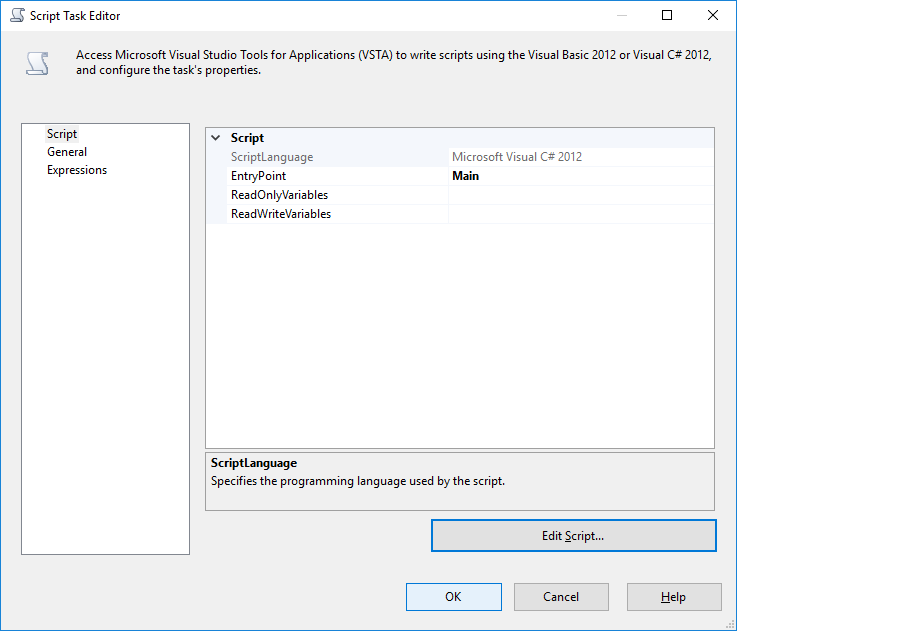
Now close the window, and click on OK.
Click on the menu DEBUG -> start Debugging or F5 to run the package, you will get the following output as shown in the below screenshot.

Click on OK or shift F5 to stop running the package.
Creating a SSIS Package
In this package, we automate the SSIS package Execution in SQL Server.
There are the following steps to automate the SSIS package -
Step1: Open the Microsoft SQL Management Studio, and click on Connect.
Step2: Go to the database and select a new database. In new database, provide the name to the database.
Step 3: To create table we use the Query:
| create table Employ (Id int, F_Name varchar(20), L_Name varchar(20), Address varchar(20), City varchar(20), Contact_no int); |
Step 4: To insert the values in the database, we use the Query:
| Insert into Employ values (1, ‘Charu’, ‘Kohli’,’Sharda Coloney’, ‘Tanakpur’,123456); |
By using the above insert query, we can insert any number of records in the database.
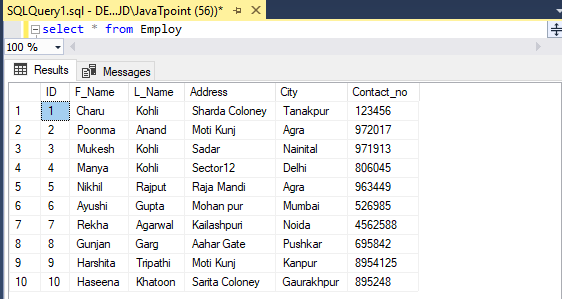
Step 5: To see the records in the database we use, “select * from Employ” query.
Step 6: Now, Suppose we want to automate ID from 4 to 15. To do this First Open the Visual Studio then drag and drop Execute query in the working area.
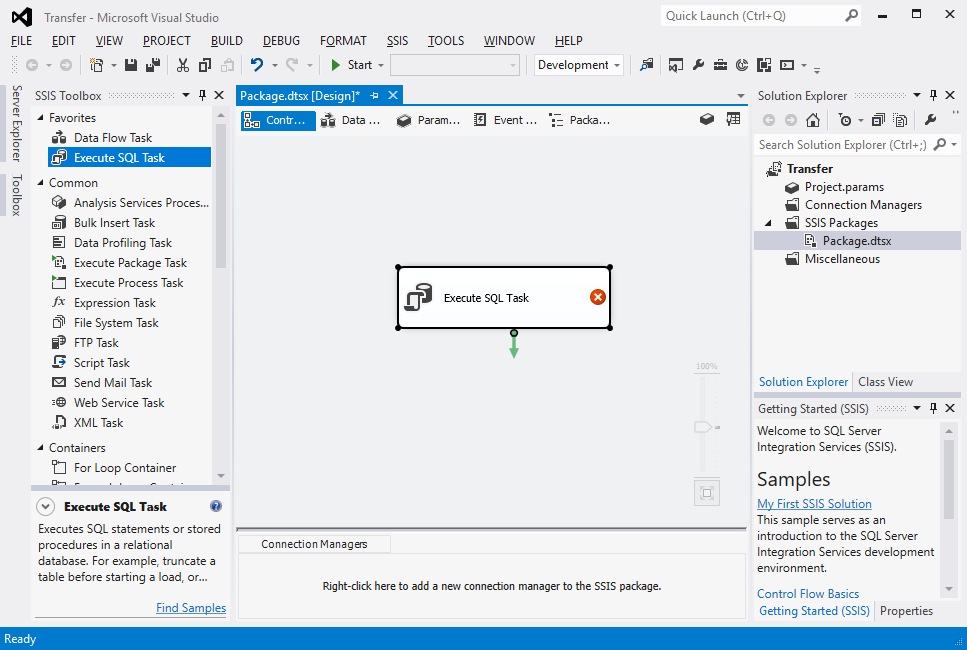
Step 7: Right Click on connection manager and go to New OLE DB Connection.

When you click on New OLE DB connection following page appears.
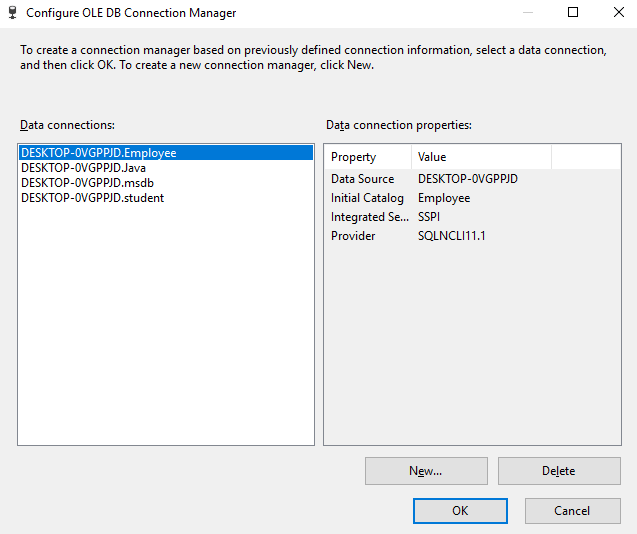
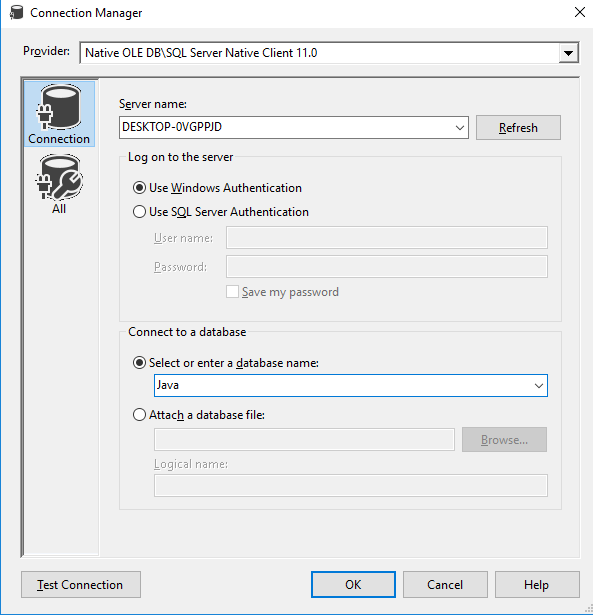
Step 8: Provides the server name and the database name, as shown in the below screenshot.
Step 9: To verify that connection is established, click on the Test Connection. If the connection is established following pop up appears.

Now click on OK.
Step 10: To execute the Query double click on the execute query and select the SQL Statement.
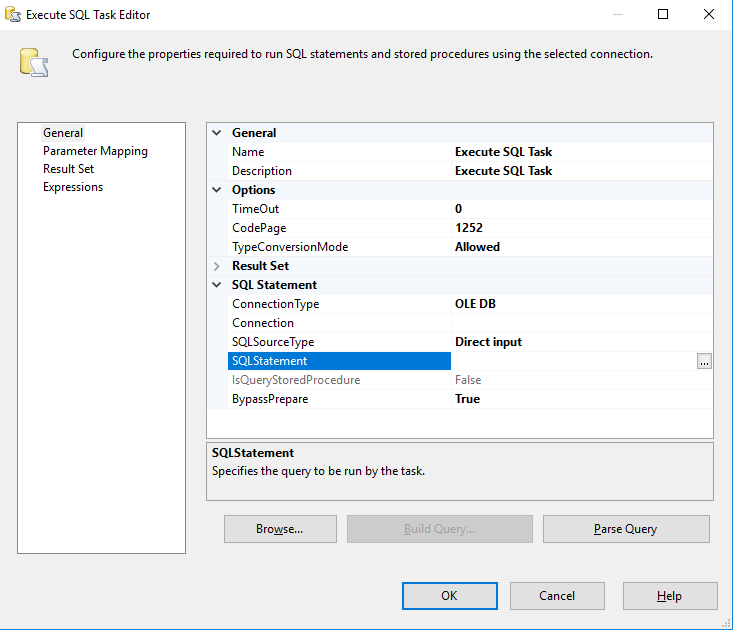
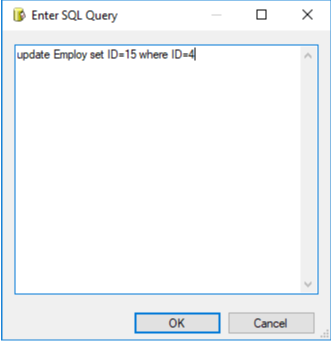
Step 11: In execute statement, enter the query. Then click on OK.
Step 12: To verify query is correct or not, click on parse query. Once you click on parse query, it will give an attestation message shown below.
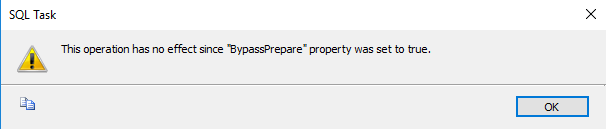
Step 13: To remove the warning set “BypassPrepare” to make it False and again click on the parse query.
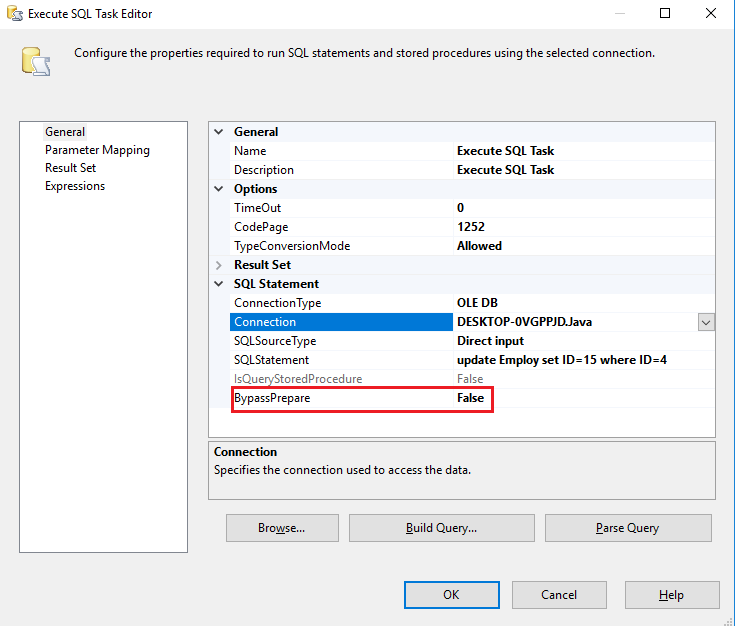
If there is no error the, following message will be shown.

Step 14: To run the package, press the key F5.
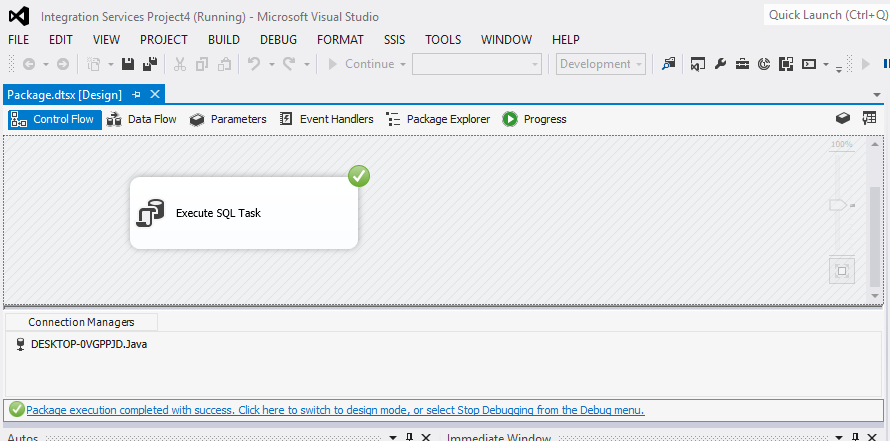
Step 15: To stop the debugging, press key Swift+F5.