Android Navigation Drawer
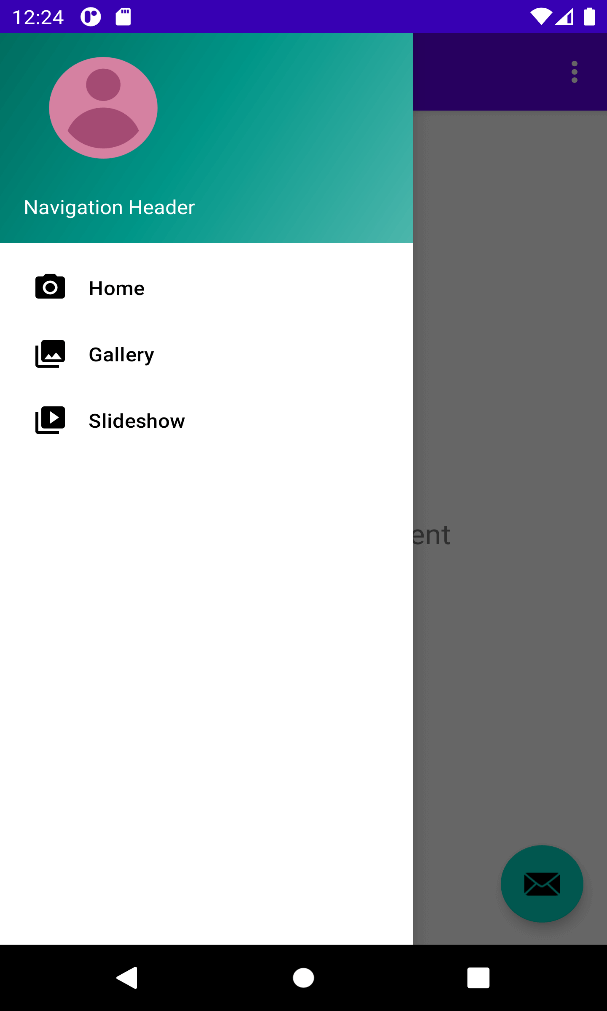
A sliding menu used to show important links in the Android Application is called Navigation Drawer. The navigation drawermakes it easier to navigate between the fragments. It is not displayed by default, so you must open it by sliding on the left or clicking the icon inthe taskbar.
In the broadest sense, the Navigation Drawer is an overlay panel, which takes the place of a task screen specifically dedicated to displaying all the options and links of an application.
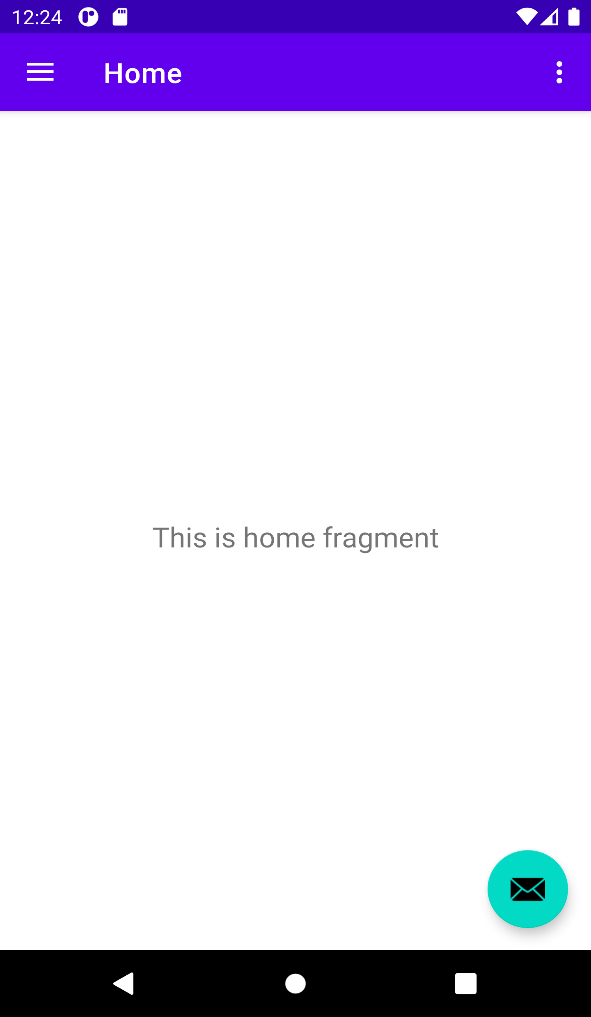
Here, webuild a navigation drawer by utilizing the Drawer Layoutthat can be found in the Android support library. It displays three fragment links that can be navigated from a drawer.
Building a Navigation Drawer
- Setup Drawer Resources
<?xml version="1.0" encoding="utf-8"?>
<menu xmlns:android="http://schemas.android.com/apk/res/android"
xmlns:tools="http://schemas.android.com/tools"
tools:showIn="navigation_view">


<group android:checkableBehavior="single">
<item
android:id="@+id/home_n"
android:icon="@drawable/ic_cam"
android:title="@string/h_menu" />
<item
android:id="@+id/gallery_n"
android:icon="@drawable/ic_gall"
android:title="@string/gal_menu" />
<item
android:id="@+id/slShow_n"
android:icon="@drawable/ic_sshow"
android:title="@string/ss_menu" />
</group>
</menu>
- Create Fragments and Navigation Graph
Now, we need to create the fragments that will be displayed within the activity. It can be created within the application and become part of the activity. Be sure that all fragments extend androidx.fragment.app.Fragment.
Then build a navigation graph between the fragments as follows:
<?xml version="1.0" encoding="utf-8"?>
<navigation xmlns:android="http://schemas.android.com/apk/res/android"
xmlns:app="http://schemas.android.com/apk/res-auto"
xmlns:tools="http://schemas.android.com/tools"
android:id="@+id/mobile_navigation"
app:startDestination="@+id/nav_home">


<fragment
android:id="@+id/nav_home"
android:name="com.example.myapplication.ui.home.HomeFragment"
android:label="@string/h_menu"
tools:layout="@layout/fragment_home" />


<fragment
android:id="@+id/nav_gallery"
android:name="com.example.myapplication.ui.gallery.GalleryFragment"
android:label="@string/gal_menu"
tools:layout="@layout/fragment_gallery" />


<fragment
android:id="@+id/nav_slideshow"
android:name="com.example.myapplication.ui.slideshow.SlideshowFragment"
android:label="@string/ss_menu"
tools:layout="@layout/fragment_ss" />
</navigation>
- Setup Toolbar
For sliding the navigation drawer on the ActionBar, you should use the new toolbar widget present in the AndroidX library. Make sure that the toolbar slides above the taskbar with drawers that can be included in the view hierarchy.
Create a new layout file res/layout/nav_toolbar.xml and implement the given XML code:
<?xml version="1.0" encoding="utf-8"?>
<androidx.coordinatorlayout.widget.CoordinatorLayoutxmlns:android="http://schemas.android.com/apk/res/android"
xmlns:app="http://schemas.android.com/apk/res-auto"
xmlns:tools="http://schemas.android.com/tools"
android:layout_width="match_parent"
android:layout_height="match_parent"
tools:context=".NavDrawAcivity">


<com.google.android.material.appbar.AppBarLayout
android:layout_width="match_parent"
android:layout_height="wrap_content"
android:theme="@style/Theme.MyApplication.AppBarOverlay">


<androidx.appcompat.widget.Toolbar
android:id="@+id/toolbar"
android:layout_width="match_parent"
android:layout_height="?attr/actionBarSize"
android:background="?attr/colorPrimary"
app:popupTheme="@style/Theme.MyApplication.PopupOverlay" />


</com.google.android.material.appbar.AppBarLayout>


<include layout="@layout/content_main" />


<com.google.android.material.floatingactionbutton.FloatingActionButton
android:id="@+id/fab"
android:layout_width="wrap_content"
android:layout_height="wrap_content"
android:layout_gravity="bottom|end"
android:layout_margin="@dimen/fab_margin"
app:srcCompat="@android:drawable/ic_dialog_email" />


</androidx.coordinatorlayout.widget.CoordinatorLayout>
- Setup Header
It also accepts a custom attribute to view the layout that provides a header for the NavigationView layout.
To create a header, create a layout/nav_header.xml as follows:
<?xml version="1.0" encoding="utf-8"?>
<LinearLayoutxmlns:android="http://schemas.android.com/apk/res/android"
xmlns:app="http://schemas.android.com/apk/res-auto"
android:layout_width="match_parent"
android:layout_height="@dimen/height_header"
android:background="@drawable/side_nav_bar"
android:paddingRight="@dimen/horizontal_marg_act"
android:paddingBottom="@dimen/vertical_margin_act"
android:gravity="bottom"
android:orientation="vertical"
android:paddingLeft="@dimen/horizontal_marg_act"
android:paddingTop="@dimen/vertical_margin_act"
android:theme="@style/ThemeOverlay.AppCompat.Dark">


<ImageView
android:id="@+id/profilePic"
android:layout_width="wrap_content"
android:layout_height="wrap_content"
android:contentDescription="@string/nav_header_desc"
android:paddingTop="@dimen/vertical_spacing_header"
app:srcCompat="@mipmap/ic_launcher_profile" />


<TextView
android:id="@+id/name"
android:layout_width="match_parent"
android:layout_height="wrap_content"
android:paddingTop="8dp"
android:text="@string/title_header"
android:textAppearance="@style/TextAppearance.AppCompat.Body1" />


<TextView
android:id="@+id/email"
android:layout_width="wrap_content"
android:layout_height="wrap_content"
android:text = "[email protected]" />
</LinearLayout>
- Setup Drawer in Activity
Let's set the default navigation drawer according to the following layout file set in res/layout/activity_nav_draw.xml for the entire drawer. Remember adding the include tag for adding the toolbar as the first child of the main content view.
<?xml version="1.0" encoding="utf-8"?>
<androidx.drawerlayout.widget.DrawerLayoutxmlns:android="http://schemas.android.com/apk/res/android"
xmlns:app="http://schemas.android.com/apk/res-auto"android:fitsSystemWindows="true"
xmlns:tools="http://schemas.android.com/tools"
android:id="@+id/l_drawer"
android:layout_width="match_parent"
android:layout_height="match_parent"
tools:openDrawer="start">


<include
layout="@layout/app_toolbar"
android:layout_width="match_parent"
android:layout_height="match_parent" />


<com.google.android.material.navigation.NavigationView
android:id="@+id/nav_view"
android:layout_width="wrap_content"
android:layout_height="match_parent"
android:layout_gravity="start"
android:fitsSystemWindows="true"
app:headerLayout="@layout/nav_header"
app:menu="@menu/activity_main_drawer" />
</androidx.drawerlayout.widget.DrawerLayout>
Now, let's setup the drawer in our NavDrawAcivity. We may also add menu icon.
import android.os.Bundle;
import android.view.View;
import android.view.Menu;
import com.google.android.material.floatingactionbutton.FloatingActionButton;
importcom.google.android.material.snackbar.Snackbar;
import com.google.android.material.navigation.NavigationView;
import androidx.navigation.NavController;
import androidx.navigation.Navigation;
import androidx.navigation.ui.AppBarConfiguration;
import androidx.navigation.ui.NavigationUI;
import androidx.drawerlayout.widget.DrawerLayout;
import androidx.appcompat.app.AppCompatActivity;
import androidx.appcompat.widget.Toolbar;


public class NavDrawAcivityextends AppCompatActivity{
private AppBarConfigurationmAppBarConfiguration;
@Override
protected void onCreate(Bundle savedInstanceState) {
super.onCreate(savedInstanceState);
setContentView(R.layout.activity_nav_draw_acivity);
Toolbar toolbar= findViewById(R.id.toolbar);
setSupportActionBar(toolbar);
FloatingActionButton fab = findViewById(R.id.fab);
fab.setOnClickListener(new View.OnClickListener() {
@Override
public void onClick(View view) {
Snackbar.make(view, "Create your own action", Snackbar.LENGTH_LONG)
                        .setAction("Action", null).show();
            }
        });
DrawerLayout drawer = findViewById(R.id.l_drawer);
NavigationViewnavigationView= findViewById(R.id.nav_view);

mAppBarConfiguration= new AppBarConfiguration.Builder(
R.id.nav_home, R.id.nav_gallery, R.id.nav_slideshow)
                .setDrawerLayout(drawer).build();


NavControllernavController= Navigation.findNavController(this, R.id.nav_host_fragment);
NavigationUI.setupActionBarWithNavController(this, navController, mAppBarConfiguration);
NavigationUI.setupWithNavController(navigationView, navController);
  }
@Override
public booleanonCreateOptionsMenu(Menu menu) {
// Builds the menu; If present, adds items to the action bar.getMenuInflater().inflate(R.menu.nav_draw_acivity, menu);
return true;
    }
@Override
public booleanonSupportNavigateUp() {
NavControllernavController= Navigation.findNavController(this, R.id.nav_host_fragment);
return NavigationUI.navigateUp(navController, mAppBarConfiguration)|| super.onSupportNavigateUp();
    }
}