File Type Validation while Uploading Using JavaScript or jquery
Introduction
In this topic, we are going to learn how to validate the file type extension and size of the file before uploading it to the server. In the web application, the file type validation is the most important for security reasons. There is a need for validation during the upload of the file to the server. We can provide the validation for the webpage either on the client side or the server side.
File Type (Extension) Validation
In jquery, we can easily provide the validation by extracting all the types of file extension and allow a particular type of extension during the uploading of the file.
Example of File Type Validation
In the below program, we provide the validation for the uploading of the file. In that program, we can only upload the file with the extension .jpeg/.jpg/.png/.gif.
Here the file type validation is going to on the change event of the HTML code.
HTML Code:
<!DOCTYPE html>
<html>
<head>
<title>
File type validation
</title>
<script src="https://ajax.googleapis.com/ajax/libs/jquery/3.5.1/jquery.min.js"></script>
<style>
body{
text-align: center;
}
</style>
</head>
<body>
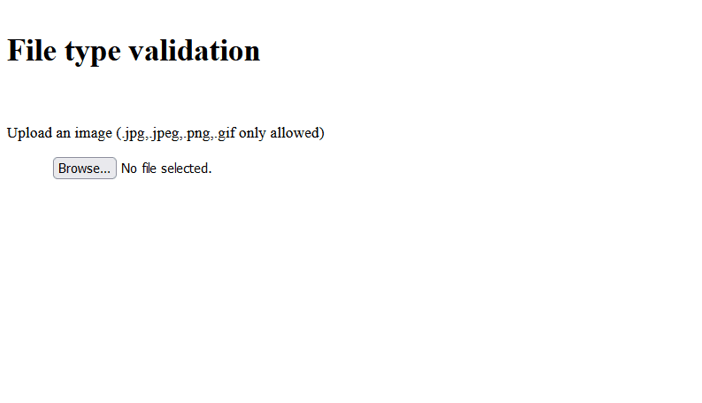
<h1>File type validation</h1>
<p>Upload an image (.jpg,.jpeg,.png,.gif only allowed)</p>
<input type="file" id="file-upload" />
<script>
$(document).ready(function(){
$("#file-upload").on("change",function(){
var $input = $(this);
var files = $input[0].files;
var filename = files[0].name;
var extension = filename.substr(filename.lastIndexOf("."));
var allowedExtensionsRegx = /(\.jpg|\.jpeg|\.png|\.gif)$/i;
var isAllowed = allowedExtensionsRegx.test(extension);
if(isAllowed){
alert("File type is valid for the upload");
}else{
alert("Invalid File Type.");
return false;
}
});
});
</script>
</body>
</html>
Output:
Explanation:
- When we use jquery, we need to import the jQuery library script first. In the above code, we need to import the
<script src="https://ajax.googleapis.com/ajax/libs/jquery/3.5.1/jquery.min.js"></script>
- We have to define an attribute type=" file" for providing the uploading feature on the webpage.
- With the help of $(document).ready(function(){…}); it is called when the HTML page loads successfully.
- With the help of $(this) we can get the file input element object of jQuery.
- With the help of $(this)[0].files, we can get all the files that are chosen by the user.
- With the help of files[0].name, we can get the file name with the extension.
- We can define the regular expression with the help of allowedExtensionsRegx. It helps us to allow the variable file type like .JPG, .JPEG, .PNG, .GIF only.
- With the help of the test() function, we can check whether the file type is allowed is not. It returns only Boolean type values, true or false only.
Working With Multiple Files Upload
Sometimes based on our project requirement, we need to provide multiple files to upload at a time. During that time, we need to make some simple modifications to our code.
Let's understand which type of modification we need to do for our code.
- In the HTML code, we need to add one more attribute name multiple . with the help of multiple attributes; the webpage allows the user to choose more than one file at a time. Let's see the below code that is going to add to the HTML code.
<input type=”file” id=”demo” multiple=”true”>
- The next modification we have to do in our code is we have to add a function $("#file-upload").on("change", function(){...}) in the HTML code. Then inside that function, we have to add another function $(this)[0].files that will return the array of the file object.
Let's see the modified code for the above for uploading more than one file at a time.
Code
        $("#file-upload").on("change",function(){

            var $input = $(this);


            var files = $input[0].files;


            for(var i=0;i<files.length;i++){
                var filename = files[i].name;


                var extension = filename.substr(filename.lastIndexOf("."));


                var allowedExtensionsRegx = /(\.jpg|\.jpeg|\.png|\.gif)$/i;


                var isAllowed = allowedExtensionsRegx.test(extension);


                if(isAllowed){
                    alert("File type is valid for the upload");

                }else{
                    alert("Invalid File Type.");
                }
            }
        });
File Size Validation
The size of the uploading file can also be validated easily by using jQuery.
Example of File Size Validation
Below is the sample example for the file size validation. In this example, we upload files having a size less than or equal to 2MB only. Here file size validation will be checked on the change event of the HTML input element.
Code
<!DOCTYPE html>
<html>
<head>
    <title>
        File size validation
    </title>


    <script src="https://ajax.googleapis.com/ajax/libs/jquery/3.5.1/jquery.min.js"></script>
    <style>
        body{
            text-align:center;
        }
    </style>
</head>
<body>
    <h1>File size validation</h1>
    <p>Upload a file (size less than or equal to 2MB) only</p>


    <!-- input element to choose a file for uploading -->
    <input type="file" id="file-upload" />

    <script>


    /* this function will call when the page has been loaded successfully */
    $(document).ready(function(){


        $("#file-upload").on("change",function(){


            var $input = $(this);


            var files = $input[0].files;


            var fileSize = files[0].size;


            var size = Math.round((fileSize / 1024));


            if (size <= 2*1024) {
                alert("Valid file size");

            } else {
                alert(
                  "Invalid file size, please select a file less than or equal to 2MB size");
            }


        });


    });


    </script>
</body>
</html>
Output:

Explanation:
Let's understand the implementation of the above code.
- At first, we have to import one jQuery library. We can do this with the help of the following statement.
<script src=”https://ajax.googleapis.com/ajax/libs/jquery/3.5.1/jquery.min.js”></script>
- We have to define an HTML element attribute type=" file" that helps us to provide the facility of choosing the file.
- With the help of $(document).ready(function(){…}); the HTML webpage loads successfully.
- Now with the help of the HTML input element, the validation of the file loads successfully.
- With the help of $(this) we can get the file input element object of jQuery.
- With the help of $(this)[0].files, we can get all the files that are chosen by the user.
- With the help of files[0].name, we can get the file name with the extension.
- We can also calculate the size of the file with a rounded figure with the help of the Math.round() function in MB.
- We can also check whether the size of the file is less or equal to 2 MB.
Working With Multiple Files Upload
In this case also, when we are required to work with multiple files upload, we can handle it easily with a few modifications in the above sample example.
Let's understand the required code modification:
- In the HTML <input> element, add multiple attributes. The multiple attributes are used to allow choosing multiple files at a time.
See the below image to understand how it can be added to an HTML <input> element:
<input type=" file"
id=”demo” multiple=”true”>
- The next modification is required in $("#file-upload").on("change",function(){...}) function. Inside this function, $(this)[0].files will return the Array of files object. So here also, we can iterate it through a for loop and validate the file size one by one for each file.
See the below-modified code:
Modified code:-
/* this function will call when the onchange event is fired */
        $("#file-upload").on("change",function(){

            /* current this object refer to input element */
            var $input = $(this);


            /* collect list of files chosen */
            var files = $input[0].files;


            /* iterating over the files array */
            for(var i=0; i<files.length; i++){
                var fileSize = files[i].size;

                /* 1024 = 1MB */
                var size = Math.round((fileSize / 1024));

                /* checking for less than or equals to 2MB file size */
                if (size <= 2*1024) {
                    alert("Valid file size");
                    /* file uploading code goes here... */
                } else {
                    alert(
                      "Invalid file size, please select a file less than or equal to 2MB size");
                }
            }


        });
Conclusion
In this article, you learned how to validate file type and size before uploading it to the server using jQuery. You have also learned how to work with multiple file upload validations.