Flask-Mail Extension
Flask-Mail Extension
All web framework provides the basic and advanced features like mail extension. But from the beginning of the tutorial, we know that flask lies in the category of the micro web framework. Flask has its limitations in providing the app creator with the functionality, but there are several extensions available for the flask such as mail, SQLite, Wtf, SQLAlchemy, etc. that allow the app creator to provide necessary features for the users or the app users.
In this part of the tutorial, we are going to install and learn how to use the Flask-mail extension.
Installing the Flask-Mail
To install it, follow the steps given below.
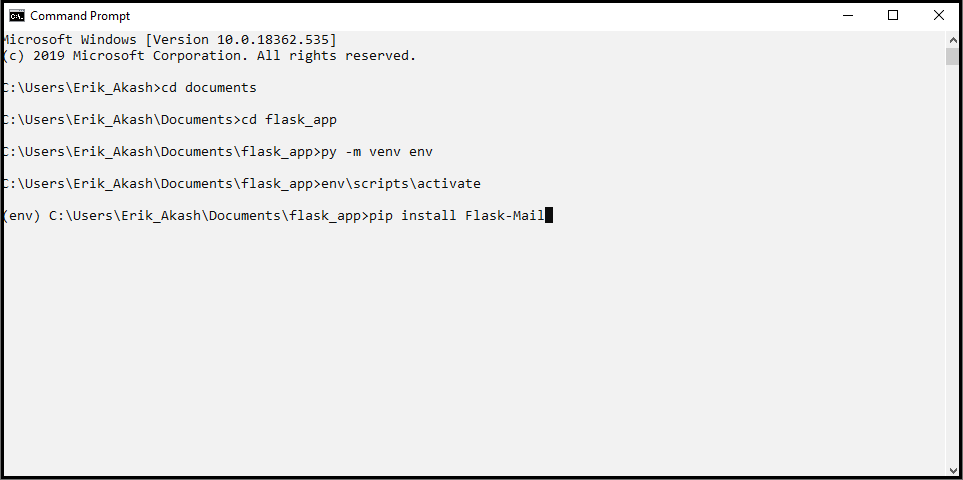
Open the cmd and navigate to the root folder of your flask app and type these commands to enter in the virtual environment. In my system, it is already installed, as you can see in the given screenshot.
- Py –m venv env
- App\scripts\activate
- pip install Flask-Mail
Press Enter anddownloading must be started, as shown below.
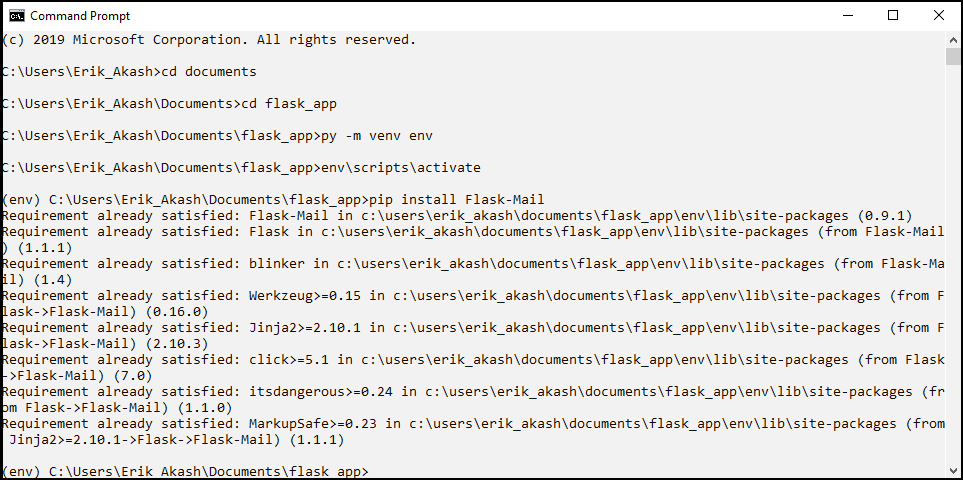
At the time of installing flask-mail, the following parameters will be installed with it.
| SN | Parameters | Definition | Default value |
| 1. | MAIL_SERVER | It tells about the id address of the email server. The default one is 'localhost’. | Localhost |
| 2. | MAIL_PORT | It refers to the port number of the server. The default port number is "25". | 25 |
| 3. | MAIL_USE_TLS | Used for enabling or disabling the transport security layer. Normally it is false(0r disabled). | False |
| 4. | MAIL_USE_SSL | This is used for turning on and off the secure socket layer. Its default value is false. | False |
| 5. | MAIL_DEBUG | This is used to provide the support of debugging to the mail application. Usually, its value is none. | None |
| 6. | MAIL_USERNAME | It denotes the user name of the sender. The default value is none. | None |
| 7. | MAIL_PASSWORD | It denotes the password of the id of the mail server. | None |
| 8. | MAIL_DEFAULT_SENDER | It is used to set the one mail id for sending mails on the several different mail id’s. | None |
| 9. | MAIL_MAX_EMAILS | it comes in use when the user has to set the limit of mail id's to send the mail in bulk. | None |
| 10. | MAIL_SUPPRESS_SEND | When the app.testing value is true, the process of sending mail is stopped. | -- |
| 11. | MAIL_ASCII_ATTACHMENTS | All attached files are converted to ASCII if its value is true. | False |
Modules classes of flask-mail extension
- Mail class
The work of the mail class is to manage and fulfill the requirements of email-messaging. The object of this Mail class is used to send mail.
Flask-mail.Mail(app=None)
Methods of the Mail class are as follows.
| SN | Name of method | Working |
| 1. | Connect() | Used for the establishing and opening the connection with the mail host. |
| 2. | Send() | this method is used to send the content of the message object to the recipient. |
| 3. | Send_message() | Used for sending the message object. |
- Message class
The message class binds the email message to a simple message class instance so that essential methods such as attach() are called on this instance.
Methods that mostly used in the message class object are given below.
| SN | Name of the method | Description |
| 1. | add_recipient() | Used for adding the recipients to the message. |
| 2. | attach() | Used for attachments which are to be sent with the message. This method has four parameters filename, content_type, data, and disposition. File name = Name of that file.Content_type=MIME type of file.Data= Raw file data.Description= Content disposition. |
Syntax of Mail class
Flask-mail.Message(subject, recipients, body, html, sender, cc, bcc, reply-to, date, charset, extra-headers, mail-options, rcpt_options)
Steps for Sending mail using Flask web Framework.
- First of all, you have to import like flask-mail, using the import statement.
from flask import *
from flask-mail import *
- Now configure the flask-mail.
app.config['MAIL_SERVER']='smtp.gmail.com'
app.config['MAIL_PORT']=465
app.config['MAIL_USERNAME'] = '[email protected]'
app.config['MAIL_PASSWORD'] = '******'
app.config['MAIL_USE_TLS'] = False
app.config['MAIL_USE_SSL'] = True
- Now instantiate the Mail class as shown below.
mail = mail(app)
- Instantiate the message class in the function mapped by some URL rule with the
desired attributes.
@app.route('/')
 def index():
 msg = Message('subject', sender = '[email protected]', recipients=['[email protected]'])
 msg.body = 'hi, This mail sent by using the flask web application'
 return "Mail is Sended, Please check the mail id for confirmation"
Example
from flask import *
 from flask-mail import *
 app = Flask(__name__)
  # Configuration parameters of flash mail
 app.config['MAIL_SERVER']='smtp.gmail.com'
 app.config['MAIL_PORT']=465
 app.config['MAIL_USERNAME'] = '[email protected]'
 app.config['MAIL_PASSWORD'] = '******'
 app.config['MAIL_USE_TLS'] = False
 app.config['MAIL_USE_SSL'] = True
 #Instantiate that we already discussed in  the topic of module classes Mail class
 mail = Mail(app)
 #Now configure the Message class object and then send the mail from a URL address
 @app.route('/')
 def index():
 msg = Message('subject', sender = '[email protected]', recipients=['[email protected]'])msg.body = 'hi there, this  mail is sent by using the flask web application'
 return "Mail Sent, Please check the mail id"
 if __name__ == '__main__':
 app.run(debug = True)