Snap Command in AutoCAD
The Object Snap feature allows you to designate a specific place on the objects.
It depicts the objects' midpoints, center points, quadrant points, insertion points, endpoints, and other locations that aid in the drafting and sketching process.
When you're asked for a point within a command, you may use object snaps to define specific positions on objects.
Object snaps can be used to draw a line from the centre of a circle to the center of another line, for example.
When you're asked for a point, you can provide an object snap. When you move the cursor over an item snap position, a marker and a tooltip are presented by default. This function, known as Auto Snap TM, gives visual confirmation of which object is being snapped.
Choose an Object Snap.
Execute one of the following actions to define an object snap at a prompt at a point:
- To use the Object Snap shortcut menu, hold Shift and right-click.
- Select an object snap from the Snap Overrides submenu with a right-click.
- Select an item snap button from the Object Snap toolbar.
- Put the name of the object you wish to snap in the box below.
When you use a prompt to define an object snap for a point, the object snap only applies to the next point you specify. Only when you are requested for a point do object snaps operate.
Use the OSOPTIONS system option to have object snaps disregard hatch objects.
Use Object Snaps for moving things.
You can enable running object snaps if you need to use one or more object snaps often. Endpoint, Midpoint, and Center, for example, might be used as running object snaps.
- By hitting F3 or clicking the Object Snap button on the status bar, you may turn on and off running object snaps.
- Click the down-arrow next to the Object Snap button on the status bar, then choose the object snaps you wish to save.
Tip: If multiple running object snaps are enabled, many object snaps may be eligible at the same time. Before you choose a point, you may use Tab to cycle through the options.
Snap a 3D Object
The 3D Object Snap feature allows you to define a specific place on 3D objects.
It shows the points on the objects that help in drafting and modelling, such as vertex, edge, corner, node, and so on.
After the Object Snap choice, the 3D Object Snap option displays.
The dialogue box for 3D Object Snap will appear as shown below:

Object Snap in AutoCAD
Without the usage of object snaps, it is impossible to create exact drawings in AutoCAD. These tools allow you to generate precise drawings while also speeding up the sketching process. All of these object snap possibilities have been reviewed and described in detail in this post.
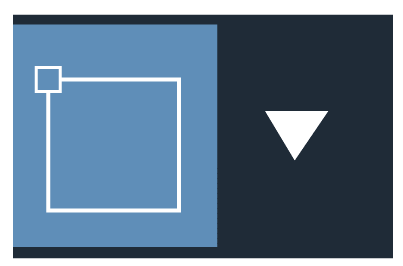
To begin, switch off each snap setting for each object. Click the triangle next to the Object-Snap Icon, then Object-Snap Settings to get started.
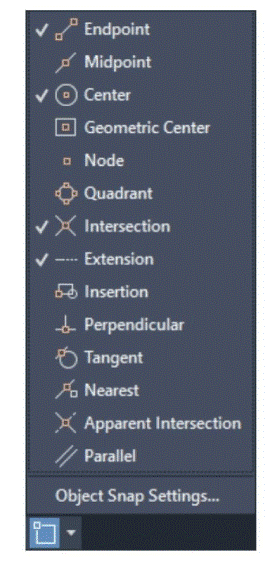
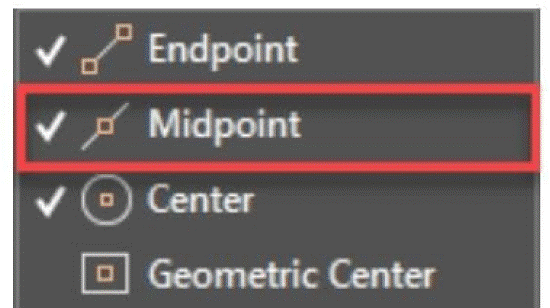
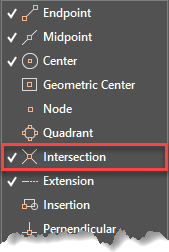
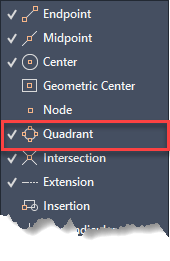
Then, except for Endpoint and Geometric Center, manually deselect each check-marked item in the "General" tab of the Object Snap Settings Menu, then click OK.
You may also disable object snaps by clicking their names in the object snap list, as seen in the figure above.
Note: Check that the Object-Snap symbol is highlighted in blue and that the proper snap icons in the object snap menu are checked if your object snap isn't working.
Endpoint
As you might expect, the Endpoint Object-Snap option allows you to snap to any Endpoint in your Project. When you need to make a quick connection, it comes in useful. It's the most basic and straightforward type of Object-Snap that you'll want to have active the most of the time.

Make a line, polyline, arc, or any other drawing with a sharp corner or end point. After that, choose a draw command from the object snap list and activate Endpoint snap. When you move your mouse close to the drawing's endpoints, you'll see that it snaps to the endpoints.
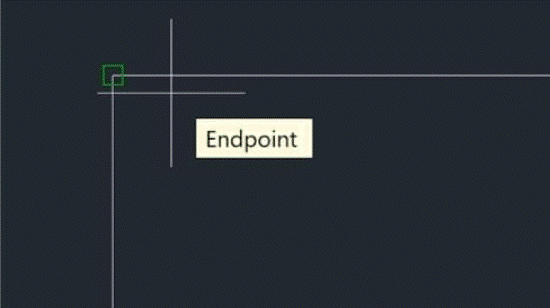
When you click the Endpoint Snap symbol, the pointer will snap to the endpoint, even if it isn't directly on it. When you click, the following set of drawings will begin right where you left off.
Midpoint
To snap to the center of any line or arc, use Midway Object-Snap.
Move your mouse close to the midpoint of a line or arc with the midpoint snap chosen and a draw command active. When you click the green triangle showing the middle, the pointer will snap to the precise midpoint.
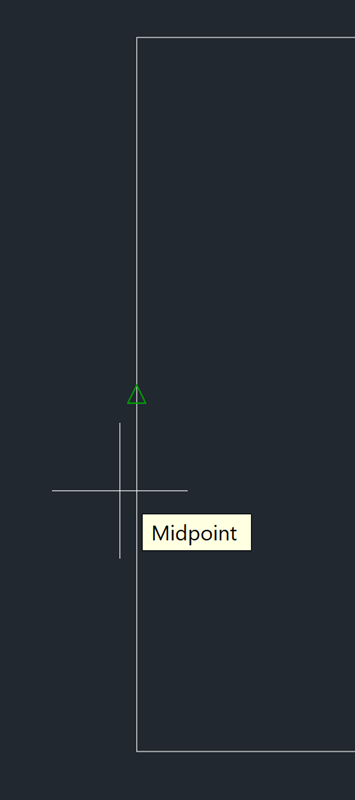
It doesn't matter where you click; the highlighted midpoint will always be snapped to as long as the Midpoint Snap Icon is visible.
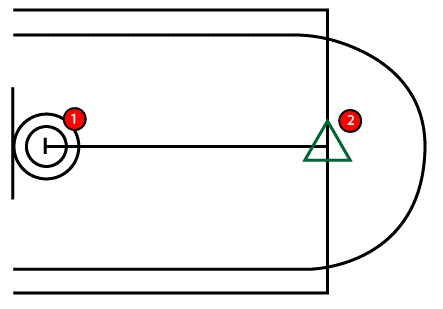
Center
You may snap to the center of any Circle, Ellipse, Arc, or Elliptical Arc using Center Snap.
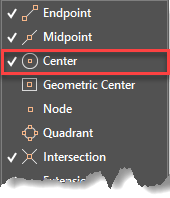
From the object snap list, choose the center snap. Create one of the above-mentioned curved shapes, then use any Draw command, such as the line tool, to hover your mouse near the circular object's perimeter.
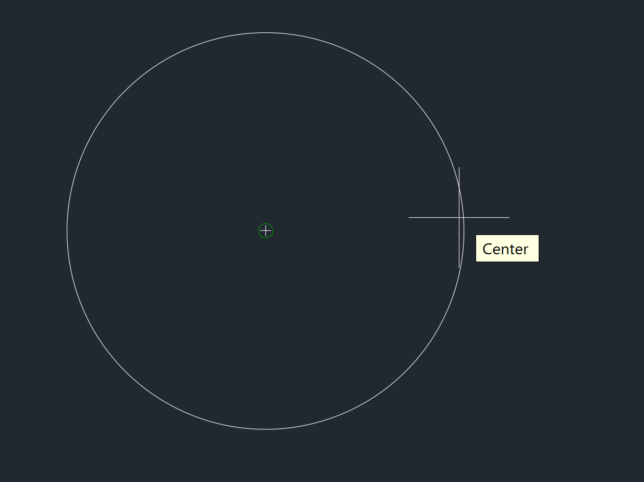
When you hover towards the object's perimeter, a plus sign will appear in the object's center. The white + symbol should be wrapped in the green Center Object-Snap icon. If it doesn't display, move your mouse over the white + symbol to bring up the Center Object-Snap icon.
Intersection
If you enable Intersection Snap, you'll be able to snap your pointer to the spot where two geometric objects intersect.
After confirming intersection is enabled in the object snap menu, activate any Draw command.
A green X marker will show when you move your mouse close to the junction of two things, which is the intersection snap marker. As long as the marker is visible, the pointer will snap to the junction location.
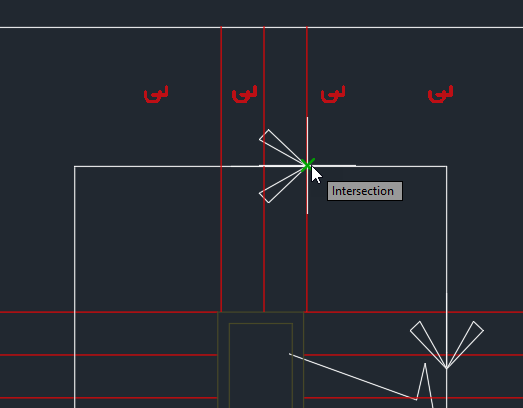
However, if the junction point is also another point, such as the midway, or if another point, such as the midpoint or terminal, is quite close to the intersection point, those points will be visible. In this situation, you may deactivate the snaps that you don't need from the object snap menu, leaving only the necessary snaps active, such as the intersection.
When Intersection is enabled alongside a large number of other Object-Snaps, it might become quite challenging. I wouldn't use it with Perpendicular, Insertion, or Apparent Intersection in particular. It has the potential to deliver erratic and unpredictable results.
Center of Geometry
In AutoCAD, the Geometric Center option allows you to snap your cursor to an object's Geometrical Center. It won't function with objects produced just with the Line tool since it requires a closed entity with single geometry.
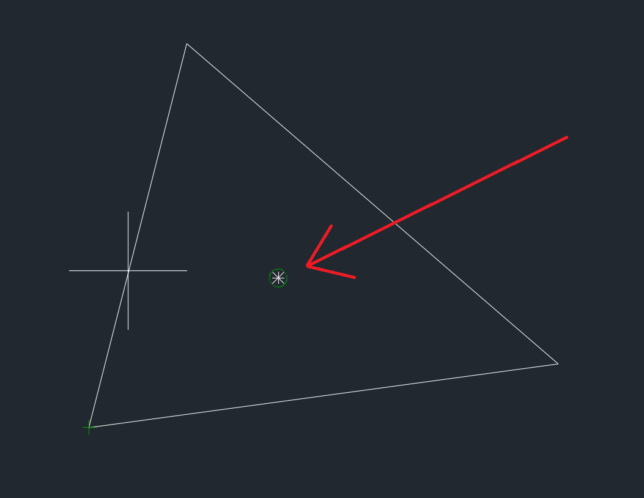
Use the Polygon tool to create any form of closed object (or Polyline or Spline, if you like). I used the Polyline Tool to make a triangle for ease of use.
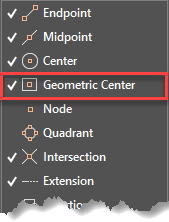
Hover your cursor towards the drawing's edge with the geometric center option selected in the object snap menu. Before hovering your mouse over an item, be sure a draw command is active. An asterisk or white 8-pointed star will emerge in the center, which you may simply snap to.
What if you've previously created a closed object with the Line tool and want to locate its geometric center?
In this situation, you may use the Connect command to join the lines together, and the closed geometry will be turned to a single polyline object. The generated polyline will have the geometric center snap applied to it.
Node
A node is a single point created with the POINT Command in AutoCAD.
To create the node, use the POINT Command or its synonym PO, then click in the drawing area. You may click as many times as you like to create a large number of nodes, or you can type in the coordinates if you want the node to be in a specific position.
My nodes are arranged in an arcing manner. Figure 6 is a little difficult to see, and you may need to adjust the brightness of your screen to improve visibility. You may also adjust the point style of these nodes to make them more prominent and obvious in the drawing.
In this situation, as with any other object snap option, you must first ensure that the Node snap option is selected from the object snap menu, followed by the draw command. The pointer will snap back to a node or point when you hover your mouse over it.

Quadrant
If you choose the Quadrant option, your cursor will snap to the quadrant points on the boundary of a circle, arc, or ellipse. Let's make a circle of any size by using the CIRCLE command.
Select the Circle's circumference by clicking on it. There are four blue squares around the outside and one in the center.
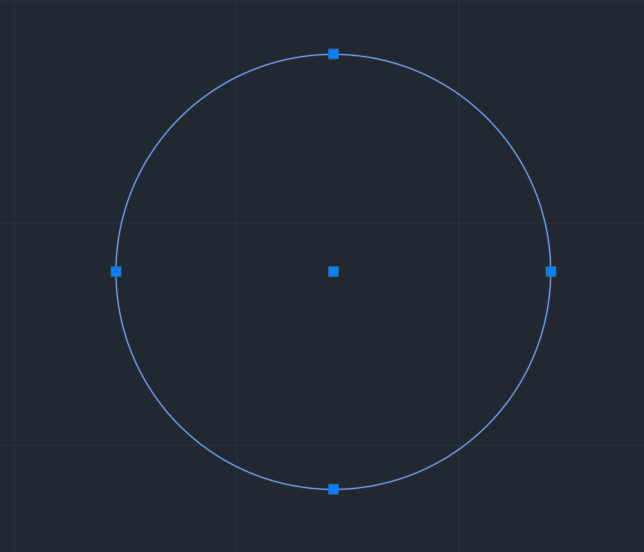
Quadrants are the four blue squares that make up the Circle's circumference. To snap to them, we may utilise Quadrant-Snap. To choose these quadrant points, select the Quadrant option from the object snap menu, and you'll be able to snap to the quadrants of your geometry.
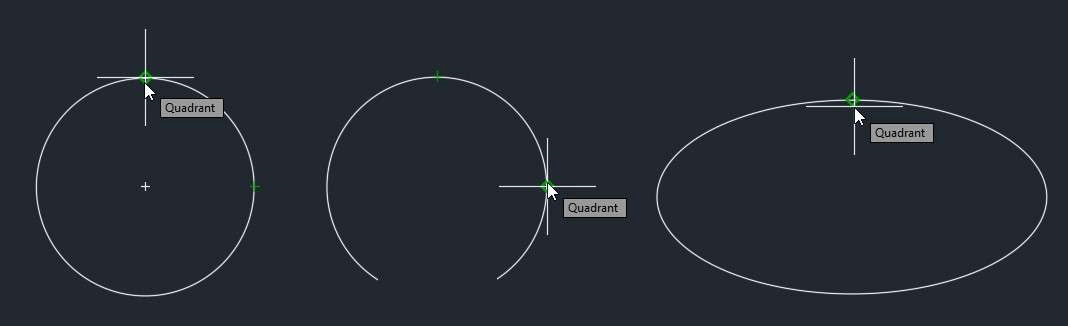
The snaps for the circle, arc, and elliptical quadrants look like the image below.
Tangent
A tangent is the intersection of two geometries at a single point. A tangent is seen in the diagram below.
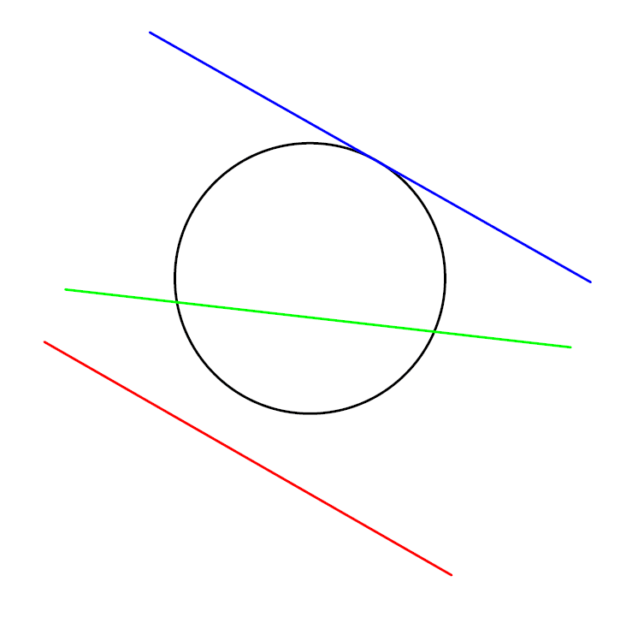
Because the red line does not contact the circle, it is not tangent to it. The green line intersects the circle at two spots and so is not tangent to the circle, but the blue line touches the circle at a single point and is thus tangent to the circle.
Tangent, like other snaps, requires that you keep it active in the object snap menu. After you've activated it, draw a line and move it close to the perimeter of a circle, arc, ellipse, or spline to see the tangent snap appear.
Perpendicular
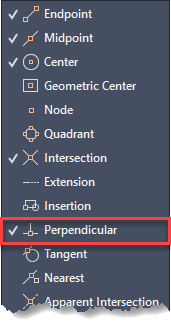
The Perpendicular Snap Option makes your selected line perpendicular by clipping it to another reference line in the design. Make sure Perpendicular Snap is switched on before using it, as illustrated in the figure below.
Start the LINE Command by clicking on a point near the reference line and then moving your mouse over it. The perpendicular snap will appear at the reference line's point of perpendicularity.
Intersection at a Glance
Apparent Intersection is a difficult Snap Option to deal with, but when utilized correctly, it may be quite beneficial.
Apparent Intersection moves your pointer to a position where two items do not strictly intersect, but appear to do so due to the View. When you have drawings in the X, Y, and Z axes in the 3D plane, you'll find yourself in this predicament.
NOTE: Do not use Intersection and Apparent Intersection at the same time, since this may result in unforeseen consequences.
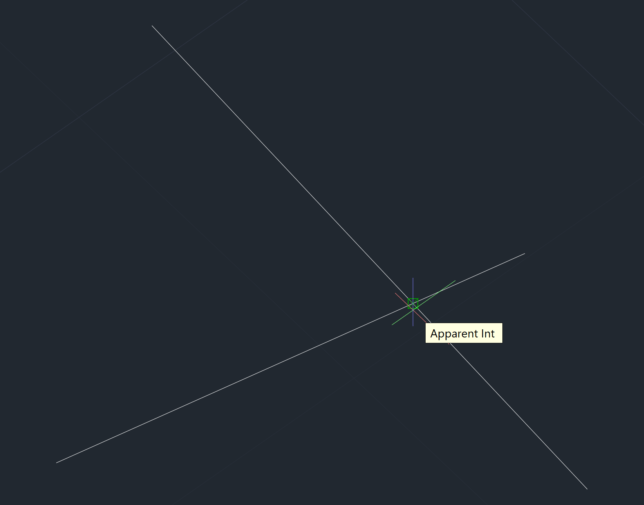
Although the lines may not truly cross, they may appear to do so from different angles, as seen by the apparent junction snap.
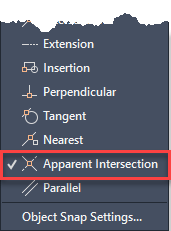
Except for Apparent Intersection, it's advisable to turn off all Object Snaps for our needs.
After that, everything is straightforward. Simply use the LINE command to hover over the apparent intersection, and the Apparent Intersection icon, which is a green square with an x in the middle, will appear.
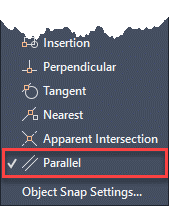
Parallel
It's a lot of fun to utilize Parallel Object Snap. Make sure your Ortho Snap is switched off before using it.

The Ortho Snap symbol appears in AutoCAD's status bar and looks like the image above. After verifying Ortho Snap is switched off, draw a line at any random angle. Turn off all Snap Options except Parallel after that.
Restart the line command, then click near the line you created previously as a reference. Then, with your cursor hovered over the existing line, wait for the parallel snap to appear. Drag your cursor out until the line is parallel to the current reference line, and a tracking line appears.
Parallel Object Snap is useful when you're working with angles that are too exact for Ortho Snap, or when you're generating similar items and matching them up.
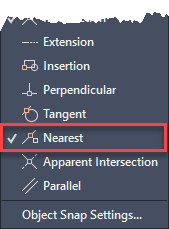
Nearest
Nearest is a snap option that works on the assumption that you want your cursor to snap to the closest point of the item. To grasp this snap, I'll begin by drawing a basic circle.
Make sure Nearest is switched on once you've generated your circle (or any shape for that matter).