Laravel Templating Inheritance
Introduction:

The Blade is a PHP Templating Engine. It grabs the PHP code and makes it easy for us to implement in HTML.
The Blade is a simple, and powerful Templating Engine provided by Laravel.
Like any other popular PHP Templating Engines, Blade does not restrict the user from using plain PHP code in the views.
All Blade views are compiled into the plain PHP code; Blade adds essential zero to our application. Blade view files use .blade.php file extension, and these files are stored in the resources/views directory.
Advantages
- With the help of Blade, we can create macros and view composers.
- It is not a slow engine because Laravel cache compiles views.
- With Blade, we can extend and include views.
- The Blade can automatically escape our data with {{{$var}:
Directives
- Check if the user is authenticated.
- It consists of the first view if it exists or includes the second if it doesn`t.
- It includes a view based on a condition.
- It includes a view if it exists.
- It checks if the user is a guest.
Templating Inheritance
Defining a Layout
The two primary benefits of Blade are as follows:
- Inheritance
- Sections
Most web applications maintain the same layouts across various pages. It is more convenient to define the layout as a Blade view.
E.g.:
In this example, we will examine a “master” page layout.
<html>
<head>
<title>App Name - @yield('title')</title>
</head>
<body>
@section('sidebar')
This is a sidebar.
@show
<div class="container">
@yield('content')
</div>
</body>
</html>
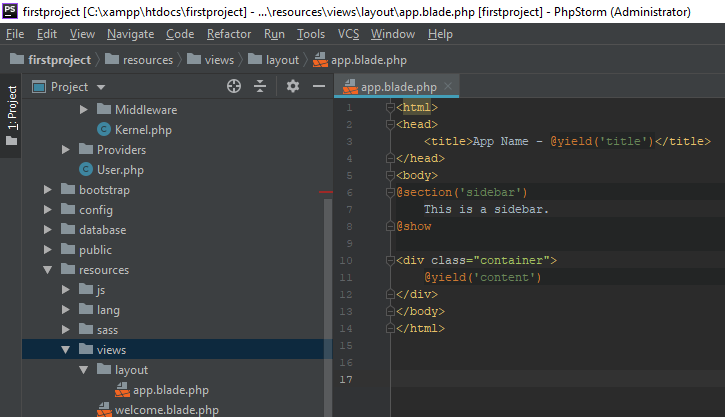
In the above example, the code contains HTML mark-up, and the @section and @yield directives. The @section directive, as the name tells us, defines a section of content, and the @yield directive displays the contents of a given section.
The above file is stored in the resources/views/layouts/app.blade.php.
So, a layout is defined for our application, now let`s explain a child view or another page that inherits the layout.
Extending a Layout
The Blade @extends directive is used to define that, “which layout the child view should inherit”?
Views that extend a Blade layout will insert content into the layout`s sections by using @section directives.
As we have seen in our first example, the contents of these sections will be displayed on the layout by using the @yield:
@extends('layouts.app')
@section('title', 'Page Title')
@section('sidebar')
    @parent
<p> Master Sidebar Appended</p>
    @endsection
@section('content')
<p> Content </p>
    @endsection
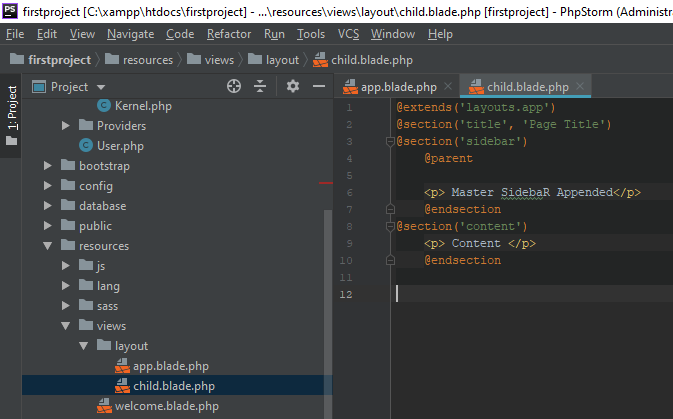
In the above example, the @parent directive adds the content to the layout`s sidebar.
When the view is provided, the @parent will be replaced by the content.
The above file is stored in the resources/views/layouts/child.blade.php.
The @yield directive accepts a default value as the second parameter. The value will be provided if the section being yielded is undefined:
@yield (‘content’,view::make(‘view.name’))
Blade views returned from a route by using the global view helper:
Route::get('blade', function () {
 return view('child');
 });
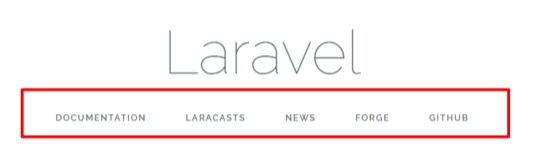
In the above picture, we can find that each of the links mentioned are hyperlinks. We can also create them as child elements with the help of blade templates following the given below procedure, i.e., “To implement the child elements in views, we should define the layout in the way it is needed.”
Components & Slots
Components & Slots provides benefits to sections and layouts. Some of the mental models find components and slots easy to understand. A reusable “alert” component would like to be reused throughout our application:
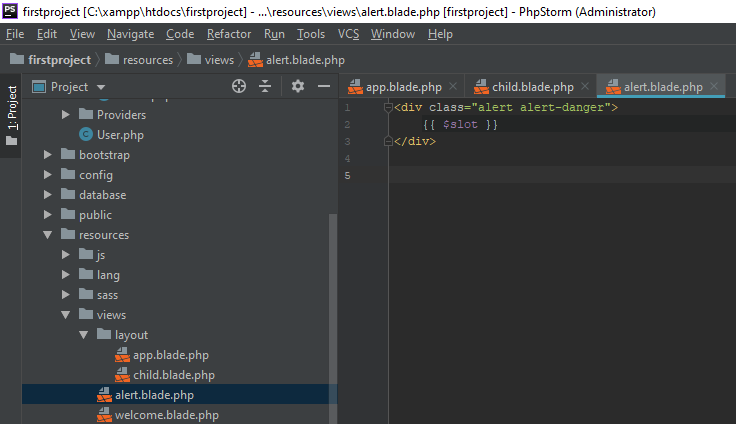
<div class=”alert alert-danger”>
 {{$slot}}
 </div)
The above content is stored in the resources/views/layouts/alert.blade.php.
The {{$slot}} variable will contain the content. We use the @component Blade directive for constructing this component:
@component(‘alert’)
 <h3> Whooops!! </h3>Something went wrong!!
 @endcomponent
The first view that exits from a given array of the possible views for the component is used in the componentFirst directive:
@componentFirst(['custom.alert','alert']) <sh3>Whoops!</h3>Something went wrong!@endcomponent
It is convenient to define multiple slots for a component. We are going to include the “title” for the modification of our alert component.
Named slots display “echoing” variable that matches their name:
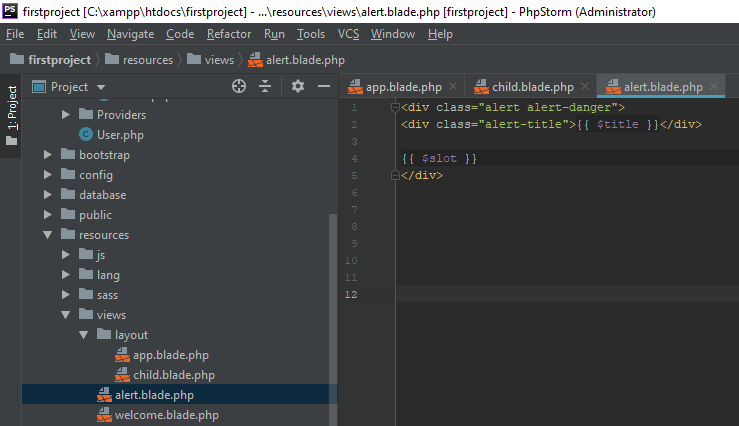
<div class="alert alert-danger">
<div class="alert-title">{{ $title }}</div>
{{ $slot }}
</div>
We insert content into the named slot by using the @slot directive.
Any of the content which is not within a @slot directive will be passed to the component in the @slot variable.
@component('alert')@slot('title')Forbidden@endslotYou are not allowed to access this resource!@endcomponent
Passing Additional Data To Components
If we need to pass additional data to a component, we pass an array for the data as the second argument to the @component directive.
@component ('alert', ['foo' => 'bar'])
          //
@endcomponent
Use Illuminate\Support\Facades\Blade;
 Blade::component(‘components.alert’, ‘alert’);
Once the component has been aliased, we provide it using a directive:
 @alert([‘type’ => ‘danger’])
 We are not allowed to access
 @endalert
We omit the component parameters if it does not contain additional slots:
@alert
 We are not allowed to access
@endalert