Spring – Beans using @Bean
Spring – Beans using @Bean
We have previously discussed an example of Spring configuration using an XML-based configuration. In the previous example, we have defined beans inside the bean-configuration file (applicationContext.xml). To make the code easier and understandable, we are going to use @Bean annotation (annotation-based configuration) for configuring Spring applications.
@Bean – The @Bean is a method level annotation. It tells the Spring container that the annotated method will return a bean. To define a bean, annotate a method with @Bean annotation. The method name must be the same as the bean name. It also supports several attributes provided by the <bean> tag such as init-method, destroy-method, dependency, and autowiring.
Let’s understand the concept of @Bean annotation through an example.
Example of Spring beans using @Bean annotation
Here, we are going to create an example of Spring beans using @Bean annotation. The Fortune.java and Coach.java are the two interfaces that contain the unimplemented methods, and GoodLuckFortune.java and Cricket_Coach.java are the Java classes that implement the Fortune and Coach interface, respectively. The class AppConfig.java is a Java-based configuration class that contains the bean information.
Following are the steps to create an example of Spring beans using @Bean:
- Create an Interface
In this step, we are going to create an interface named Fortune.java.
Fortune.java
public interface Fortune {
public String getDailyFortune();
}
- Create a Java class
In this step, we are going to create a class named GoodLuckFortune.java that implements the Fortune interface.
GoodLuckFortune.java
import org.springframework.stereotype.Component;
@Component
public class GoodLuckFortune implements Fortune{
public String getDailyFortune() {
return "Goodluck For today..!!" ;
}
}
- Create another Interface
In this step, we are going to create another interface named Coach.java.
Coach.java
public interface Coach {
public String getDailyTraining();
public String getFortuneService();
}
- Create another Java class
In this step, we are going to create another Java class named Cricket_Coach.java that implements the Coach interface.
Cricket_Coach.java
import org.springframework.stereotype.Component;
@Component
public class Cricket_Coach implements Coach {
private Fortune fortuneService;
public Cricket_Coach(Fortune fortuneService) {
this.fortuneService = fortuneService;
}
public String getDailyTraining() {
return "Daily 5 hours of running..!" ;
}
public String getFortuneService() {
return fortuneService.getDailyFortune() ;
}
}
- Create the Configuration class
In this step, we are going to create the configuration class named AppConfig.java.
AppConfig.java
import org.springframework.context.annotation.Bean;
import org.springframework.context.annotation.ComponentScan;
import org.springframework.context.annotation.Configuration;
@Configuration
@ComponentScan( "com.app.SpringBean_usingBean" )
public class AppConfig {
// defining bean for GoodLuckFortune class
@Bean
public Fortune goodLuckFortune() {
return new GoodLuckFortune();
}
//defining bean for Cricket_Coach class
@Bean
public Coach cricket_Coach() {
return new Cricket_Coach(goodLuckFortune());
}
}
In the AppConfig.java file, we have declared the bean classes, one is GoodLuckFortune, and the other is Cricket_Coach. The bean name and the method name (on which @Bean is defined) are must be the same as defined in the above code.
- Create the main class
In this step, we are going the main class named App.java.
App.java
import org.springframework.context.annotation.AnnotationConfigApplicationContext;
public class App
{
public static void main( String[] args )
{
AnnotationConfigApplicationContext appcontext = new AnnotationConfigApplicationContext(AppConfig.class);
Coach newCoach = appcontext.getBean("cricket_Coach", Coach.class);
System.out.println(newCoach.getDailyTraining());
System.out.println(newCoach.getFortuneService());
appcontext.close();
}
}
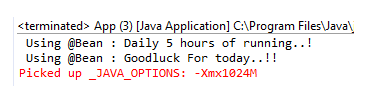
Output