Spring MVC Form Validation
Spring Validation is used to validate the @Controller inputs. It is used to check and accept the user input in any web application. Using Spring validation, we can validate the user input on the server-side.
Bean Validation API
From Spring framework version 4 and above, the Spring framework supports Bean Validation 1.0 (JSR-303) and Bean Validation 1.1 (JSR-349).
Below is given an annotation used for validation:
@Valid – The @Valid annotation is used to annotate a method parameter, property, or method return type for validation. It is used to annotate a model object that we want to validate.
BindingResult – It is an interface that represents the binding results. It extends an interface for error registration, allowing a validator to be applied, and adds binding-specific analysis.
Validation Annotations
A variety of annotations are used in Spring MVC form Validation, which is available in javax.validation.constraints package.
Following is the list of commonly used Validation annotations:
| Annotations | Description |
| @Size | It specifies that the size of the annotated element must be between the specified boundaries. |
| @Pattern | It specifies that the annotated CharSequence must match the regular expression. |
| @Past | It specifies that the annotated element must be a date in the past. |
| @Null | It specifies that the annotated element must be null. |
| @NotNull | It specifies that the annotated element should not be null. |
| @Min | It specifies that the annotated element must be a number whose value must be equal or greater than the specified minimum number. |
| @Max | It specifies that the annotated element must be a number whose value must be equal or smaller than the specified maximum. |
| @Future | It specifies that the annotated element must be a date in the future. |
| @Digits | It specifies that the annotated element must be a digit or number within the specified range. The supported types are short, int, long, byte, etc. |
| @DecimalMin | It specifies that the annotated element must be a number whose value must be equal or greater than the specified minimum. It is very similar to @Min annotation, but theonly difference is it supports CharSequence type. |
| @DecimalMax | It specifies that the annotated element must be a number whose value should be equal or smaller than the specified maximum. It is very similar to @Max annotation, but the only difference is it supports CharSequence type. |
| @AssertTrue | It determines that the annotated element must be true. |
| @AssertFalse | It determines that the annotated element must be false. |
Example of Spring MVC Validation
Here, we are going to create an example of Spring MVC Validation using @Valid annotation in the Controller class.
Following are the steps to create an example of Spring Validator:
- Create a request page
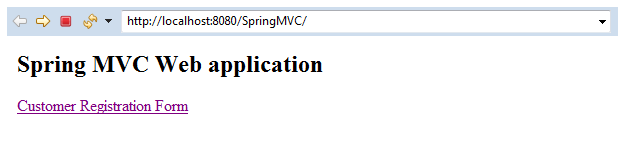
In this step, we are going to create a request page named index.jsp.
index.jsp
 <html>
 <body>
 <h2> Spring MVC Web application </h2>
 <a href = "cust-regis-form"> Customer Registration Form </a>
 </body>
 </html>
- Create a Model class
In this step, we are going to create a Model class named Customer.java, which stores the data. In the Customer class, we are going to use the @NotNull and @Size annotations on the “lname” variable.
Customer.java
 import javax.validation.constraints.NotNull;
 import javax.validation.constraints.Size;
 public class Customer {
                 private String fname;
                 @NotNull
                 @Size(min = 3, message = " This field is required ")
                 private String lname;
                 public String getFname() {
                                 return fname;
                 }
                 public void setFname(String fname) {
                                 this.fname = fname;
                 }
                 public String getLname() {
                                 return lname;
                 }
                 public void setLname(String lname) {
                                 this.lname = lname;
                 }
  }
- Create the Controller
In this step, we are going to create the Controller named MainController.java, which returns the JSP view pages. In the Controller class, we are going to use the @Valid annotation and BindingResult for validation.
MainController.java
 import javax.validation.Valid;
 import org.springframework.stereotype.Controller;
 import org.springframework.ui.Model;
 import org.springframework.validation.BindingResult;
 import org.springframework.web.bind.annotation.ModelAttribute;
 import org.springframework.web.bind.annotation.RequestMapping;
 @Controller
 public class MainController {
                 @RequestMapping("/cust-regis-form")
                 public String showCustomerForm(Model m) {
                                 m.addAttribute("customer", new Customer()) ;
                                 return "customerform" ;
                 }
                 @RequestMapping("/processForm")
                 public String showCustomerData( @Valid @ModelAttribute("customer") Customer custom,
                                                 BindingResult thebindingresult) {
                                 if (thebindingresult.hasErrors()) {
                                                 return "customerform" ;
                                 }
                                 else {
                                                 return "customerformdata" ;
                                 }
     }
  }
- Add the entry of controller into web.xml
In this step, we are going to add the entry of the Controller inside the web.xml file.
web.xml
 <?xml version = "1.0" encoding = "UTF-8"?>
 <web-app xmlns:xsi = "http://www.w3.org/2001/XMLSchema-instance"
                 xmlns = "http://xmlns.jcp.org/xml/ns/javaee"
                 xsi:schemaLocation = "http://xmlns.jcp.org/xml/ns/javaee http://xmlns.jcp.org/xml/ns/javaee/web-app_3_1.xsd"
                 id = "WebApp_ID" version = "3.1">
                 <display-name>spring-mvc-demo</display-name>
                 <absolute-ordering />
                 <!-- Spring MVC Configs -->
                 <!-- Step 1: Configure Spring MVC Dispatcher Servlet -->
                 <servlet>
                                 <servlet-name>dispatcher</servlet-name>
                                 <servlet-class>org.springframework.web.servlet.DispatcherServlet</servlet-class>
                                 <init-param>
                                                 <param-name>contextConfigLocation</param-name>
                                                 <param-value>/WEB-INF/spring-servlet.xml</param-value>
                                 </init-param>
                                 <load-on-startup>1</load-on-startup>
                 </servlet>
                 <!-- Step 2: Set up URL mapping for Spring MVC Dispatcher Servlet -->
                 <servlet-mapping>
                                 <servlet-name>dispatcher</servlet-name>
                                 <url-pattern>/</url-pattern>
                 </servlet-mapping>
 </web-app>
- Add the entry of Model into another XML file
In this step, we are going to define the Model/ bean into another XML file named spring-servlet.xml.
spring-servlet.xml
  <?xml version = "1.0" encoding = "UTF-8"?>
 <beans xmlns = "http://www.springframework.org/schema/beans"
                 xmlns:xsi = "http://www.w3.org/2001/XMLSchema-instance"
                 xmlns:context = "http://www.springframework.org/schema/context"
                 xmlns:mvc = "http://www.springframework.org/schema/mvc"
                 xsi:schemaLocation = "  http://www.springframework.org/schema/beans
 http://www.springframework.org/schema/beans/spring-beans.xsd
 http://www.springframework.org/schema/context
 http://www.springframework.org/schema/context/spring-context.xsd
 http://www.springframework.org/schema/mvc
 http://www.springframework.org/schema/mvc/spring-mvc.xsd">
                 <!-- Step 3: Add support for component scanning -->
                 <context:component-scan base-package = "com.app.SpringMVCValidation"  />
                 <!-- Step 4: Add support for conversion, formatting and validation support -->
                 <mvc:annotation-driven/>
                 <!-- Step 5: Define Spring MVC view resolver -->
                 <bean
                                 class="org.springframework.web.servlet.view.InternalResourceViewResolver">
                                 <property name = "prefix" value = "/WEB-INF/view/" />
                                 <property name = "suffix" value = ".jsp" />
                 </bean>
 </beans>
- Create other JSP pages
In this step, we are going to create the other view pages (JSP pages).
customerform.jsp
 <%@ taglib prefix = "form" uri = "http://www.springframework.org/tags/form" %>
 <!DOCTYPE html>
 <html>
 <head>
 <meta charset = "ISO-8859-1">
 <title> Customer Form </title>
   <style>
        .error {color:red}
    </style>
 </head>
 <body>
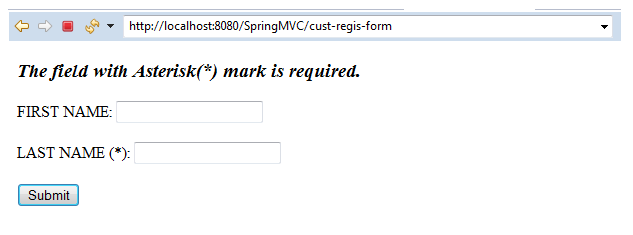
 <h3><i>The field with Asterisk(*) mark is required.</i></h3>
 <form:form action = "processForm" modelAttribute = "customer" >
 FIRST NAME: <form:input path = "fname" />
 <br></br>
 LAST NAME (*): <form:input path = "lname" />
   <form:errors path = "lname" cssClass = "error" >
   </form:errors>
 <br></br>
 <input type = "submit" value = "Submit" />
  </form:form>
 </body>
 </html>
customerformdata.jsp
 <%@ taglib prefix = "c" uri = "http://java.sun.com/jsp/jstl/core" %>
 <!DOCTYPE html>
 <html>
 <head>
 <title>Customer data</title>
 </head>
 <body>
 The customer is confirmed: ${customer.fname} ${customer.lname}
 </body>
 </html>
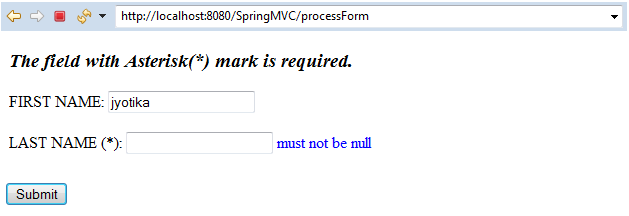
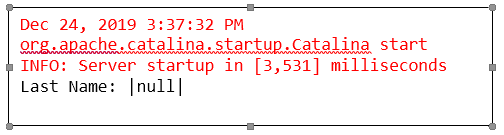
Output
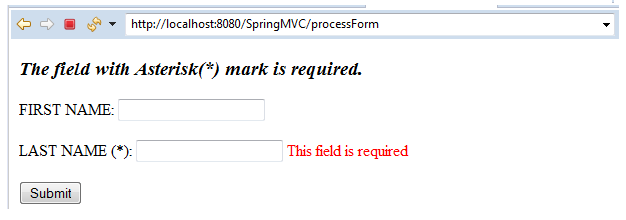
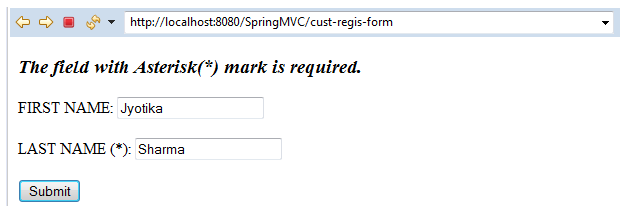

Whitespaces problem with required Validator
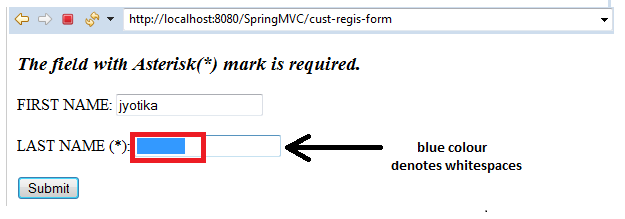
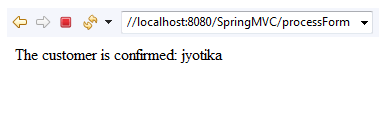
If we pass whitespaces in the required Validator field, the String containing only whitespaces will pass the Validation. For example, we have created the LAST NAME as the required field, and if we enter whitespaces in that field, it will pass the Validation.
Following output shows the whitespaces problem:
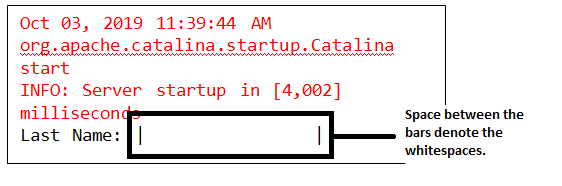
To overcome the discussed problem, we are going to use the @InitBinder annotation inside the Controller. The @InitBinder works as a pre-processor and used to trim the whitespaces before the Strings.
Spring MVC @InitBinder
The @InitBinder annotation is used to initialize the WebDataBinder, which is used for spreading commands and form object arguments of annotated handler methods.
For accessing the @InitBinder annotation, we need to write the given code snippet in the Controller named MainController.java class.
MainController.java
 @InitBinder
 public void initBinder(WebDataBinder dataBinder)  {
                 StringTrimmerEditor stringEditor = new StringTrimmerEditor(true);
                 dataBinder.registerCustomEditor(String.class,stringEditor );
}
After using the @InitBinder, the problem of whitespaces is removed from the application, as only whitespaces in the text field didn’t pass the validation, shown in the output.