Spring – Configuration using @Configuration
Spring – Configuration using @Configuration
We have previously discussed the Spring configuration using an XML configuration file. In that case, we have defined all the bean information in the bean-configuration file (applicationContext.xml). In Spring, there are three ways of configuring the Spring container, which are listed below:
- Full XML configuration – In this case, we are going to define all the bean information in the XML configuration file. For example, we have created a bean named Jio.java in our application. We want to add its information in the bean-configuration or XML-based config file.
Following code shows how to add bean information in the bean-config file.
- XML Component Scan – The XML Component Scan is very similar to XML configuration. In this case, we are using <context:component-scan> property, which enables the auto-scanning feature in the Spring framework. In <context:component-scan> property, an attribute base-package is used to specify the package which contains the bean class.
The following code shows how to use Component Scan in the bean-config file.
Here, the com.app.AnnotationIOC is the base package which contains the bean.
- Java Configuration class – In Java-based Configuration, instead of the bean-config file, we are using the @Configuration annotation on a class which contains the bean information. The @Configuration annotation is used for dependency injection. It also contains the bean definition methods annotated with the @Bean annotation.
Following code displays how to use the @Configuration annotation.
@Configuration
 @ComponentScan("com.app.SpringAnnotation_Configuration")
 public class Config_App {
 }
In the above code, we have used the @ComponentScan annotation to define the package which contains the bean.
We have already discussed an example of Full XML Configuration and XML Component Scan. Now, we will discuss an example of Java Configuration class.
Example of Spring configuration using @Configuration
Here, we are going to create an example of Spring configuration using @Configuration and @ComponentScan annotation.
Following are the steps to create an example of Spring configuration using @Configuration:
- Create an Interface
In this step, we are going to create an Interface named Sim.java that contains some unimplemented methods.
Sim.java
public interface Sim {
public String Calling();
public String Messaging();
}
- Create a Java class
In this step, we are going to create a class named Airtel_Sim.java that implements the Sim interface and its unimplemented methods.
Airtel_Sim.java
import org.springframework.stereotype.Component;
@Component
public class Airtel_Sim implements Sim {
public String Calling() {
return "Calling via Airtel Sim..! " ;
}
public String Messaging() {
return "Messaging via Airtel Sim..!!" ;
}
}
- Create the Configuration class
In this step, we are going to create a class Config_App.java, that contains the bean information. In the Config_App.java, we are going to use the @Configuration annotation on the top of the class to declare it as the configuration class. Also, we are using the @ComponentScan annotation to provide the base package which contains the bean.
import org.springframework.context.annotation.ComponentScan;
import org.springframework.context.annotation.Configuration;
@Configuration
@ComponentScan("com.app.SpringAnnotation_Configuration")
public class Config_App {
}
In the above code, “com.app.SpringAnnotation_Configuration” is the package that contains the bean.
- Create the main class
In this step, we are going to create the main class named App.java that contains the main() method.
App.java
import org.springframework.context.annotation.AnnotationConfigApplicationContext;
public class App
{
public static void main( String[] args )
{
AnnotationConfigApplicationContext appContest = new AnnotationConfigApplicationContext(Config_App.class);
Sim sim = appContest.getBean( "airtel_Sim", Sim.class);
System.out.println(sim.Calling());
System.out.println(sim.Messaging());
appContest.close();
}
}
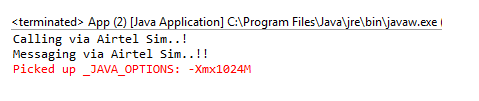
Output