Vue.js Binding
Vue.js Binding
A common need for the data binding is to control the element’s class list and its inline styles. Since the class list and inline style are both attributes, we can use the v-bind to handle both attributes. Here, we only have to calculate a final string with our expressions. However, it is annoying and mistaken to interact with the new string. Due to this, Vue provides special changes in the class list and inline style when v-bind is used. In addition to strings, we can also evaluate the objects or arrays.
Example: This example explains how we can use the Vue.js binding in the Vue.js application.
Index.Html
<!DOCTYPE html>
<html>
  <head>
    <meta charset="utf-8">
    <meta name="viewport" content="width=device-width,initial-scale=1.0">
    <title>Vue.js Binding</title>
    <script src="https://unpkg.com/vue/dist/vue.js"></script>
  </head>
  <body>
    <div id="app">
      {{titlename}} <br/>
      <a href = "hreflink" target = "_blank"> Click Here </a> <br/>
      <a v-bind:href = "hreflink" target = "_blank">Click Here </a> <br/>
     </div>
  </body>
</html>
Main.js
import Vue from 'vue'
import App from './App'
import router from './router'
Vue.config.productionTip = false
var vm = new Vue({
  el: '#app',
  data: {
    titlename : "Vue.js Data Binding",
    hreflink : "https://www.tutorialandexample.com/"
  }
});
Output: After executing the above code, we will get the output, as shown below:
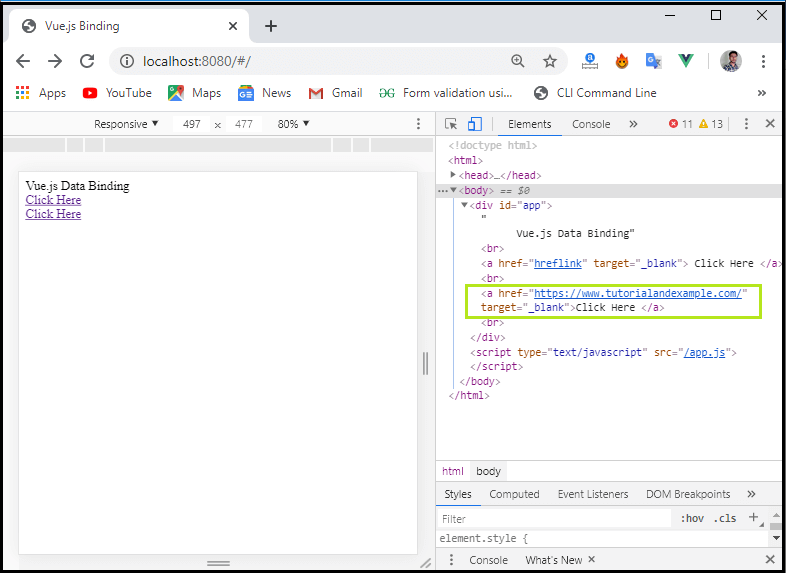
In the above example, we can see the first Click Here option that shows the href as a hreflink, and the second Click Here option shows the correct URL as we want. When we click on the Click Here option, it navigates to the page which we added in that option.
Binding HTML Classes
If we want to bind the HTML classes, it is required to use the v-bind: class property. Here, the isactive is a variable, which is based on the true or false value. In the data object, specify the isactive variable as true value. There is a class defined in the style tag .active that can be set any background color whatever we want. If the isactive variable value is true, the background color will apply, otherwise not.
Example: This example explains how we can use the binding HTML classes with Vue.js binding.
Index.html
 <!DOCTYPE html>
<html>
  <head>
    <meta charset="utf-8">
    <meta name="viewport" content="width=device-width,initial-scale=1.0">
    <title>Vue.js Binding</title>
    <script src="https://unpkg.com/vue/dist/vue.js"></script>
  </head>
  <style>
   .active {
            background: green;
         }
    </style>
  <body>
    <div id="app">
      <div v-bind:class = "{active:isactive}"><b>{{Message}}</b></div>
    </div>
  </body>
</html>
Main.js
import Vue from 'vue'
import App from './App'
import router from './router'
Vue.config.productionTip = false
var vm = new Vue({
  el: '#app',
  data: {
   Message: "Hi! This is an Example of Vue.js Binding HTML Classes",
   isactive: true
  }
});
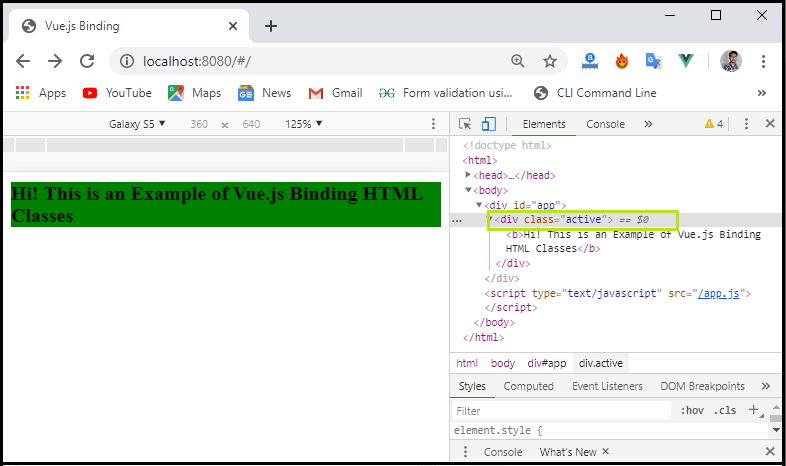
Output: After executing this code, we will get the output, as shown below:
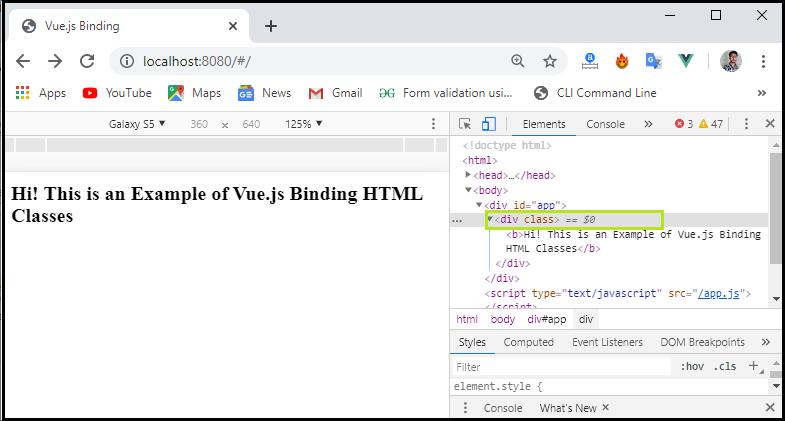
If we set the value of isactive variable to false, then it shows the normal output, as shown below:
Main.js
import Vue from 'vue'
import App from './App'
import router from './router'
Vue.config.productionTip = false
var vm = new Vue({
  el: '#app',
  data: {
   Message: "Hi! This is an Example of Vue.js Binding HTML Classes",
   isactive: false
  }
});
Output: After executing this code, we will get the output, as shown below:
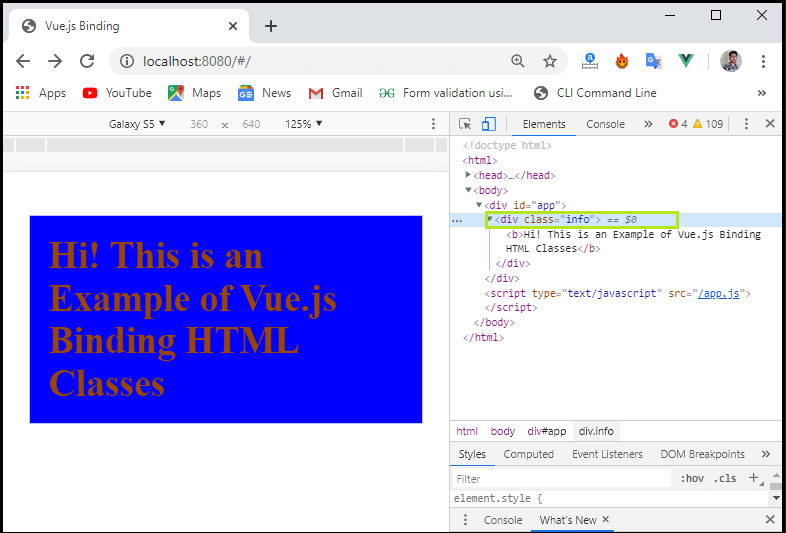
We can also apply multiple classes to the HTML tags using v-bind attributes with .active, div, .info, and .displayerrors variables. We can set the value of variable according to our need. These variables should be applied in <style> tag.
Index.Html
<!DOCTYPE html>
<html>
  <head>
    <meta charset="utf-8">
    <meta name="viewport" content="width=device-width,initial-scale=1.0">
    <title>Vue.js Binding</title>
    <script src="https://unpkg.com/vue/dist/vue.js"></script>
  </head>
  <style>
   .active {
            background-color: green;
            color:pink
         }
         div {
            margin: 10px 0;
            padding: 15px;
            font-size : 30px;
         }
         .info {
            color: rgb(155, 70, 0);
            background-color: Blue;
         }
         .displayError{
            color: red;
            background-color: yellow;
         }
    </style>
  <body>
    <div id="app">
      <div v-bind:class = "[isActive ? infoclass : '', haserror ? errorclass : '']"><b>{{Message}}</b></div>
    </div>
  </body>
</html>
Main.js
import Vue from 'vue'
import App from './App'
import router from './router'
Vue.config.productionTip = false
var vm = new Vue({
  el: '#app',
  data: {
   Message: "Hi! This is an Example of Vue.js Binding HTML Classes",
   infoclass : 'info',
               errorclass : 'displayError',
               isActive : true,
               haserror : false
  }
});
Output: After executing this code, we will get the output, as shown below:
Inline Binding Styles
In the inline binding style, we can apply the style in the div tag and fetch the data from the data object. To set the data objects, we can use the following syntax:
Syntax:
<div v-bind:style = “{name of the data object}”></div>
Example: This example explains how we can use the inline binding style in the Vue.js binding property.
Index.html
<!DOCTYPE html>
<html>
  <head>
    <meta charset="utf-8">
    <meta name="viewport" content="width=device-width,initial-scale=1.0">
    <title>Vue.js Binding</title>
    <script src="https://unpkg.com/vue/dist/vue.js"></script>
  </head>
  <body>
    <div id="app">
      <div v-bind:style = "{ color: activeColor, fontSize: fontSize + 'px'}">{{Message}}</div>
    </div>
  </body>
</html>
Main.js
import Vue from 'vue'
import App from './App'
import router from './router'
Vue.config.productionTip = false
var vm = new Vue({
  el: '#app',
  data: {
   Message: "Hi! This is an Example of Vue.js Binding Inline Style",
   activeColor: 'Blue',
   fontSize: '28'
  }
});
Output: After executing the above code, we will get the output, as shown below:
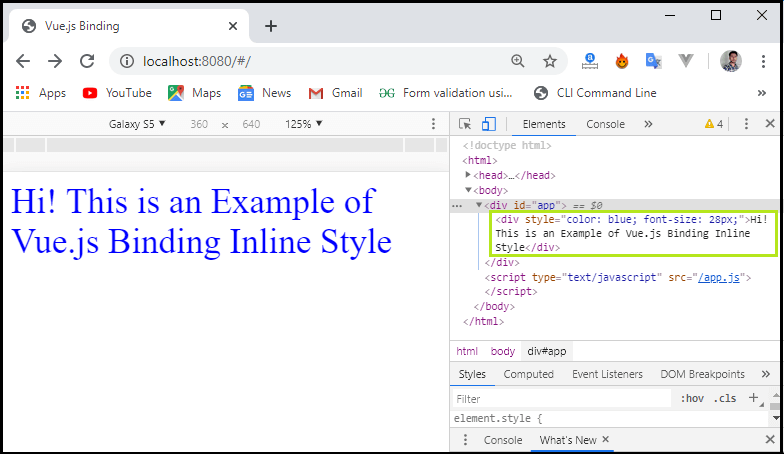
In the above example, we have seen that how the data objects could be applied in the div tag. On the other hand, we can also do the same thing by assigning the values to a variable and then assign the variable to the div. We can use the styleobj object to assign the values of the object and then assign it to the div.
Example: This example explains how we can use the styleobj object in the Binding property.
Index.Html
<!DOCTYPE html>
<html>
  <head>
    <meta charset="utf-8">
    <meta name="viewport" content="width=device-width,initial-scale=1.0">
    <title>Vue.js Binding</title>
    <script src="https://unpkg.com/vue/dist/vue.js"></script>
  </head>
  <body>
    <div id="app">
      <div v-bind:style = "styleobj">{{Message}}</div>
    </div>
  </body>
</html>
Main.js
import Vue from 'vue'
import App from './App'
import router from './router'
Vue.config.productionTip = false
var vm = new Vue({
el: '#app',
data: {
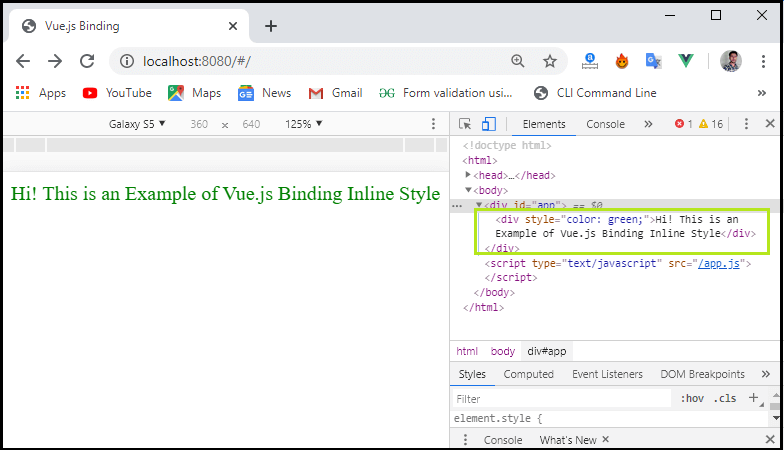
Message: "Hi! This is an Example of Vue.js Binding Inline Style",
styleobj: {
color: 'green',
fontSize: '30'
}
}
});
Output: After executing this code, we will get the output, as shown below:
Form Input Bindings
If we want to create a form, we can use the form input bindings. Here, we are going to use the v-modal attribute instead of v-bind and also use the radio and select buttons in the form. Let’s take an example to understand it more clearly:
Example: This example explains how we can create a form in the Vue.js binding.
Index.Html
 <!DOCTYPE html>
<html>
  <head>
    <meta charset="utf-8">
    <meta name="viewport" content="width=device-width,initial-scale=1.0">
    <title>Vue.js Binding</title>
    <script src="https://unpkg.com/vue/dist/vue.js"></script>
  </head>
  <body>
    <div id="app">
      <h3>Name</h3>
      <input  v-model = "name" placeholder = "Enter Name" />
      <h3>Name entered is : {{name}}</h3>
      <hr/>
      <h3>Gender</h3>
      <input type = "radio" id = "male" value = "Male" v-model = "picked">Male
      <input type = "radio" id = "female" value = "Female" v-model = "picked">Female
      <h3>Gender Selected : {{picked}} </h3>
      <hr/>
      <h3>Course</h3>
      <select v-model = "courses">
         <option disabled value = "">Select one</option>
         <option>Python</option>
         <option>Javascript</option>
         <option>Java</option>
         <option>C++</option>
         <option>Android</option>
         <option>PHP</option>
      </select>
      <h3>Selected course is : {{ courses }}</h3>
      <hr/>
      <h3>Details</h3>
      <textarea v-model = "textmessage" placeholder = "Add Details"></textarea>
      <h1><p>{{textmessage}}</p></h1>
      <hr/>
      <h3>terms</h3>
      <input type = "checkbox" id = "checkbox" v-model = "checked"> {{checked}}
    </div>
  </body>
</html>
Main.js
import Vue from 'vue'
import App from './App'
import router from './router'
Vue.config.productionTip = false
var vm = new Vue({
  el: '#app',
  data: {
    name:'',
    picked : '',
    course : "",
    textmessage:'',
    checked : false
  }
});
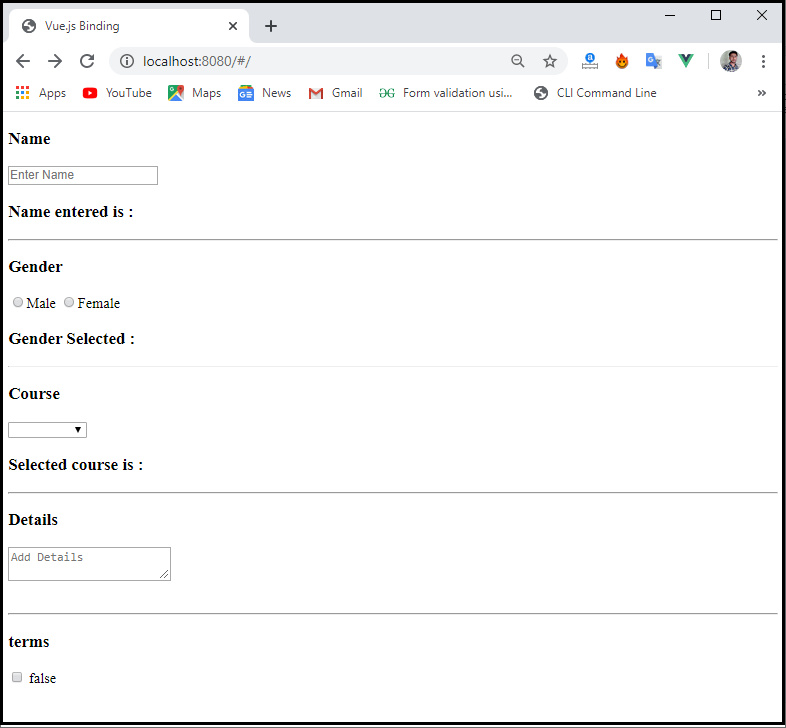
Output: After executing this code, we will get the output, as shown below:
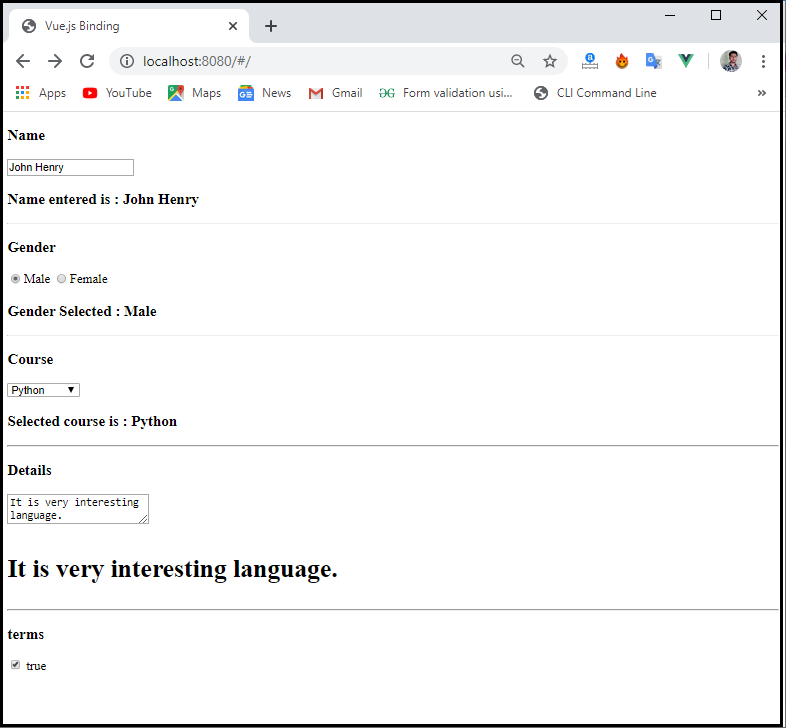
After filling all the fields, it shows the data in detail at that time, as shown below screenshot.
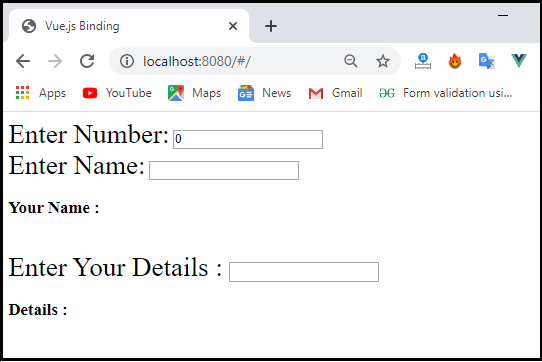
Modifiers
We can also use the modifiers in the Vue.js binding. Modifiers are many types, such as trim, number, and lazy.
Trim: Trim modifier is used to remove the spaces entered at the beginning and the end.
Number: The Number modifier is used to only enter the numbers. It does not take any input besides numbers.
Lazy: Lazy modifier is used to display the content of the textbox. Once we fill all the fields and leaves the textbox, then it displays the content.
Example: This example explains how we can use the modifiers in the Vue.js binding.
Index.html
<!DOCTYPE html>
<html>
  <head>
    <meta charset="utf-8">
    <meta name="viewport" content="width=device-width,initial-scale=1.0">
    <title>Vue.js Binding</title>
    <script src="https://unpkg.com/vue/dist/vue.js"></script>
  </head>
  <body>
    <div id="app">
      <span style = "font-size:30px;">Enter Number:</span> <input v-model.number = "number" type = "number">
      <br/>
      <span style = "font-size:30px;">Enter Name:</span> <input v-model.lazy = "name">
      <h3>Your Name : {{name}}</h3>
      <br/>
      <span style = "font-size:30px;">Enter Your Detail : </span><input v-model.trim = "message">
      <h3>Details : {{message}}</h3>
    </div>
  </body>
</html>
Main.js
import Vue from 'vue'
import App from './App'
import router from './router'
Vue.config.productionTip = false
var vm =  new Vue({
   el : '#app',
   data: {
      number : 0,
      name: '',
      message : ''
   }
})
Output: After executing this code, we will get the output, as shown below:
When we entered something in the textbox, the output will display like the below output:
