
CodeIgniter Input Class
Input Class
The CodeIgniter framework provides an input class that includes various input functions to pre-process global input data for protection; furthermore, it also provides some helper functions to obtain input data. This class is pre-loaded in the CodeIgniter application, so you do not need to load the input class into the controller file manually.
What is XSS Filtering?
An XSS filtering is used in the input class to filter your input data and prevent cross-site scripting attacks. And, if you want to invoke xss filtering that is automatically called in the input class, when it encounters a POST or COOKIE data. For this, you have to enable the application/config/config.php and follow the given below syntax:
$config[ ‘global_xss_filtering’ ] = TRUE;
The main methods of input class are:
- $this->input->post()
- $this->input->get()
- $this->input->cookie()
- $this->input->server()
Class reference
- raw_input_stream(): A raw_input_stream() function is used to read all the property of the input data.
- post(): A post() function is used to send data to the server without passing it to the URL.
Syntax
post( [$index = NULL [ $xss_clean = NULL ] ] );
It has two parameters:
$index: It defines the POST parameter name of the form and if the defined item does not exist, it returns the NULL value.
$xss_clean: It defines whether you want to apply xss_clean to the form parameter or not.
Example:
$this->load->input->post(‘myname’, TRUE);
And, if you want to pass multiple POST parameters to the server, you can define an array with or without XSS filtering.
Example:
$this->load->input->post( array( ‘myname’, ‘myemail’, ‘mypass’), TRUE);
Create a controller file Input_controller.php and save it in application/controller/ Input_controller.php. After that, write the following program in the controller file.
Input_controller.php
<?php
 defined('BASEPATH') OR exit('No direct script access allowed');
 class Input_controller extends CI_Controller
 {
     public function input_function()
     {
         echo "<title> Tutorial and Example </title>";
         $this->load->helper('url');
         $this->load->view('myview');
     }
     public function show()
     {   echo "<title> Tutorial and Example </title>";
                 echo"<h2> Your Input Data </h2>";
         $mydata = $this->input->post(array('myname', 'myemail', 'mypass'), TRUE);
         print_r($mydata);
     }
 }
 ?>
Create a view file my_view.php and save it in application/views/my_view.php. Then, type the following program in the controller file.
my_view.php
<h2> Uses of Input Class </h2>
 <form method="post" action="<?php echo site_url('/Input_controller/show') ?>" name="myform">
 <label> Name </label>
 <input type="text" name="myname" placeholder="Enter your name"/>
 <br /><br />
 <label> Email </label>
 <input type="email" name="myemail" placeholder="Enter your email"/>
 <br /><br />
 <label> Password </label>
 <input type="password" name="mypass" placeholder="Enter your password"/>
 <br /><br />
 <button>Submit</button>
 </form>
Now run the program in the localhost by invoking the URL localhost/CodeIgniter-3.1.11/Input_controller/input function and fill the form details, it shows the output, as shown below.
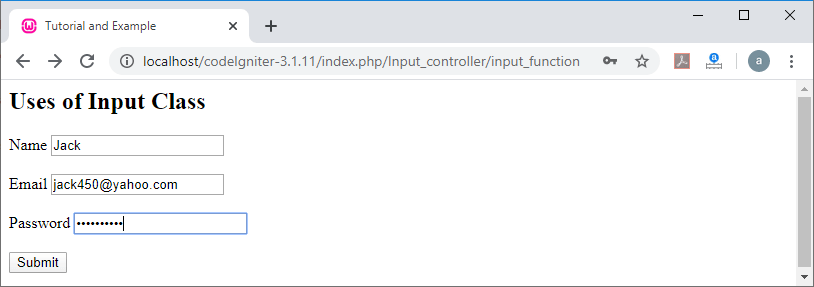
Now click on the submit form button, it shows the output, as shown below.
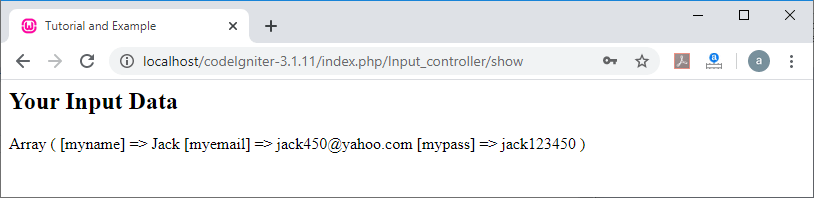
3. get(): A get() function is similar to the post() function for sending the data to the server, but it has slight changes such as it does not hide the user’s data while passing on the URL.
Syntax
get( [$index = NULL [, $xss_clean = NULL ] ] );
It has two parameters:
$index: It defines the GET parameter name of the form.
$xss_clean: It defines whether you want to apply xss_clean to the form parameter or not.
Example:
$this->load->input->get(‘myname’, TRUE);
And, if you want to pass multiple parameters using GET to the server, you have to define it in an array with or without XSS filtering.
$this->load->input->get( array( ‘myname’, ‘myemail’, ‘mypass’), TRUE);
Create a controller file Input_controller.php and save it in application/controller/ Input_controller.php. Then, type the following program in the controller file.
Input_controller.php
<?php
 defined('BASEPATH') OR exit('No direct script access allowed');
 class Input_controller extends CI_Controller
 {
     public function input_function()
     {
         echo "<title> Tutorial and Example </title>";
         $this->load->helper('url');
         $this->load->view('myview');
     }
     public function show()
     {   echo "<title> Tutorial and Example </title>";
         echo"<h2> Your Input Data </h2>";
         $mydata = $this->input->get(array('myname', 'myemail', 'mypass'), TRUE);
         print_r($mydata);
     }
 }
 ?>
Create a view file my_view.php and save it in application/views/my_view.php. After that, write the following program in the controller file.
my_view.php
<h2> Uses of Input Class </h2>
 <form method="get" action="<?php echo site_url('/Input_controller/show') ?>" name="myform">
 <label> Name </label>
 <input type="text" name="myname" placeholder="Enter your name"/>
 <br /><br />
 <label> Email </label>
 <input type="email" name="myemail" placeholder="Enter your email"/>
 <br /><br />
 <label> Password </label>
 <input type="password" name="mypass" placeholder="Enter your password"/>
 <br /><br />
 <button>Submit</button>
 </form>
Now run the program in the localhost by invoking the URL localhost/CodeIgniter-3.1.11/Input_controller/input function and fill the form details, it shows the output, as shown below.
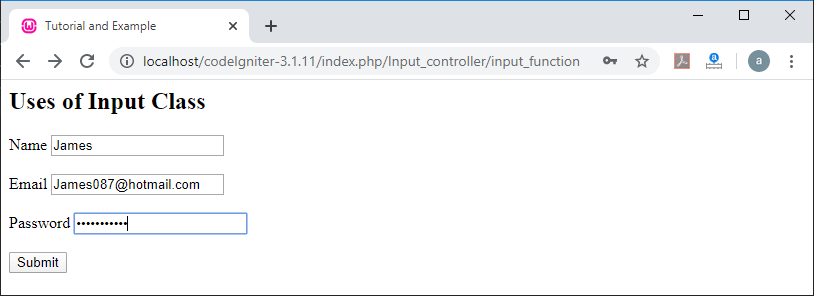
Now click on the submit form button, it shows the output, as shown below.

4. post_get(): This is a combination of the post() and get() functions. It works in the same way as the post() and get() functions, but in this post() function will work first for streaming the data and then GET().
Syntax
post_get ($index [, $xss_clean = NULL ] );
It has two parameters:
$index: It defines the POST/GET parameters name in the form.
$xss_clean: It defines whether you want to apply xss_clean to the form parameter or not.
Example:
$this->load->input->post_get(‘myname’, TRUE);
5. get_post(): It is similar to the post_get() function for data streaming. But in the get_post() function, the get() function will work first to stream the data, and then post().
Syntax
get_post ($index [, $xss_clean = NULL ] );
It has two parameters:
$index: It defines the GET/ POST parameters name in the form.
$xss_clean: It defines whether you want to apply xss_clean to the form parameter or not.
Example:
$this->load->input->get_post(‘myname’, TRUE);
Example of the post() and get() function in the input library class.
Create a controller file Input_controller.php and save it in application/controller/ Input_controller.php. Then, type the following program in the controller file.
Input_controller.php
<?php
 defined('BASEPATH') OR exit('No direct script access allowed');
 class Input_controller extends CI_Controller
 {
     public function input_function()
     {
         echo "<title> Tutorial and Example </title>";
         $this->load->helper('url');
         $this->load->view('myview');
     }
     public function show()
     {   echo "<title> Tutorial and Example </title>";
         echo"<h2> Your Input Data </h2>";
         $mydata = $this->input->get(array('myname', 'myemail', 'mypass'), TRUE);
         print_r($mydata);
     }
 }
 ?>
Create a view file my_view.php and save it in application/views/my_view.php. After that, write the following program in the controller file.
my_view.php
<h2> Uses of Input Class </h2>
 <form method="get" action="<?php echo site_url('/Input_controller/show') ?>" name="myform">
 <label> Name </label>
 <input type="text" name="myname" placeholder="Enter your name"/>
 <br /><br />
 <label> Email </label>
 <input type="email" name="myemail" placeholder="Enter your email"/>
 <br /><br />
 <label> Password </label>
 <input type="password" name="mypass" placeholder="Enter your password"/>
 <br /><br />
 <button>Submit</button>
 </form>
Now run the program in the localhost by invoking the URL localhost/CodeIgniter-3.1.11/Input_controller/input function and fill the form details, it shows the output, as shown below.
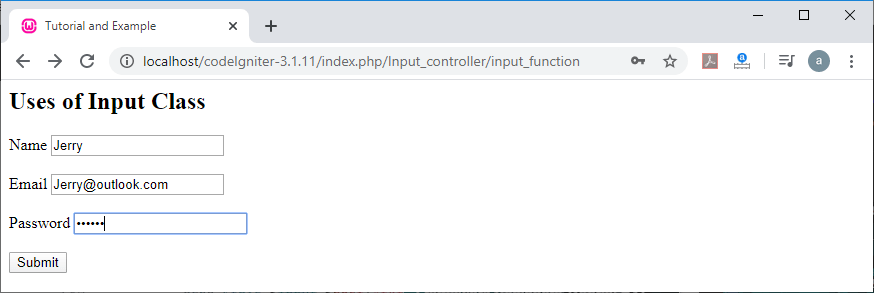
Now click on the submit form button, it shows the output, as shown below.

6. cookie(): The cookie() function is also similar to the post() and get() functions, but it only fetches cookie data.
Syntax
cookie ( [$index = NULL [, $xss_clean = NULL ] );
It has two parameters:
$index: It defines the cookie name.
$xss_clean: It defines whether you want to apply xss_clean filtering to the form parameter or not.
Example:
$this->input->cookie(‘cookie_data’, TRUE); // with xss Filtering
$this->input->cookie(‘cookie_data’); // without xss filtering
7. server(): As the name suggests, a server() function is used to fetches only the server data ($_server).
Syntax
Server ($index [, $xss_clean = NULL]);
It has two paratemeters:
$index: It defines the fields value’s name.
$xss_clean: It defines whether you want to apply xss_clean filtering to the form parameter or not.
Create a controller file Input_controller.php and save it in application/controller/ Input_controller.php. After that, write the following program in the controller file.
Input_controller.php
<?php
 defined('BASEPATH') OR exit('No direct script access allowed');
 class Input_controller extends CI_Controller
 {
     public function server()
     {   echo "<title> Tutorial and Example </title>";
   $server = $this->input->server(array( 'SERVER_PROTOCOL', 'REQUEST_URI'), TRUE);
 print_r($server);
 }
 }
 ?>
Now run the program in the localhost by invoking the URL localhost/CodeIgniter-3.1.11/Input_controller/server, it shows the output, as shown below.
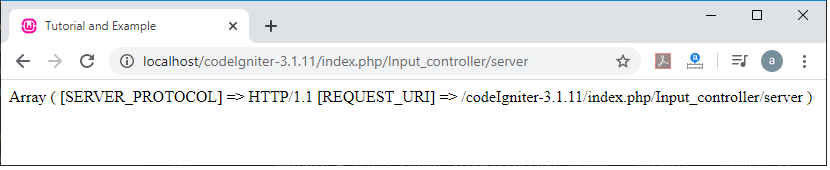
8. set_cookie(): As the name suggests, a set_cookie () function is used to set the cookie that contains the values ??you specify.
Syntax
set_cookie ($name = ‘’ [, $value = ‘’ [, $expire = ‘’ [, $domain = ‘’ [, $path = ‘/’ [, $secure = NULL [, $httponly = NULL ] ] ] ] ] ] ] );
There are following parameters of set_cookie() function:
$name: It defines the cookie name or an array of parameters name.
$value: It defines the values that you have set in cookie parameters.
$expire: It shows the cookie expiration time in seconds.
$domain: In this parameter, you can define the cookie domain name.
$path: It defines the cookie storage path in the application.
$prefix: It allows you to set the cookie prefix name.
$secure (bool): It allows that your cookie can only pass through secure HTTPS.
$httponly (bool): It determines whether you want to make the cookie accessible for HTTP requests (no Java script).
These are two methods to pass information that can be set in the cookie function: Array Methods and Discrete parameters:
- Array Method
$cookie = array(
 ‘name’ => ‘My Cookie name’,
 ‘value’ => ‘This is my first cookie’,
 ‘expire’ => ‘13580’,
 ‘domain’ => ‘localhost.com’,
 ‘path’ => ‘/’,
 ‘prefix’ => ‘mycookie_’,
 ‘secure’ => TRUE
 );
 $this->input->set_cookie($cookie);
Note: If you want to delete a cookie from an application, pass only the name and value with an empty expiration time. Furthermore, if the cookie expiration time is zero, it will work till the browser is opens.
2. Discrete parameter
It allows you to set cookie data individually in each field of the cookie function.
$this->input->set_cookie($name, $value, $expire, $domain, $path, $prefix, $secure);
Create a controller file Input_controller.php and save it in application/controller/ Input_controller.php. After that, write the following program in the controller file.
Input_controller.php
<?php
 defined('BASEPATH') OR exit('No direct script access allowed');
 class Input_controller extends CI_Controller
 {
     public function input_function()
     {
         echo "<title> Tutorial and Example </title>";
          $mycookie = array(
             'name' => 'My_Cookie',
             'value' => 'Welcome to the Tutorial and Example',
             'expire' => '13580',
             'domain' => 'localhost.com',
             'path' => '/',
             'prefix' => 'mycookie_',
             'secure' => TRUE
             );
             $this->input->set_cookie($mycookie);
            echo "<h2> Cookie has been set </h2>";
     }
     }
 ?>
Now run the program in the localhost by invoking the URL localhost/CodeIgniter-3.1.11/Input_controller/server, it shows the output, as shown below.

9. ip_address(): As the name defines, it is used to display the IP address of the current user. And, if the IP address of the current user is invalid, it returns ‘0.0.0.0’ or is not a valid IP.
Syntax
echo $this->input->ip_address();
10. valid_ip(): It is used to validate the IP address that the user has provided in the Codeigniter application. And if the address is valid, it returns TRUE; otherwise, it shows FALSE.
Syntax
valid_ip ($ip [, $which = ‘’ ]);
It has two parameters:
$ip: It takes an IP address as an input
$which: It defines the type of IP protocol (‘ipv4’ or ‘ipv6’) that you are using to validate the IP address.
Write the following program in the controller file such as:
Input_controller.php
<?php
 defined('BASEPATH') OR exit('No direct script access allowed');
 class Input_controller extends CI_Controller
 {
     public function get_valid_ip()
     {
                  echo "<title> Tutorial and Example </title>";
                         $ip = "192.168.2";
                         if ( $this->input->valid_ip($ip, 'ipv4'))
                         {
                                                 echo 'Valid';
                         }
                         else
                         {
                                                 echo 'It is not a Valid IP address';
                         }
             }
 }
 ?>
Now run the program in the localhost by invoking the URL localhost/CodeIgniter-3.1.11/Input_controller/get_valid_ip, it shows the output, as shown below.

11. user_agent(): A user_agent() function is used to display all information that relates to the current user's web browser. And if the information is not available, it returns the NULL value.
Syntax
user_agent ( [$xss_clean = NULL ]);
$xss_clean (bool): It defines whether you want to apply XSS filtering.
For example:
echo $this->input->user_agent();
Write the following program in the controller file such as:
Input_controller.php
<?php
 defined('BASEPATH') OR exit('No direct script access allowed');
 class Input_controller extends CI_Controller
 {
     public function get_user_agent()
             {
  echo "<title> Tutorial and Example </title>";
 $data = $this->input->user_agent();
 echo $data;
             }
 }
 ?>
Now run the program in the localhost by invoking the URL localhost/CodeIgniter-3.1.11/Input_controller/get_user_agent, it shows the output, as shown below.

12. request_headers(): It is used to return HTTP request headers in an array format.
Syntax
request_headers ( [ $xss_clean = FALSE ]);
$xss_clean (bool): It defines whether you want to apply XSS filtering.
For example:
$data = $this->input->request_headers();
Write the following program in the controller file such as:
Input_controller.php
<?php
 defined('BASEPATH') OR exit('No direct script access allowed');
 class Input_controller extends CI_Controller
 {
     public function header_request()
             {
 echo "<title> Tutorial and Example </title>";
         $data = $this->input->request_headers();
        print_r($data);
             }
 }
 ?>
Now run the program in the localhost by invoking the URL localhost/CodeIgniter-3.1.11/Input_controller/header_request, it shows the output, as shown below.
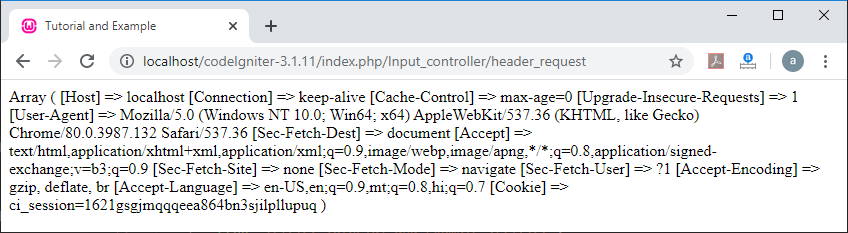
13. method(): A method() function is used to display the method name either in the upper or lower case.
Syntax
method ( [ $upper = FALSE ]):
$upper (bool): It takes a Boolean value to determines the method name in upper or lower letters.
For example:
Write the following program in the controller file such as:
Input_controller.php
<?php
 defined('BASEPATH') OR exit('No direct script access allowed');
 class Input_controller extends CI_Controller
 {
     public function get_method()
     {
         echo "<title> Tutorial and Example </title>";
         echo $this->input->method(TRUE);
         echo "<br />";
 echo $this->input->method();
 echo "<br />";
 echo $this->input->method(FALSE);
     }
 }
 ?>
Now run the program in the localhost by invoking the URL localhost/CodeIgniter-3.1.11/Input_controller/get_method, it shows the output, as shown below.
