Ionic Popover
The Ionic popover is a small dialog box that displays at the top of the screen. It can be used for anything, but it is usually used for a button, an action, a pointer, which is similar to the ionic model and action sheets work. The Ionic popover allows the user to present and gather the information easily. The popover is commonly used in the following situations, which are given below:
- Popover shows more information about the current view.
- You can select the generally used tools or configuration in the application.
- Ionic popover contains a list of actions that perform in the current view.
Popover Controller
Popover components programmatically controlled by the popover controller. It can be used to create or dismiss the popover. If you want to create or dismiss the popover, you can use the create() and dismiss() method in the ionic application.
Present() Method
The present() method is used to display the popover on the popover controller instance. If you want to set the position of the popover, it is required to pass a click event in the present() method. If you have not passed any click event, the popover will be displayed at the center of the current page of the screen.
Dismiss() Method
The dismiss() method is used to dismiss the popover after its creation on the popover controller instance. After calling the dismiss() method on the view controller, the popover will be dismissed.
Let us see step by step process how a data passes from page to the popover component.
Step 1: Create a new project in ionic. You can select the blank app template to create a new project.
Step 2: Create a popover custom component in the project. The main purpose of creating a component is to show the notifications of new messages only. To create a component, run the following command:
$ ionic g page popovercomponent
Step 3: After executing the above command, it will create the popover components. Now, you can add the code in the popover components according to your requirements, as shown below:
Popovercomponent.page.html
<ion-content padding>
   <ion-grid>
     <ion-row><ion-col>This is an ionic popover example.</ion-col></ion-row>
     <ion-row><ion-col><ion-button color="success" expand="block" (click)="ClosePopover()">Ok</ion-button></ion-col></ion-row>
   </ion-grid>
 </ion-content>
Step 4: In this step, open the app.module.ts file and import the popover components, as shown below:
App.module.ts
import { NgModule } from
'@angular/core';
 import { BrowserModule } from '@angular/platform-browser';
 import { RouteReuseStrategy } from '@angular/router';
 import { IonicModule, IonicRouteStrategy } from '@ionic/angular';
 import { SplashScreen } from '@ionic-native/splash-screen/ngx';
 import { StatusBar } from '@ionic-native/status-bar/ngx';
 import { AppComponent } from './app.component';
 import { AppRoutingModule } from './app-routing.module';
 import { PopovercomponentPageModule } from './popovercomponent/popovercomponent.module';
 @NgModule({
   declarations: [AppComponent],
   entryComponents: [],
   imports: [BrowserModule, IonicModule.forRoot(), AppRoutingModule, PopovercomponentPageModule],
   providers: [
     StatusBar,
     SplashScreen,
     { provide: RouteReuseStrategy, useClass: IonicRouteStrategy }
   ],
   bootstrap: [AppComponent]
 })
 export class AppModule {}
Step 5: Next, open the popovercomponent.page.ts file and write the following code, which is given below:
Popovercomponent.page.ts
import { Component, OnInit } from
'@angular/core';
 import {PopoverController} from '@ionic/angular';
 @Component({
   selector: 'app-popovercomponent',
   templateUrl: './popovercomponent.page.html',
   styleUrls: ['./popovercomponent.page.scss'],
 })
 export class PopovercomponentPage implements OnInit {
   constructor(private popover:PopoverController) {}
   ngOnInit() {
   }
   ClosePopover()
   {
     this.popover.dismiss();
   }
 }
Step 6: Next, open the home.page.ts file and create the CreatePopOver() function by using the following code.
Home.page.ts
import { Component } from
'@angular/core';
 import { PopoverController } from '@ionic/angular';
 import { PopovercomponentPage } from '../popovercomponent/popovercomponent.page';
 @Component({
   selector: 'app-home',
   templateUrl: 'home.page.html',
   styleUrls: ['home.page.scss'],
 })
 export class HomePage {
   constructor(private popover:PopoverController)
   {
    }
   CreatePopover()
   {
     this.popover.create({component:PopovercomponentPage,
     showBackdrop:false}).then((popoverElement)=>{
       popoverElement.present();
     })
   }
   }
Step 7: Now, open the home.page.html file and write the code, which is shown below:
Home.page.html
<ion-header>
   <ion-toolbar color="primary">
     <ion-title>Ionic Popover Example</ion-title>
   </ion-toolbar>
 </ion-header>
 <ion-content class="padding" color="light">
   <h1>Popover Notification</h1>
   <ion-button color="danger" (click)="CreatePopover()">Open Popover</ion-button>
 </ion-content>
Output: After executing this code, you will get the following output:
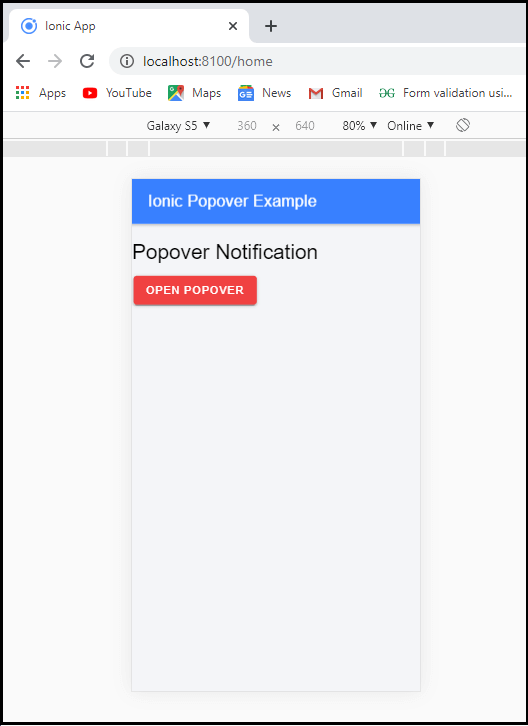
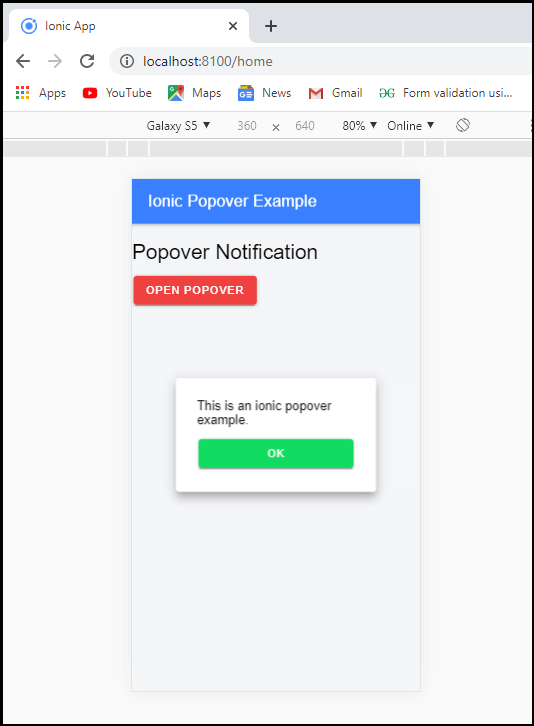
When you click on the Open Popover button, it shows the notification popover. After that, when you click on the Ok button then the notification popover will be closed, as shown below: