JavaFX BorderPane
In the JavaFX application, in order to set Border Pane as a layout, the BorderPane class is used. The BorderPane layout allows us to arrange the components in the left, right, top, bottom, and center of the container. All methods needed for this purpose are present in the javafx.scene.layout.BorderPane class.
Properties and corresponding methods to set BorderPane as a layout:
1. Top
This property of the Border Pane class allows us to define the position of the component at the top of the container and the setTop() method helps to set it.
2. Bottom
This property of the Border Pane class allows us to define the position of the component at the bottom of the container and the setBottom() method helps to set it.
3. Left
This property of the Border Pane class allows us to define the position of the component at the left of the container and the setLeft() method helps to set it.
4. Right
This property of the Border Pane class allows us to define the position of the component at the right of the container and the setRight() method helps to set it.
5. Center
This property of the Border Pane class allows us to define the position of the component at the center of the container and the setCenter() method helps to set it.
Layouts in JavaFX applications- Simple BorderPane
Example:
import javafx.application.Application;
import javafx.scene.Group;
import javafx.scene.Scene;
import javafx.scene.control.Label;
import javafx.scene.layout.BorderPane;
import javafx.stage.Stage;


public class BorderUI extends Application
{


    @Override
    public void start(Stage primaryStage) throws Exception
    {

    Label label = new Label(" Simple BorderPane example ");

        BorderPane box = new BorderPane(label);
         Scene scene = new Scene(box,600,400);

           primaryStage.setScene(scene);
           primaryStage.setTitle(" JavaFX Layout - Simple BorderPane layout");
           primaryStage.show();
        }


    public static void main(String[] args)
  {
        Application.launch(args);
    }
}
Output:
In order to create the Border Pane in JavaFX, we have to import all the required libraries such as javafx.application.Application, javafx.stage.Stage, javafx.scene.Scene, javafx.scene.control.Label, javafx.scene.layout.BorderPane.
Then we have created one class named BorderUI extending the Application class. Also, we have to override the start method to provide implementation details. This method creates an object of Stage as primaryStage. For the container to hold Border Pane with the label, a Border Pane object is created which is then passed to the Scene class object.
Border Pane is created with the help of its constructor and the component is passed in it.
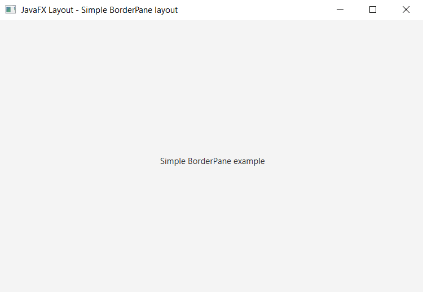
The stage is prepared, the title is set and the show() method is called to display output. In order to run the application, the launch(args) method is invoked. In output Frame like container is displayed with the title, " JavaFX Layout - Simple BorderPane layout”. Also, it displays Border Pane with the label of Simple BorderPane example placed in the center.
Layouts in JavaFX applications- BorderPane with components at Top, Bottom, Left, Right, and Center
Example:
import javafx.application.Application;
import javafx.geometry.Pos;
import javafx.scene.Scene;
import javafx.scene.control.Label;
import javafx.scene.layout.BorderPane;
import javafx.stage.Stage;


public class BorderUI extends Application
 {


    @Override
    public void start(Stage primaryStage) throws Exception
    {

      Label new_center = new Label("BorderPane center");
      Label new_top = new Label("BorderPane top");
      Label new_bottom = new Label(" BorderPane bottom");
      Label new_left = new Label(" BorderPane left");
      Label new_right = new Label(" BorderPane right");
              BorderPane pane = new BorderPane(new_center,
             new_top, new_right, new_bottom, new_left);
          pane.setAlignment(new_top, Pos.CENTER);
         pane.setAlignment(new_bottom, Pos.CENTER);
          pane.setAlignment(new_left, Pos.CENTER);
          pane.setAlignment(new_right, Pos.CENTER);
         Scene scene = new Scene(pane,600,400);

           primaryStage.setScene(scene);
           primaryStage.setTitle(" JavaFX Layout -  BorderPane layout Example");
           primaryStage.show();
        }
    public static void main(String[] args) {
        Application.launch(args);
    }
}
Output:
In order to create the Border Pane with the components in all the directions in JavaFX, we have to import all the required libraries such as javafx.application.Application, javafx.stage.Stage, javafx.scene.Scene, javafx.scene.control.Label, javafx.scene.layout.BorderPane, javafx.geometry.Pos.
Then we have created one class named BorderUI extending the Application class. Also, we have to override the start method to provide implementation details. This method creates an object of Stage as primaryStage. For the container to hold Border Pane with components in all directions, a Border Pane object is created which is then passed to the Scene class object.
Border Pane is created with the help of its constructor and component in the left, right, center, top, and bottom of the container.
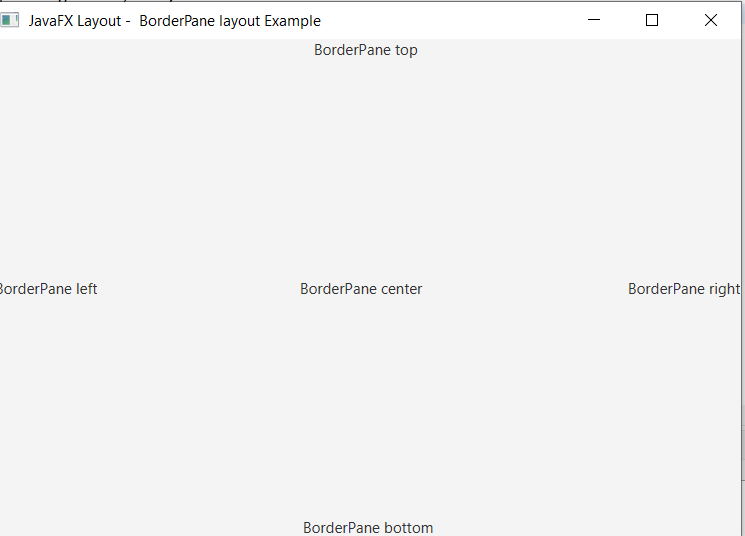
The stage is prepared, the title is set and the show() method is called to display output. In order to run the application, the launch(args) method is invoked. In output Frame like container is displayed with the title, " JavaFX Layout - BorderPane layout Example ”. Also, it displays Border Pane with 5 labels at the top, bottom, left, right, and center of the container.