JavaFX Button
The button is one of the UI control present in the JavaFX. The javafx.scene.control.Button class is used for creating a button in javafx example. It is also possible to create a simple button as well as the button with an image. Button in javafx is used to control how the application will work on a particular event occurrence. Also, it is possible to add an event handler to the button and provide action for the same.
There are 2 ways by which we can create a button in JavaFX,
- Creating constructor and passing text to it which is to be displayed on the button.
- Also, we can use the setText() method with string passed in it.
JavaFX Simple Button:
Example:
import javafx.application.Application;
import javafx.scene.Scene;
import javafx.scene.control.Button;
import javafx.scene.layout.StackPane;
import javafx.stage.Stage;

public class ButtonUI extends Application
{

    @Override
    public void start(Stage primaryStage) throws Exception
    {

         StackPane pane = new StackPane();
         Button newbtn=new Button(" Submit ");
         Scene scene=new Scene(pane,400,400);
         pane.getChildren().add(newbtn);
         primaryStage.setScene(scene);
         primaryStage.setTitle("JavaFX Button Example");
         primaryStage.show();


    }
    public static void main ( String[] args ) {
        launch( args );
    }
}
Output:
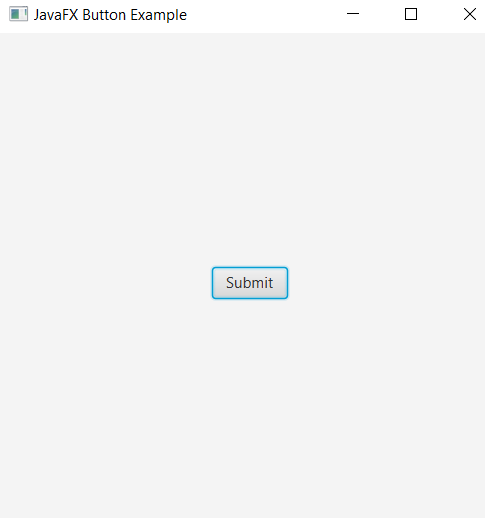
In order to create a Button in JavaFX, we have to import all the required libraries such as the javafx.application.Application, javafx.scene.Scene, javafx.scene.control.Button, javafx.scene.layout.StackPane and javafx.stage.Stage. Then we have created one class named ButtonUI extending the Application class. Also, we have to override the start method to provide implementation details. This method creates an object of Stage as primaryStage. For the container to hold the button, a StackPane object is created which is then passed to the Scene class object. Button object is created and added in the pane. Then the stage is prepared and the title is set to it. The show() method is called to display output. In the main method launch(args) is called to run the application. In output one frame-like container is displayed with a title, JavaFX Button Example and Submit is displayed on the container.
JavaFX Button with Image:
The Button class consists of a constructor which is used to accept graphics and text on the button. Below code implements button with image:
Example:
import java.io.FileInputStream;


import javafx.application.Application;
import javafx.scene.Scene;
import javafx.scene.control.Button;
import javafx.scene.image.Image;
import javafx.scene.image.ImageView;
import javafx.scene.layout.StackPane;
import javafx.stage.Stage;

public class ButtonUI extends Application {

    @Override
    public void start(Stage primaryStage) throws Exception {

    FileInputStream file=new FileInputStream("home.jpg");
         Image newimage = new Image(file);
         ImageView imgview=new ImageView(newimage);

         StackPane pane = new StackPane();
         Button newbtn=new Button(" Home ",imgview);
         newbtn.setWrapText(true);
         Scene scene=new Scene(pane,400,400);
         pane.getChildren().add(newbtn);
         primaryStage.setScene(scene);
         primaryStage.setTitle(" JavaFX Button with Image Example");
         primaryStage.show();

    }
    public static void main(String[] args) {
        launch(args);
    }
}
Output:
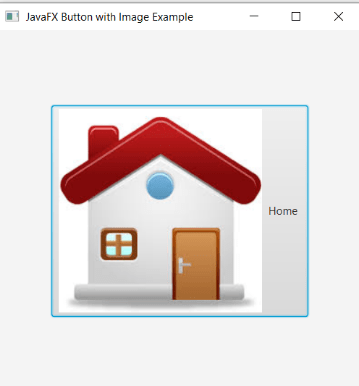
In order to create the Button with the image in JavaFX, we have to import all the required libraries such as javafx.application.Application, javafx.scene.Scene, javafx.scene.control.Button, javafx.scene.layout.StackPane, javafx.scene.image.Image, javafx.scene.image.ImageView, and javafx.stage.Stage. Then we have created one class named ButtonUI extending the Application class. Also, we have to override the start method to provide implementation details. This method creates an object of Stage as primaryStage. For the container to hold a button with the image, a StackPane object is created which is then passed to the Scene class object. FileInputStream object is created which is then passed to the image constructor. And the image object created with the constructor is passed to the ImageView. Then the Button class object is created, the setWrapText method is called with parameter true to ensure the text is wrapped properly then this button object is passed to StackPane object using the add method, then the Stage is prepared, the title is set to it, and show method is called to display the output. Finally, in the main method, the launch(args) method is called to launch the application. In the output frame like container is displayed with the title JavaFX Button with Image Example and button with a home icon and text home is displayed in the frame.
setGraphic method in Button:
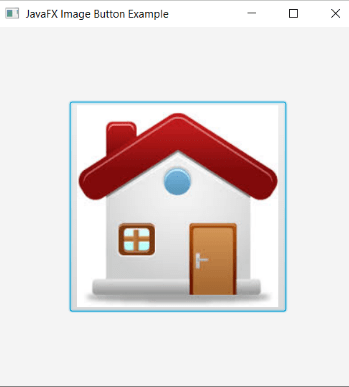
The setGraphic method is also provided by the button class in JavaFX to set an image on the button.
import java.io.FileInputStream;


import javafx.application.Application;
import javafx.scene.Scene;
import javafx.scene.control.Button;
import javafx.scene.image.Image;
import javafx.scene.image.ImageView;
import javafx.scene.layout.StackPane;
import javafx.stage.Stage;

public class ButtonUI extends Application {

    @Override
    public void start(Stage primaryStage) throws Exception {

    FileInputStream file=new FileInputStream("home.jpg");
         Image newimage = new Image(file);
         ImageView imgview=new ImageView(newimage);

         StackPane pane = new StackPane();
         Button newbtn=new Button();
         newbtn.setGraphic(imgview);
         newbtn.setWrapText(true);
         Scene scene=new Scene(pane,400,400);
         pane.getChildren().add(newbtn);
         primaryStage.setScene(scene);
         primaryStage.setTitle(" JavaFX Image Button Example");
         primaryStage.show();

    }
    public static void main(String[] args) {
        launch(args);
    }
}
Output:
In order to create the Button with the image in JavaFX, we have to import all the required libraries such as javafx.application.Application, javafx.scene.Scene, javafx.scene.control.Button, javafx.scene.layout.StackPane, javafx.scene.image.Image, javafx.scene.image.ImageView, and javafx.stage.Stage. Then we have created one class named ButtonUI extending the Application class. Also, we have to override the start method to provide implementation details. This method creates an object of Stage as primaryStage. For the container to hold a button with the image, a StackPane object is created which is then passed to the Scene class object. FileInputStream object is created which is then passed to the image constructor. And the image object created with the constructor is passed to the ImageView. Then the Button class constructor is called, then setGraphic() and setWrapText() method is called with parameter ImageView and true respectively. Then this button object is passed to the StackPane object using the add method, then the Stage is prepared, the title is set to it, and the show method is called to display the output. Finally, in the main method, the launch(args) method is called to launch the application. In the output frame like container is displayed with the title JavaFX Image Button Example and a button with the home icon is displayed in the frame.