JavaFX Installation
In order to run JavaFX applications, we need to have eclipse and java installed on our machine.
Prerequisite:
| Operating system | Any Operating system (Windows, Linux, Mac) |
| Memory requirement | No minimum requirement |
| Disk Space | No minimum requirement |
| JDK version | JDK 1.8 or above |
For JavaFX, java is mandatory on the machine.
If you have already installed Java on your machine, you can verify the installation using the following commands:
- For Windows:
- Open Command line.
- Type the command, C:\>java -version
- Press Enter key. It will display the available version of java.
- For Linux:
- Open Command Terminal.
- Type the command, $ java-version.
- Press Enter key. It will display the available version of java.
If Java is not configured on your local machine follow the below steps to install java:
1. Install Java SDK from Oracle website, https://www.oracle.com/java/technologies/javase-downloads.html
2. Install JDK from Download files.
3. Follow the instruction given in Documentation to install setup.
4. Set Path for Java compiler
- For Windows,
Insert ‘;%JAVA_HOME% bin’ at the end of system variable and path
- For Linux,
Export PATH=$PATH:$JAVA_HOME/bin/
5. Set Java_Home variable to the path in your local machine where java is installed
- For Windows,
Set Java_Home variable to C:\Program Files\Java\jdk1.8.0_171
- For Linux,
Export JAVA_HOME=/usr/local/java-current
Installing Eclipse IDE:
1. Visit the link https://www.eclipse.org/downloads/ and download the latest version of the eclipse available on the site.
2. After clicking on the download button, it will download the installer. After successful download click on the exe file, prompt will appear, click on the Run button.
3. It will show various software suits, choose the right one you want to install.
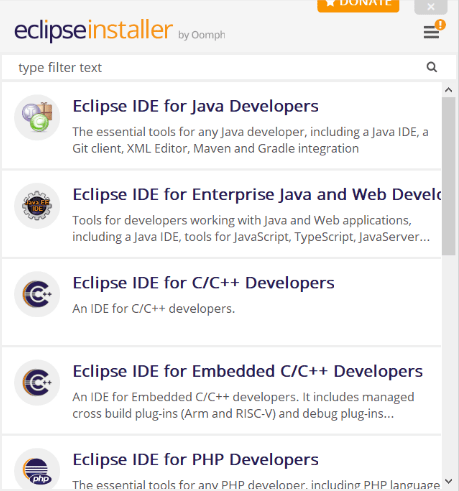
4. We will choose Eclipse IDE for Java Developers. The next screen will appear. Choose the path and click on the Install button.
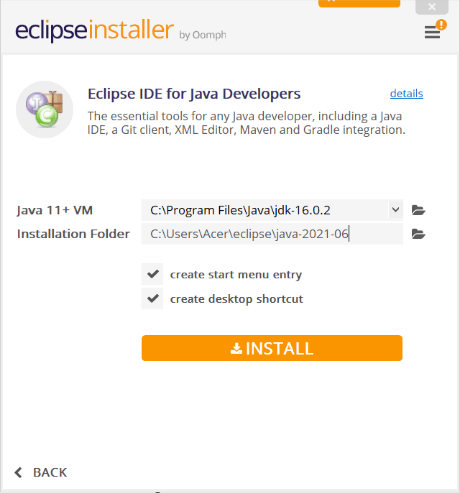
5. Accept the Eclipse foundation software user agreement by clicking on the Accept button and then in the next window click the Launch button to start Eclipse IDE.
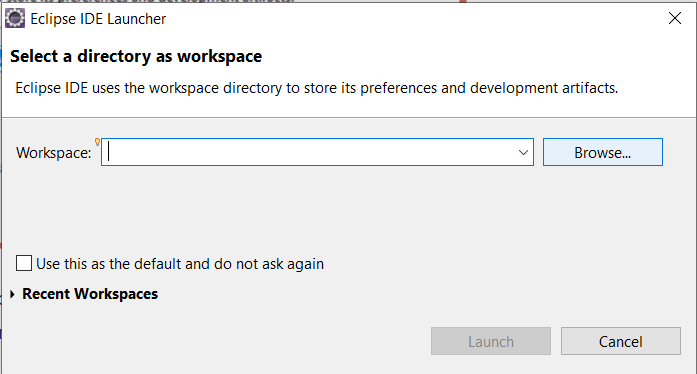
6. Select the workspace directory by clicking on the browse button and once selected click on the Launch button.
Installing JavaFX:
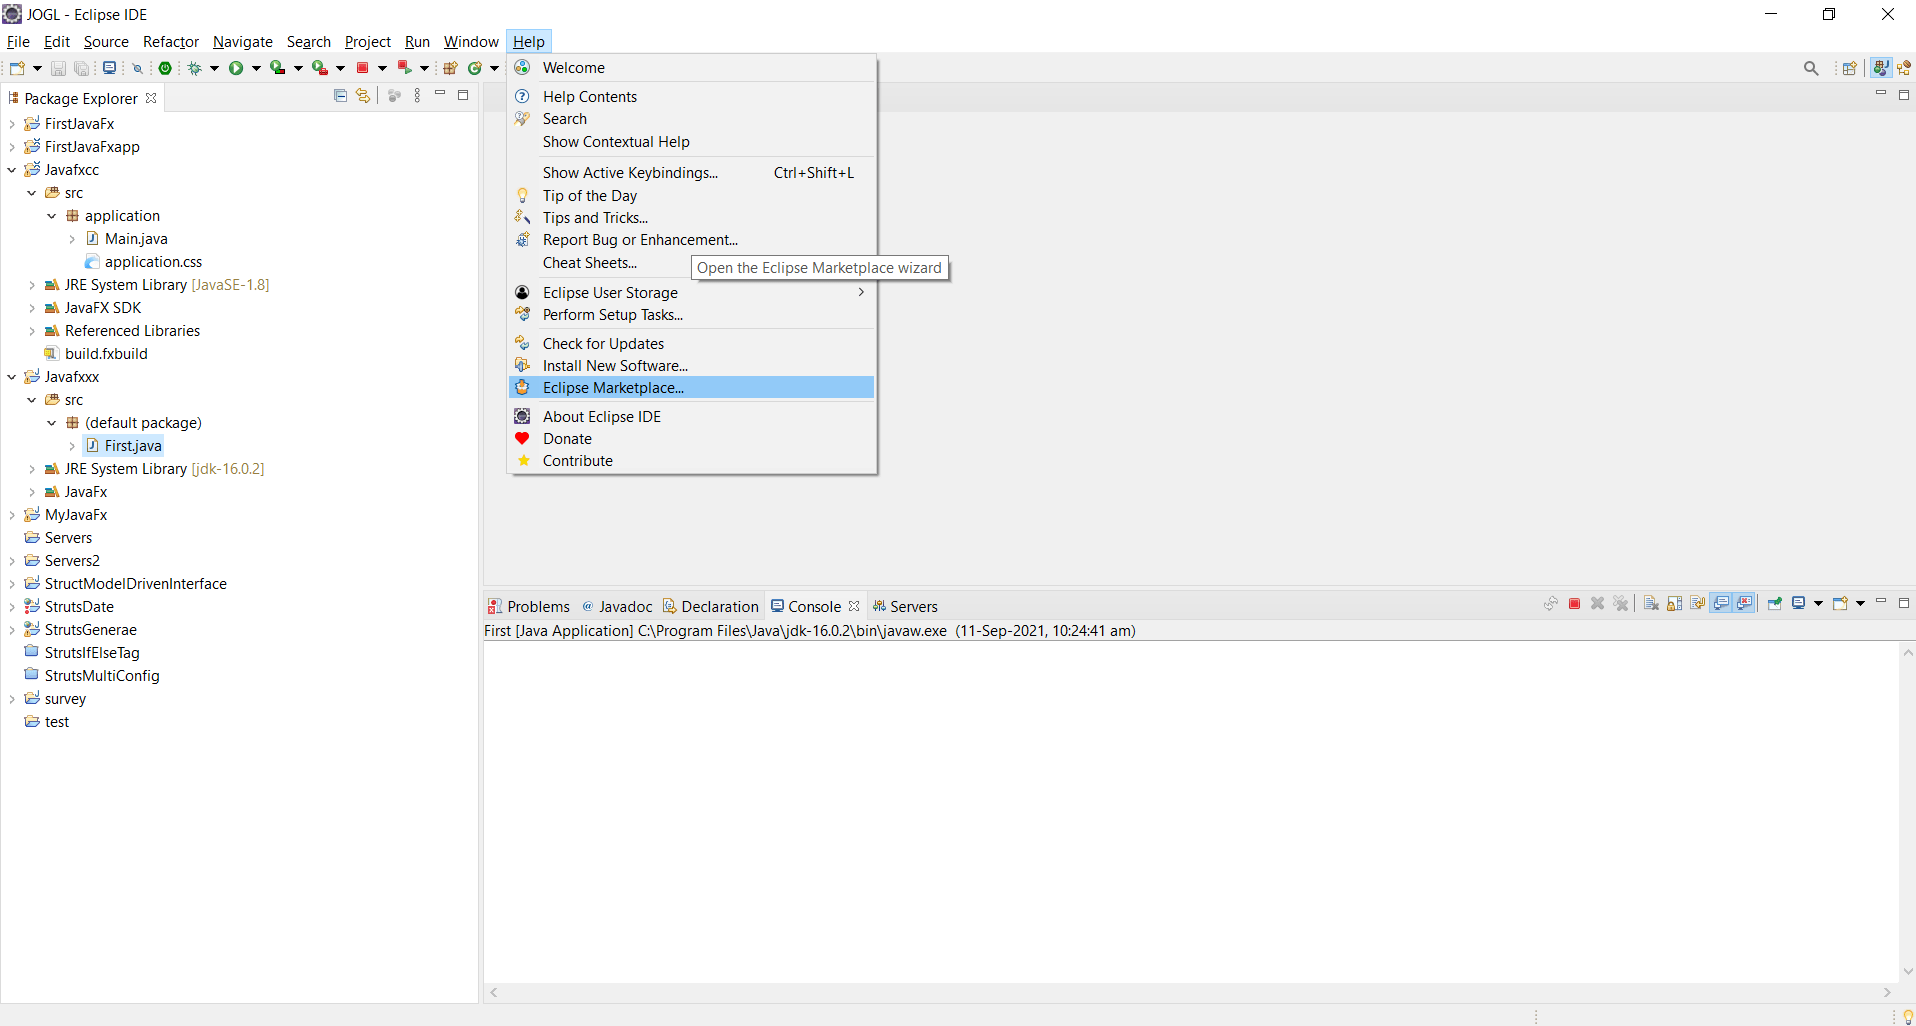
1. Open the Eclipse IDE installed on your machine, click on the Help, then select the Eclipse Marketplace from the drop-down menu.
2. Then in Eclipse Marketplace type javafx in the searchbox and click the enter button.
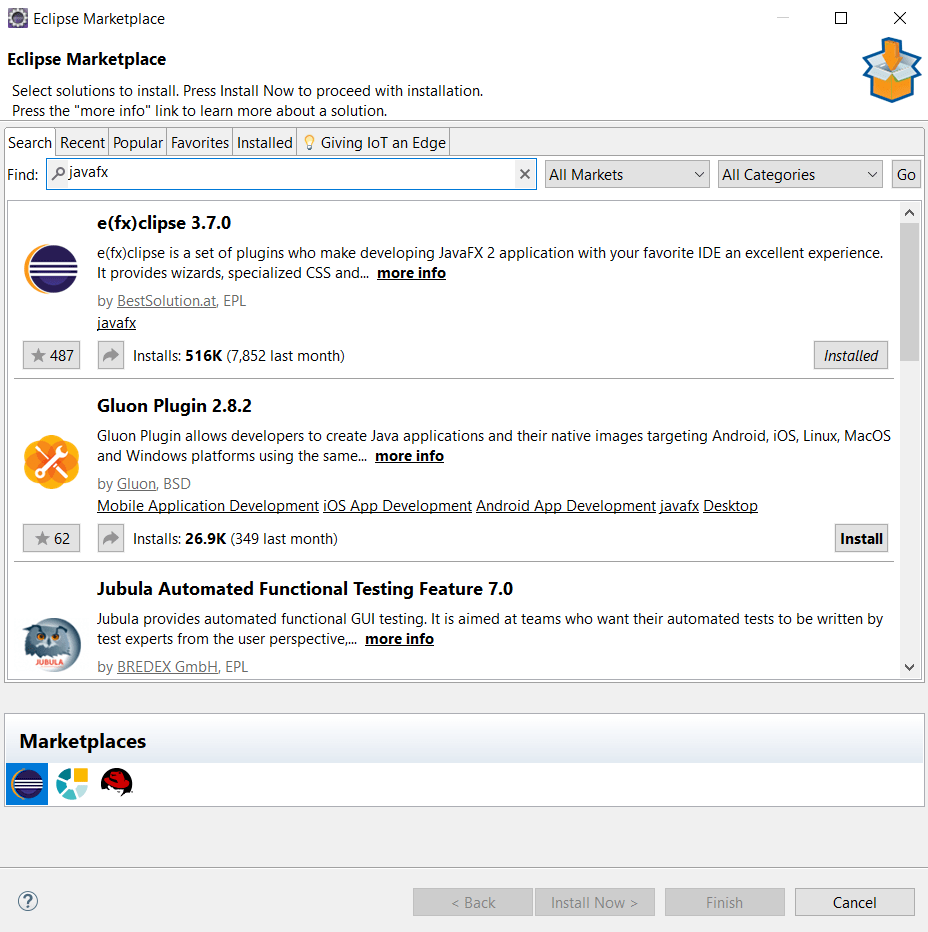
3. It will show e(fx), install it.
4. Once it is successfully installed you have to restart the eclipse to reflect the changes done.
5. Click on File then select New, Choose Project option, and select JavaFX and under dropdown of it click it on JavaFX project.
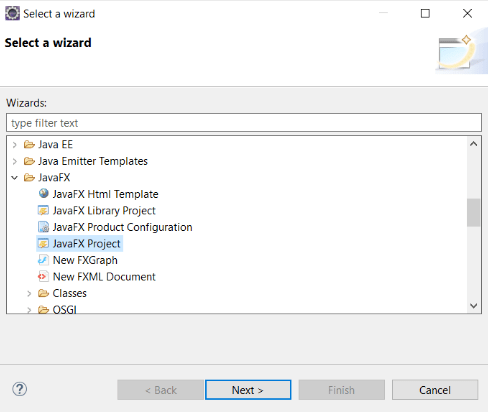
6. Click on the Next button and Enter the name of the project let us say “JavaFx" and click on the Finish button.
7. Then you have to download JavaFX from the site https://gluonhq.com/products/javafx/.
8. It will download the zip file, you have to extract it into any folder.
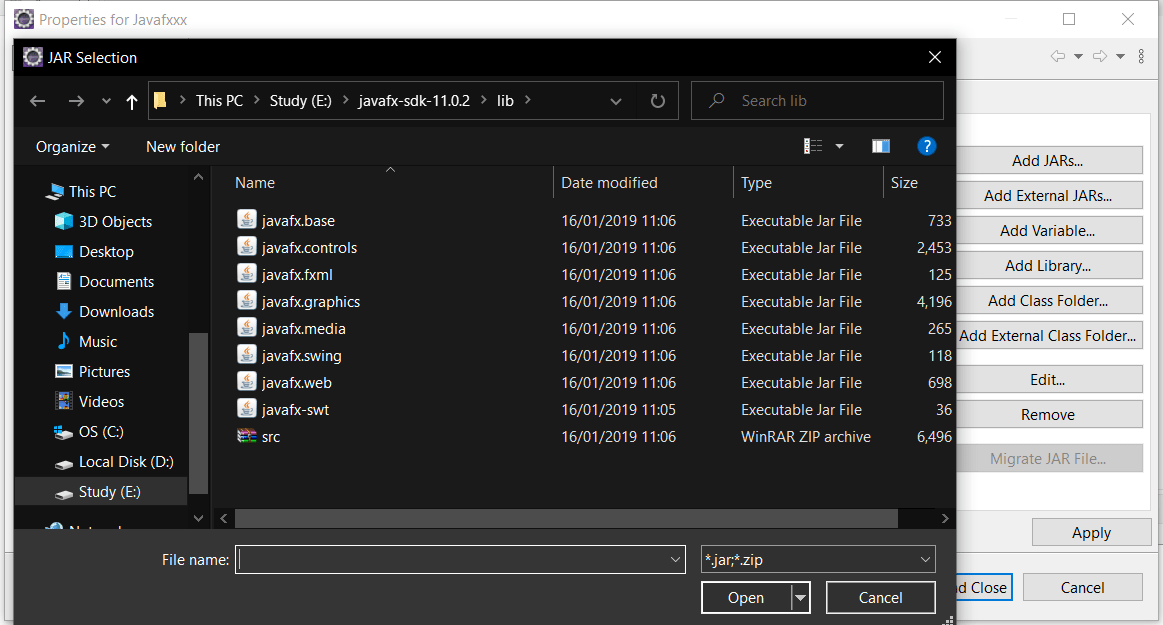
9. Right click on the project and click on Properties, choose the Java Build Path option, and then click on the Libraries tab.
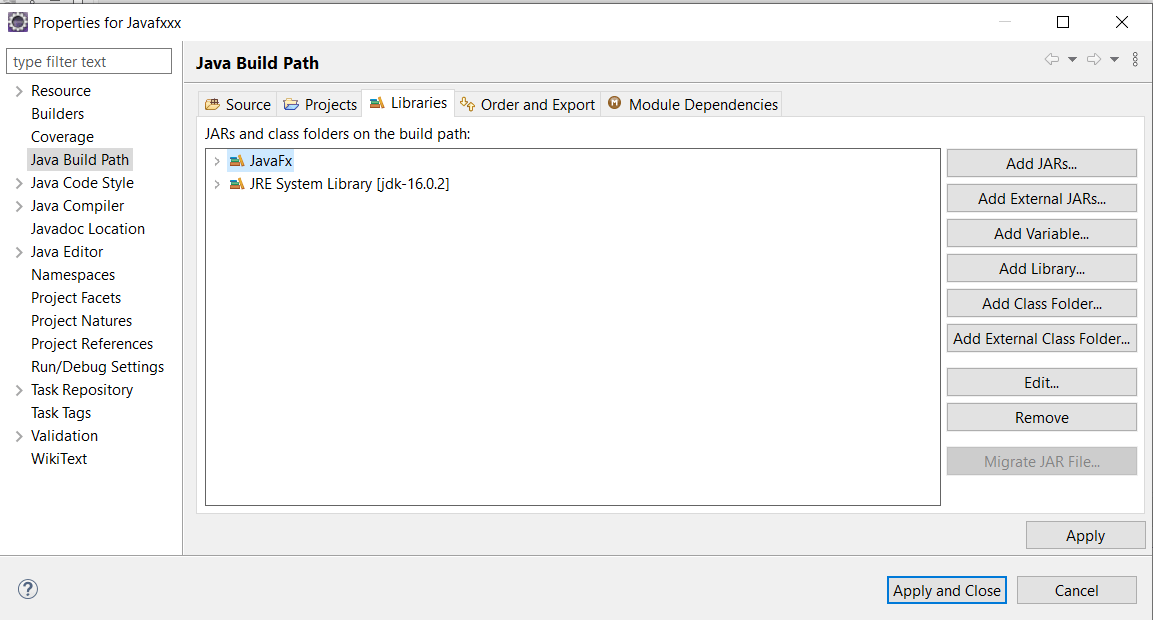
10. Then choose JavaFX SDK, click on the add external JARs from the right menu. Then choose all the .jar files available in the downloaded folder in the lib directory. Click on open then select Apply then Apply and Close.
11. Right click on the project select Run As choose Run Configuration then in arguments tab under VM arguments enter the following text:
--module-path /path/to/JavaFX/lib --add-modules=javafx.controls,javafx.fxml
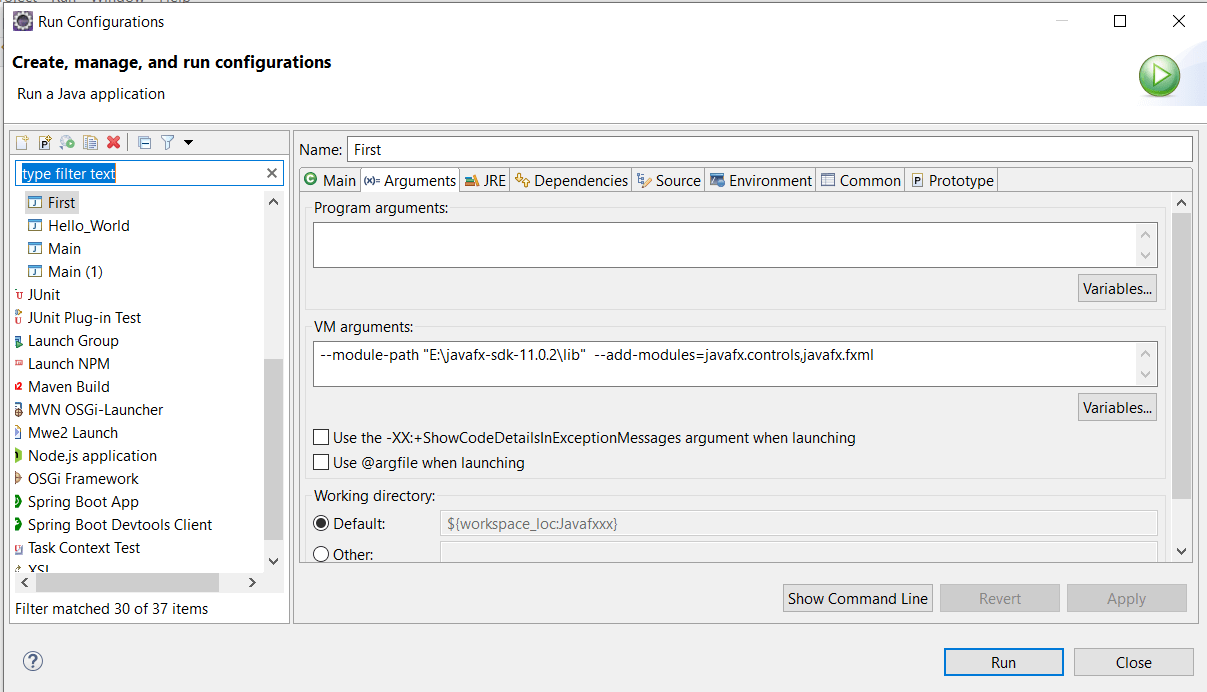
12. Also, you have to uncheck the box saying "Use the – XstartOnFirstThread..”
13. Then at last click Apply and Run.
After successful installation create a new java file in the project by right clicking on the src-> new-> class. Then enter the Java class name and package name if you want.
Java Code:
import javafx.application.Application;
import javafx.scene.Scene;
import javafx.scene.control.Button;
import javafx.stage.Stage;
import javafx.scene.layout.StackPane;


public class First extends Application
{

    @Override
    public void start (Stage primaryStage) throws Exception
   {
        Button btn1 = new Button("Welcome");
        StackPane root = new StackPane();
        root.getChildren().add(btn1);
        Scene scene=new Scene (root,600,400);
        primaryStage.setTitle (" Welcome to JavaFX ");
        primaryStage.setScene (scene);
        primaryStage.show();
    }
    public static void main (String[] args)
    {
        launch(args);
    }
}
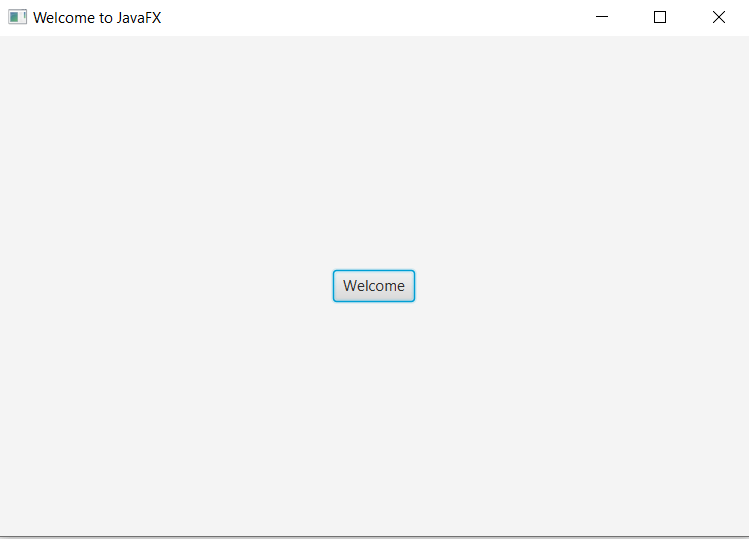
In order to run the application, Right click on the java file select Run as, and click on Java Applications. It will show one frame with the title, Welcome to JavaFX, and welcome button added on it.