Ionic Geolocation
In today’s time, the mobile location plays an essential role in the mobile application. The Ionic Cordova geolocation plugin provides information about the location of the device, like as latitude and longitude. The most common sources to get the location information of devices are Global Positioning System (GPS) and location derived from network signals like as IP addresses, Radio Frequency Identification (RFID), GSM/CDMA cell IDs, and Wi-Fi and Bluetooth MAC addresses.
The geolocation API is based upon the specifications of the W3C Geolocation API. It runs only on devices that do not provide an implementation. It supports different platforms such as Android, Browser, iOS, Windows, and Amazon Fire OS.
Nowadays, the most popular mobile applications, like WhatsApp, Twitter, Facebook, and Instagram, use geolocation plugin to share the user’s location. Some apps give the riding, food, E-commerce services based on the geolocation.
In this topic, we are going to discuss the ionic geolocation. Here, you will see step by step all the process of ionic geolocation in the ionic application.
Step 1. Firstly, you create a new project in the ionic application. It also makes sure that you have installed the latest version of the ionic framework.
Step 2. After the installation of the latest version of the ionic framework, you are required to select a blank template from the various templates. After this process, you need to run the following commands to install the Cordova geolocation plugin in the ionic application.
$ cd myapp
 $ ionic cordova plugin add cordova-plugin-geolocation
 $ npm install @ionic-native/geolocation
Step 3. After executing these commands, it is required to import the geolocation plugin in the app.module.ts file, as shown below:
App.module.ts
 import { NgModule } from '@angular/core';
 import { BrowserModule } from '@angular/platform-browser';
 import { RouteReuseStrategy } from '@angular/router';
 import { IonicModule, IonicRouteStrategy } from '@ionic/angular';
 import { SplashScreen } from '@ionic-native/splash-screen/ngx';
 import { StatusBar } from '@ionic-native/status-bar/ngx';
 import { AppComponent } from './app.component';
 import { AppRoutingModule } from './app-routing.module';
 import { Geolocation } from '@ionic-native/geolocation/ngx';
 @NgModule({
   declarations: [AppComponent],
   entryComponents: [],
   imports: [BrowserModule, IonicModule.forRoot(), AppRoutingModule],
   providers: [
     StatusBar,
     SplashScreen,
     Geolocation,
     { provide: RouteReuseStrategy, useClass: IonicRouteStrategy }
   ],
   bootstrap: [AppComponent]
 })
 export class AppModule {}
Step 4. In this step, you are required to import geolocation plugin in the home.page.ts file. Here, you create a function to find the location of the device, as shown below:
Home.page.ts
import { Component } from '@angular/core';
 import { Geolocation } from '@ionic-native/geolocation/ngx';
 import { LoadingController } from '@ionic/angular';
 import { AlertController } from '@ionic/angular';
 @Component({
   selector: 'app-home',
   templateUrl: 'home.page.html',
       message: 'Please wait.....',
       });
     await loading.present();
     this.geolocation.getCurrentPosition({maximumAge: 1500, timeout: 6000, enableHighAccuracy: true }).then((resp) => {
       // resp.coords.latitude
       // resp.coords.longitude
       loading.dismiss();
       this.lati = resp.coords.latitude;
       this.longi = resp.coords.longitude;
       }, er => {
         // alert("error getting location")
         loading.dismiss();
         this.showLoader('Can not retrieve Location');
       }).catch((error) => {
       // alert('Error getting location'+JSON.stringify(error));
       loading.dismiss();
       this.showLoader('Error getting location - ' + JSON.stringify(error));
       });
   }
  async showLoader(msg) {
     const alert = await this.alertController.create({
       message: msg,
       buttons: ['OK']
     });
     await alert.present();
   }
 }
Step 5. In this step, you write the code in the home.page.html file and also create a button to get the location of device, as shown below:
Home.page.html
<ion-header>
   <ion-toolbar color="success">
     <ion-title>Ionic Geolocation Example</ion-title>
   </ion-toolbar>
 </ion-header>
 <ion-content class="padding">
   <ion-button (click)="getCurrentLocation()" expand="block">Search Location</ion-button>
   <ion-list>
     <ion-list-header>
       <ion-label>Location Details</ion-label>
     </ion-list-header>
     <ion-item>
       <ion-label>Longitude</ion-label>
       <ion-badge>{{longi}}</ion-badge>
     </ion-item>
     <ion-item>
       <ion-label>Latitude</ion-label>
       <ion-badge>{{lati}}</ion-badge>
     </ion-item>
   </ion-list>
 </ion-content>
Step 6. In this step, you can use your android device to run the app. Before testing the app, you required to add the platform to the app. The following command helps to install the platform with android, as shown below:
$ ionic cordova platform add android
 $ ionic cordova run android –aot
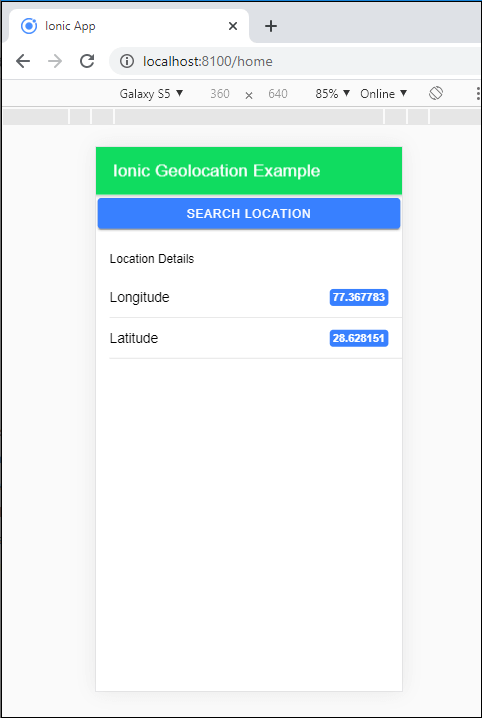
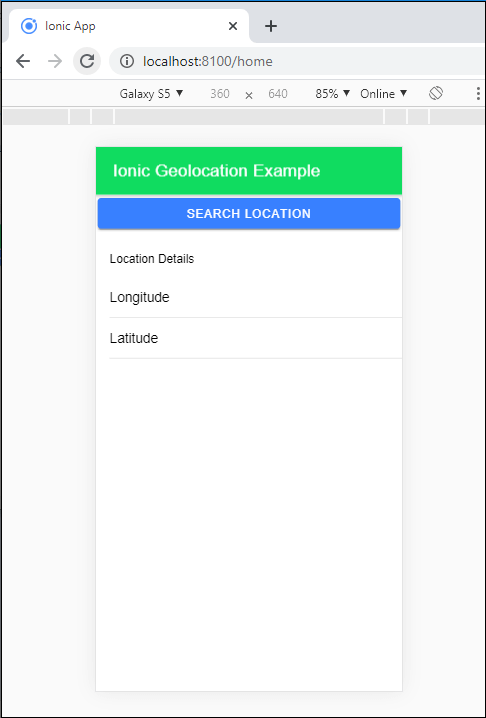
Output: After successful execution of the code, you will get the following output:
When you click on the Search Location button, it shows the latitude and longitude information of the location, as shown below: