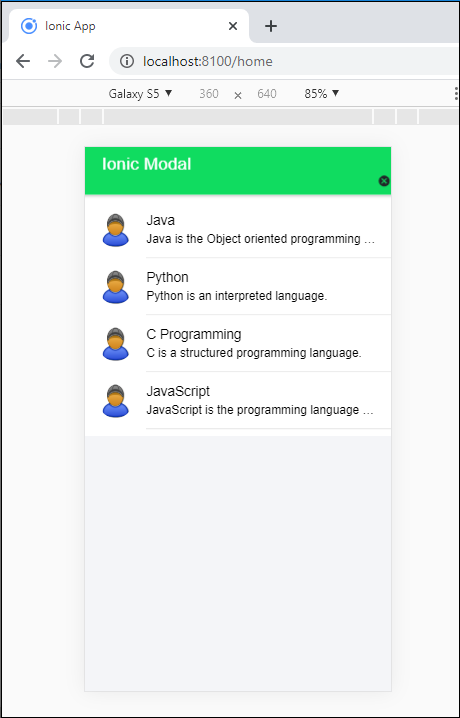
Ionic Modal
Ionic modal is displayed as a temporary UI that slides into the screen. The ionic modal is a dialog box that is displayed at the top of the app’s content, and it will disappear after the user interaction. The modal is useful as a select component. When there are many options to select from or when filtering items in a list. Such cases are that login or signup, composing messages, and presenting app configuration options.
Ionic Modal Controller
The modal controller programmatically controls the modal component. Ionic modal can be created or dismissed from the modal controller. By using the create() and dismiss() method, you can create and dismiss the ionic modal easily.
There are two methods of modal which are used in the ionic application that are as follows:
- Create
- Dismiss
Create
The create() method is used to create the modal. It creates a modal overlay with the different modal options. By setting modal options in the create method, you can customize the controller.
Dismiss
The dismiss() method is used to dismiss the modal overlay after creating the modal. For performing the additional actions after the model is dismissed, then you can call the onDidDismiss function.
Now, you can see how the modal controller works in the ionic application. You can use these steps to create the modal that are given below:
Step-1: Firstly, you create a new project. To creating a new project, you can select the blank app template to create a home page in the ionic.
Step-2: Create a new page for the modal controller. For creating a modal controller in the ionic application, you are required to run the given below command before running the ionic serve command.
$ ionic g page modal
Step-3: After creating the model page in the ionic application, you open the following files and add the provided code. You can also modify the code according to your requirements.
Example: This example explains how you can work with the modal controller in the ionic application.
Modal.page.html
<ion-header>
   <ion-toolbar color="success">
     <ion-title>Ionic Modal</ion-title>
     <ion-icon name='close-circle' color="dark" (click)='dismiss()' style='float: right;'></ion-icon>
   </ion-toolbar>
 </ion-header>
 <ion-content color="light">
   <ion-list>
     <ion-item>
       <ion-avatar slot="start">
         <img src="assets\icon\avatar.png"/>
       </ion-avatar>
       <ion-label>
         <h2>Java</h2>
         <p>Java is the Object oriented programming language.</p>
       </ion-label>
     </ion-item>
     <ion-item>
       <ion-avatar slot="start">
         <img src="assets\icon\avatar.png"/>
       </ion-avatar>
       <ion-label>
         <h2>Python</h2>
         <p>Python is an interpreted language.</p>
       </ion-label>
     </ion-item>
     <ion-item>
       <ion-avatar slot="start">
         <img src="assets\icon\avatar.png"/>
       </ion-avatar>
       <ion-label>
         <h2>C Programming</h2>
         <p>C is a structured programming language.</p>
       </ion-label>
     </ion-item>
     <ion-item>
       <ion-avatar slot="start">
         <img src="assets\icon\avatar.png">
       </ion-avatar>
       <ion-label>
         <h2>JavaScript</h2>
         <p>JavaScript is the programming language of HTML and the web.</p>
       </ion-label>
     </ion-item>
   </ion-list>
 </ion-content>
Modal.page.ts
Here, you have to create a dismiss() method to dismiss the modal user interface.
import { Component, OnInit } from '@angular/core';
 import { ModalController} from '@ionic/angular';
 @Component({
   selector: 'app-modal',
   templateUrl: './modal.page.html',
   styleUrls: ['./modal.page.scss'],
 })
 export class ModalPage implements OnInit {
   constructor(public modalCtrl: ModalController) {}
   ngOnInit() {
   }
   dismiss() {
     this.modalCtrl.dismiss();
   }
 }
Step-4: In this step, you have to construct the app.module.ts file. Here, you can import the modal page and then include it inside the @NgModule.
App.module.ts
 import { NgModule } from '@angular/core';
 import { BrowserModule } from '@angular/platform-browser';
 import { RouteReuseStrategy } from '@angular/router';
 import { IonicModule, IonicRouteStrategy } from '@ionic/angular';
 import { SplashScreen } from '@ionic-native/splash-screen/ngx';
 import { StatusBar } from '@ionic-native/status-bar/ngx';
 import { AppComponent } from './app.component';
 import { AppRoutingModule } from './app-routing.module';
 import { ModalPageModule } from './modal/modal.module';
 @NgModule({
   declarations: [AppComponent],
   entryComponents: [],
   imports: [BrowserModule, IonicModule.forRoot(), AppRoutingModule, ModalPageModule],
   providers: [
     StatusBar,
     SplashScreen,
     { provide: RouteReuseStrategy, useClass: IonicRouteStrategy }
   ],
   bootstrap: [AppComponent]
 })
 export class AppModule {}
Step-5: In this step, you open the Home.page.html file to write the html code for the ionic application.
Home.page.html
<ion-header>
   <ion-toolbar color="primary">
     <ion-title>Ionic Modal Example</ion-title>
   </ion-toolbar>
 </ion-header>
 <ion-content class="ion-padding" color="light">
   <h1>Ionic Modal Controller</h1>
   <ion-button expand="round" color="success" (click)="showModal()">
     Show Modal
   </ion-button>
 </ion-content>
Step-6: In this step, you open the home.page.ts file and write the ts code to the ionic application. The showModel() method is used to create the modal cotroller.
Home.page.ts
import { Component } from '@angular/core';
 import { ModalController} from '@ionic/angular';
 import { ModalPage } from '../modal/modal.page';
 @Component({
   selector: 'app-home',
   templateUrl: 'home.page.html',
   styleUrls: ['home.page.scss'],
 })
 export class HomePage {
   constructor(public modalCtrl: ModalController) {}
   async showModal() {
     const modal = await this.modalCtrl.create({
       component: ModalPage
     });
     return await modal.present();
   }
 }
Output: After executing this code, you will get the output, as shown below:
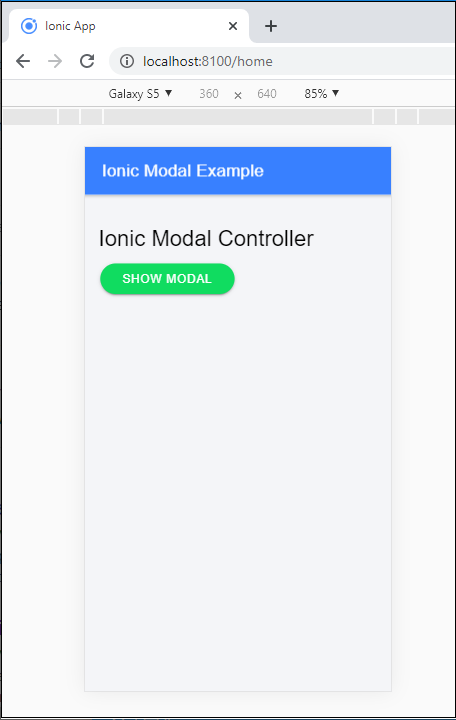
When you click on the show modal button, then it opens the new page on the mobile screen. If you want to close that page, then you click on the close button which appears at the bottom of the toolbar, as shown below: