WebDriver-Name Locator:
WebDriver-Name Locator:
The name locator is used to identify any element in UI with the help of the name backend attribute.
The Syntax of the name attribute is as below:
driver.findElement(By.name(“value of the name attribute”));
Let us see one sample test case in which we will try to locate the web element using the name locators:
| Steps | Actions | Input | Expected Result |
| 1. | Open the Google Chrome browser. | The Google Chrome browser should be opened. | |
| 2. | Navigate to the Google home page. | www.google.com | The Google home page must be displayed. |
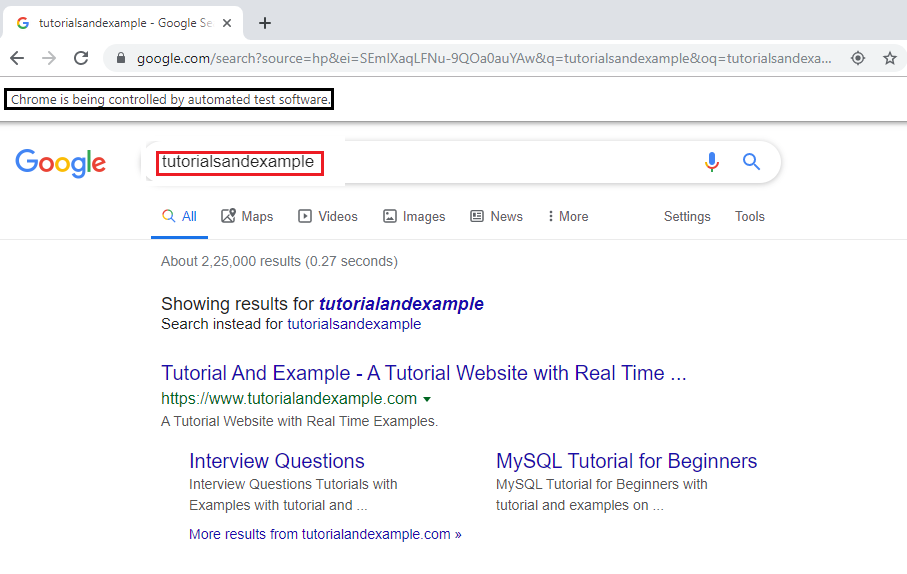
| 3. | Identify the search text box and pass the value. | Tutorialandexample | The value should be entered in the search text box. |
| 4. | Click on the Google search button. | The Google search button should be clicked. | |
| 5. | Close the Browser. | The Browser should be closed. |
- Firstly, we have to launch the Eclipse and open the existing test suite new_test, which we have created in earlier sessions of the WebDriver tutorial.
- Then right-click on the src folder and create a new Class File from New ? Class.
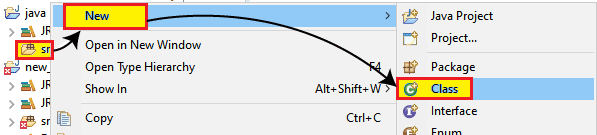
- And give your Class name as name_locator and click on the Finish button.

We are creating our test case step by step to give you a complete understanding of how to use the name locators to identify a particular web element.
Step1:
- To access the Google Chrome browser. First, we need to download the Google Chrome driver and set the system property for the Chrome driver.
- We have already discussed this in previous sessions of the tutorial.
- And you can also refer given link "Working with Chrome browser” for a better understanding of how we download it and set System property for Chrome driver.
// set the system property for chrome browser
System.setProperty("webdriver.chrome.driver", "C:\\Users\\JTP\\Downloads\\chromedriver_win32\\chromedriver.exe");
//create the object for chrome driver
WebDriver driver = new ChromeDriver();
Step2:
After that, we will navigate to the given URL.
Here the sample code,
//navigate to the URL
driver.get("https://www.google.com");
Step3:
Now we are trying to locate the Google search text box by using the value of its name attribute.
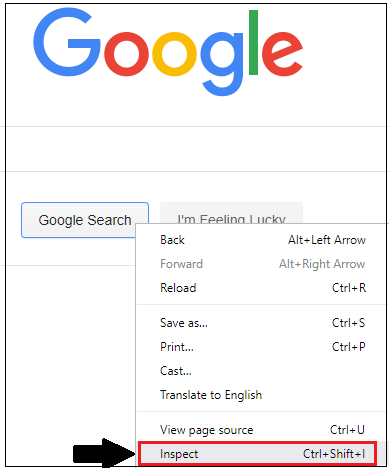
- Right-click on the Google search text box and select the Inspect Element tab.
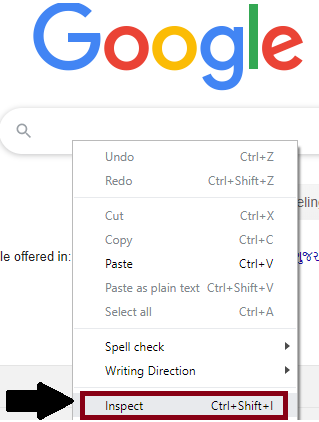
- The developer tool window will be launched with all the specific codes used in the development of the Google search text box.
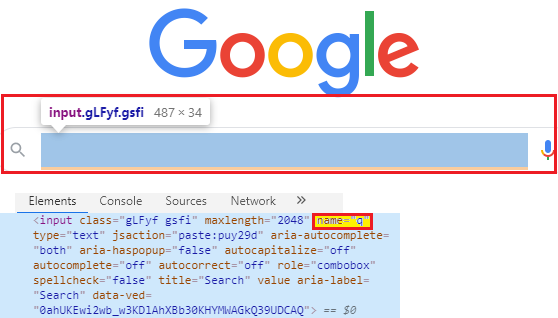
- Copy the value of its name attribute, i.e., “q.”
Here the sample code:
//Identify the search text box and pass the value.
 driver.findElement(By.name("q")).sendKeys("tutorialsandexample");
  Thread.sleep(2000);
 System.out.println("user name entered successfully");
Step4:
- Right-click on the Google search button, and select the Inspect Element tab.
- The developer tool window will be launched with all the specific codes used in the development of the Google search button.
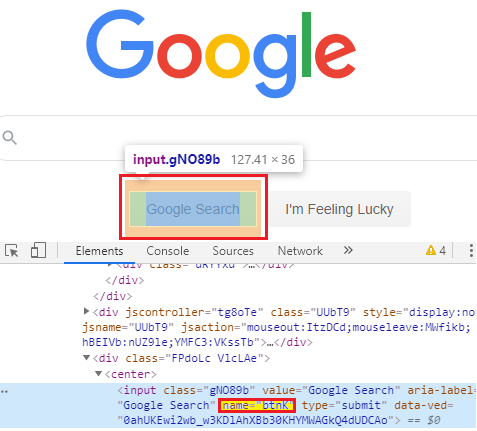
- Then, copy the value of its name attribute, i.e., “btnK.”
Here the sample code:
// Click on the Google Search button.
  driver.findElement(By.name("btnK")).click();
 Thread.sleep(2000);
 System.out.println("button is clicked");
Step5:
In the last step of our sample test case, we are closing the browser.
Here the sample code for closing the browser,
//Close the browser
 driver.close();
Our final test script will look like this:
package testpackage;
import java.util.concurrent.TimeUnit;
import org.openqa.selenium.By;
import org.openqa.selenium.WebDriver;
import org.openqa.selenium.chrome.ChromeDriver;
public class name_locator {
public static void main(String[] args) throws InterruptedException {
//set the system property
System.
setProperty("webdriver.chrome.driver","C:\\Users\\JTP\\Downloads\\chromedriver_win32\\chromedriver.exe"); //creating the object for chrome driver  WebDriver driver = new ChromeDriver(); //Navigate to google home page.  driver.get("https://www.google.com"); // identify the search text box and pass the value.
driver.findElement(By.
name("q")).sendKeys("tutorialsandexample");
Thread.sleep(2000);
System.out.println("value entered successfully ");
// Click on the google search button.
driver.findElement(By.name("btnK")).click();
Thread.sleep(2000);
System.out.println(" button is clicked");
//Close the browserdriver.close();
}
}
- To run the code in Eclipse, we have to right-click on the code and then select Run As ? Java Application.
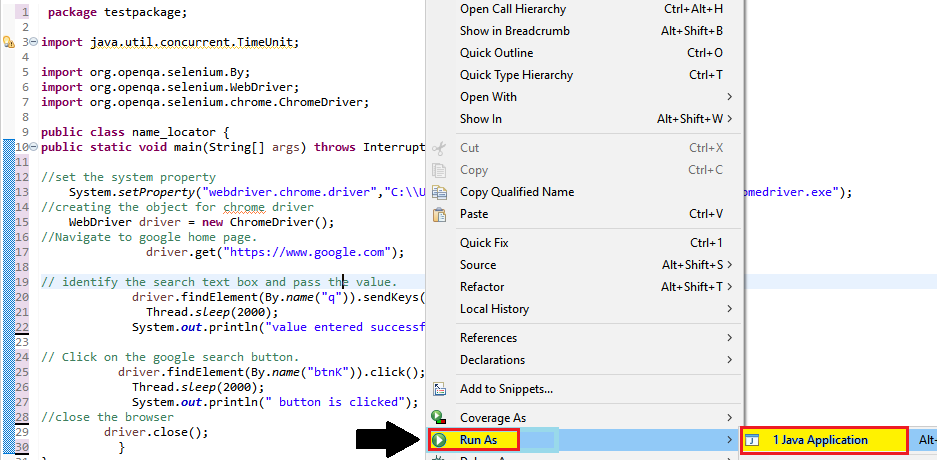
- The above test script will launch the Google Chrome browser and automate all the test scenarios.